How to Remove Paint From a Concrete Floor: Effective Methods That Work
You can remove paint from a concrete floor by matching the method to the paint type and surface. For fresh spills, blot and rinse with warm soapy water. For dried latex or oil, scrape, pressure-wash, or use a matched chemical stripper; stubborn spots may need grinding or an infrared/heat tool. Always wear PPE, test a small area, and neutralize caustic products. For large jobs consider renting equipment or hiring pros, and keep reading to learn step-by-step choices and tips.
How to Remove Paint from a Concrete Floor Quick Answer
If the paint’s fresh, you can blot and rinse it away with water and a mild detergent before it soaks in.
For dried paint, you’ll want to scrape, use a chemical stripper or a pressure washer depending on size, and test a spot first.
Tackle large areas with a stripper and power washer, and handle small spots with a scraper and a stiff brush or a citrus-based remover.
Direct recommendations for common scenarios (fresh spills, dried paint, large areas, small spots)
Start by matching your situation to the right approach: for fresh spills blot and rinse immediately with warm soapy water; for small dried spots scrape gently with a plastic putty knife then use a paint remover pad or solvent; for large painted areas rent a pressure washer or use a chemical stripper and stiff brush; and for stubborn enamel or multiple layers consider a grinder or professional service.
When wondering how do you remove paint from concrete floor, choose appropriate PPE, test solvents in an inconspicuous spot, work outward from edges, and repeat as needed until the surface is clean.
Understanding Paint on Concrete
You’ll first want to know why paint sticks to concrete—its porosity and rough texture let coatings key in, and different formulas (latex, oil-based, epoxy) bond differently.
Check what kind of paint you’re dealing with and how it was applied, because age, thickness, location, and the concrete’s finish all affect removal options.
That quick assessment guides which method and products will work best.
Why paint adheres to concrete (porosity, texture, paint type)
Concrete’s porous, textured surface gives paint plenty to grab onto, and the chemistry of both the substrate and coating decides how strong that grip will be.
You’ll find paint seeping into pores and locking around aggregate, while surface roughness increases mechanical bonding.
Moisture, contaminants, and curing state affect adhesion, so you should assess and prepare the concrete before attempting removal.
Types of paint commonly found on concrete (latex, oil-based, epoxy)
Knowing what type of paint you’re up against will shape how you remove it, since different formulations bond and weather differently.
Latex is water-based, softer, and usually easier to strip or pressure-wash.
Oil-based paints cure harder and resist water and some cleaners.
Epoxy creates a tough, chemical-resistant coating that often needs mechanical methods or strong chemical strippers to remove effectively.
Assessing the situation: age, thickness, location, and finish
Before you pick a removal method, take a close look at the paint itself: how old it is, how many coats and how thick they are, where it’s applied, and whether it’s glossy or textured.
You’ll note age for adhesion, thickness for removal effort, location for containment and runoff, and finish for prepping technique. This assessment guides tool, chemical, and safety choices.
Safety, Tools, and Materials Checklist
Before you start, make sure you’ve got proper PPE (gloves, eye protection, respirator) and that the area is well ventilated.
Gather the right tools—scrapers, wire brushes, grinders or pressure washers if needed—and choose suitable chemical strippers or cleaners for your paint type.
Consider renting or hiring heavy equipment like a grinder, pressure washer, or steamer for large or stubborn jobs to save time and get safer results.
Personal protective equipment (PPE) and ventilation requirements
Because paint removers and dust can irritate your skin, eyes, and lungs, you should gear up with proper personal protective equipment and guarantee good ventilation before you start work.
Wear chemical-resistant gloves, safety goggles, a respirator rated for solvents or dust (N95 or P100 as appropriate), long sleeves, and sturdy footwear.
Open windows, run fans, and avoid working alone in confined spaces.
Necessary tools and equipment
You’ll need a compact kit of safety gear and specialty tools to remove paint from concrete effectively and safely.
- Heavy-duty gloves, eye protection, and a respirator rated for particulates
- Stiff push broom, wire brush, and scraper or floor scraper with carbide blades
- Angle grinder or orbital sander with dust shroud and appropriate discs
- Shop vacuum, plastic sheeting, and disposal bags for waste
Chemical strippers and cleaners to consider
With safety gear on and tools staged, you can move on to selecting chemical strippers and cleaners that match your paint type and site conditions. Choose solvent or caustic strippers, eco-friendly products for indoor use, and test a small area first.
| Type | Best for | Note |
|---|---|---|
| Solvent | Oil-based paint | Ventilate |
| Caustic | Latex | Neutralize |
| Bio | Light spots | Slower |
When to rent or hire equipment (grinders, pressure washers, steamers)
If your project goes beyond a few small spots, consider renting or hiring heavy equipment like grinders, pressure washers, or steamers to save time and get consistent results.
Choose grinders for thick, stubborn coatings, pressure washers for surface paint and dirt, and steamers for sensitive areas or solvent-free removal.
Factor rental cost, skill level, ventilation, PPE, and disposal rules before committing.
Step-by-Step Methods to Remove Paint from Concrete
You’ll learn five practical ways to strip paint from concrete, so you can pick the best approach for your surface and budget.
I’ll walk you through mechanical grinding and scraping, pressure washing and hot water/steam extraction, chemical strippers, heat/infrared removal, and abrasive blasting options.
Follow each step carefully to protect the concrete and stay safe.
Method 1 Mechanical removal: grinding and scraping
Start by preparing the area and marking work zones so you control dust and keep bystanders safe.
For small spots you’ll use hand tools like scrapers and wire brushes, and for larger areas switch to power tools such as angle or floor grinders.
Finish by thoroughly cleaning up dust and residue to reveal the cleaned concrete and prevent contamination.
Step 1: Prepare area and mark work zones
Begin by clearing the work area of vehicles, furniture, and loose debris so you have an unobstructed space to work and move equipment.
Next, cordon off the zone with tape or cones, post signage, and cover nearby surfaces with drop cloths to catch dust.
Plan access routes for tools and exits, and guarantee good ventilation and lighting before you start.
Step 2: Use hand tools for small spots (scrapers, wire brushes)
Grab a sturdy scraper and a stiff wire brush and target small paint spots first—they’re quicker and cheaper to fix by hand than with power tools.
Hold the scraper at a low angle, chip away loosened paint, then scrub remaining residue with the wire brush.
Work in short strokes, reapply pressure as needed, collect chips, and wipe the area clean before considering chemical cleaners or repeat passes.
Step 3: Use power tools for larger areas (angle grinders, floor grinders)
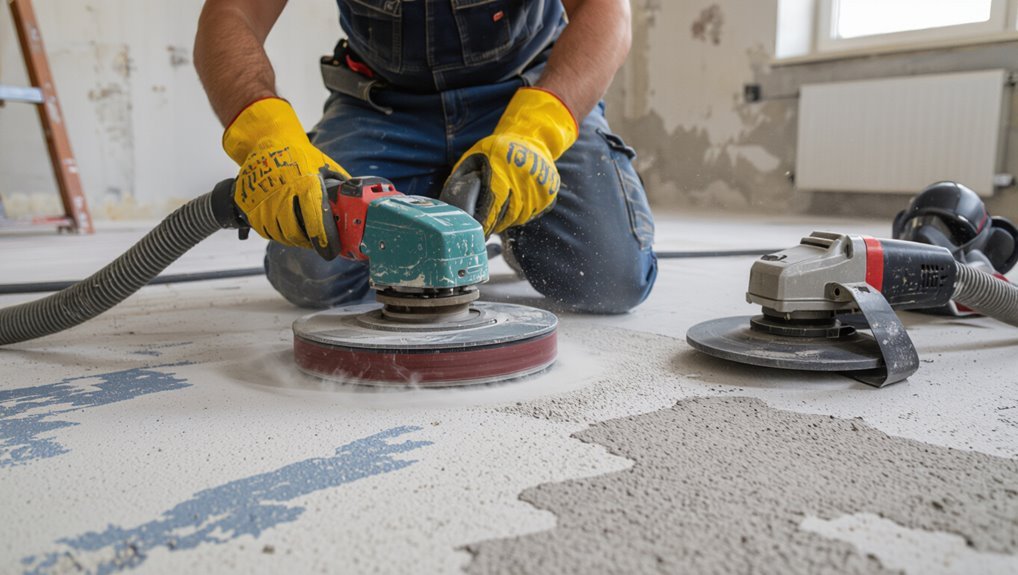
For larger painted areas you’ll switch to power tools—an angle grinder with a diamond cup or wire wheel for spotty sections, or a floor grinder/shot blaster for broad surfaces—to remove paint faster and more evenly than hand tools.
Wear PPE, secure ventilation, and work in overlapping passes.
Adjust grit and speed to avoid gouging, inspect progress frequently, and pause to change discs as needed.
Step 4: Clean up dust and residue
Once the grinding’s done, you’ll need to remove the dust and residue before any sealing or staining—start by sweeping or vacuuming with an HEPA-rated shop vac to capture fine particles.
Then wipe down the surface with a damp microfiber mop or cloth to pick up remaining slurry.
Rinse with clean water, squeegee toward a drain or collection point, and let the concrete fully dry before inspection.
Method 2 Pressure washing and hot water/steam extraction
Now try pressure washing or hot water/steam extraction to lift paint from concrete, starting by selecting the correct pressure and nozzle for your surface.
Pre-soak stubborn areas and apply a biodegradable detergent to help loosen the paint before rinsing.
Finish by thoroughly drying the area and inspecting for any remaining paint or damage so you can repeat targeted passes if needed.
Step 1: Choose correct pressure and nozzle
Start by matching your pressure washer’s PSI and nozzle to the paint type and surface condition so you don’t damage the concrete.
Use lower PSI (1,200–1,800) and wider fan nozzles for thin or aged paint; increase to 2,000–3,000 PSI with a 25° or 15° nozzle for stubborn coatings.
Test a small area first and adjust to avoid etching.
Step 2: Pre-soak and use biodegradable detergents
Soak the area thoroughly with warm water and a biodegradable detergent before you blast it—this softens the paint, lifts contaminants, and reduces the pressure and passes you’ll need to avoid etching the concrete.
Let the solution dwell 10–15 minutes, agitating stubborn spots with a stiff brush. Reapply as needed, keeping the surface wet while you work to maintain paint saturation for more effective pressure removal.
Step 3: Post-wash drying and inspection
After pressure washing or steam extraction, let the concrete dry completely before you inspect it for missed paint or surface damage; moisture can hide residual stains and make evaluation unreliable.
Walk the area, use good lighting, and mark spots needing touch-ups. Test stubborn areas with a scraper or rotary brush.
Note any pitting or etching for later repair, then plan follow-up cleaning or repainting.
Method 3 Chemical paint strippers and removers
Now you’ll use chemical strippers tailored to the paint—solvent, caustic, or biodegradable—so pick one that matches the coating and substrate.
Apply it according to the label, allow the recommended dwell time, then agitate and lift the softened paint before neutralizing the surface.
Finish by thoroughly rinsing and disposing of rinse water and residue safely per local regulations.
Step 1: Select stripper based on paint type (solvent, caustic, biodegradable)
Choose a stripper that matches the paint type and the surface condition before you start, because the wrong product can damage concrete or leave stubborn residue.
Identify whether paint is oil-based, latex, or epoxy, then pick solvent, caustic, or biodegradable formulas accordingly.
Consider concrete porosity and previous sealers, safety gear, ventilation, and disposal requirements when choosing a product.
Step 2: Application technique and dwell time
Prepare your work area, then apply the chemical stripper in consistent, even strokes so each section soaks for the recommended dwell time; this guarantees the agent penetrates the paint instead of just sitting on the surface.
Work in manageable swaths, avoid puddles, and follow manufacturer timing. Cover adjacent areas, monitor dwell time closely, and reapply only if the product begins to dry before softening the paint.
Step 3: Agitation, removal, and neutralization
After the stripper has softened the paint, agitate the surface to lift the coating—use a stiff nylon brush or a floor scrubbing machine for large areas—and work in overlapping passes so you don’t miss spots.
Scrape lifted paint with a putty knife or scraper, collect loose flakes, then apply a neutralizer per product instructions to stop chemical action.
Blot test to confirm neutrality before proceeding.
Step 4: Rinse and dispose of waste safely
When the paint and neutralizer are fully lifted, rinse the area thoroughly with clean water—use a pressure washer on a low-to-moderate setting for large areas or a garden hose and stiff broom for smaller spots—to remove residue and diluted chemicals.
Collect runoff and scrapings with absorbent pads or a dustpan, place waste in labeled, sealed containers, and follow local hazardous-waste rules for disposal.
Method 4 Heat and infrared paint removal
You can use heat when the paint is brittle, thin, or already flaking, but you shouldn’t try it on lead-based coatings or in poorly ventilated areas.
Follow safety precautions like heat-resistant gloves, eye protection, and keeping a fire extinguisher nearby.
Use a heat gun or infrared panel slowly to soften the paint, then scrape it away in small sections, working from low to moderate heat to avoid damaging the concrete.
When heat is effective and safety precautions
Although heat works well on many oil- and latex-based paints, it’s most effective when the paint layer is relatively thin, well-adhered, and the concrete surface won’t be damaged by elevated temperatures.
Before you begin, check the paint type and test a small area so you know whether infrared or a heat gun will soften the coating without charring the substrate.
You’ll wear PPE, ventilate, and monitor temps to prevent burns or fumes.
Step-by-step use of heat guns or infrared panels
Start by positioning your heat gun or infrared panel about 6–12 inches from the painted area, angle it slightly, and move it steadily to warm the coating until it softens and bubbles.
Hold steady, avoid overheating, and ventilate.
Scrape softened paint with a putty knife, repeat heating as needed, clean residue with a stiff brush and mild detergent, then neutralize and rinse thoroughly.
Method 5 Abrasive blasting (sandblasting, soda blasting)
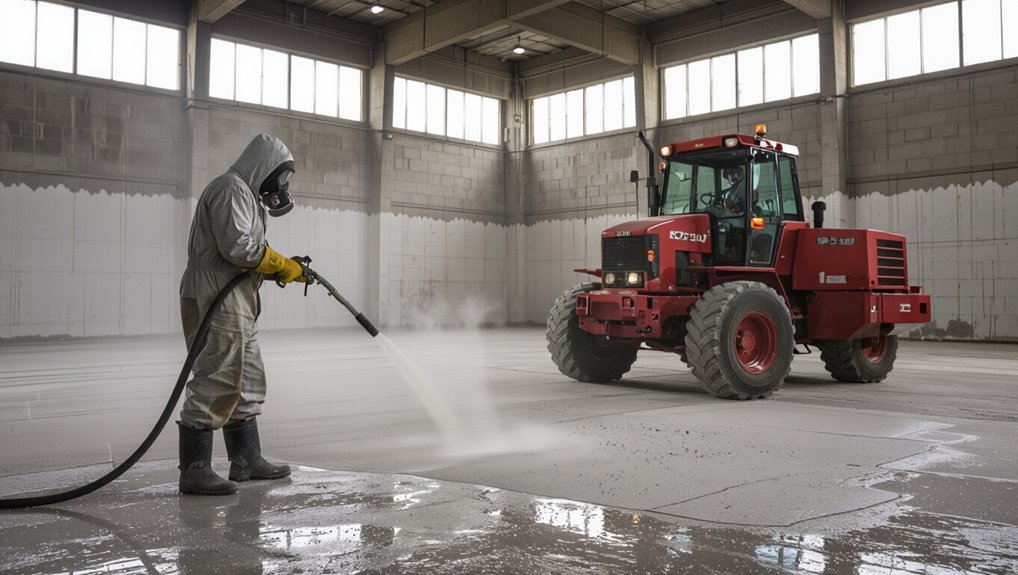
If the paint is thick, stubborn, or covers a large outdoor area, you’ll often choose abrasive blasting over chemical or mechanical methods for speed and effectiveness.
Before you blast, you’ll prep the surface, set up containment to protect nearby plants and structures, and gather the right gear—media, a blaster, PPE, and an air compressor.
After blasting you’ll vacuum and collect spent media for proper disposal and then rinse and inspect the concrete for any remaining coating.
When to choose blasting vs. other methods
Anytime you’re weighing blasting against other paint-removal methods, consider the scale, surface condition, and surrounding environment first.
Choose blasting when large areas, thick or multiple paint layers, or deeply embedded coatings need fast, uniform removal.
Avoid it for fragile concrete, detailed finishes, or tight spaces where overspray or media could damage nearby materials.
Pick blasting when efficiency outweighs risk.
Prep, equipment, containment, and cleanup
Before blasting, you’ll set up to protect the work area and guarantee operator safety: inspect the concrete for cracks or loose material, choose the right media (sand only where allowed—prefer soda, crushed glass, or garnet for concrete), assemble a matched blaster, nozzle, and compressor, and stage PPE (respirator, hearing protection, full-face shield, thick gloves, and protective clothing).
Seal openings, hang containment curtains, test blast patterns, collect spent media with a HEPA vacuum, and dispose per local regulations.
Choosing the Best Method Comparison and Decision Guide
You’ll weigh effectiveness, cost, speed, and potential surface damage to pick the right paint-removal method.
Use a simple decision flowchart that separates common scenarios like a small spot vs. an entire slab and indoor vs. outdoor jobs.
That way you can match the least invasive, most cost-effective approach to the situation.
Comparing effectiveness, cost, speed, and surface damage
When choosing a paint-removal method, weigh effectiveness, cost, speed, and potential surface damage together rather than separately. You’ll balance quick, cheap options that may harm concrete against slower, pricier choices that preserve texture. Use this simple visual to compare attributes:
| Method | Speed | Surface impact |
|---|---|---|
| Chemical | Medium | Low–Medium |
| Grinding | Fast | High |
| Pressure wash | Fast | Medium |
Decision flowchart for common scenarios (small spot vs. entire slab, indoor vs. outdoor)
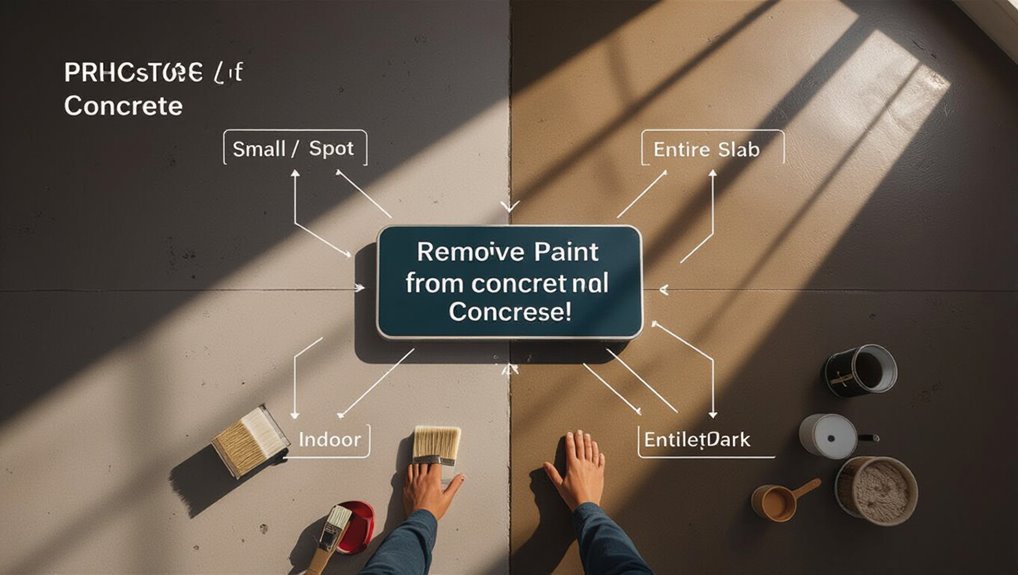
If you’re tackling paint removal, work from the scope and setting: small indoor spots need gentler, low-dust approaches (chemical stripper or hand-scraping), while large outdoor slabs call for faster, higher-impact methods (grinding or high-pressure washing) that accept more surface wear.
Decide by size, location, ventilation, and finish sensitivity. Choose low-damage methods indoors; choose speed and durability outdoors; test first.
Common Problems and Mistakes to Avoid
Don’t rush into aggressive methods that can groove or etch your concrete—test a small area first and use the gentlest effective technique.
Make sure the remover you pick is compatible with your paint type and concrete surface, or you’ll waste time and damage materials.
Also follow safety and disposal rules to avoid health risks and legal fines.
Damage to concrete (grooving, etching) and how to prevent it
Although concrete’s surface looks tough, aggressive cleaning or the wrong chemicals can easily groove or etch it, leaving permanent marks that show up every time it rains or the sun hits them.
You should test methods on an inconspicuous patch, use gentle mechanical action, choose pH-safe cleaners, protect edges, and rinse thoroughly. Move slowly to avoid overworking the surface.
Ineffective product choices and compatibility mistakes
Picking the wrong cleaner or mixing incompatible products will waste time, damage the concrete, and often make stains harder to remove.
You should match remover chemistry to paint type — solvent for oil-based, alkaline for latex — and avoid homemade blends.
Don’t use colored or abrasive cleaners that stain or etch.
Test a small area, follow manufacturer guidelines, and replace when a product clearly underperforms.
Safety and disposal errors to avoid
When you handle paint removers and contaminated rags carelessly, you risk fires, toxic exposure, and environmental harm.
Don’t pour solvents down drains, burn soaked cloths, or toss contaminated waste in regular trash.
Wear respirator, gloves, and eye protection, ventilate the area, and follow label disposal instructions.
Use sealed, labeled containers and take hazardous waste to a proper collection facility.
Prevention and Best Practices After Paint Removal
Once the paint’s gone, you’ll need to prep the concrete properly—clean, repair cracks, and guarantee it’s fully dry before applying any coatings or sealers.
Pick primers and paints made specifically for concrete to improve adhesion and prevent peeling later.
Finally, set up a simple maintenance routine—regular cleaning and inspections—to catch problems early and avoid rework.
Preparing concrete for new coatings or sealers
Start by thoroughly cleaning and drying the surface so new coatings will bond properly; remove dust, efflorescence, and any leftover paint residue. Then, repair cracks or spalls and test for moisture to prevent adhesion failures.
Next, etch or mechanically profile smooth areas, vacuum and tack cloth, seal active stains, and guarantee temperatures and humidity meet product guidelines so coatings cure evenly and last.
Choosing primers and paints for concrete to avoid future issues
Pick a primer and paint system rated for concrete and your environment to prevent peeling and blistering later.
Choose a solvent- or water-based acrylic or epoxy primer compatible with your chosen topcoat. Match breathable formulas for indoor areas and tougher epoxies for garages.
Follow manufacturer instructions for cure times and recoat windows, and use products labeled for concrete adhesion and alkali resistance to reduce future failures.
Routine maintenance tips to prevent re-painting problems
After you’ve removed old paint and prepped the surface, keep a simple maintenance routine to protect your new finish and avoid premature re-painting.
Sweep and mop regularly with mild detergent, spot-clean stains promptly, and use floor mats at entries.
Inspect quarterly for chips or moisture, touch up small areas quickly, and reapply a breathable sealer every few years to extend coating life.
Cost and Time Estimates
You’ll want to weigh DIY costs—like $20–$200 for supplies—against professional rates, which can range from a few hundred to several thousand dollars depending on scope.
Small spots often take a few hours, medium areas a day or two, and full slabs can require several days plus drying and curing time.
Knowing these ranges helps you pick the most cost-effective and timely approach.
Typical costs for DIY vs. professional removal
Anyone tackling paint removal will want to budget both time and money, because DIY methods and professional services differ sharply in cost, labor, and speed.
DIY supplies—stripper, scraper, grinder rental, PPE—typically run $30–$200 for small jobs.
Pros charge $1–$6 per sq ft or flat rates including labor and disposal.
Factor cleanup, permits, and potential repairs into estimates.
Time required for small jobs, medium areas, and full slabs
Estimate time by job size:
Small spots (under 100 sq ft) often take 1–4 hours if you’re using chemical stripper and a scraper or a rented orbital grinder;
medium areas (100–500 sq ft) usually need a full day with prep, multiple passes, and cleanup.
Full slabs (>500 sq ft) can take several days, especially if repairs, drying, or professional equipment are required.
When to Call a Professional
If the area is large, the paint’s soaked into the concrete, or you’re dealing with hazardous coatings, it’s probably safer to call a pro.
Ask potential contractors about their experience with concrete paint removal, the methods they’ll use, and whether they’ll provide a written estimate and timeline.
Expect clear cost breakdowns, permits or disposal fees if applicable, and references or photos of past work.
Signs the job is too big or risky for DIY
When the paint covers a huge area, involves multiple layers or stubborn industrial coatings, or sits on a delicate or structural surface, it’s time to call a professional; you’ll save time, avoid damage, and reduce safety risks that come with heavy equipment, harsh chemicals, or complex removal methods.
Call pros if you lack proper PPE, encounter lead-containing paint, persistent stains, extensive cracking, or unclear structural concerns.
Questions to ask a contractor and what to expect from estimates
What should you ask a contractor before they start work?
Ask about licensing, insurance, references, experience with paint removal on concrete, cleanup and disposal, and estimated timeline.
Request a written estimate detailing scope, materials, labor, warranty, and payment schedule.
Compare at least three bids, check reviews, and clarify change-order procedures so you won’t face surprises during the project.
Frequently Asked Questions
You probably have a few specific questions about paint removal, like whether sealed or stained concrete can be stripped and how to handle epoxy paint.
You’ll want clear guidance on using harsh chemicals such as muriatic acid or bleach, safe disposal of paint chips and wash water, and whether removal will permanently change the concrete’s color or texture.
Read on for brief, practical answers to each of these points.
Can I remove paint from sealed or stained concrete?
Wondering if paint can come off sealed or stained concrete? You can, but it’s trickier.
Sealers block penetrative removers, and stain pigments may mask paint. Test a small area first.
Use a stripper designed for sealed surfaces or light mechanical abrasion—careful not to remove the stain if you want to keep it.
Rinse thoroughly and reseal afterward to protect the concrete.
Is it safe to use muriatic acid or bleach to remove paint?
Is it safe to use muriatic acid or bleach to strip paint from concrete? You can, but both pose hazards.
Muriatic acid is corrosive and releases fumes; wear acid-resistant gear, work outdoors, and neutralize afterward.
Bleach can lighten concrete and won’t remove stubborn paint; it’s corrosive to metals and irritates skin.
Test a small area and follow label safety instructions strictly.
How to dispose of paint chips and contaminated wash water?
After using acids or bleaches to loosen paint, take care when handling resulting paint chips and rinse water—both can carry hazardous chemicals and heavy metals.
Collect chips in heavy-duty, labeled bags; let solids dry.
Contain rinse water and absorb with cat litter or commercial absorbent; sweep solids into bags.
Contact your local hazardous waste facility for disposal guidelines—never pour contaminated water down drains or storm sewers.
Will paint removal change concrete color or texture permanently?
Although many paint-removal methods lift only the coating, they can still alter concrete’s color or texture depending on the technique and surface condition.
You might notice lightening, darkening, etched patches, or rougher aggregate exposure after chemical strippers, pressure washing, or grinding.
Test a small area first, adjust intensity, and reseal or refinish to restore uniform appearance if permanent changes occur.
How to remove epoxy paint specifically?
If you’ve noticed color or texture changes from general paint removal, epoxy presents its own challenges because it bonds so tightly to concrete.
Use a commercial epoxy stripper or muriatic acid cautiously, or grind with a diamond cup wheel for stubborn areas.
Always test a small spot, wear PPE, ventilate, and neutralize after chemical use.
Consider professional removal for large or thick coatings.