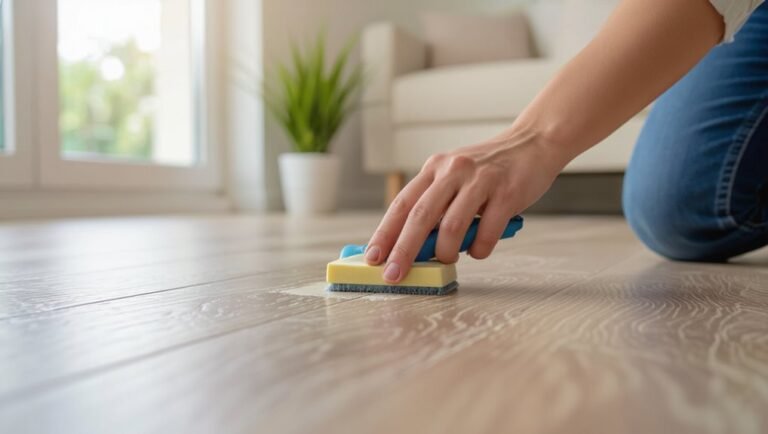
How to Make Laminate Floors Shine Again Without Damaging the Surface
You can restore laminate shine safely by first sweeping or vacuuming grit, then mopping with a damp microfiber and a pH‑neutral or diluted vinegar solution (test a small spot). Tackle sticky residue with a microfiber cloth and gentle cleaner, avoid steam, wax, oil, or abrasive pads, and buff dry with a soft microfiber for a final sheen. Spot‑repair scratches with a laminate kit or colored wax stick. Keep up simple maintenance and you’ll find more tips ahead.
How to Make Laminate Floors Shine Again Without Damaging the Surface
To restore shine without harming the surface, use a gentle, pH-neutral cleaner and a microfiber mop, working in small sections and avoiding excess water.
You’ll want soft microfiber cloths, a spray bottle, a commercial laminate-safe polish (or a homemade mix of water and a little white vinegar), and a dry microfiber buffing pad for the final pass.
Take care not to use abrasive pads, wax, or oil-based products that can dull or damage the finish.
One-sentence summary of safest, most effective approach
When you want laminate floors that shine without risking damage, start with a gentle routine: sweep or vacuum grit away, spot-clean with a damp microfiber mop and a pH-neutral cleaner, then buff dry with a soft cloth to restore luster.
For a one-line answer to how do you make laminate floors shine: clean gently, avoid excess water or harsh chemicals, and dry/buff to revive the finish.
Best materials and tools to use immediately
The best immediate tools are a soft microfiber mop, a handheld microfiber cloth for buffing, a vacuum or broom with a soft-bristle head to remove grit, and a pH-neutral laminate cleaner or a mild homemade mix (water with a few drops of dish soap or white vinegar diluted to about 1:10).
Use minimal liquid, wring the mop well, and keep abrasive pads, waxes, and oil-based products off the surface to avoid dulling or damaging the wear layer.
- Microfiber mop
- Handheld microfiber cloth
- Soft-bristle vacuum/broom
- pH-neutral cleaner or diluted vinegar/dish soap
Basic Understanding What Laminate Flooring Is and Why Shine Fades
Laminate flooring is a layered product with a photographic wood-look layer and a protective wear layer, so it doesn’t refinish like hardwood.
Over time you’ll lose shine from surface wear, soap or mineral residue, and improper cleaning that scuffs the finish.
Learn to tell dullness from actual damage—scratches, chipped edges, or a worn-through wear layer need repair, while surface haze usually cleans up.
What laminate floors are made of and how their finish differs from hardwood
Although it looks like real wood, laminate flooring is a layered product built from a fiberboard core topped with a printed decorative layer and a tough clear wear layer.
So its surface behaves differently than hardwood. You won’t sand or refinish it; the wear layer resists scratches and holds surface treatments.
Cleaners must be compatible with that sealed, synthetic finish to preserve shine.
Common causes of dullness and surface damage (wear, residue, improper cleaning)
When you start noticing a loss of luster, it’s usually due to surface wear, residue buildup, or cleaning mistakes that aren’t compatible with the sealed wear layer.
You abrade finish with grit, scuffs, or heavy traffic; leave soap or wax films that matt the surface; or use abrasive pads and harsh cleaners that dull or etch the topcoat.
Regular gentle care prevents most problems.
Signs of damage vs. loss of shine
1 clear sign that you’re dealing with surface wear rather than a deeper issue is consistent dulling across high-traffic areas while the pattern and edges remain intact.
You can check the problem by testing moisture, scratches, and finish wear:
- Water test for swelling
- Scratch visibility
- Finish peeling or flaking
- Localized color change
These distinguish finish loss from structural damage.
Safe Preparations Before Cleaning or Polishing
Before you start cleaning or polishing, check the floor for scratches, worn wear layers, and any signs of water damage so you know what treatments are safe.
Gather the right tools, approved cleaners, and basic protective gear—avoid abrasive pads, oil-based products, and harsh solvents that can ruin laminate.
Always test your chosen cleaner and method on a small, inconspicuous spot first to confirm it won’t strip finish or cause discoloration.
Assessing the floor condition: scratches, wear layer, water damage
Although laminate is durable, you should inspect the surface closely for scratches, worn-through wear layers, and any signs of water damage before you clean or polish.
Walk the room with good light, note deep scratches, lifted edges, bubbling or discoloration from moisture.
Mark damaged areas, photograph for reference, and decide if repair or replacement is needed before applying cleaners or polishes.
Tools, cleaners, and protective gear to avoid
Pick the right tools and products, and skip anything that can harm laminate—abrasive pads, steam cleaners, oil-based polishes, and harsh solvents can strip the wear layer or swell the core.
Don’t use waxes, ammonia cleaners, or bleach. Avoid metal scrapers and rough brushes.
Wear gloves and eye protection when handling chemicals, and use microfiber mops and gentle pH-neutral cleaners for safe, effective cleaning.
How to test a small area first (spot test procedure)
Wondering if that cleaner or polish will harm your laminate?
Test first on an inconspicuous spot (corner or under furniture). Clean, dry, apply small amount, wait 24 hours. Check finish, color, and texture. If fine, proceed.
- Choose hidden area
- Use recommended dilution
- Wait full 24 hours
- Inspect for changes
Step-by-Step Method to Restore Shine Without Damage
Start by dry-cleaning the floor—sweep, vacuum, or dust to remove grit that can scratch during cleaning.
Next you’ll do a gentle deep clean with a diluted laminate-safe solution and a microfiber mop, then treat stubborn gum, wax, or scuff marks with targeted, nonabrasive methods.
Finish with a light polishing step using recommended products or simple DIY options, followed by a final rinse and buff to bring out durable shine without damage.
Step 1: Dry cleaning sweeping, vacuuming, and dust removal
Begin by removing loose grit and dust with a dry-cleaning routine: sweep with a soft-bristle broom or use a vacuum set to the hard-floor attachment to lift particles without scratching the surface.
Then follow these quick steps to finish dry prep:
- Move furniture gently.
- Sweep edges and corners.
- Vacuum crevices with brush tool.
- Inspect for remaining grit before wet cleaning.
Step 2: Gentle deep clean recommended diluted cleaners and microfiber mops
1 simple, gentle deep clean will lift ground-in grime without harming your laminate if you use the right products and tools: dilute a pH-neutral cleaner per the manufacturer’s directions, wring a microfiber mop until it’s just damp, and work in short, overlapping passes so you don’t oversaturate seams.
Rinse mop frequently, change solution when dirty, dry any damp areas promptly, and avoid oil-based or abrasive cleaners.
Step 3: Removing stubborn residue (gum, wax, scuff marks) safely
Once you’ve lifted the bulk of grime with your diluted cleaner and damp microfiber, tackle stubborn residues like gum, wax, and scuff marks with targeted, gentle techniques that won’t harm the wear layer.
Use these steps:
- Freeze gum with ice in a bag, then gently lift with a plastic scraper.
- Soften wax with a warm cloth, wipe away.
- Remove scuffs with a melamine sponge, light pressure.
- Rinse and dry.
Step 4: Light polishing techniques safe for laminate (products and DIY solutions)
When you’re ready to restore shine without risking the wear layer, choose gentle polishing methods—either a commercial laminate polish formulated for your floor or a DIY mix of water and a tiny amount of white vinegar or rubbing alcohol.
Work in small sections with a soft microfiber pad, using light, circular motions until the surface looks even and streak-free.
Let each area dry fully before moving on.
Step 5: Final rinse and buffing method for optimal shine
After you’ve polished each section and it feels dry to the touch, give the floor a final rinse with clean water to remove any residue.
Then buff immediately with a dry microfiber cloth or pad to bring out a uniform, lasting shine.
Then follow this quick routine:
- Work small areas.
- Use light, even pressure.
- Overlap strokes.
- Inspect for streaks and repeat if needed.
Recommended cleaning schedule to maintain results
Anyone can keep laminate floors looking fresh by following a simple, regular cleaning schedule that balances light daily care with deeper weekly and monthly steps to restore shine without causing damage.
You should sweep or vacuum daily, mop with a damp microfiber twice weekly, deep-clean with a manufacturer-safe cleaner monthly, and polish lightly every three months.
Address spills immediately to prevent stains or warping.
Product Guide What to Use and What to Avoid
You’ll want to stick to approved commercial laminate cleaners or gentle DIY mixes like a 1/4 cup vinegar or a few drops of mild dish soap per gallon of water to avoid residue.
Don’t use waxes, oil-based products, steam mops, or abrasive pads, since they can warp or dull the finish.
Below is a clear comparison of safe versus unsafe products and the outcomes you can expect.
Approved commercial cleaners and polishers for laminate
While you can clean laminate with homemade mixes, choosing a commercial cleaner or polisher designed for laminate gives more consistent shine and protection.
This section lists approved products, what makes them safe, and which ingredients or formulations to avoid. You’ll want cleaners labeled for laminate, water-based polishes, and non-abrasive formulas.
Avoid wax, oil, or solvent-based products.
- Bona
- Zep
- Rejuvenate
- Quick Shine
DIY mixtures that are safe (vinegar, mild soap) and correct dilutions
Because laminate is sensitive to excess moisture and harsh chemicals, stick to simple, water-based DIY mixtures that clean without leaving residue.
Use these safe dilutions and tips:
- 1 cup white vinegar to 1 gallon warm water.
- A few drops mild dish soap in 1 gallon water.
- Microfiber mop, wrung nearly dry.
- Spot-test a hidden area first.
Chemicals and tools to avoid (wax, oil-based products, steam mops, abrasive pads)
If you want your laminate to keep its factory finish, skip waxes, oil-based cleaners, steam mops, and abrasive pads—they can clog seams, dull the wear layer, and cause swelling or scratches.
Protect your floor by avoiding:
- Paste wax or furniture polish
- Oil-based soaps
- Steam cleaning devices
- Steel wool or scrubbing pads
Use pH-neutral, damp mopping instead.
Comparison table: safe vs unsafe products and expected outcomes
Although a quick glance at ingredient lists can be confusing, this comparison table lays out what to use and what to avoid so you can protect your laminate’s finish and predict results.
| Safe (Use) | Unsafe (Avoid) | Expected Outcome |
|---|---|---|
| Microfiber mop + mild cleaner | Wax/polish | Streak-free, protected finish |
| Vinegar dilute | Steam mop | Dullness, swelling |
| Isopropyl 50% spray | Abrasive pads | Quick cleanup, no scratches |
Troubleshooting Common Problems
If you’re seeing streaks or residue after cleaning, start by checking your cleaner and mop for buildup so you can correct the technique.
For light scratches and dull spots you can usually revive the finish with targeted products and gentle buffing rather than sanding.
If shine comes back unevenly or damage is beyond surface fixes, I’ll walk you through step‑by‑step remedies and when it’s time to evaluate replacement.
Tackling streaks and residue after cleaning
When streaks or white residue show up after mopping, you’ll want to identify whether they come from the cleaning solution, hard water, or residue left behind by too much product so you can fix the problem quickly.
Rinse with plain water, wring the mop nearly dry, and buff with a microfiber cloth.
For hard water, use distilled water; for residue, dilute the cleaner more.
Dealing with light scratches and dull spots without sanding
Small scratches and dull patches don’t mean you have to sand: you can often minimize them with targeted cleaning, gentle buffing, and the right products.
Wipe area clean, use a microfiber cloth and a laminate-safe cleaner, then apply a small amount of polish or restorer per instructions.
Buff lightly in circular motions, test inconspicuous spots first, and repeat sparingly until gloss improves.
When shine returns unevenly step-by-step fixes
After you’ve cleaned and buffed as described above, you may still see patches where the gloss looks different.
Inspect lighting and dirt, then re-clean dull areas with a microfiber and gentle cleaner. Buff small sections in overlapping strokes.
If residue causes haze, wipe with diluted vinegar then water, dry immediately.
Repeat buffing until sheen matches surrounding floor, working one zone at a time.
When the floor is too damaged for surface treatments
If surface cleaning and buffing haven’t restored your laminate’s gloss, the damage may go beyond what topical fixes can handle.
You’ll need to assess options and act decisively:
- Identify deep scratches, warping, or worn finish.
- Replace affected planks if isolated.
- Consider full floor replacement for widespread damage.
- Consult a pro for moisture or structural issues.
Preventive Care and Best Practices to Keep Laminate Shiny
To keep your laminate looking its best, stick to simple daily and weekly routines like sweeping, dry mopping, and spot-cleaning spills immediately.
Plan seasonal and long-term measures too—use rugs at entryways, control humidity, and add furniture pads to prevent scratches.
For high-traffic zones, do use durable runners and regular quick cleanups, and don’t drag heavy items or use abrasive products.
Daily and weekly maintenance habits
Although laminate is low-maintenance, a few simple daily and weekly habits will keep it looking glossy and prevent long-term damage.
You should sweep or vacuum daily, wipe spills immediately, and mop weekly with a damp microfiber—never soak. Rotate high-traffic rugs and spot-clean scuffs promptly.
Follow this short routine:
- Sweep/vacuum daily
- Wipe spills immediately
- Damp-mop weekly
- Spot-clean scuffs promptly
Seasonal and long-term care (rugs, humidity control, furniture pads)
When seasons change, you’ll need a few preventive steps to protect laminate over the long term: use rugs in high-traffic and entry areas, control indoor humidity to prevent planks from warping, and put felt pads under furniture to stop scratches.
Rotate rugs periodically, wipe moisture promptly, maintain 30–50% humidity with a humidifier/dehumidifier, and check pads for wear so finishes stay glossy.
Do’s and don’ts for high-traffic areas
If you’ve got busy hallways or a lively family room, focus on simple routines that stop wear before it starts:
- Use entry mats and vacuum daily to remove grit.
- Place runners on routes and rotate them regularly.
- Attach felt pads to furniture and lift instead of dragging.
- Avoid wet mopping; spot-clean spills fast with a damp microfiber.
Cost and Time Estimates
You can expect each step—sweeping, mopping, and spot-treating—to take about 10–30 minutes per room, while a deeper clean or refinishing prep might add an hour or two.
For supplies, a DIY refresh usually runs $10–$60 for cleaners and tools, whereas hiring a pro can cost $1–3 per square foot or a flat $100–$500 depending on job size.
Use these estimates to decide whether to tackle the job yourself or hire someone.
Typical time required for each step
Most jobs break down into short, predictable steps you can plan around: sweeping or vacuuming (5–10 minutes for an average room), mopping with a laminate-safe cleaner (10–15 minutes plus 10–20 minutes to air-dry), spot-treating scuffs (5–15 minutes depending on extent), and buffing for extra shine (10–20 minutes).
Allow extra time for stubborn stains (15–30 minutes) and furniture moving (10–30 minutes).
Budget ranges for DIY supplies vs professional services
When weighing costs, DIY supplies usually run from about $15 to $100 for a typical room—basic broom, microfiber mop, a laminate-safe cleaner and polish, and occasional spot-treatment products—while hiring pros typically starts around $100–$300 for a small room and can climb to $300–$800+ for larger spaces or deep-restoration jobs.
| Option | Typical cost |
|---|---|
| Basic DIY kit | $15–$40 |
| Enhanced DIY | $40–$100 |
| Small pro job | $100–$300 |
| Large pro/deep | $300–$800+ |
FAQ Common Reader Questions
You’ll find answers here to common worries like whether you can use a steam mop or if vinegar will harm your laminate.
We’ll also cover how often to polish, whether scratches can be fixed without replacing planks, and when professional restoration might be needed.
Read on for clear, practical guidance so you can protect and keep your floors shining.
Can I use a steam mop on laminate floors?
Thinking about reaching for a steam mop? You should avoid using steam mops on laminate floors because high heat and moisture can warp or delaminate the planks and damage the protective wear layer.
Instead, use a damp (not wet) microfiber mop and manufacturer-approved cleaners.
If a steam mop’s manual claims compatibility, test a small, inconspicuous area first and proceed cautiously.
Will vinegar damage my laminate?
If you skipped the steam mop because of heat and moisture risks, you might wonder whether common household cleaners like vinegar are safer for laminate.
Diluted vinegar (about 1 cup per gallon of water) is generally safe for occasional cleaning, but never use full-strength vinegar or let liquid sit.
Wring your mop well, dry promptly, and test an inconspicuous spot first to avoid dulling or warping.
How often should I polish or treat laminate to keep it shiny?
Although laminate doesn’t need frequent polishing like real hardwood, you should refresh its shine only as needed—typically every 2–6 months depending on traffic and wear.
Monitor dull spots, high-traffic zones, and spills; spot-treat with a manufacturer-safe cleaner between full refreshes.
Use minimal product, microfiber mop, and avoid waxes or polishes not designed for laminate to prevent buildup and slipperiness.
Can scratches be removed without replacing planks?
Can minor scratches be fixed without swapping out entire planks? Yes.
You can often reduce visibility using laminate repair kits, colored wax sticks, or blending crayons matched to your floor. Clean first, apply sparingly, then buff gently.
For deeper gouges, use epoxy fillers and colorant. Test in an inconspicuous spot and follow product instructions to avoid haze or residue.
Is professional restoration ever necessary?
When everyday fixes and touch-up products don’t restore your floor’s uniform look, you’ll want to contemplate professional restoration.
Pros bring specialized tools, experience with deep scratches or water damage, and access to industrial-grade coatings that DIY kits can’t match.
You should call a pro when:
- Planks warp from moisture.
- Damage spans large areas.
- Multiple deep scratches exist.
- Warranty-safe coatings are needed.
Closing Tips and Quick Checklist
Before you finish, use this fast checklist to restore shine safely: sweep, spot-clean with a gentle solution, and buff with a microfiber cloth.
Keep a few last-minute tips in mind to avoid accidental damage — don’t use excess water, avoid wax-based products, and protect high-traffic areas.
Follow these simple steps and you’ll keep your laminate gleaming without risking harm.
Fast checklist to restore shine safely
Use this quick checklist to restore your laminate’s shine safely and efficiently:
- Remove dust and debris with a soft broom or vacuum attachment.
- Spot-clean sticky areas with a damp microfiber cloth and mild cleaner.
- Buff dry with a clean microfiber pad, following grain lines.
- Place felt pads on furniture legs and use mats to minimize wear.
Follow each step gently to protect the finish and maintain shine.
Last-minute tips to avoid accidental damage
If you want to finish strong, take a few quick precautions that prevent common accidents and keep your laminate looking its best.
Don’t rush; check for wet spots, secure rugs, and avoid harsh products.
Follow this brief checklist:
- Wipe spills immediately
- Use felt pads on furniture
- Avoid steam cleaners
- Test cleaners on a hidden seam
You’ll protect finish and shine.