How to Clean Concrete Basement Floors: Simple Steps for a Spotless Finish
You can get a spotless concrete basement floor with simple steps: clear the area, sweep or vacuum loose debris, then mop with warm water and dish soap. Spot-treat stains with a stiff brush and a mild degreaser, blotting rather than scrubbing hard. Rinse thoroughly, remove standing water with a squeegee or wet vac, and speed drying with fans and a dehumidifier. For stubborn stains, sealants or professional help may be needed—keep going to find full techniques and tips.
How to Clean Concrete Basement Floors Quickly
For a fast, effective clean, sweep or vacuum.
Scrub stained areas with a strong broom and a solution of warm water and trisodium phosphate or a concrete cleaner, then rinse and dry.
If you’re facing large-scale damage, persistent oil or chemical stains, mold that keeps returning, or structural cracks, call a pro.
They’ll have the equipment and expertise to restore the floor safely and quickly.
One-sentence summary of the fastest effective method
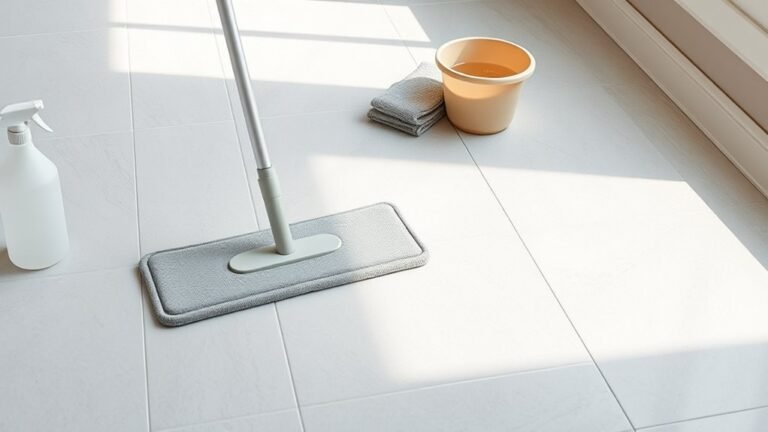
Grab a broom, a mop, and a bucket of warm water mixed with a few drops of dish soap, then sweep.
Spot-treat stains with a stiff brush and a mild degreaser, and finish by mopping and rinsing for the quickest effective clean of a concrete basement floor.
If you’re wondering how do you clean concrete basement floors, follow that routine and dry thoroughly to prevent mildew.
When to call a pro
If stains are stubborn, odors persist, water keeps pooling, or the job feels bigger than you can handle, call a pro—especially when structural issues, mould growth, or extensive chemical contamination are involved.
You’ll save time and avoid mistakes. Consider hiring someone when you see:
- Persistent mildew or black mould
- Repeated flooding or poor drainage
- Deep chemical stains
- Cracked or heaving slabs
- Complex waterproofing needs
Basic Understanding What You Need to Know About Concrete Basement Floors
You’ll want to understand that concrete is porous and holds moisture and stains, which means it needs specific cleaners and techniques.
Expect common issues like dust, efflorescence, oil spots, mold, and peeling paint that each require different treatments.
Also take safety seriously—use ventilation, proper PPE, and watch for electrical hazards when cleaning.
Why concrete needs special cleaning (porosity, moisture, stains)
Because concrete is porous and often sits where moisture collects, it soaks up spills, salts, and grime the way a sponge does—making ordinary mopping ineffective.
You need cleaners that penetrate, lift embedded dirt, and neutralize mineral residues. Moisture encourages deeper staining and can hide odors, so you’ll use dehumidifying, proper cleaners, and occasional scrubbing or pressure washing to restore and protect the surface.
Common types of basement floor issues (dust, efflorescence, oil, mold, paint, paint peel)
Basement floors show a few recurring problems you’ll want to recognize before cleaning or repairing: dust builds up from abrasion and movement; efflorescence appears as white powder from moisture; oil and grease leave dark, stubborn stains; mold thrives in damp areas and discoloration; paint can chip or peel, creating flaking debris and hiding damage.
Identifying each issue helps you choose the right treatment.
Safety considerations (ventilation, PPE, electrical hazards)
When working on concrete basement floors, prioritize ventilation, proper PPE, and awareness of electrical hazards to keep yourself safe. Open windows, run fans, and vent fumes outdoors when using cleaners.
Wear gloves, eye protection, a respirator for dust or chemicals, and slip-resistant shoes.
Disconnect or cover exposed outlets, avoid wetting live circuits, and use GFCI-protected tools to prevent shocks.
Tools, Materials, and Prep Checklist
Before you start cleaning, gather essential tools like brooms, stiff brushes, a wet/dry vacuum, buckets, and protective gear so you won’t stop mid-job.
Choose appropriate cleaners—alkaline concrete cleaners, degreasers, and mild acids if needed—and consider optional heavy-duty equipment such as a pressure washer or floor scrubber for stubborn grime.
Finally, run quick pre-clean checks: test for moisture, inspect and note cracks, and clear the area of furniture and debris.
Essential tools and equipment
You’ll need a compact set of tools and materials to clean concrete efficiently and safely:
- Stiff-bristled push broom or deck brush
- Wet/dry vacuum or mop and bucket
- Scrub brush and long-handled squeegee
- Protective gear: gloves, goggles, mask
- Heavy-duty trash bags and tack cloths
Gather these, clear the area, and test equipment before starting to guarantee smooth, safe work.
Recommended cleaning solutions and chemicals
1 simple kit of cleaning solutions will handle most concrete basement floors: a pH-neutral cleaner for routine dirt, a degreaser for oil and grease stains, a mild acid (like diluted muriatic or vinegar) for efflorescence and mineral deposits, and a bleach solution for mildew and mold.
Use protective gear, test patches, and follow dilution instructions.
- pH-neutral cleaner
- Degreaser
- Diluted acid
- Bleach solution
- Protective gloves
Optional tools for heavy-duty jobs (pressure washer, floor scrubber)
For really stubborn grime or large areas, consider renting a pressure washer or a walk-behind floor scrubber to save time and get deeper cleaning than hand-scrubbing allows. Both require proper setup, compatible nozzles or pads, and attention to water and chemical runoff.
- Choose PSI and nozzle for concrete
- Use detergent rated for washers/scrubbers
- Protect drains and nearby items
- Work in sections for control
- Rent compatible pads and spare parts
Pre-cleaning inspection steps (moisture test, crack check)
After renting or setting up heavy-duty gear, take time to inspect the floor so you don’t trap moisture or miss repairs before cleaning.
Check for damp spots, cracks, and efflorescence; mark trouble areas. Use a moisture meter and flashlight, then decide on repairs.
- Moisture test with meter
- Visual crack scan
- Tap for hollow areas
- Mark repaired spots
- Note drainage issues
Step-by-Step Cleaning Process
Start by clearing everything out and making sure the floor’s dry so you can see what needs attention.
Sweep and vacuum loose dirt, then spot-treat stains like oil, rust, or paint before applying a degreaser or heavy-duty cleaner and agitating the surface.
Finish by scrubbing—by hand or with a machine—and thoroughly rinsing the floor.
Step 1 Clear and dry the space
Clear out everything from the basement floor—furniture, boxes, loose debris—and give yourself room to work.
Make sure surfaces are dry and safe before you start cleaning.
- Move items to a dry, elevated spot
- Check for leaks or damp spots
- Use towels or a mop to soak up moisture
- Open windows or run a dehumidifier
- Wear gloves and sturdy shoes
Step 2 Sweep and vacuum loose debris
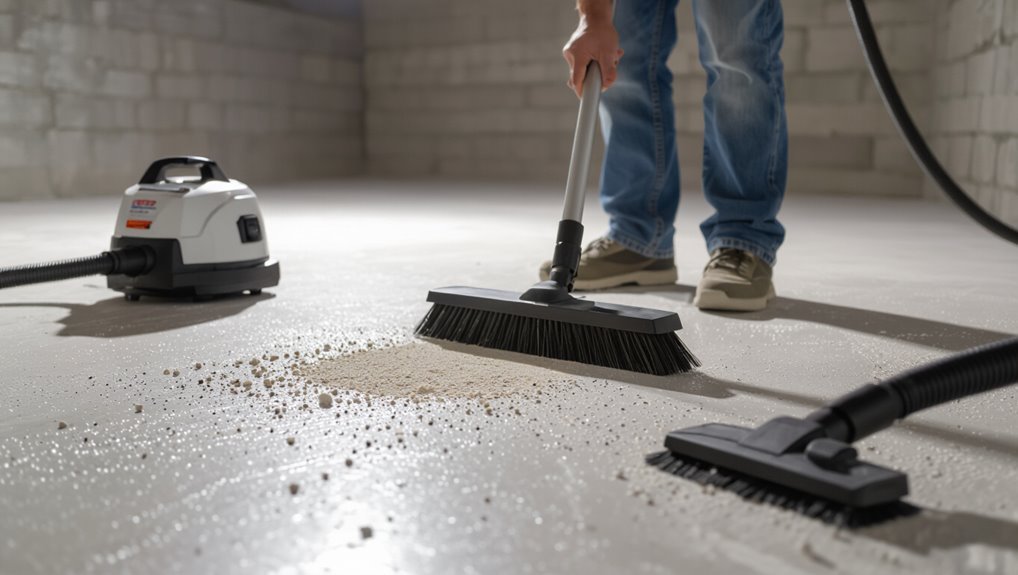
With the space emptied and dry, grab a stiff-bristled broom and sweep the entire floor, working from the farthest corner toward the exit so you don’t retrack over cleaned areas.
Gather dust into manageable piles, then use a shop vacuum with a wide floor attachment to remove fine grit.
Check corners, edges, and under shelving; repeat sweeping if needed.
Step 3 Treat stains (oil, grease, rust, paint)
Once you’ve removed loose debris, tackle stains by identifying their type—oil and grease need a degreaser or cat litter, rust calls for a tartaric or oxalic acid solution, and paint requires a solvent or scraper—so you can pick the right treatment and avoid wasting time or damaging the concrete.
- Blot excess oil, don’t smear
- Apply cat litter for fresh spills
- Use rust remover per label
- Scrape flaking paint gently
- Rinse and inspect before next step
Step 4 Apply degreaser or heavy-duty cleaner and agitate
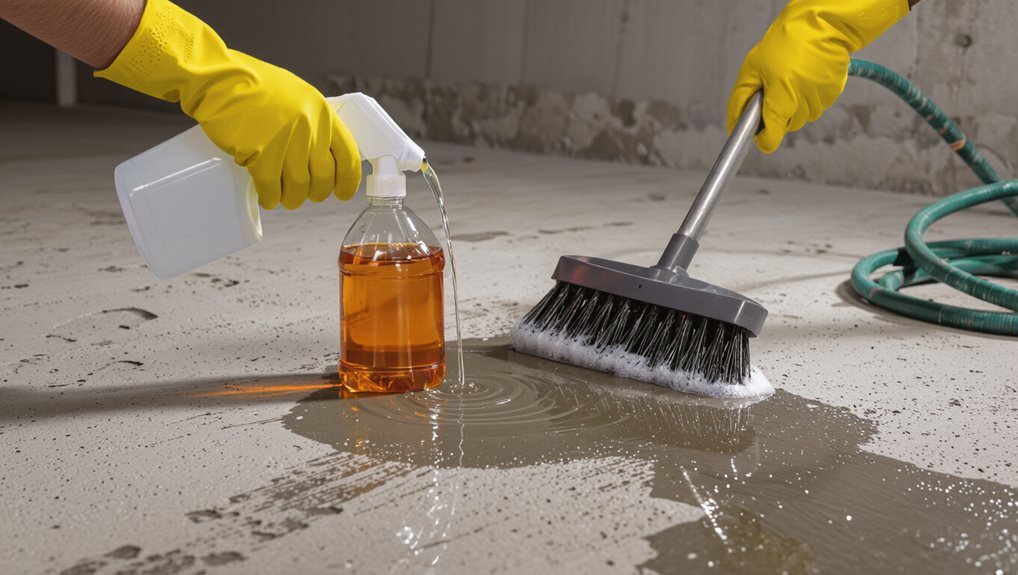
Start by choosing a degreaser or heavy-duty concrete cleaner rated for basement floors.
Then mix it exactly as the label directs so it’s strong enough to lift grime without harming the concrete.
Apply in manageable sections, work it into pores with a stiff-bristle brush or broom, let it dwell per instructions, and blot excess.
Wear gloves and ventilate the area throughout.
Step 5 Scrub and rinse (manual vs machine methods)
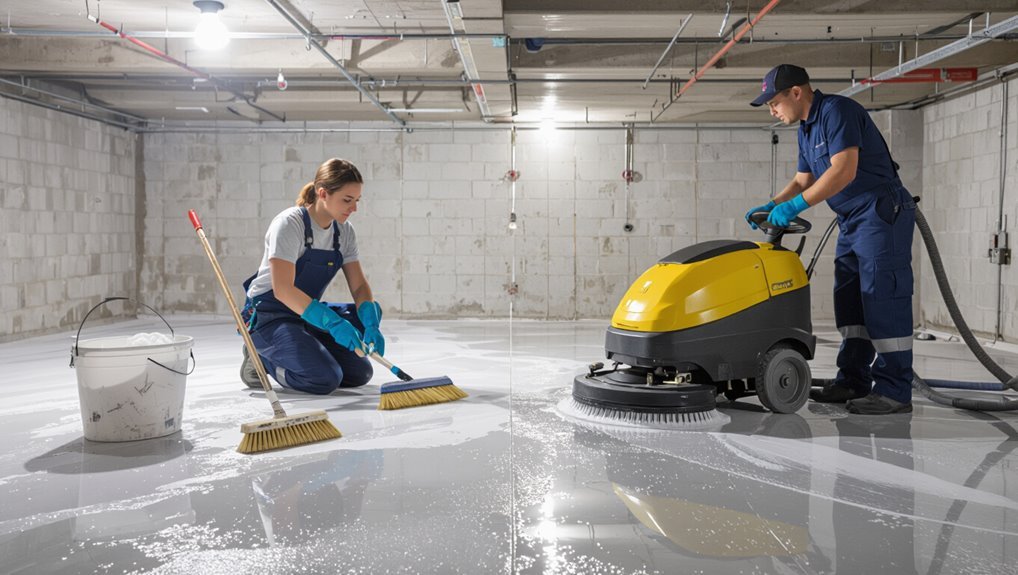
Now that the degreaser has had time to work and you’ve blotted away excess, it’s time to scrub and rinse so grime actually comes off instead of just loosening.
Use a stiff-bristled broom or deck brush for small areas; for larger spaces, rent a floor scrubber or rotary machine.
Rinse thoroughly with clean water and squeegee toward a drain or wet vacuum.
Step 6 Remove efflorescence and mineral deposits
1 common issue you’ll see on basement concrete is a powdery, white residue called efflorescence, which forms when water draws salts to the surface and then evaporates.
You’ll remove it by dry-brushing first, then applying a masonry cleaner or diluted vinegar solution, scrubbing with a stiff brush, rinsing thoroughly, and allowing the slab to dry.
Repeat stubborn spots or consult pros for heavy deposits.
Step 7 Disinfect and mold removal process
Treat disinfecting and mold removal as a focused step: you’ll kill lingering spores, remove visible mold, and prevent regrowth by using the right cleaners, proper dilution, and thorough drying.
Wear gloves and an N95 mask, test cleaners on a small area, apply a bleach or commercial fungicide solution per label, scrub with a stiff brush, rinse residue, and dispose of contaminated materials safely.
Step 8 Final rinse and drying techniques (fans, dehumidifier)
After rinsing away disinfectant and scrubbed residue, you’ll perform a final rinse and set up drying to prevent moisture from returning to the concrete.
Use clear water, work from farthest point to exit, and remove standing water with a squeegee or wet vac.
Then deploy fans and a dehumidifier until the slab is fully dry.
- Position fans for crossflow
- Run dehumidifier low and steady
- Open doors briefly
- Monitor moisture with a meter
- Check for hidden damp spots
Deep Cleaning and Renovation Options
When your regular cleaning isn’t enough, you’ll want to contemplate deeper options like safe basement pressure washing, resurfacing, or grinding and polishing to restore the floor.
I’ll explain how to use a pressure washer without damaging walls or causing moisture problems, outline resurfacing and polishing benefits, and show when you should strip old sealers or coatings first.
That way you can pick the right renovation route for durability and appearance.
Using a pressure washer safely in a basement
Although a pressure washer can blast away stubborn grime and efflorescence more quickly than scrubbing, you’ll need to take specific precautions to use one safely in a basement: control water flow, protect electrical systems, manage runoff, and choose the right nozzle and pressure setting for concrete.
Stay low pressure (1500–2500 PSI), keep sparks and outlets covered, direct water to a drain or pump, and wear eye and hearing protection.
Concrete resurfacing, grinding, and polishing overview
Consider resurfacing, grinding, or polishing if simple cleaning won’t restore your basement floor—each method tackles different problems and delivers distinct results. You’ll choose resurfacing for deep repairs, grinding for flatness, and polishing for shine; pros, costs, and downtime vary. Decide based on damage, budget, and desired finish.
| Method | Best for | Outcome |
|---|---|---|
| Resurface | Cracks, pitting | New layer |
| Grind | Unevenness | Flat slab |
| Polish | Aesthetic | Glossy finish |
When to strip old sealers or coatings
If your basement floor shows peeling, discoloration, or a buildup that cleaning won’t remove, you’ll likely need to strip old sealers or coatings before any renovation.
Test small areas to gauge adhesion and compatibility. Use a chemical stripper or mechanical method suited to the coating, follow safety guidelines, remove residue thoroughly, and guarantee the concrete is dry and dust-free before applying new sealer or finish.
Prevention and Maintenance Best Practices
Keep a simple routine—sweep and mop weekly and tackle spills right away—to prevent stains and buildup.
Consider sealants or an epoxy coating for long-term protection, and address any moisture with dehumidifiers, drainage fixes, or waterproofing.
When storing items or doing heavy work, use pallets, rubber mats, or plywood to shield the surface.
Regular cleaning schedule and quick-clean tips
A simple, consistent routine keeps your concrete basement floor looking good and prevents small problems from becoming big ones.
You should sweep weekly, mop monthly, and spot-clean spills immediately to avoid stains.
Quick tips:
- Sweep dust and grit daily
- Use a damp mop for light dirt
- Treat oil spots ASAP
- Keep mats at entries
- Air out to reduce moisture
Sealing and coating options to protect floors (sealants, epoxy)
1 practical step to extend your concrete basement floor’s life is to apply a protective sealant or coating—these products block moisture, resist stains, and make cleaning easier. Choose based on traffic and appearance: acrylic for shine, penetrating sealers for protection, epoxy for durability. Apply per instructions; sand and recoat as needed.
| Type | Best use |
|---|---|
| Acrylic | Light traffic |
| Epoxy | Heavy traffic |
| Penetrating | Natural look |
Moisture control and waterproofing tips
Because basements sit below grade and draw groundwater, you should prioritize moisture control to prevent mold, efflorescence, and structural damage—start by addressing both interior and exterior sources with simple, regular maintenance.
Grade soil away from foundation, keep gutters clear, and install downspout extensions.
Use dehumidifiers, repair leaks, apply waterproofing sealers to walls, and monitor humidity with a hygrometer regularly.
How to protect floors during storage or heavy use
When you store items or put heavy equipment on your concrete basement floor, take steps to prevent stains, cracks, and surface wear by using protective layers, distributing weight, and keeping the area clean and dry.
Use pallets, rubber mats, or plywood under heavy objects, lift rather than drag, place drip trays under machinery, and inspect periodically for spills or shifting so you can address issues early.
Common Mistakes and Troubleshooting
Watch out for common mistakes that can make cleaning worse, like using the wrong or acidic cleaners, over-wetting the slab, or treating stains improperly.
If you spot recurring efflorescence or stubborn stains that don’t budge, you’ll need targeted fixes rather than repeating the same methods.
Below you’ll find straightforward troubleshooting steps to correct these problems and prevent them from coming back.
Mistake 1 Using wrong cleaners or acidic solutions
If you reach for harsh acidic cleaners like muriatic acid or straight vinegar thinking they’ll strip stains fast, you’ll often do more harm than good—these solutions can etch concrete, damage sealers, and make future staining worse.
Instead, choose pH-neutral cleaners or a diluted degreaser, test a small area first, and follow manufacturer instructions to protect the slab and any coatings.
Mistake 2 Over-wetting causing mold or damage
Because excess water soaks into the slab and surrounding materials, you can unintentionally invite mold, efflorescence, and damage by over-wetting the floor during cleaning.
Use minimal water, work in small sections, and wring mop heads or use a wet vacuum to remove moisture.
Dry thoroughly with fans or dehumidifiers, and check corners and joints so trapped dampness doesn’t lead to problems.
Mistake 3 Improper stain treatment making marks worse
Over-wetting can mask the next problem: treating stains the wrong way can actually set them or spread them across the slab.
If you use harsh acids, dyes, or scrub aggressively without testing, you’ll lock stains into porous concrete or push them deeper.
Spot-test cleaners, blot don’t rub, and neutralize residues. Use appropriate products for oil, rust, or organic stains to avoid making marks worse.
How to fix stubborn problems (persistent stains, recurring efflorescence)
Tackle stubborn stains and recurring efflorescence methodically: identify the root cause, choose the right treatment, and test a small area before committing to a full repair.
For persistent oil, use a concrete degreaser and poultice; for rust, use oxalic acid carefully.
For efflorescence, fix moisture sources, scrub with a stiff brush and mild acid, then seal the floor to prevent recurrence.
Cost, Time, and When to Hire a Professional
You’ll want to know how much time each task takes—sweeping, scrubbing, degreasing, and sealing—so you can plan the job.
DIY cleaning usually costs much less than hiring pros, but professional rates cover deep stains, repairs, and specialized equipment.
If the floor has structural cracks, persistent oil stains, or mold, you should hire a pro.
Typical time investment by task
Expect to spend anywhere from an hour for a quick sweep and spot-clean up to a full weekend for deep cleaning, repairs, and sealing; plan each step so you don’t rush the dry times between rinsing, etching, and sealing. Below’s a quick time guide to help you schedule:
| Task | Typical Time | Notes |
|---|---|---|
| Sweep/spot clean | 0.5–1 hr | Quick tidy |
| Degrease | 1–2 hrs | Let sit |
| Etch/rinse | 2–4 hrs | Includes drying |
| Repair | 1–6 hrs | Depends on damage |
| Seal | 2–8 hrs | Multiple coats possible |
Estimated cost ranges for DIY vs professional cleaning
When weighing DIY versus hiring a pro, consider both upfront expenses and the value of your time: doing it yourself can cost as little as $20–$200 for basic supplies (broom, degreaser, patching compound).
A thorough DIY deep-clean, repair, and seal project typically runs $100–$500 depending on materials and rent for specialty tools.
Pro cleaning usually costs $300–$1,200, plus inspection fees.
Signs you should hire a pro
If stains, cracks, or odors are beyond what you can tackle with rented tools and store-bought cleaners, it’s time to contemplate a pro—especially since their expertise can save you time and prevent costly mistakes.
Hire one when damage is structural, stains resist treatments, moisture issues persist, or you lack time or tools.
Pros offer warranties, faster turnaround, and correct fixes that prevent recurring problems.
Frequently Asked Questions
You probably have a few quick questions about care and safety, so let’s cover the basics.
I’ll tell you how often to clean, whether household bleach works for mildew, what a sealer can and can’t stop, if using a pressure washer indoors is safe, and the best way to remove paint splatters.
Read on for clear, practical answers.
How often should I clean my concrete basement floor?
How often should you clean your concrete basement floor depends on use, moisture levels, and finish: lightly used, dry storage spaces usually need a sweep and occasional mop every 1–3 months, while active workshops, laundry rooms, or damp basements benefit from monthly cleaning and more frequent spot checks to prevent stains and mold.
For sealed floors, you can extend deep cleans; for unsealed, stay vigilant.
Can I use household bleach to clean mildew on concrete?
Although household bleach can kill mildew on concrete, it’s not always the best choice because it doesn’t penetrate porous surfaces well and can damage nearby materials and vegetation.
If you use bleach, dilute properly, test a small area, wear gloves and eye protection, rinse thoroughly, and ventilate.
For deep or recurrent mildew, consider oxygen bleach or a commercial concrete fungicide instead.
Will a sealer prevent all stains and moisture?
Bleach and other cleaners can handle surface mildew, but they won’t change how porous concrete behaves—so you may be wondering if a sealer will stop every stain and drop of moisture.
Sealers reduce absorption and make cleaning easier, but they aren’t foolproof. Heavy oil, constant water intrusion, or substrate cracks can still cause staining or seepage.
Reapply and address sources for best results.
Is it safe to use a pressure washer indoors?
Can you safely run a pressure washer inside your basement? You can, but take precautions: guarantee proper ventilation to avoid exhaust fume buildup, use GFCI-protected outlets and dry cords, control overspray to protect walls and stored items, and avoid excessive pressure that can damage concrete or force water into cracks.
Wear eye and hearing protection, and mop up standing water promptly to prevent mold.
How do I remove paint splatters from concrete?
If you’ve used a pressure washer in the basement or tackled other messy jobs, you’ll probably find paint splatters on the floor.
Scrape loose blobs with a putty knife, then apply a commercial paint stripper or mineral spirits for latex; use a solvent recommended for oil-based paints.
Scrub with a stiff brush, rinse, and repeat until gone.
Wear gloves and ventilate the area.