Does Vinyl Flooring Expand? What Homeowners Need to Know
Yes — vinyl flooring will expand and contract with temperature and humidity changes, so you’ll need to plan for movement. The amount varies by type: rigid cores shift less than flexible sheet or LVP. Proper acclimation, expansion gaps (typically 1/4″–1/2″), and the right installation method prevent buckling, gaps, or cupping. Control indoor climate and follow manufacturer specs; installers can help guarantee warranty compliance. Keep going to learn specific gap sizes and fixes for common problems.
Does Vinyl Flooring Expand? Quick Answer
Yes — vinyl will expand and contract slightly with changes in temperature and humidity.
You’ll notice small dimensional shifts when rooms get hot or humid, and the product’s core and installation method affect how much movement occurs.
Plan for expansion gaps and proper acclimation to keep the floor stable.
One-sentence summary of how vinyl flooring behaves with temperature and humidity
Because vinyl is made of flexible polymers and installed in long panels or planks, it will expand and contract modestly with changes in temperature and humidity.
So you should leave proper expansion gaps and control the room environment to prevent buckling or gaps.
When you ask “does vinyl flooring expand,” know it shifts slightly with heat and moisture, so plan for movement and acclimate materials.
Basic Understanding of Vinyl Flooring and Movement
You’ll find vinyl comes in several forms—sheet, luxury vinyl plank/tile (LVP/LVT), and rigid-core—each with different layers and installation methods.
Know that heat and moisture make these materials expand or contract at varying rates, so movement isn’t a defect but a material response.
Industry standards for dimensional stability help you compare products and set proper installation gaps to control that movement.
What is vinyl flooring? Types (sheet, luxury vinyl plank/tile, rigid core)
Vinyl flooring is a family of resilient, synthetic floor coverings made from PVC and layered construction that resist moisture and wear.
You’ll find it in three main forms—sheet vinyl, luxury vinyl plank/tile (LVP/LVT), and rigid core—that differ in installation method, durability, and movement behavior.
You’ll choose sheet for seamless coverage, LVP/LVT for realistic wood or tile looks, and rigid core for added stability.
How materials respond to temperature and moisture (expansion vs. contraction)
When temperatures rise or humidity climbs, vinyl flooring expands; when it cools or dries, the material contracts.
You’ll notice boards or sheets slightly change length and width as heat and moisture vary. That movement is physical: polymers absorb moisture and gain energy, then loosen.
You should leave proper gaps and control indoor climate to accommodate normal expansion and contraction.
Industry standards for dimensional stability
Those natural size changes mean manufacturers and industry groups set measurable limits and testing methods so you know how much movement to expect.
You’ll see standards like ASTM and ISO specifying allowable dimensional change percentages, acclimation protocols, and heat/moisture test procedures.
Look for certified ratings on product data sheets; they tell you how stable a plank is and guide installation gaps, acclimation time, and warranty coverage.
Why Vinyl Expands Causes and Mechanisms
You’ll notice vinyl expands mainly because materials change with temperature and because humidity or moisture in the subfloor and room can make planks absorb water and swell.
How the floor was installed—floating versus glued-down—also affects how much movement you’ll see, and product details like thickness, wear layer, and core type change the degree and speed of expansion.
Keep these factors in mind when diagnosing gaps, buckling, or edge lifting.
Temperature changes and thermal expansion
Because vinyl is made of polymers that respond to heat, temperature swings cause its molecules to shift and the material to expand or contract.
You’ll notice boards lengthen in warm conditions and shrink when it’s cooler. This dimensional change is predictable: greater temperature differentials produce more movement, so you should allow installation gaps and avoid trapping flooring against fixed edges to prevent buckling.
Humidity and moisture absorption (subfloor and room conditions)
Although vinyl’s polymers respond strongly to temperature, moisture plays an equally important role: when humidity rises or a damp subfloor transfers water into the plank layers, the vinyl and any core materials can absorb moisture, swell, and change dimensions.
You should monitor indoor humidity, fix leaks, and guarantee subfloor dryness before installing to minimize cupping, gapping, and long-term deformation.
Installation factors that influence movement (floating vs. glued-down)
When you choose a floating installation instead of gluing the vinyl down, the floor can move more freely with temperature and humidity changes. Therefore, you need to leave proper expansion gaps and pay attention to stair nosing, thresholds, and large open areas.
Glued-down planks, by contrast, are restrained and transfer stresses differently, which can reduce visible expansion but raise the risk of buckling or adhesive failure if the subfloor or adhesive isn’t compatible.
You should plan layout, connecting strips, and acclimation time to minimize movement issues and guarantee long-term stability.
Product-specific variables (thickness, wear layer, core type)
If you want to predict how much a vinyl floor will expand, start by looking at the product’s construction: plank thickness, wear layer, and core type all change how the material reacts to heat and moisture.
Thicker planks and rigid cores (WPC/XPC) resist dimensional change more than thin, flexible vinyl.
A durable wear layer reduces surface absorption, limiting short-term swelling and visible gaps.
How Much Does Vinyl Flooring Expand? Typical Measurements
You’ll typically see vinyl expand between about 0.1% and 0.5% of its length, with rigid SPC/LVT at the low end and flexible sheet or plank vinyl at the high end.
In real installations that means gaps of roughly 1/8″ to 1/4″ are common around a 10-foot run, and manufacturers usually specify exact edge-gap recommendations in their installation guides.
Check the product sheet for the maker’s tolerance and follow their minimum expansion gap to prevent buckling.
Expected expansion ranges for common vinyl types
Because vinyl reacts to temperature and humidity, different types will expand by different amounts — rigid luxury vinyl plank (LVP) and vinyl tile usually shift less, often under 1/8 inch per 10 feet, while flexible sheet vinyl and older, thinner vinyl can expand up to 1/4 inch or more over the same run; knowing these typical ranges helps you plan seam placement, changes, and the required expansion gap around the room.
| Vinyl Type | Typical Expansion |
|---|---|
| LVP / Tile | ≤ 1/8″ per 10′ |
| Sheet Vinyl | ~1/8″–1/4″ per 10′ |
| Older Thin Vinyl | ≥ 1/4″ per 10′ |
Real-world examples and edge-gap recommendations from manufacturers
When measuring real installations, manufacturers usually specify a concrete edge gap to accommodate the expansion you’ll see in normal temperature and humidity swings.
Following their guidance prevents buckling or visible seams.
Typical recommendations:
- 1/8″–1/4″ for glued vinyl,
- 1/4″–3/8″ for floating LVT/LVP,
- larger gaps at doorways or long runs,
- and >1/2″ for very long continuous rooms.
Installation Strategies to Accommodate Expansion
Before you install, acclimate the planks and prep the subfloor so the material and site start at the same temperature and moisture level.
Leave proper expansion gaps at walls, around pipes, and at junctions, and plan where transition strips, reducers, and perimeter trims will cover those gaps.
Choose the right fastening—loose-lay/click-lock, glue-down spots, or full-spread adhesive—and use additional strategies for large rooms and open plans to manage cumulative movement.
Pre-installation steps: acclimation and site preparation
If you want your vinyl floor to expand and contract without buckling, start by acclimating the planks and preparing the site properly.
You’ll control moisture, temperature, and substrate flatness before laying boards. Follow these steps:
- Store boxes flat for 48–72 hours
- Maintain room temp at recommended range
- Measure substrate moisture
- Level uneven areas
- Remove baseboards and obstacles
Proper expansion gaps: where and how wide
Because vinyl needs room to move, you’ll leave consistent expansion gaps around fixed objects and at perimeter walls to prevent buckling and edge separation.
Keep gaps 1/4″ to 1/2″ for most installations; increase to 3/4″ in large rooms over 40 feet or where temperature swings are extreme.
Maintain gaps at pipes, thresholds, and door frames, and follow manufacturer specs for exact widths.
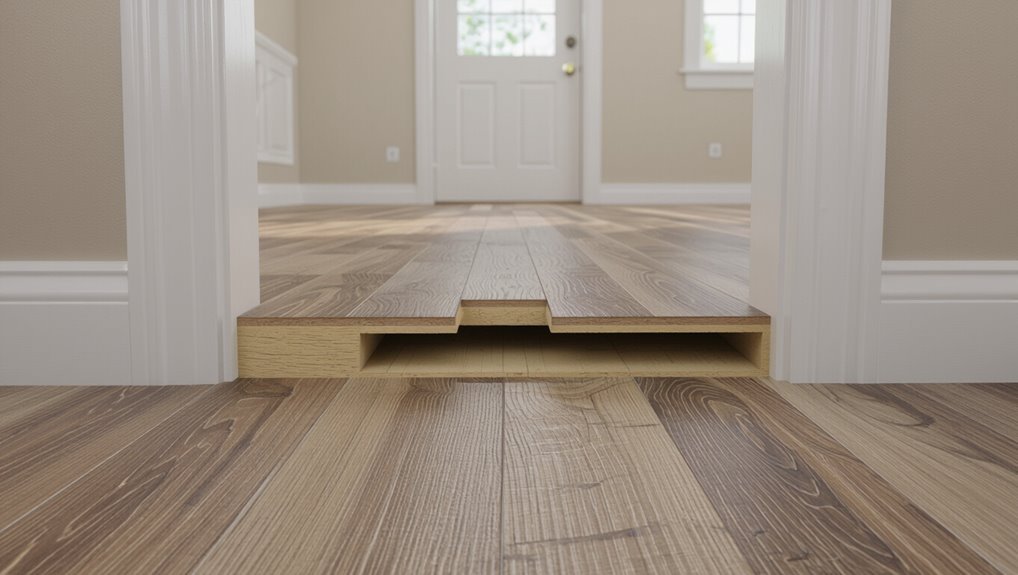
Transition strips, reducers, and perimeter trims: placement and function
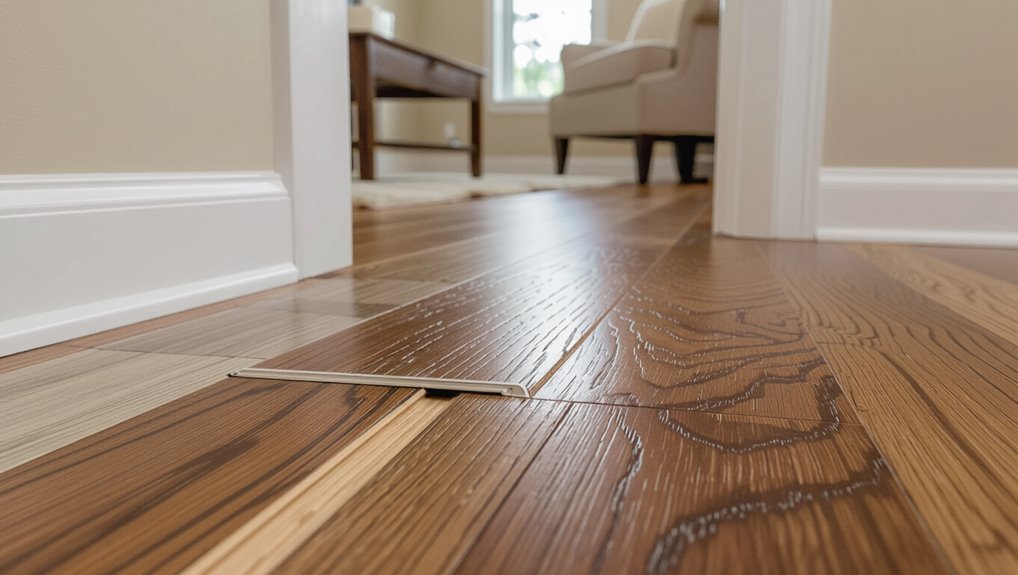
Now that you’ve set correct expansion gaps, you’ll use connector strips, reducers, and perimeter trims to manage movement at edges and level changes while keeping a clean finish.
Place junction strips between different flooring types or rooms, use reducers at height shifts, and install perimeter trims where planks meet walls.
Leave specified gaps beneath trims so vinyl can expand and contract without buckling.
Fastening methods: glue-down, click-lock, and full-spread adhesive considerations
Three common fastening methods—click-lock, glue-down, and full-spread adhesive—each handle vinyl expansion differently, so you’ll choose based on subfloor type, room size, and movement needs.
Click-lock floats and needs perimeter gaps; glue-down limits movement but suits stable substrates; full-spread adhesive provides maximum restraint and bond.
Match method to vinyl type, substrate moisture, and installer skill to prevent buckling or gaps.
Special considerations for large rooms and open floor plans
When you’re working in a large room or open floor plan, expansion needs change because long runs and wide sightlines amplify temperature- and moisture-driven movement.
Plan additional expansion gaps, use separation strips at natural breaks, and stagger seams to reduce visible shifting.
Consider multiple floating zones with isolation joints and allow for seasonal acclimation—especially near exterior walls and big glazing areas—to minimize buckling.
Detecting and Troubleshooting Expansion Problems (Problem-Solution)
Watch for common signs like buckling, cupping, or widening gaps so you can spot expansion issues early.
If planks are lifting, follow a clear troubleshooting sequence—assess moisture, relieve pressure, and refasten or replace affected pieces—so you know whether a repair will hold.
Try temporary fixes like weighing down loose areas or using a seam sealer, but replace flooring when damage is widespread or moisture problems persist.
Common signs of expansion (buckling, cupping, gaps)
Early signs of vinyl flooring expansion are usually visible: you’ll spot buckling where planks lift at the seams, cupping when plank edges curl upward, and widening gaps as boards pull apart.
You may also notice uneven shifts, clicking sounds when you walk, or doors that stick.
Monitor humidity and temperature; document changes with photos and measurements to assess severity before taking corrective action.
Step-by-step troubleshooting for buckling or lifting
Start by confirming the problem: inspect the affected area for raised seams, curled edges, or buckled plates.
Note measurements and take photos, then check room humidity and temperature to see if conditions exceed the vinyl’s recommended range.
Isolate moisture sources, remove trim to free edges, gently lift a plank to assess adhesive or locking failure.
Dry the subfloor, and document findings for repair steps.
When to repair vs. when to replace
If the buckling is limited to a few planks, the subfloor is dry, and the locking system or adhesive shows only localized failure, you can usually repair rather than replace—repairing is faster and less costly when damage is confined and the material still matches.
Replace when widespread buckling, moisture damage, chronic gaps, or warped boards exist, or when matching planks aren’t available—full replacement prevents recurring issues.
Temporary fixes homeowners can try
When a full replacement isn’t necessary or you’re waiting for a long-term fix, you can try a few temporary measures to reduce buckling and relieve pressure on vinyl planks.
Remove trim to give planks room, weigh down curled edges with clean, flat boards, use shims at door thresholds to stabilize connections, and lower indoor humidity with dehumidifiers until professional repairs are scheduled.
Mistakes to Avoid When Installing or Maintaining Vinyl Floors
Don’t skip acclimating your vinyl or you’ll invite unnecessary buckling.
Make sure you leave proper expansion gaps and never install over damp or uneven subfloors.
Also avoid the wrong adhesives or fasteners, since they can lock the floor in place or fail prematurely.
Skipping acclimation
Although vinyl feels ready to lay straight out of the box, skipping acclimation can lead to buckling, gaps, or seams that don’t sit flat once temperature and humidity change.
You should let planks rest in the room 48–72 hours so they adjust to local conditions.
Failing to acclimate risks uneven boards, adhesive failure, and premature wear—so follow manufacturer guidelines before installing.
Insufficient expansion gaps
If you leave little or no expansion gap around the edges, your vinyl planks won’t have room to expand and will buckle, curl, or push against walls and junctions as temperature and humidity change.
You should follow manufacturer gap recommendations, leave consistent spacing at doorways and against fixed objects, and use proper trim.
Regularly check edges and re-seat trim if seams start to bind.
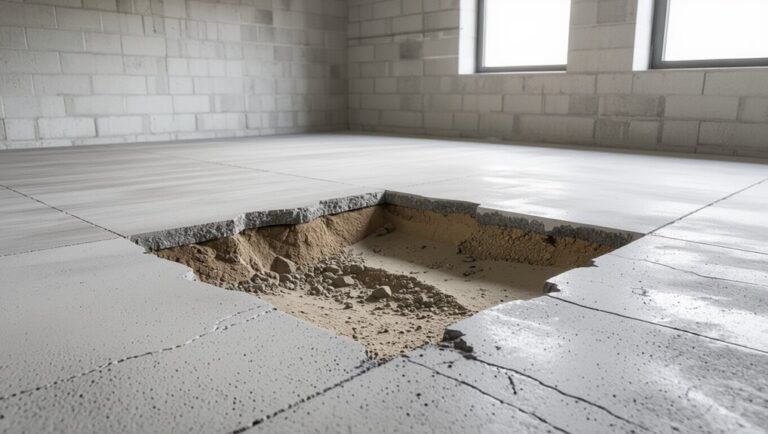
Installing over damp or uneven subfloors
When you install vinyl over a damp or uneven subfloor, the adhesive can fail, planks can warp, and mold can develop, so always test and prepare the substrate first.
Don’t ignore moisture readings or visible irregularities.
Dry, level, and clean the surface, repair dips or high spots, and use a moisture barrier if needed.
Proper prep prevents buckling, gaps, and premature replacement.
Using wrong adhesives or fasteners
After you’ve fixed moisture and leveling issues, the next big mistake is using the wrong adhesive or fasteners—doing so can void warranties, cause tiles or planks to lift, and damage the vinyl surface.
Always follow manufacturer recommendations, choose adhesives rated for vinyl and your subfloor type, avoid nails or staples unless specified, and allow proper curing time so the floor can expand and contract without restraint.
Prevention, Maintenance, and Best Practices
To keep vinyl expansion under control, you’ll manage indoor temperature and humidity and choose products suited to your climate and room use.
You should perform routine inspections and preventive maintenance to catch issues early.
When installing, weigh certified installers against DIY tips so you get lasting results.
Controlling indoor temperature and humidity
Although vinyl’s stability depends on many factors, controlling indoor temperature and humidity is the single most effective step you can take to prevent expansion and buckling.
You should monitor conditions and act promptly to keep levels steady.
- Keep thermostat between 65–75°F
- Maintain relative humidity at 35–55%
- Use dehumidifiers in damp seasons
- Run HVAC regularly
- Seal gaps around doors and windows
Routine inspections and preventive maintenance
When you inspect your vinyl floors regularly and perform simple maintenance, you’ll catch small issues before they become costly repairs. A quick monthly check of seams, junctions, and perimeter gaps lets you spot swelling, loose edges, or moisture intrusion early so you can take targeted action.
Clean with manufacturer-recommended products, tighten threshold strips, address leaks immediately, and re-seal edges or caulk as needed to prevent expansion problems.
Choosing the right vinyl product for your climate and room use
Regular inspections and proper upkeep are only part of preventing vinyl expansion; choosing the right product for your climate and room use prevents many issues before they start.
Pick waterproof, dimensional-stable luxury vinyl for bathrooms and basements, and rigid core or SPC for humid, variable climates.
Match wear layer and warranty to traffic levels, and guarantee acclimation guidelines fit local temperature and humidity ranges.
Working with certified installers vs. DIY tips
Because proper installation and upkeep make the biggest difference in preventing vinyl expansion, you’ll want to weigh the pros of hiring a certified installer against tackling a DIY project yourself; certified pros bring training, precision cutting, moisture testing, and warranty-backed work, while skilled DIYers can save money by following manufacturer acclimation, expansion gap, and adhesive guidelines precisely.
Decide based on skill, time, and risk tolerance.
Comparison: Floating vs. Glue-Down vs. Loose-Lay Performance
When you compare floating, glue-down, and loose-lay vinyl, pay attention to how each moves with temperature and humidity.
Floating planks shift on their joints, glue-down stays fixed to the substrate, and loose-lay relies on weight and friction.
Consider how that movement affects expansion gaps, changes, and the likelihood you’ll need to repair or replace sections later.
We’ll weigh the pros and cons for expansion tolerance and repairability so you can pick the best option for your space.
Movement behavior by installation type
Although each installation method handles dimensional changes differently, you’ll see clear patterns in how floating, glue-down, and loose-lay vinyl respond to heat, humidity, and foot traffic. You’ll notice movement allowances, adhesive restraint, and surface shifting vary by method.
| Installation | Movement | Typical Behavior |
|---|---|---|
| Floating | Expansion gaps | Slides slightly under stress |
| Glue-down | Restricted | Minor buckling if adhesive fails |
| Loose-lay | Moderate | Shifts on smooth substrates |
Pros and cons related to expansion and repairs
If you want the easiest repairs and predictable movement, floating floors give you the most forgiving behavior—boards can be lifted and replaced and the expansion gap handles seasonal growth.
However, they can shift under heavy traffic and need careful edge restraint.
Glue-down offers stability and resists movement but repairs are tougher and expansion issues show as buckling.
Loose-lay balances easier replacement with moderate movement control.
Cost and Warranty Implications of Expansion Issues
You’ll want to factor potential repair costs—like plank replacement, reinstallation, or subfloor fixes—into your budget since labor and materials can vary widely.
Coverage depends on your warranty: some handle manufacturing defects and limited expansion issues, while others exclude damage from improper installation or environmental conditions.
Check the fine print so you know what’s covered, what triggers voiding, and what out-of-pocket expenses you might face.
Potential repair costs and factors affecting price
Repairing expansion-related damage to vinyl flooring can range from a modest DIY fix to several hundred dollars for professional service, depending on the scope and cause.
You’ll pay less for isolated plank replacement or seam resealing; more for subfloor repair, moisture mitigation, or full-room replank.
Labor, materials, access, and regional rates drive price.
Get multiple quotes and document damage promptly.
What warranties typically cover regarding expansion and installation
Costs and warranty coverage often go hand-in-hand when expansion problems crop up, so it’s important to know what protections your flooring and installer warranties offer.
You’ll usually find manufacturer warranties cover material defects, not damage from improper acclimation or installation.
Installer warranties may cover installation errors causing buckling or gaps.
Check duration, exclusions, required maintenance, and claim procedures to avoid surprises and unexpected costs.
FAQ
You probably have a few quick questions about how temperature and installation affect vinyl expansion, like whether it expands in cold weather or needs a gap around the edges.
You’ll also want to know about installing over radiant heat, how long to acclimate planks, and whether waterproof vinyl removes expansion concerns.
I’ll answer each point clearly so you can avoid problems and protect your warranty.
Will vinyl flooring expand in cold weather?
Wondering whether vinyl flooring will expand in cold weather? It contracts, not expands, as temperature drops, so you might notice slight gaps or tighter seams.
Vinyl reacts to thermal changes and humidity, so seasonal movement is normal. You should monitor seams and shifts for any lifting or buckling, but cold typically causes shrinkage rather than expansion; acclimation helps minimize issues.
How much gap do I need around the edges?
Because vinyl needs room to move with temperature and humidity changes, leave an expansion gap of about 1/4 inch to 1/2 inch (6–12 mm) around the room perimeter for glued or floating vinyl plank/tile, and up to 3/4 inch (18 mm) for larger rooms or high‑variation environments; follow manufacturer specs and use trim or quarter round to cover the gap.
Measure consistently, allow gaps at doorways, and stagger seams.
Can I install vinyl flooring over radiant heated floors?
Can you install vinyl over radiant heat? Yes — many luxury vinyl planks and tiles work with low-temperature, properly installed radiant systems.
Check manufacturer specs for maximum surface temperature (usually around 85°F/29°C), use recommended underlayment or adhesive, and guarantee even heat distribution.
Avoid rapid temperature changes. If in doubt, consult both the flooring and heating system manufacturers before installing.
How long should I acclimate vinyl planks before installation?
How long should you acclimate vinyl planks before installation?
You should let planks sit in the room they’ll be installed for at least 48 hours, ideally 72 hours, maintaining normal temperature and humidity.
Keep boxes unopened while warming, then open and lay planks flat.
Proper acclimation minimizes expansion or contraction after installation and helps achieve stable, long-lasting flooring.
Does waterproof vinyl eliminate expansion concerns?
Even though waterproof vinyl resists moisture, it doesn’t eliminate expansion and contraction concerns; temperature and humidity changes still cause dimensional movement.
You should allow proper expansion gaps and follow manufacturer guidelines. You must leave recommended perimeter and junction gaps, secure floating installations correctly, and avoid tight cuts near fixed objects.
Proper installation and acclimation prevent buckling and gaps, regardless of waterproofing.
Visual Guide and Quick Reference Resources
You’ll find clear diagrams showing proper expansion gap placement and changeover details so you can see exactly where to leave space and how to finish seams.
Use the quick-reference checklist to verify each installation step, whether you’re an installer or a homeowner.
Keep the diagrams and checklist handy during installation to prevent common expansion problems.
Diagrams: proper gap placement and transition details
When laying vinyl, diagrammed illustrations make it easy to see where expansion gaps belong and how connections should align.
So follow the visuals to place consistent edge and doorway clearances, leave space at fixed objects, and use the correct junction profile for height differences.
Use diagrams showing gap dimensions, direction of expansion, threshold junctions, T-mold placements, and butt-joint guidance to prevent buckling and visible seams.
Quick-reference checklist for installers and homeowners
1 clear checklist keeps installers and homeowners on the same page, letting you confirm gap sizes, changeover types, and fastening points at a glance.
Use this quick-reference to prevent issues and speed inspections:
- Measure and record perimeter expansion gap (recommended mm/in)
- Note changeover type and height difference
- Verify adhesive or locking method
- Check room temperature and acclimation time
- Photograph finished gaps and changeovers for records