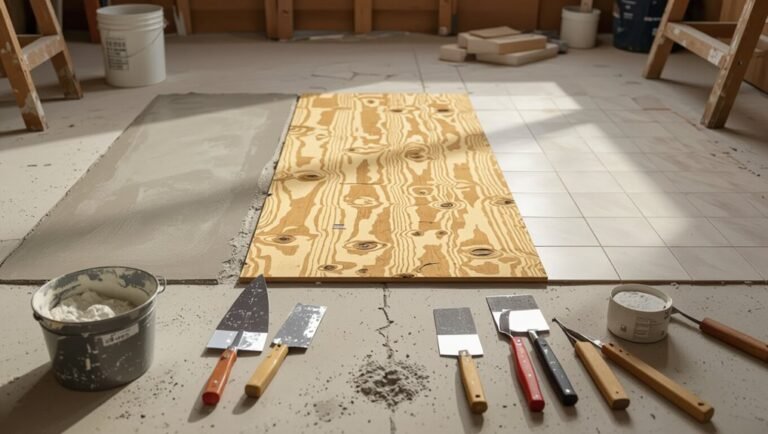
Can You Install Vinyl Flooring Over Tile? What You Need to Know First
Yes — you can install vinyl over tile if the tile is sound, level, and firmly attached. You’ll need to repair grout, fill low spots, and thoroughly clean and dry the surface so adhesives bond. Choose the right vinyl type and method (glue-down, click-lock, sheet, or peel-and-stick) for the room, avoid high-moisture areas unless waterproofing’s in place, and allow the planks to acclimate; keep going to get prep steps, pros and cons, and tips.
Can You Install Vinyl Flooring Over Tile? Quick Answer
Yes — you can install vinyl over tile in many cases, as long as the existing tile is sound, level, and well-adhered.
You’ll want to repair cracked grout, fill low spots, and clean thoroughly before laying vinyl.
If the tile is uneven or loose, remove it first to guarantee a long-lasting result.
Short, direct recommendation (yes/no and when)
You can usually install vinyl flooring directly over existing tile if the tile is level, well-bonded, and free of cracks or wax; otherwise you’ll need to repair, level, or remove the tile first.
Short answer: yes, when tile is sound and flat.
Say no if grout is high, tiles are loose, or subfloor damage exists—then fix or remove tile before installing.
Basic Understanding What Is Vinyl Flooring and What Is Tile?
Before you start, know that vinyl comes in several types—LVP and LVT planks, sheet, and peel-and-stick—while tile is usually ceramic, porcelain, or natural stone.
You’ll see they differ in composition and flexibility: vinyl is synthetic and forgiving, tile is rigid and often thicker.
Those structural and installation differences are what determine whether and how you can install vinyl over tile.
Types of vinyl flooring (LVP, LVT, sheet, peel-and-stick)
Anyone choosing vinyl for a tile-overlay will find four main types to contemplate: luxury vinyl plank (LVP) and luxury vinyl tile (LVT), vinyl sheet, and peel-and-stick tiles.
You’ll pick based on appearance, durability, and installation ease. LVP/LVT mimic wood or stone; sheet covers seams; peel-and-stick’s simple.
Consider traffic, moisture, and your patience.
- Excited to transform
- Relieved by simplicity
- Confident in choice
Common types of tile (ceramic, porcelain, natural stone)
While vinyl imitates many looks, tile itself comes in three common varieties—ceramic, porcelain, and natural stone—each with distinct properties you’ll want to know before laying vinyl over it.
Ceramic is affordable and glazed. Porcelain is denser and more moisture-resistant. Natural stone (like marble or slate) is porous and uneven.
You’ll assess flatness, grout condition, and moisture before proceeding.
How vinyl and tile differ in structure and installation
Because vinyl and tile are built for different purposes, you’ll notice key differences in materials, installation methods, and long-term performance that affect whether you can lay one over the other.
Tile is rigid, thick, and requires mortar and grout on a flat subfloor.
Vinyl is flexible, thin, and often click-lock or adhesive-backed, needing a smooth, clean surface for proper adhesion and movement accommodation.
When It’s Appropriate to Install Vinyl Over Tile
You can install vinyl over tile when the surface is flat, firmly bonded, and dry, because unevenness, poor adhesion, or moisture will cause failures.
Favor living areas and bedrooms for overlays, but avoid high-moisture rooms like bathrooms or basements unless you address waterproofing and substrate concerns.
Also check local building codes and your vinyl’s warranty, since some manufacturers or jurisdictions prohibit overlays or require specific preparations.
Suitable conditions for overlaying (level, adhesion, moisture)
A solid assessment is the first step: before you plan to lay vinyl over existing tile, confirm the floor is flat, the tile is firmly bonded, and there’s no active moisture issue.
Check for uneven grout lines, loose or hollow tiles, and surface contaminants. Use a straightedge, perform a moisture test, and repair or level imperfections.
Proper adhesion and dryness are non-negotiable.
Room types where overlay is recommended or discouraged
Once you’ve verified flatness, bond, and dryness, consider the room’s use and moisture exposure before installing vinyl over tile.
Kitchens, living areas, and bedrooms are usually fine with rigid or LVP overlays if seams are sealed.
Avoid overlays in bathrooms, laundry rooms, or basements prone to moisture, or on exterior entryways where freeze/thaw and heavy water intrusion risk adhesive failure and warping.
Building code and warranty considerations
Because building codes and manufacturer warranties can restrict what you can do, check both before installing vinyl over tile.
Verify local code for floor changes, fire ratings, and height limits. Confirm the vinyl maker allows installation over existing tile; otherwise you’ll void warranty.
Keep documentation of approvals, use approved underlayments, and follow specified adhesives and acclimation procedures to maintain coverage and safety.
Preparation Checklist Before Installing Vinyl Over Tile
Before you start, gather the tools and materials you’ll need—tape measure, straightedge, underlayment, adhesive, and cutting tools.
Inspect the existing tile for cracks, loose pieces, and deteriorated grout, repairing anything that could affect adhesion.
Measure the room carefully and calculate how much vinyl and underlayment you’ll need, adding a small waste allowance.
Tools and materials needed
Gathering the right tools and materials will make installing vinyl over tile faster and help you avoid costly mistakes.
You’ll need a utility knife, straightedge, and tapping block; adhesive or underlayment per product instructions; spacers and a roller for smoothing.
Prepare safety gear and a clean workspace so you can work confidently.
- You’ll feel relief
- You’ll gain control
- You’ll enjoy the result
Inspecting tile condition: cracks, loose tiles, grout condition
When you inspect the existing tile, check carefully for cracks, loose pieces, and deteriorating grout so you know whether the floor can support vinyl or needs repair first.
Tap tiles to find hollowness, pry any loose ones and reattach or replace them.
Clean and regrout gaps, level uneven areas, and guarantee the surface is stable, dry, and smooth before proceeding.
Measuring and calculating materials
Start by measuring the room’s length and width and multiply to get square footage so you know how much vinyl you’ll need.
Add 5–10% for waste and pattern matching. Measure doorways, closets, and alcoves separately.
Note plank or sheet orientation to minimize seams. Calculate underlayment, adhesive, and trim quantities.
Compare material coverage on packaging before buying.
Step-by-Step Installation Process
Now you’ll move through the installation step by step, starting by evaluating and repairing any damaged or loose tile.
Clean and degrease the surface, decide if you need an underlayment or leveling compound, and acclimate the vinyl planks or sheets to the room.
Finally, plan your layout carefully and make precise cuts before you start installing.
Step 1 Assess and repair existing tile surface
Inspect the tile surface closely to determine if it’s suitable for vinyl—look for loose, cracked, or uneven tiles, missing grout, and any contaminants like wax or adhesive residue.
Remove or replace damaged tiles, fill low spots with a leveling compound, and re-grout gaps.
Make certain the surface is flat, stable, and free of movement so your vinyl adheres properly and lasts.
Step 2 Clean and degrease tile thoroughly
Scrub the tile surface thoroughly to remove dirt, grease, wax, and any old adhesive residue—these contaminants will prevent vinyl from sticking properly.
Use a stiff brush and a degreasing cleaner or trisodium phosphate solution, rinsing well. Pay attention to grout lines and corners.
Let the floor dry completely, then wipe with a solvent-free cleaner to guarantee no film remains before proceeding.
Step 3 Decide on underlayment or leveling compounds
3 choices will determine how your vinyl performs: leave the tile as-is, install an underlayment, or apply a leveling compound. You’ll weigh surface flatness, thinset seams, and moisture.
Choose underlayment for cushioning and sound control; use leveling compound for uneven grout lines. Make decisions based on subfloor condition and vinyl type to guarantee durability and a smooth finish.
- Relief: no more lumpy floors
- Confidence: long-lasting results
- Joy: beautiful, comfortable walking surface
Step 4 Acclimate vinyl planks/sheets to the room
Before you lay a single plank, let the vinyl acclimate in the room for at least 48 hours so it adjusts to the temperature and humidity where it’ll live; this prevents expansion, contraction, and gaps after installation.
Open boxes, spread planks or unroll sheets flat on the subfloor, and avoid heat sources.
Check manufacturer temperature and humidity ranges and record conditions before you install.
Step 5 Layout planning and cutting vinyl
Start by planning a layout that balances aesthetics and waste reduction: measure the room, snap a chalk line down the center or along a focal wall, and dry-fit rows of vinyl to see where narrow end pieces will fall so you can adjust the starting line and avoid tiny cuts at doorways.
Mark and number planks as you go, then use a straightedge, utility knife or vinyl cutter to make precise cuts—always wear safety gear and cut slowly to keep edges clean.
Measure twice, cut once, and stagger seams for stability.
Step 6 Installation methods: glue-down, click-lock, peel-and-stick
With your layout set and cuts made, you’ll choose the installation method that matches the vinyl type and your skill level: glue-down (adhesive applied to the substrate), click-lock (floating planks that snap together), or peel-and-stick (pre-applied adhesive). Choose glue-down for permanence, click-lock for DIY ease, peel-and-stick for quick small areas.
| Method | Skill | Best use |
|---|---|---|
| Glue-down | Pro | Large rooms |
| Click-lock | DIY | Whole floors |
| Peel-and-stick | Beginner | Patches, small rooms |
Step 7 Finishing touches: trim, transitions, thresholds
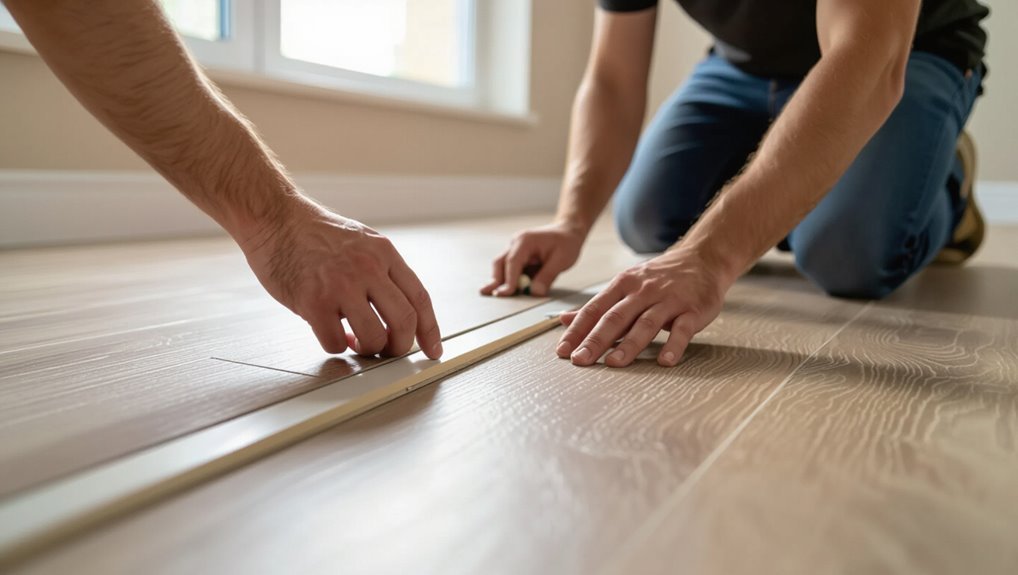
Step 7 ties everything together: you’ll install baseboards, connector strips, and thresholds so the new vinyl looks professional and functions properly.
Fit junctions at doorways, trimming vinyl for a snug seam.
Reattach or replace baseboards, sealing gaps with color-matched caulk.
Screw or press thresholds per manufacturer instructions to allow expansion and provide a smooth, secure path between different floor surfaces.
Comparison Vinyl Over Tile vs Removing Tile First
When you’re weighing vinyl over tile versus removing the tile first, consider time and labor: covering tile is usually quicker and less messy, while removal takes more effort.
Factor in cost and performance, since skipping removal can save money up front but might affect longevity if the tile or subfloor has issues.
If tiles are loose, uneven, or damaged, you’ll want to remove them to guarantee a durable floor.
Time and labor comparison
Although removing old tile might seem thorough, installing vinyl over tile usually saves you significant time and labor because you skip demolition, subfloor repairs, and grout cleanup. You’ll work faster, need fewer helpers, and disrupt your home less.
| Task | Vinyl over Tile | Remove Tile First |
|---|---|---|
| Demolition | Minimal | Extensive |
| Prep time | Short | Longer |
| Labor needed | Low | High |
| Cleanup | Light | Heavy |
| Project length | Short | Long |
Cost comparison
Curious how your wallet will fare? Installing vinyl over tile usually saves labor and disposal costs, lowering upfront expenses.
You’ll pay less for prep and installation, especially DIY. Removing tile adds demolition, hauling, floor repair and more labor hours, raising total cost.
Also factor adhesive, underlayment and potential subfloor fixes—these can narrow savings if tile removal reveals issues.
Performance and longevity comparison
If you lay vinyl over tile, you’ll gain time and save on immediate costs, but expect some trade-offs in long-term performance compared with removing the tile first.
Overlaid vinyl may transmit tile movement, grout lines, and adhesive failures, shortening lifespan and increasing repairs.
Removing tile yields a smoother, more stable substrate, better adhesive bond, and generally longer-lasting vinyl with fewer maintenance issues.
When full tile removal is the better option
When you want the most durable, trouble-free result, removing old tile first is the better option.
You’ll eliminate height issues, uneven grout lines, and hidden damage that can compromise vinyl. Full removal gives you a clean, level subfloor for proper adhesive bonding and longer lifespan.
Choose removal if tiles are loose, cracked, or if you plan to change floor height or door clearances.
Common Problems and Mistakes to Avoid
Don’t trap moisture or ignore subfloor problems, because that’ll lead to mold and buckling.
Check for uneven or loose tiles and fix them before you install, and don’t use the wrong adhesive or skip a recommended underlayment.
Finally, leave proper expansion gaps and handle changes correctly so the floor can move without cracking or popping.
Trapping moisture and subfloor issues
Because tile can hide slow-moving moisture and unevenness, trapping water between the tile and new vinyl creates rot, mold, and adhesive failure that you’ll notice only after installation.
Check for dampness, efflorescence, or musty odors before you cover. Use a moisture meter, guarantee proper vapor barriers where needed, and repair or replace compromised underlayment to protect the vinyl and indoor air quality.
Installing over uneven or loose tiles
Once you’ve ruled out moisture and underlayment damage, address another common pitfall: uneven or loose tiles.
You should inspect for hollow spots, cracked grout, and wobbly pieces. Remove or secure any unstable tiles and level high or low areas before laying vinyl.
Skipping this leads to telegraphing, premature wear, and adhesive failure. Proper prep guarantees a smooth, durable finish.
Using wrong adhesive or skipping underlayment
If you skip a proper underlayment or use the wrong adhesive, your new vinyl can shift, bubble, or fail long before its expected life.
You need an underlayment rated for vinyl to smooth imperfections and provide moisture protection.
Use adhesive manufacturers recommend for tile-over installations.
Test compatibility, follow open time and trowel size, and don’t improvise with generic glues or thinset substitutes.
Ignoring expansion gaps and transitions
When you ignore expansion gaps and shifts, your vinyl can buckle, peel, or push against doorways and adjoining floors as temperatures and humidity change.
You need consistent gaps around room edges and at fixed objects, plus proper connectors between different floorings.
Without them you’ll get warping, unsightly seams, and premature failure—so follow manufacturer gap specs and install connectors where surfaces meet.
Best Practices and Pro Tips
Before you start, you’ll want to account for temperature and humidity shifts, pick a vinyl that balances durability with comfort, and plan changes to keep floor heights consistent.
Consider whether you can handle the prep and tricky cuts yourself or if hiring a pro will save time and prevent costly mistakes.
These choices will determine how long your new floor looks and performs.
Preparing for temperature and humidity changes
Although vinyl is resilient, it still expands and contracts with temperature and humidity shifts, so you’ll need to control the environment before and after installation.
Keep indoor temperature between 60–80°F and relative humidity 30–50%. Acclimate planks in the room 48–72 hours.
Use dehumidifiers or humidifiers as needed, avoid sudden HVAC changes, and allow seams to settle before heavy traffic.
Choosing the right vinyl type for durability and comfort
Anyone can pick vinyl that looks great, but you should focus on the construction and wear layer to get lasting durability and comfort.
Choose rigid core (WPC or SPC) for stability over tile, thicker wear layers (20 mil+ for high traffic) for scratch resistance, and an appropriate underlayer for cushioning and sound.
Test samples for feel before committing.
Matching transitions and maintaining floor height
After you’ve chosen the right rigid-core vinyl and wear layer, you’ll need to think about how the new floor meets adjacent surfaces and how it affects overall height.
Measure connections to doorways, thresholds, and adjoining rooms. Use tapered reducers, ramps, or undercut door jambs to avoid trip hazards.
Match connection profiles and trim thickness so doors close properly and finishes look seamless.
Hiring a pro vs DIY: when to call an installer
When you’re weighing whether to tackle a vinyl-over-tile install yourself or hire a pro, consider skill level, tools, and the room’s complexity—simple, flat rooms with minimal changes are often fine for experienced DIYers, but uneven tile, complicated layouts, or plumbing and door adjustments generally call for a pro.
If you lack time, confidence, or proper tools, hire an installer to avoid costly mistakes.
Cost, Lifespan, and Maintenance
You’ll want to budget for materials, labor, and any prep like leveling or underlayment when planning your vinyl-over-tile project.
Expect vinyl to last 10–25 years depending on product quality, installation, and how much traffic and moisture it sees.
To keep it looking good, follow simple cleaning routines and address spills, seams, and wear promptly.
Typical cost breakdown (materials, labor, prep)
Breaking the cost of installing vinyl over existing tile into three parts—materials, labor, and prep—lets you see where your money goes and where you can trim expenses. You’ll budget for planks/adhesive, pro installation, and surface leveling. Compare DIY vs pro for savings and risks.
| Materials | Labor | Prep |
|---|---|---|
| $2–$6/ft² | $1–$4/ft² | $0.50–$2/ft² |
Expected lifespan and factors affecting durability
Although vinyl can last a long time with proper care, its lifespan depends on product quality, traffic, installation, and maintenance routines.
You’ll typically see 10–25 years: luxury vinyl plank tends toward the higher end, thin click or glue-down options toward the lower.
Subfloor stability, moisture control, and protecting high-traffic areas greatly affect durability and when you might need to replace it.
Cleaning and maintenance recommendations
Knowing how long vinyl can last helps you plan for upkeep, and proper cleaning will keep that lifespan on the higher end.
Wipe spills promptly, sweep or vacuum weekly, and mop with a manufacturer‑approved cleaner. Use felt pads on furniture, avoid abrasive tools and steam cleaners, and protect high‑traffic areas with rugs.
Inspect seams periodically and repair minor damage quickly to prevent bigger issues.
FAQ
You’ll probably have a few practical questions, like whether planks can go directly over grout lines or stick to glazed porcelain or ceramic tile.
Expect to cover added height, compatibility with underfloor heating, and how to handle changes to other floor types.
I’ll answer each so you can decide the best approach for your installation.
Can you install vinyl plank directly over grout lines?
Can you lay vinyl plank directly over grout lines? You can in many cases, but grout lines should be level, intact, and shallow.
Deep or uneven grout creates telegraphing and wear. Fill or grind high spots, sand rough edges, and use a self-leveling compound for pronounced gaps.
A smooth, flat substrate guarantees proper adhesion and a longer-lasting finish.
Will vinyl stick to glazed porcelain or ceramic tile?
Will vinyl stick to glazed porcelain or ceramic tile? It can, but success depends on surface texture and adhesive.
Smooth, glossy tiles resist glue; you’ll need to abrade, etch, or use a primer to create grab.
Clean thoroughly, remove contaminants, and choose an adhesive rated for nonporous surfaces.
Test a small area first to confirm bond before committing to the whole floor.
How much height will vinyl add over existing tile?
Although thickness varies by product and installation method, expect vinyl over tile to add roughly 1/16″ to 1/2″ for most glue-down vinyl planks or sheets, and about 3/8″ to 5/8″ (or more) for floating click-lock vinyl with an underlayment.
Measure connections to adjacent floors, door clearances, and appliance or cabinet fit. You may need reducers or trim to create smooth thresholds.
Can underfloor heating be used with vinyl over tile?
If you’re planning on adding underfloor heating after installing vinyl over tile, you’ll want to confirm compatibility and heat limits before you start.
Many luxury vinyl products work with electric or hydronic systems if surface temperature stays below manufacturer limits (usually 27–29°C/80–84°F).
Verify adhesive and underlayment are rated for heat, use a thermostat with a floor sensor, and follow installation guidelines.
How do you handle transitions to other floor types?
How do you create a clean, safe junction between vinyl over tile and other floor types? You’ll use transition strips, level thresholds, and adhesive-edge trims to bridge height differences and hide seams.
Match colors and profiles, fasten securely, and leave movement gaps. Proper connections prevent tripping, look finished, and protect edges.
- Relief: peace of mind
- Pride: polished finish
- Comfort: seamless flow