
How to Remove Vinyl Flooring That Is Glued Down Without Wrecking the Subfloor
You can remove glued vinyl without wrecking the subfloor if you go slow, use the right tools, and protect the substrate. Start by testing a small area, score seams with a utility knife, then heat and peel or lift tiles with a floor scraper and pry bar. Use a heat gun, safe solvent, or a grinder for stubborn adhesive, and patch or sand soft spots gently. Keep PPE on and work section by section; more detailed techniques and tips follow.
Can You Remove Glued Vinyl Flooring Without Damaging the Subfloor?
You can often remove glued vinyl without wrecking the subfloor, but it usually takes patience and the right tools.
Expect several hours for a small room and more for larger areas, especially if the adhesive is stubborn.
With heat, adhesive remover, and careful scraping you’ll minimize damage and avoid unnecessary repairs.
Short summary of feasibility and time/effort expectations
Removing glued vinyl without damaging the subfloor is possible but depends on adhesive strength, subfloor type, and how long the vinyl’s been down.
You can often salvage the substrate if you work slowly, use heat, solvent, and proper tools, and know how to remove vinyl flooring that’s glued down.
Expect several hours for a small room; tougher jobs take days and more effort.
Basic Understanding What Is Glued Vinyl Flooring and Why It’s Challenging to Remove
You’ll run into different glued vinyl types—sheet vinyl, luxury vinyl tile/plank, and VCT—each glued down with adhesives that range from pressure-sensitive tapes to high-strength acrylics and mastics.
Those adhesives bond more or less strongly depending on the glue and whether your subfloor is plywood, OSB, or concrete.
Knowing which materials you’re dealing with matters because adhesive bond strength and subfloor vulnerability (swelling, delamination, or surface damage) dictate how aggressively you can remove the flooring.
Types of vinyl flooring (sheet vinyl, luxury vinyl tile/plank, VCT)
Flooring comes in three common glued vinyl varieties—sheet vinyl, luxury vinyl tile/plank (LVT/LVP), and vinyl composition tile (VCT)—and each peels up and adheres differently.
You’ll treat them differently when removing to protect the subfloor. Consider these quick distinctions:
- Sheet vinyl: large continuous sheets, prone to tearing.
- LVT/LVP: individual planks/tiles, easier to pry.
- VCT: dense tiles, often brittle.
- Repairability varies.
Common adhesives used and their bond strength
Because different jobs call for different glues, glued vinyl can be bonded with everything from pressure-sensitive mastic to solvent-based adhesives and epoxy. Each type grips the subfloor with different strength and cleanup needs.
You’ll face low-tack pressure-sensitive that peels, stronger acrylic or urethane mastics that need heat or solvent, and industrial epoxies that resist removal and often require mechanical scraping.
Typical subfloor materials (plywood, OSB, concrete) and vulnerability considerations

Different adhesives behave differently on plywood, OSB, and concrete, so you need to know what lies beneath the vinyl before you start pulling.
Plywood tolerates scraping but delaminates if wet or gouged. OSB swells and fragments more easily, so avoid aggressive prying.
Concrete’s porous surface bonds strongly; expect grinding or chemical removal. Match method to subfloor to prevent costly damage.
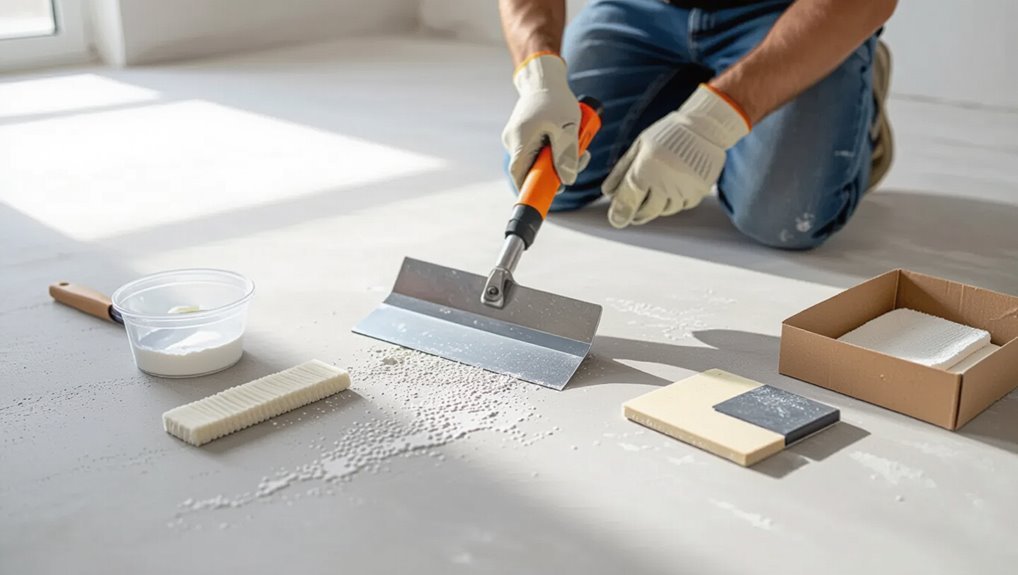
Safety, Tools, and Materials You’ll Need
Before you start, make sure you’re geared up with proper PPE—gloves, eye protection, a respirator, and knee pads—to protect against dust, chemicals, and flying debris.
You’ll need basic tools like a floor scraper, heat gun, pry bar, mallet, and an oscillating tool, plus a floor stripper for stubborn adhesive.
For large jobs or very stubborn glue, consider renting professional gear such as a floor grinder, steam stripper, or chemical adhesive remover.
Personal protective equipment (PPE)
When you’re removing glued vinyl, wear proper personal protective equipment to protect your eyes, lungs, hands, and knees from dust, adhesive fumes, sharp edges, and heavy tools.
Use certified gear, replace damaged items, and ventilate the area. Follow label warnings and local regulations.
- NIOSH-rated respirator
- Safety goggles
- Cut-resistant gloves
- Knee pads
Essential tools for safe removal (scraper, heat gun, floor stripper, oscillating tool, pry bar, mallet)
Gather the right tools and you’ll work faster, safer, and with less strain:
You’ll need a sturdy floor scraper, heat gun for softening adhesive, an oscillating tool with a scraper blade for tight spots, and a pry bar plus mallet for lifted edges.
Use a floor stripper for stubborn glue and keep tools sharp and handles secure to avoid slips.
- Scraper
- Heat gun
- Oscillating tool
- Pry bar/mallet
Optional professional tools and when to rent them (floor grinder, steam stripper, chemical adhesive remover)
If your job is large, the adhesive is stubborn, or you want the fastest, cleanest finish, consider renting professional gear: a floor grinder for heavy adhesive and leveling, a steam stripper to loosen resilient glue without harsh chemicals, and a commercial-strength chemical adhesive remover for spots that won’t budge.
Rent when time, effort, or subfloor protection justify cost and skill.
- Floor grinder
- Steam stripper
- Chemical remover
- PPE and ventilation
Preparation Before You Start
Before you start removing glued vinyl, inspect the floor and test a small, inconspicuous area to see how the adhesive and backing respond.
Make sure you check for asbestos or other hazardous materials—if you suspect any, stop and call a pro for testing and removal.
Clear the room, protect adjacent areas, and decide on a disposal plan that complies with local regulations.
Inspecting the floor and testing a small area
Once you’ve cleared the room, take a close look for seams, bubbles, or areas where the vinyl peels—these clues tell you how the floor was installed and how stubborn the adhesive might be.
Test a small corner: heat gently, lift a strip, and note adhesive type and subfloor condition.
Then assess effort and tools needed.
- Heat test
- Peel test
- Adhesive note
- Subfloor check
Checking for asbestos or hazardous materials and when to call a pro
Having tested a corner and noted the adhesive and subfloor, turn your attention to safety: older vinyl and its backing can contain asbestos or other hazardous materials, and disturbing them can release dangerous fibers.
If the home predates 1980 or you see crumbly backing, stop.
Get professional testing and abatement if positive; don’t attempt DIY removal of asbestos-containing materials.
Clearing the room and protecting adjacent areas
If you’re removing glued vinyl, clear the room of furniture, rugs, and loose items so you can work uninterrupted and keep debris from spreading.
Seal doorways with plastic sheeting and painter’s tape, cover vents, and protect adjacent flooring with rosin paper or cardboard.
Move fragile items away, unplug appliances, and lay down drop cloths to catch adhesive scraps and dust for easier cleanup.
Determining disposal plan and local regulations
Before you start pulling up flooring, decide how you’ll dispose of the vinyl and adhesive so you don’t run into surprises with pickup or drop-off.
Check local regulations for hazardous waste rules, recycling options, and landfill fees.
Contact your municipality or waste hauler, ask about bulk or construction debris pickup, and arrange a dumpster or rental bin if needed to avoid fines or rejected loads.
Step-by-Step Removal Process
Start by scoring and cutting the vinyl into manageable strips so you can work in sections.
Then you’ll loosen the adhesive with heat or steam as appropriate, use scraping and prying to protect the subfloor, and apply chemical removers where needed following product instructions.
If the job calls for power tools, use a grinder or floor stripper carefully to remove adhesive without overcutting the subfloor.
Step 1 Score and cut vinyl into manageable strips
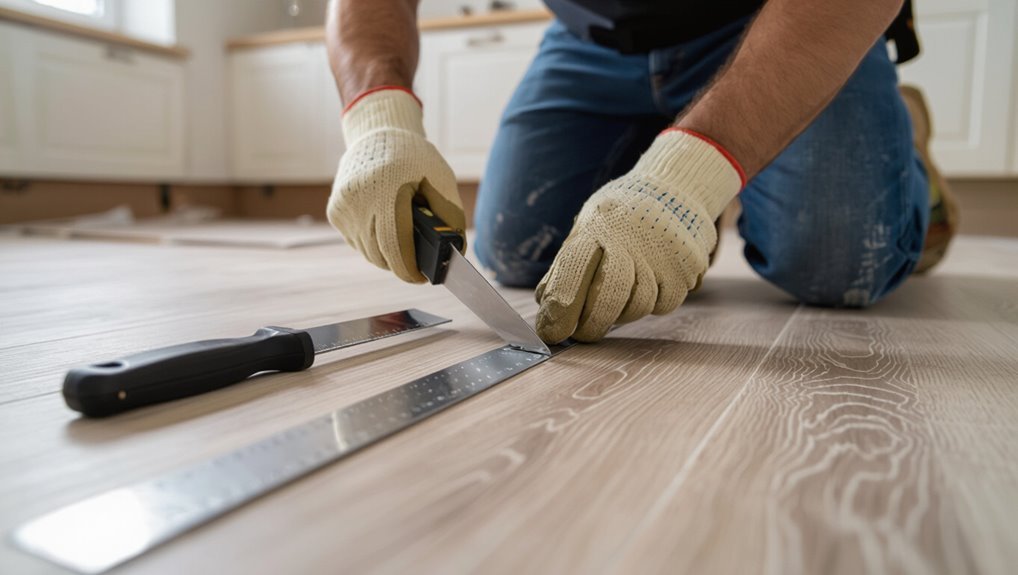
Once you’ve cleared the room and marked a working line, score the vinyl into long, manageable strips so you can peel and lift them without tearing or wrestling with oversized sections.
Use a straightedge and utility knife, cutting to about 6–12 inches wide. Work toward an edge, keeping cuts shallow to protect the subfloor.
- Measure strips evenly
- Keep blade sharp
- Use steady pressure
- Peel along grain
Step 2 Loosen adhesive with heat or steam (when to use which)
2 methods will help loosen glued vinyl: heat and steam, and you’ll pick the one that matches your floor and subfloor conditions.
Use a heat gun or infrared heater for thin vinyl or plywood subfloors; heat softens adhesive quickly.
Choose a steam cleaner on concrete or resilient subfloors where moisture won’t harm the substrate; steam loosens adhesive without overheating.
Test a small area first.
Step 3 Mechanical removal: scraping and prying techniques to protect the subfloor
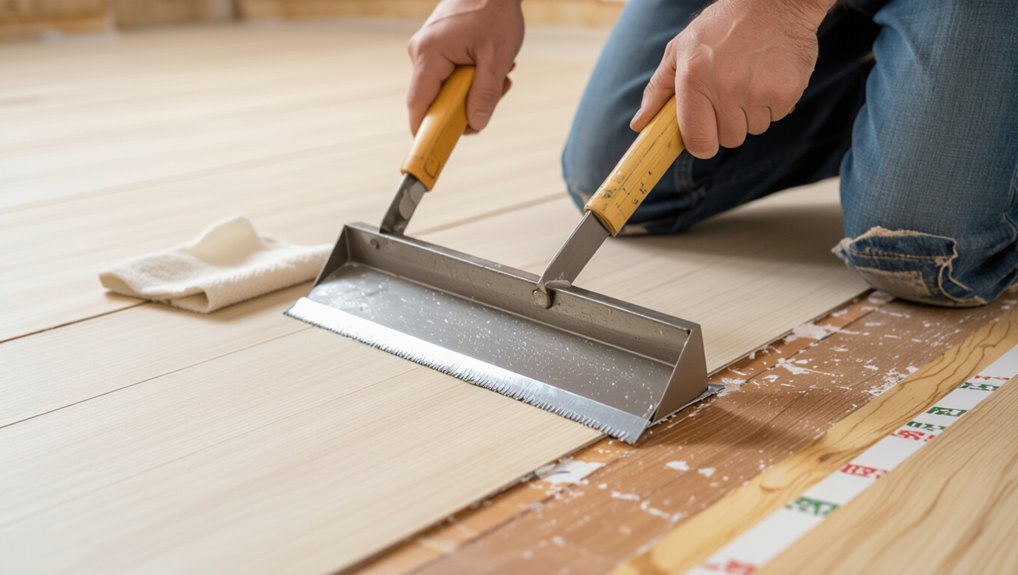
Prepare to work methodically: you’ll use scrapers, floor scrapers, and pry bars to separate vinyl and adhesive from the subfloor while minimizing gouges or tears.
Start at seams or torn edges, lift sheets with a pry bar, and push a flat scraper at a low angle.
Keep blades sharp, change direction often, and support the subfloor edge with a block to prevent chipping.
Step 4 Using chemical adhesive removers safely (selection, application, dwell time)
After you’ve removed as much vinyl and adhesive as you can with scrapers and pry bars, you’ll often hit stubborn residue that needs a chemical remover to finish the job.
Choose a low-VOC, floor-safe solvent, test a small area, apply per label, and respect dwell time. Use full PPE and ventilate well.
- Select safe solvent
- Patch test
- Follow dwell time
- Ventilate and PPE
Step 5 Power tools: grinder or floor stripper methods without overcutting the subfloor
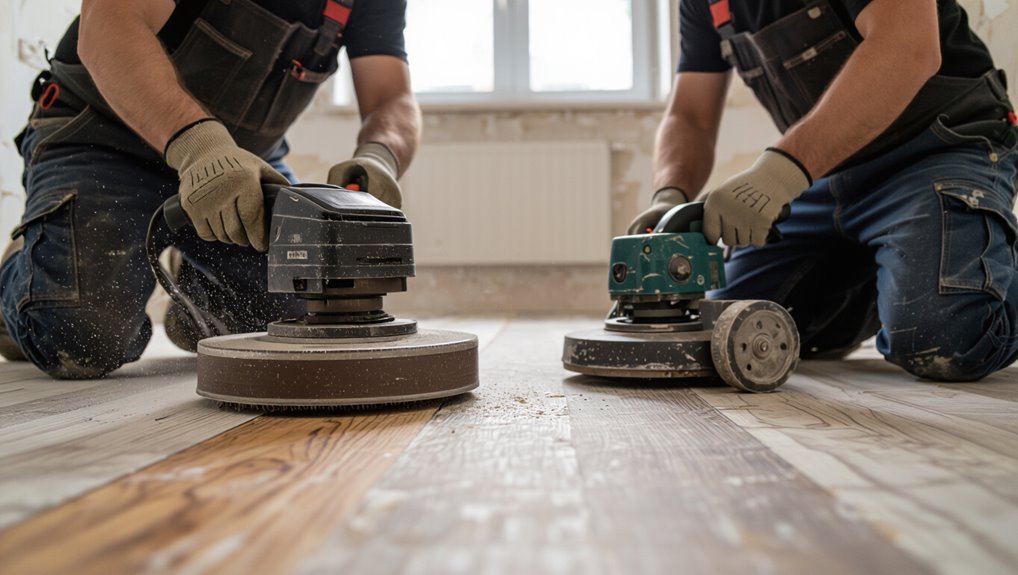
Switch on the grinder or floor stripper only when you’re ready to work in controlled passes, keeping the blade or bit flat and the machine moving steadily to remove adhesive without gouging the subfloor.
Use a low-speed, coarse diamond cup or floor scraper wheel, keep pressure light, overlap passes slightly, and stop frequently to check depth.
Wear PPE and ventilate the area.
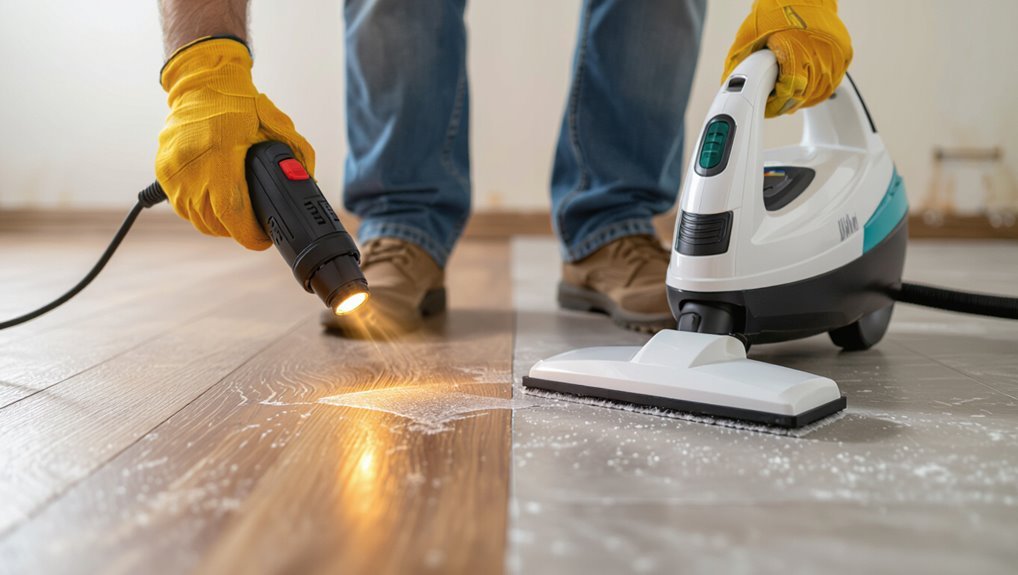
Step 6 Clean-up: scraping residual adhesive, solvent wiping, and neutralizing residues
Finish scraping by working methodically across the floor to remove any stubborn adhesive left after the grinder, using a stiff floor scraper or metal putty knife held at a low angle so you peel rather than gouge the subfloor.
Wipe with solvent recommended for the adhesive, ventilate, wear gloves, then rinse and neutralize per product instructions.
Allow to dry fully before proceeding.
Repairing and Restoring the Subfloor After Removal
Now that the vinyl’s up, you’ll inspect the subfloor for common problems like rot, delamination, gouges, and leftover adhesive.
For plywood or OSB you might sand, patch small areas, or replace damaged panels; for concrete you’ll remove adhesive residue, patch cracks, and perform moisture testing.
These steps’ll guarantee the surface is sound and ready for your new flooring.
Assessing subfloor damage and common issues to look for
Before you start repairs, take a careful look at the exposed subfloor to identify soft spots, delamination, mold, adhesive residue, nail pops, and any water staining—these issues will dictate whether you can repair in place or need to replace sections.
Inspect, document, and prioritize problems so you address safety and stability first.
- Soft or springy areas
- Mold or rot
- Heavy adhesive buildup
- Protruding fasteners
Repair techniques for plywood and OSB (sanding, patching, replacing damaged panels)
Start by cleaning and drying the subfloor so you can see damage clearly; then address plywood and OSB with targeted techniques—sanding for surface irregularities, patching small holes and delaminations, and replacing any panels that are structurally compromised.
Sand smooth, vacuum, and inspect. Use exterior-grade plywood or matching OSB for replacements, secure panels to joists, seal seams, and screw or glue patches firmly for a stable, flat substrate.
Preparing concrete for new flooring (adhesive residue removal, patching, moisture testing)
Assess the concrete carefully after you strip the vinyl—the floor needs to be clean, level, and dry before you install new flooring.
Scrape or grind adhesive residue, then vacuum and mop.
Fill low spots and cracks with a compatible patching compound, feathering edges.
Perform a moisture test (calcium chloride or relative humidity).
Only proceed when readings meet your new flooring’s manufacturer specifications.
Comparison of Removal Methods Speed, Cost, Risk to Subfloor
You’ve got several removal options—peeling by hand, using a floor scraper, applying heat or solvents, or renting a mechanical stripper—and each varies sharply in speed, cost, and the chance of damaging the subfloor. Weigh time, budget, and fragility: hand is cheap but slow; scraper balances risk; heat helps adhesive; mechanical is fast yet risky.
| Method | Trade-off |
|---|---|
| Hand | Cheap, very slow |
| Scraper | Moderate cost, moderate risk |
| Heat/Solvent | Low cost, adhesive lift |
| Mechanical | Fast, high risk |
Common Mistakes and How to Avoid Them
Watch out for common mistakes that can turn a removal job into a repair project: don’t burn or gouge the subfloor with excessive heat or grinders.
Test adhesives and use the right solvents, check for asbestos or lead before you start, and never rush the process.
Take measured, informed steps to protect the floor and your health.
Mistake 1 Using excessive heat or grinders that gouge the subfloor
Although it might seem faster, using excessive heat or aggressive grinders can seriously damage the subfloor, turning a removable vinyl job into a costly repair.
You should avoid torches, high-temp heat guns, and aggressive diamond grinders. Use moderate heat, hand scrapers, and non-abrasive pads.
Work slowly, test a small area, and stop at the first sign of scorching, charring, or gouging to preserve the substrate.
Mistake 2 Skipping adhesive testing and using wrong chemicals
If you skip testing the adhesive and grab the first solvent you find, you’ll likely waste time and risk staining or damaging the subfloor.
Always test a small area with the manufacturer’s recommended adhesive remover or a milder citrus or water-based product first.
Observe reaction, residue, and finish effects. Adjust method—mechanical scraping plus appropriate solvent—until the subfloor is clean and intact.
Mistake 3 Failing to check for hazardous materials
After testing adhesives and choosing the right remover, don’t overlook checking for hazardous materials before you start ripping up glued vinyl.
You should inspect for asbestos, lead, and mold; older flooring and adhesive layers can contain them. Hire a certified tester if you suspect contamination.
If tests are positive, follow legal disposal rules and use trained abatement pros to protect your health and the subfloor.
Mistake 4 Rushing and causing structural damage
When you rush through removing glued vinyl, you can easily gouge the subfloor, tear plywood layers, or damage joists—so take your time and work methodically.
Move in small sections, use proper tools at the right angles, and avoid prying with excessive force.
Pause to assess progress, replace dull blades, and brace vulnerable areas.
Slow, deliberate work preserves structural integrity and saves repair costs.
Best Practices and Tips for Minimizing Subfloor Damage
Work in small sections and test each removal method incrementally so you can spot damage early and adjust your approach.
Combine heat, mechanical, and chemical techniques strategically to loosen adhesive without overworking the subfloor.
If progress stalls or you risk gouging the substrate, stop and call a professional.
Work in small sections and test methods incrementally
Because glued vinyl can hide fragile spots and stubborn adhesive, tackle removal in small sections and test methods incrementally so you don’t damage the subfloor.
Work a few square feet at a time, assess adhesive behavior, and adjust tools or pressure accordingly.
Pause to inspect the substrate, repairing or stopping if delamination appears.
Small-scale testing prevents widespread harm and saves time.
Combine heat, mechanical, and chemical approaches strategically
Start by combining heat, mechanical, and chemical tactics in a planned sequence so you can loosen adhesive efficiently without over-stressing the subfloor.
Heat softens glue, scrape gently with a floor scraper, then apply a mild adhesive remover on stubborn spots.
Alternate methods, pause to inspect the substrate, and adjust intensity to avoid gouging.
Protect ventilation and use PPE throughout.
When to stop and call a professional
If progress stalls, the glue keeps gouging the subfloor, or you’re unsure about hidden damage, stop and call a pro—continuing can turn a salvageable floor into a costly repair.
Call a contractor when you hit structural issues, extensive rot, mold, or stubborn adhesive that resists heat and solvents. A pro prevents further damage, assesses repairs, and guarantees proper moisture and level checks before refinishing.
Cost, Time Estimates, and When to Hire a Pro
For a typical DIY job, you can expect to spend a few hours to a full weekend and $50–$300 for tools and supplies in a small room, scaling up to a couple of days and $300–$800 for larger spaces.
Watch for stubborn adhesive, damaged or uneven subfloors, or mold—those are signs you should call a pro.
If the removal will affect structural elements, plumbing, or electrical, hire an experienced contractor to avoid costly mistakes.
Typical DIY time and cost ranges by room size
Although actual times and costs depend on the adhesive, subfloor condition, and your tools, you can expect clear DIY ranges by room size:
Small (bathroom/closet) — 2–6 hours, $30–$150 in supplies;
Medium (bedroom/kitchen) — 1–2 days, $100–$400;
Large (living/dining) — 2–4 days, $300–$900.
Tough adhesive or repairs add time and materials but still fit these bands.
Signs the job requires professional intervention
When you run into deep gouges, pervasive adhesive that won’t budge, or a warped subfloor, call a pro—these problems can quickly turn a weekend job into costly, time-consuming repairs you may not be equipped to handle.
If mold, structural damage, or electrical/plumbing under the floor appears, or your timeline is tight, get estimates. Pros charge more but save time, risk, and hidden repair costs.
Frequently Asked Questions
You probably have a few quick questions about the removal process, like whether you can skip sanding the subfloor or how long to wait before installing new flooring.
You’ll also want to know about eco-friendly adhesive removers, how to tackle stubborn glue on concrete, and whether removal affects your home’s value.
I’ll answer each one clearly so you can plan the next steps.
Can glued vinyl be removed without sanding the subfloor?
If the vinyl was glued down with a strong adhesive, you’ll usually need to remove at least some residue to guarantee a smooth, stable surface—yet full sanding isn’t always required.
You can scrape, use a scraper with heat, or apply a chemical stripper to lift adhesive.
Test a small area first, clean thoroughly, and only sand spots where stubborn residue remains to protect the subfloor.
Are there eco-friendly adhesive removers that work?
Curious about greener options? You can use eco-friendly adhesive removers based on citrus solvents, soy, or biodegradable glycol ethers.
They soften glue without harsh fumes, making cleanup easier and safer. Test a small area first to confirm they don’t damage the subfloor finish.
For thick residue, combine gentle scraping with repeated applications rather than switching to harsher chemicals.
How do you handle stubborn adhesive on concrete?
Tackle stubborn adhesive on concrete by combining mechanical removal with targeted solvents and patience.
Start by scraping with a floor scraper or grinder to lift bulk residue. Then apply a concrete-safe adhesive remover or citrus solvent, letting it dwell per instructions.
Agitate with a stiff brush, rinse thoroughly, and repeat small sections until clean.
Wear PPE and ventilate the area.
Will removing glued vinyl lower the value of my home?
Will removing glued vinyl lower your home’s value? It depends: clean, careful removal that preserves the subfloor and leaves a neutral, finished surface usually won’t hurt—and can improve appeal.
Sloppy removal, gouged plywood or concrete, or visible adhesive can reduce perceived value. If you’re unsure, disclose the work, or hire a pro to protect resale prospects and buyer confidence.
How long before you can install new flooring after removal?
After you strip glued vinyl, you’ll usually wait 24–72 hours before installing new flooring so the subfloor can dry, any adhesive residues can be removed, and you can repair or level the surface as needed.
If moisture, glue, or damage persists, extend drying and remediation until the subfloor meets your new flooring’s moisture and flatness specs.
Don’t rush—proper prep prevents failures.