
How to Cut Vinyl Flooring Around Objects Without Ruining the Edges
You can cut vinyl flooring around pipes, vents, and posts without ruining the edges by measuring carefully, making templates, and using a sharp utility knife with a straightedge for straight cuts and snips or a jigsaw for curves. Score shallow passes until you cut through to prevent fraying, support the plank on a sacrificial board, and test-fit before sealing edges with flexible caulk or trim. Follow these steps and you’ll get neat, durable edges — keep going to pick up pro tips and fixes.
Can You Cut Vinyl Flooring Around Objects Without Ruining the Edges?
You can cut vinyl neatly around pipes, vents, and door jambs with the right tools and a steady hand, and you’ll usually end up with clean edges if you measure and score carefully.
Expect a professional-looking finish on simple shapes, but irregular or tight spots can show mistakes.
Call a pro when curves are complex, tolerances are tight, or you don’t have the right tools or confidence to avoid visible damage.
Short, direct guidance and expected outcome
Measure carefully, score cleanly, and you can cut vinyl flooring around pipes, door jambs, and fixtures without fraying the edges.
Use a sharp utility knife, straightedge, and snips for curves. Practice on scraps, mark cut lines, and cut shallow passes until through.
Expect neat seams that tuck under trim; properly cut pieces sit flush, resist lifting, and look professional when installed—no ragged edges.
When to call a pro vs. DIY
After you’ve practiced cuts and know your tools, decide whether to tackle tricky areas yourself or call a pro.
If cuts are simple—straight lines, gentle curves—you can DIY with patience and proper blades.
Call a pro for complex templates, tight inside cuts, plumbing or electrical obstacles, or if you lack confidence.
Pros save time, guarantee clean edges, and reduce costly mistakes.
Basic Understanding What You Need to Know About Vinyl Flooring and Edge Damage
You’ll want to know how different vinyl types—LVP, LVT, and sheet vinyl—behave when cut, since rigid planks chip differently than flexible sheet.
Edge damage usually comes from dull blades, improper support, or forcing cuts around pipes and trim. Choosing the right blades, straightedges, and backing support will make the difference between clean edges and costly touch-ups.
Types of vinyl flooring (LVP, LVT, sheet vinyl) and how they react to cuts
Different vinyl types—LVP, LVT, and sheet vinyl—cut and chip in distinct ways, so knowing their construction helps you avoid edge damage. You’ll handle each differently: LVP locks and trims cleanly, LVT’s thicker layers need steady blades, and sheet vinyl requires careful scoring.
| Type | Cut Behavior | Tip |
|---|---|---|
| LVP | Clean, snap | Use sharp utility blade |
| LVT | Layered, can chip | Cut slowly, support edges |
| Sheet | Flexible, tears | Score and bend gently |
Common causes of edge damage when cutting around objects
Cutting vinyl around pipes, door frames, and fixtures often leads to edge damage because you’re working in tight spaces where blades, pressure, and support aren’t aligned.
You’ll nick edges by forcing cuts, using excessive pressure, or twisting the material. Improper marking, unstable backing, and rushing also tear or compress edges.
Slow, steady motions and proper support prevent fraying, chipping, and uneven seams.
Tools and materials that affect edge quality
After you’ve slowed your motions and supported tight spots, the next thing to check is what you’re using: blades, shears, straightedges, and the vinyl itself all change how clean an edge comes out.
You’ll want sharp, appropriate tools and compatible material choices:
- Fresh utility blade
- Vinyl-rated shears
- Solid straightedge
- Stable, flat substrate
Choose wisely to minimize tearing and fraying.
Tools and Materials Required
Before you start cutting, gather the right tools so the job’s accurate and safe.
You’ll want basic hand tools like a sharp utility knife and coping saw, plus recommended power tools and blades for cleaner cuts.
Also, have measuring and marking tools or templates, and protective gear.
Finish with edge trims, sealants, and the proper adhesive to secure and protect the cut edges.
Essential hand tools (utility knife, jigsaw, coping saw)
Grab a sharp utility knife, a jigsaw with a fine-tooth blade, and a coping saw—these three hand tools will handle almost every vinyl flooring cut you’ll encounter. You’ll score, trim, and shape edges cleanly.
Use the right technique, steady hands, and proper safety.
- Utility knife: straight cuts
- Jigsaw: curves and openings
- Coping saw: tight detail
- Sanding block: finish edges
Power tools and blades recommended for vinyl
When you need speed and precision on larger jobs, power tools make quick work of vinyl flooring—just pick the right motor and blade for clean cuts.
You’ll prefer tools that control heat and tear. Choose blades and speeds for thin or thick vinyl; avoid excessive RPMs that melt edges.
- Circular saw with fine-tooth blade
- Trim router with carbide bit
- Oscillating multi-tool
- Variable-speed jigsaw
Measuring and marking tools, templates, and protective gear
A few precise tools make the difference between a sloppy install and a professional-looking job: a reliable tape measure, a carpenter’s square or T-square, a straightedge or level, and a sharp pencil or fine-tip marker for clear cut lines.
You’ll also want templates and safety gear. Use:
- Cardboard or template plastic
- Utility knife
- Safety glasses
- Knee pads and gloves
Finishing materials (edge trims, sealants, adhesive)
You’ll need a few specific finishing materials to make your vinyl floor look complete and durable: edge trims to cover exposed edges, a quality adhesive for seams or junctions, and a waterproof sealant for moisture-prone areas.
- Choose matching edge trims for connections.
- Use solvent or pressure-sensitive adhesive where needed.
- Apply sealant at perimeters and cutouts.
- Keep spare trim and adhesive for repairs.
Preparation Assess, Measure, and Protect
Before you start cutting, inspect the floor and surrounding areas for pipes, vents, and door jambs so nothing gets nicked.
Choose a cutting method that matches your vinyl type, then make templates or full-size paper patterns for tricky edges and changes.
Protect finished planks and the subfloor with rosin paper or cardboard while you work to avoid damage.
Inspecting the object and surrounding area (pipes, vents, door jambs)
Start by walking the room and noting every obstacle—pipes, vents, door jambs, thresholds, and any irregular wall or floor changes—so you’ll know exactly where cuts, notches, or reliefs are required.
Measure each object’s size, position, and clearance. Check for moving parts, trim depth, and gap requirements.
Protect fixtures and mark precise cut lines; small errors cost fit and finish.
Choosing the right cutting approach by vinyl type
Material matters: different vinyl types cut and handle differently, so assess whether you’re working with rigid plank (WPC/LVP), solid vinyl plank, or sheet/vinyl composite and choose blades, tools, and cut methods accordingly.
For rigid planks, use a fine-tooth saw blade or scoring knife.
For solid vinyl, score and snap or use a utility knife.
For sheets, use a sharp straight blade and steady support.
Creating templates and full-size paper patterns
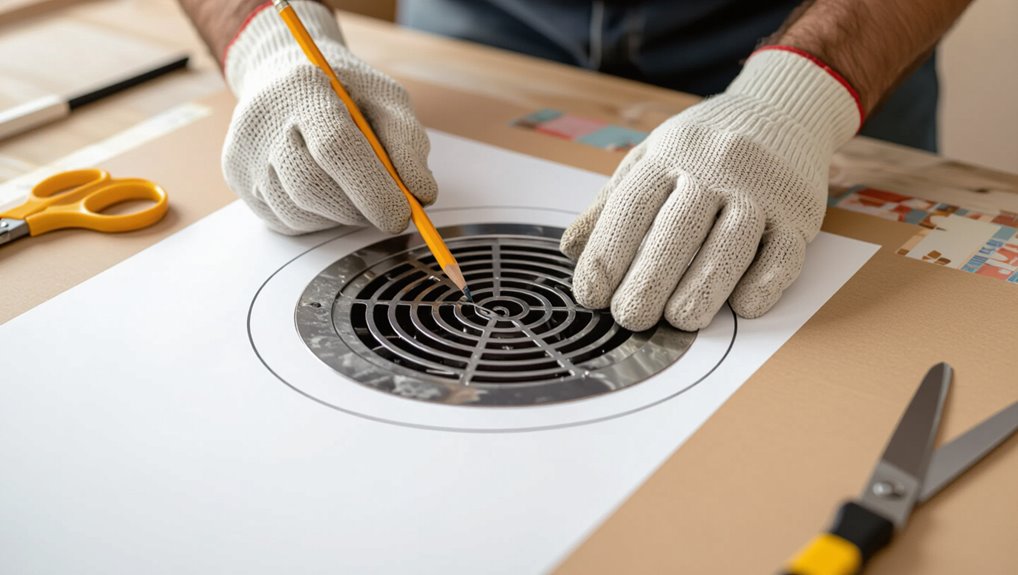
Measure carefully and make full-size templates for any irregular cuts so your pieces fit the first time.
Trace templates on kraft paper or cardboard, mark cut lines, seam allowances, and orientation. Test-fit templates against posts, pipes, or thresholds.
Transfer marks to vinyl precisely, label each piece, and note grain direction. Use templates to avoid re-cuts and preserve clean, accurate edges.
Protecting finished planks and subfloor before cutting
Before you cut, protect both the finished planks and the subfloor so you don’t damage surfaces or ruin your layout.
Cover adjacent planks with rosin paper or cardboard, tape seams with low-tack painter’s tape, and lay a sacrificial board under cut lines to prevent tear-out.
Keep debris off the subfloor and mark protected zones clearly to avoid slips or accidental cuts.
- Use rosin paper
- Tape seams
- Sacrificial board
- Clear debris
Step-by-Step: Cutting Vinyl Flooring Around Simple Objects (Pipes, Posts, Vents)
Start by marking and transferring an accurate template onto the plank so your cuts line up with pipes, posts, or vents.
Score and make partial knife cuts for crisp edges, then use a hole saw or jig for neat round openings.
Test-fit the piece, adjust as needed, and finish by smoothing and sealing the cut edges.
Step 1: Marking and transferring template to plank
1. Measure the object’s position from two fixed room reference points, then transfer those dimensions to a scrap paper template.
Fit the plank over the object, trace the template onto the plank’s backing, and mark alignment lines indicating grain and seam orientation.
Double-check clearances and orientation before cutting so the layout stays accurate and the pattern matches surrounding planks.
Step 2: Scoring and partial cuts for clean edges (knife techniques)
With your template traced and alignment lines set, you’ll use scoring and partial cuts to get crisp edges without damaging adjacent planks.
Use a sharp utility knife, score the vinyl along the line with several light passes, then snap or bend to break cleanly.
For tight fits, make shallow relief cuts toward the waste area, keeping the blade angled away from finished faces.
Step 3: Using hole saws and jigs for round objects
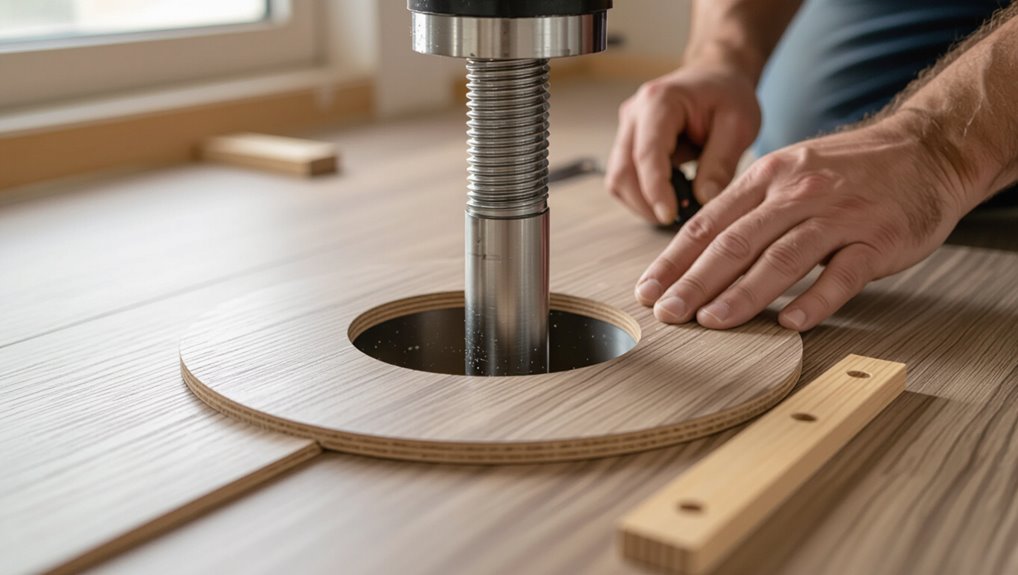
When you’re cutting vinyl around pipes, posts, or vents, hole saws and simple jigs let you make neat round openings quickly and accurately; pick a hole saw sized slightly larger than the fixture, clamp the plank over scrap wood, and drill slowly to prevent tearing.
Mark center, use a backing block or guide bushing, remove plug, and clean the cut edge with light sanding for a snug fit.
Step 4: Test-fitting and adjusting
After cutting, place the plank in position and check the fit around the pipe, post, or vent—look for gaps, tight spots, or edge lift that could keep the flooring from sitting flat.
If needed, mark pressure points, trim tiny amounts, or slightly widen holes.
Re-test until the piece lays evenly without forcing; verify seams align and the object’s trim won’t pinch the vinyl.
Step 5: Final smoothing and finishing edges
Now that the piece fits snugly, you’ll smooth and finish the cut edges so the vinyl sits flat and looks professional.
Trim any rough bits with a sharp utility knife, then gently sand bevels with fine-grit sandpaper.
Clean debris, apply matching seam sealer or adhesive, and press edges down with a roller.
Check for gaps; fill or recaulk as needed for a tight, durable finish.
Step-by-Step: Cutting Around Complex or Irregular Objects (Toilets, Built-ins, Trim)
When you hit toilets, built-ins, or trim, start by making a strip template or using coping techniques to transfer tight shapes accurately.
Cut in sequence so each plank stays intact where possible, then fit filler pieces to replace any removed sections and keep seams tight.
Finally, secure and seal all joints to maintain waterproofing and a clean finish.
Step 1: Strip template method and coping techniques
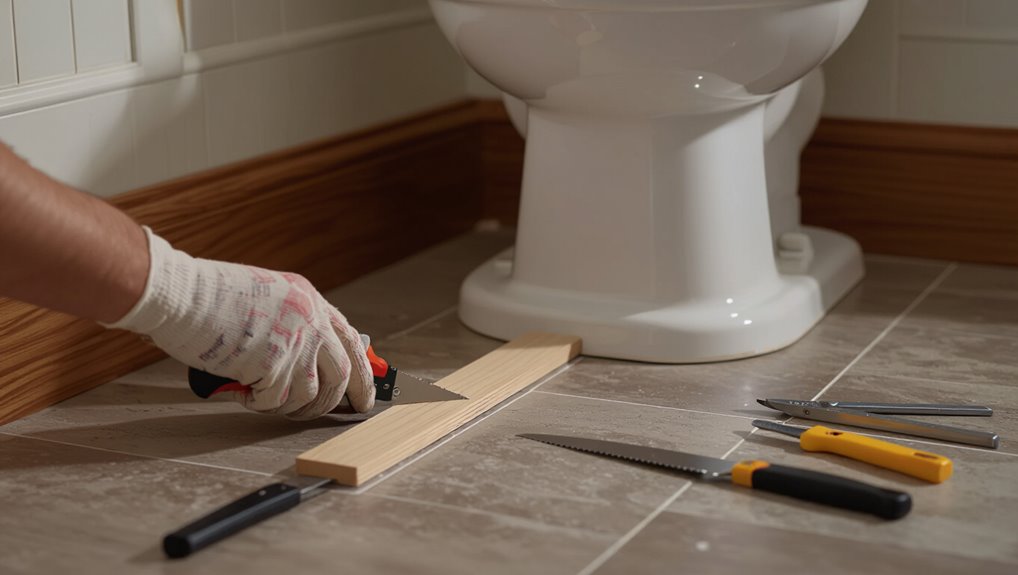
Start by creating a narrow strip template that matches the shape you’ll need to cut around—this simple pattern gives you a precise guide for coping around toilets, built-ins, and trim.
Trace the template onto the plank, cut just outside the line, then refine with a utility knife or coping saw.
Test-fit, shave tiny amounts, and repeat until the plank seats cleanly without forcing.
Step 2: Sequential cutting to preserve plank integrity
Sequential cuts keep the plank stable and prevent accidental breaks as you work around toilets, built-ins, or trim.
Measure and mark cut lines, then score shallowly along each line. Make progressive relief cuts toward the final shape, removing small sections gradually.
That reduces stress on the plank, lets you adjust fit, and keeps edges clean. Use a sharp knife and steady hand for control.
Step 3: Replacing cutouts with filler pieces and seams
Fit filler pieces into cutouts to restore a continuous surface and hide seams. Match grain, thickness, and direction; dry-fit pieces, trimming for tight contact.
Use small tabs or spline strips to bridge gaps and keep edges aligned. Press pieces flush, ensuring patterns line up.
Leave minimal seam gaps for movement; don’t glue full edges yet—prepare for final sealing in the next step.
Step 4: Securing and sealing joints for waterproofing
Once your filler pieces sit tight and patterns line up, it’s time to secure and seal those joints so water can’t sneak in around toilets, built-ins, or trim.
Press seams with a roller, apply waterproof seam tape underneath where possible, and use a bead of clear, flexible silicone in tight gaps.
Wipe excess, let cure, and test with a small water splash.
Specialized Techniques for Different Vinyl Types
Different vinyl types need different tricks: with sheet vinyl you’ll score and cut carefully to make large openings without frayed edges, while with click-lock LVP/LVT you’ll protect the tongue-and-groove and edge profiles as you trim.
For glue-down vinyl you’ll take steps to prevent surrounding planks from lifting when you cut.
In the following tips I’ll show specific tools and techniques for each situation.
Sheet vinyl: cutting large openings without fraying edges
Cutting large openings in sheet vinyl requires planning and the right tools so edges stay clean and don’t fray as you work.
Measure and mark, then score the face with a sharp utility knife, cutting multiple light passes.
Support nearby material to prevent tear-out, finish cuts from the underside if layered, and sand or seal exposed backing to prevent future unraveling.
Click-lock LVP/LVT: preserving tongue-and-groove and edge profiles
If you moved from scoring sheet vinyl to click-lock LVP/LVT, you’ll find the goals change: instead of preventing frays, you need to protect the tongue-and-groove and the finished edge profile so planks snap and seal properly.
Use sharp blades, cut from the top face to avoid chipping, trim minimally at joints, test-fit before locking, and keep edges square.
Handle tongues gently to prevent breaks.
Glue-down vinyl: preventing lifting while cutting
When you work with glue-down vinyl, you’ll need techniques that keep the adhesive bond intact while you score and trim—so cuts don’t cause edges to lift or gumming to creep up onto the plank faces.
Work slowly, remove only tiny sections at a time, use a sharp blade and straightedge, and support adjacent material.
Clean adhesive residue immediately, and press edges back with a roller to re-seat the bond.
Common Problems and How to Fix or Avoid Them
When you cut vinyl flooring you’ll sometimes run into frayed edges, split planks, gaps, or accidental damage to nearby surfaces.
I’ll show simple fixes—like clean trimming, edge sealing, and using backer supports—and prevention tips to keep planks from chipping or shifting.
Follow a few careful cutting and cleanup steps to avoid harming the subfloor, walls, or trim.
Frayed or jagged edges causes and repairs
Frayed or jagged edges usually happen because you’re cutting vinyl with dull tools, wrong blades, or improper technique, and they can ruin the look and make seams hard to hide.
To repair, trim ragged bits with a sharp utility knife, sand lightly, and seal cuts with vinyl adhesive or matching edge sealer.
Prevent recurrence by using fresh blades, steady support, and slow, firm strokes.
Plank splitting or chipping prevention and fixes
If you cut too fast, use the wrong blade, or pry planks improperly, vinyl edges can split or chip—leaving visible gaps and weakened seams.
To prevent this, score before snapping, use a sharp fine-tooth blade, clamp pieces close to the cut, and support edges while prying.
For minor chips, sand lightly and apply matching filler or seam sealer to reinforce and hide damage.
Gaps and misalignment after cutting remedies
Although precise cuts cut the risk, gaps and misaligned vinyl planks still happen, especially in tight spaces or around obstacles; you’ll spot them as visible seams, uneven edges, or panels that don’t lock properly.
Fix small gaps with matching color seam filler or flexible caulk. For alignment, loosen adjacent planks, realign, then reseat and tap gently.
Replace badly cut pieces for a clean finish.
Damage to surrounding objects or subfloor mitigation steps
When correcting gaps or realigning planks, don’t forget how easily nearby baseboards, cabinets, door frames, or the subfloor itself can get nicked or gouged during cutting and tapping.
Protect surfaces with painter’s tape, scrap wood guards, and thin plywood sheets. Use a mallet with a tapping block, score rather than saw near trim, and repair minor dents with wood filler or floor patch.
Tips, Best Practices, and Professional Shortcuts
Choose the right blade, speed, and light pressure to keep cuts clean and prevent chipping.
Use templates, spacer blocks, and simple jigs for repeatable precision, and save filler strips, molding, or trim for hiding small imperfections.
Before you lock everything down, do quick edge and fit checks so any final snags get fixed now.
Best blades, cutting speeds, and pressure to minimize damage
Pick the right blade and you’ll cut cleaner, faster, and with far less chipping or tearing.
Use fine-toothed carbide or diamond blades for laminate-backed vinyl; sharp utility blades work for sheet vinyl.
Run tools at moderate speed to avoid melting, and feed steadily with light, consistent pressure.
Let the blade do the work—don’t force it—and replace dull blades promptly to preserve edges.
Using templates, spacer blocks, and jigs for repeatable precision
If you want repeatable, professional cuts, set up simple templates, spacer blocks, and jigs before you start so each piece is measured and trimmed the same way every time.
You’ll save time and reduce errors.
Use:
- Template for complex shapes
- Spacer block for consistent gaps
- Stop-block jig for length repeats
- Masking-jig for safe, aligned cuts
When to use filler strips, molding, or trim to hide imperfections
Once your templates and jigs are producing consistent cuts, plan how you’ll hide the small gaps or imperfect edges that still show up.
Use filler strips where seams are narrow and unseen, match color and thickness.
Choose molding or quarter-round for visible perimeter gaps or uneven walls.
Reserve decorative trim for junctions or permanent fixes, and always test-fit before final adhesive or nailing.
Quick checks before final installation to ensure clean edges
Before you lock down adhesive or nail the last plank, run a quick, systematic check of every visible edge to catch issues you can still fix without damage.
Verify tight seams, consistent gap for expansion, and alignment against walls or fixtures. Trim tucked edges, sand burrs, and reseat loose joints.
Use a straightedge and light to spot gaps, then correct before finishing.
Comparison: DIY vs. Hiring a Professional
You can weigh cost, time, edge-damage risk, and expected finish to decide whether to tackle cutting vinyl yourself or hire a pro. Below is a quick comparison to help you judge common scenarios and when professional help is strongly recommended. Use this to match your budget, schedule, and tolerance for risk.
| Factor | DIY | Hiring a Professional |
|---|---|---|
| Cost | Lower material-only expense, possible tool rental | Higher upfront cost, includes labor and expertise |
| Time & Effort | Longer if inexperienced, learning curve | Faster, efficient for larger or complex jobs |
| Risk & Finish | Higher edge-damage and imperfect seams | Lower risk, cleaner edges, better overall finish |
Cost, time, risk of edge damage, and expected finish
Comparing DIY vs. hiring a pro for cutting vinyl comes down to cost, time, edge risk, and the finish you’ll get: doing it yourself saves labor money but takes longer and raises the chance of nicked or uneven edges unless you’ve got steady hands and the right tools.
On the other hand, a professional costs more upfront but usually delivers faster work, cleaner cuts, and fewer touch-ups.
DIY saves money but risks visible flaws; pros minimize rework and give a polished finish.
Scenarios where professional help is strongly recommended
When your project involves complex patterns, large-format planks, irregular layouts, or changes to other flooring types, hire a pro—these situations demand precise cuts, experienced layout planning, and specialized tools you probably don’t have.
Call a professional if subfloor repairs, changes, tight tolerances around fixtures, or waterproofing details are required.
They’ll avoid costly mistakes, guarantee warranty compliance, and save you time and stress.
FAQ Frequently Asked Questions
You probably have specific questions like whether a utility knife will handle every cut or how to cut a perfect circle for a pipe.
You’ll also want to know if you can replace a single damaged plank, how to waterproof edges around plumbing, and which safety steps to follow.
Below are clear, practical answers to those common concerns.
Will a utility knife work for all vinyl cuts?
Curious whether a utility knife can handle every vinyl cut? You can use a utility knife for straight cuts, simple trims, and thin vinyl sheets—it’s precise and inexpensive.
However, it struggles with thick, multi-layer luxury vinyl, long rip cuts, or intricate curves. For those, you’ll need a jigsaw, laminate cutter, or hole saw to get clean, reliable results without damaging edges.
How do I cut a perfect circle for a pipe in vinyl?
Need a perfect circle for a pipe? Trace the pipe onto the vinyl, add a 1/8″ gap for expansion, then cut a starter hole with an awl or drill.
Use a sharp jigsaw blade or rotary cutter for clean curved cuts, supporting the vinyl underneath.
Finish edges with fine sandpaper or a file, and test-fit before final installation.
Can I replace just one damaged plank near an object?
Can you replace just a single damaged plank that’s tucked up against a fixed object? Yes — but it can be tricky.
You’ll need to gently remove surrounding planks or open seams to access the damaged piece without harming the object or edges. Measure and cut the replacement precisely, then reverse the removal steps to reinstall.
Take your time and use proper tools for clean seams.
How to make edges waterproof around plumbing penetrations?
If you can swap a single plank near a pipe or toilet, you’ll also want to make sure the cut edges around that plumbing stay watertight.
Trim edges cleanly, dry-fit around the penetration, then apply a bead of flexible silicone or polyurethane sealant where vinyl meets pipe.
Press edges tight, let cure fully, and install a trim or escutcheon to protect the seal from abrasion.
What safety precautions should I take when cutting vinyl?
When cutting vinyl, protect yourself and your workspace: wear safety glasses, a dust mask or respirator rated for fine particles, and cut-resistant gloves.
Keep fingers clear of blades, and clamp or secure the material to prevent slips.
Also work in a well-ventilated area, use sharp tools to reduce force and tears, and follow tool instructions.
Unplug power tools when changing blades, and clean scraps promptly to avoid tripping.
Final Checklist Before Finishing Installation
Before you finish, check the fit, finish, and seal of every seam and trim so nothing gaps or lifts.
Follow a stepwise checklist—fit pieces, apply sealant where needed, and clean the surface thoroughly.
Finally, note simple maintenance tips to protect exposed edges and keep the floor looking new.
Fit, finish, seal, and clean stepwise pre-finalization checklist
Take a quick, methodical pass through these final steps to confirm each plank fits, edges are finished, seams are sealed, and the floor is clean and ready for traffic.
You’ll verify alignment, tidy edges, and address gaps before sealing.
Follow this checklist:
- Inspect fit and alignment.
- Trim/finish exposed edges.
- Apply seam sealant where needed.
- Clean surface and remove debris.
Maintenance tips to preserve edges after installation
Although the installation’s done, you’ll want to protect edges from wear and moisture by following a short, targeted maintenance routine; inspect seams weekly for gaps, wipe spills immediately, and avoid steam cleaners.
Reapply flexible sealant where caulking cracks, trim swelling baseboards, and use felt pads on furniture.
Schedule annual checks and touch-ups to keep edges tight, watertight, and looking professional.
