How to Lay Timber Floor on Concrete: What You Need to Know Before Starting
You can lay timber on concrete if you control moisture, level the slab, and pick the right system. First check slab moisture with a meter and repair or level any dips. Use a continuous DPM, acclimatize engineered boards for 7–14 days, and choose floating, glue-down, or batten/sleeper methods depending on moisture and room size. Use suitable adhesive and underlay, follow manufacturer rules, and maintain humidity; continue for detailed steps and tips.
Can You Lay Timber Flooring on Concrete?
Yes — you can lay timber on concrete, but success depends on moisture control, subfloor prep, and the type of timber system you pick.
You’ll usually choose floating installations or engineered boards over concrete, while solid nailed-down timber is only suitable with a plywood or battens subfloor.
I’ll explain when each method makes sense and what prep each requires.
Short summary of feasibility and primary methods
Although concrete floors can be tricky because of moisture and flatness issues, you can definitely lay timber over them using the right method.
You’ll assess moisture, level the slab, and choose an appropriate system. Common approaches include floating floors over underlay/insulation, glued engineered planks, or sleepers/battens.
Learn how to lay timber floor on concrete to pick the best, durable solution for your space.
When to choose floating, engineered, or nailed-down timber on concrete
Now that you know the main methods and the issues to check on a concrete slab, pick the system that fits the slab condition, room use, and your budget.
Choose floating engineered boards for moisture-prone slabs and DIY ease.
Opt for glued or nailed engineered for stability in larger rooms.
Use solid nailed-down timber only with a proper plywood subfloor and low moisture risk.
Basic Understanding What You Need to Know Before Starting
Before you start, you’ll want to know which timber type suits concrete—engineered boards and quality laminates are usually better choices than solid timber.
Check the concrete for moisture, level and smoothness, and be aware of building regs and manufacturer warranty requirements that affect installation.
Finally, make sure you’ve got the right tools and materials on hand, from damp-proof membranes and adhesives to spacers and a good saw.
Types of timber flooring suitable for concrete (solid vs engineered vs laminates)
When you’re fitting timber over concrete, choosing the right type—solid, engineered, or laminate—makes all the difference in durability, moisture resistance, and installation method; each has specific pros and limits that you’ll want to weigh against your budget and site conditions. Choose engineered for stability, solid for refinishing, laminate for cost.
| Type | Strength | Installation |
|---|---|---|
| Solid | Refinishable | Floating/glue |
| Engineered | Stable | Glue/nail/floating |
| Laminate | Affordable | Click-floating |
Characteristics of concrete subfloors (moisture, level, smoothness)
Because concrete influences every step of a timber installation, you need to assess moisture, levelness, and surface smoothness before you start; excessive damp will ruin wood, uneven slabs cause squeaks and gaps, and rough patches prevent adhesives from bonding properly.
Test moisture with a meter or mat, check level with a long straightedge, and grind or self-level where needed for a stable, bondable base.
Building regulations and warranty considerations
Although timber looks straightforward to lay, you’ll need to confirm that your plans meet local building regulations and the manufacturer’s warranty conditions before you start.
Check moisture barriers, ventilation, and fire or structural requirements specific to your area.
Follow manufacturer installation guidelines for adhesives, acclimatisation, and subfloor preparation to keep warranties valid.
Keep records and receipts to support any future claims.
Tools and materials overview
Tools and materials set the stage for a successful timber floor over concrete, so gather them carefully before you start. You’ll need precise tools and quality materials: moisture barrier, adhesive or underlay, and timber. Don’t skimp—mistakes cost.
Check tools: circular saw, moisture meter, tape, spacers, mallet. Plan quantities, protective gear, and delivery timing to avoid delays.
- Moisture control
- Accurate cuts
- Durable finish
Assessing Your Concrete Subfloor
Before you install timber, you’ll need to assess the concrete subfloor for moisture using calcium chloride or relative humidity tests and spot-checks with a moisture meter.
Check levelness and flatness with a straightedge against tolerances, look for contaminants like oil, paint or laitance, and note any surface damage.
Also confirm structural soundness and locate movement joints so your timber installation can accommodate slab movement.
How to test for moisture: calcium chloride, relative humidity, moisture meters
Because concrete can hold and release moisture long after it seems dry, you need to verify its moisture levels with reliable tests before installing timber.
Use a calcium chloride test for surface emission rates, in-situ relative humidity probes for internal moisture, and a calibrated moisture meter for spot checks.
Follow manufacturers’ protocols, test multiple locations, and compare results to timber tolerance limits before proceeding.
Checking levelness and flatness: tolerances and straightedge method
Check the concrete for levelness and flatness with a long straightedge and a tape measure so you can pinpoint high and low spots that will affect how your timber lays.
Walk the room, place the straightedge in multiple directions, and measure gaps. Aim for tolerances the timber manufacturer specifies (often 3mm over 2m).
Note deviations to plan leveling, screeding, or using a ply underlay.
Identifying contaminants and surface problems (oil, paint, laitance)
Once you’ve mapped high and low spots with your straightedge, turn your attention to what’s bonded to the slab surface.
Inspect for oil stains, paint, and laitance—powdery cement residue. Scrape, grind, or use chemical cleaners and degreasers as appropriate.
Test adhesion and porosity after cleaning. Any remaining contaminants will prevent adhesives or screeds from bonding properly, so remove them thoroughly.
Structural considerations and movement joints
While surface preparation matters, you also need to confirm the slab’s structural suitability and existing movement provisions before laying timber: inspect for shrinkage cracks, construction joints, and control joints.
Note slab thickness and reinforcement, and verify the slab is free of active settlement or deflection that could transfer stresses into the floor finish.
Then plan movement joints in the timber to align with slab joints, allow seasonal expansion, and install appropriate isolation or flexible sealants.
Preparing the Concrete Surface
Before you lay timber, you’ll need to clean and degrease the concrete thoroughly, repair any cracks or holes, and make the surface flat with a screed or self‑leveling compound.
Decide on moisture control—install a damp‑proof membrane, liquid DPM, or vapour barrier as appropriate—and let any remediation cure fully.
Finally, acclimatise your timber in the room for the recommended time and conditions so it’s stable before installation.
Cleaning and degreasing procedures
Start by removing all loose debris, dust, and residues so you can see the concrete clearly and spot stains or grease.
Scrub stained areas with a stiff brush and a concrete cleaner or trisodium phosphate solution, rinse thoroughly, and let dry.
Use a degreaser for oil, following manufacturer directions, then neutralize and rinse.
Confirm surface is clean, dry, and free of residues before proceeding.
Moisture mitigation options (damp-proof membranes, liquid DPM, vapour barriers)
Because concrete can wick moisture up into timber, you need an effective damp-proof strategy before laying the floor.
Choose between a sheet DPM, liquid-applied DPM, or a vapour-permeable membrane based on slab condition and moisture readings.
Sheet membranes give instant protection; liquid DPM seals irregular surfaces.
Guarantee overlaps, proper priming and edge detailing, and ventilation to prevent trapped moisture and long-term damage.
Leveling and smoothing: self-leveling compounds and screeds
When your concrete slab shows unevenness, cracks, or surface defects that would telegraph through timber flooring, you’ll need to level and smooth it with a suitable self-leveling compound or screed.
These products restore a flat, load-bearing surface and guarantee a durable bond for adhesives or underlays.
Choose product based on depth, cure time and compatibility.
Prime per manufacturer, mix evenly, pour, screed, and allow full cure before installing timber.
Repairing cracks and holes
If your concrete has cracks or holes, you’ll want to address them before laying timber so they don’t telegraph through the finished floor or weaken the adhesive bond.
Clean debris, widen hairline cracks slightly, then use an appropriate concrete repair mortar or epoxy filler.
Level and cure repairs per manufacturer instructions, sand high spots, and verify the surface is dry, solid, and dust-free before proceeding.
Acclimatisation of timber: recommended time and conditions
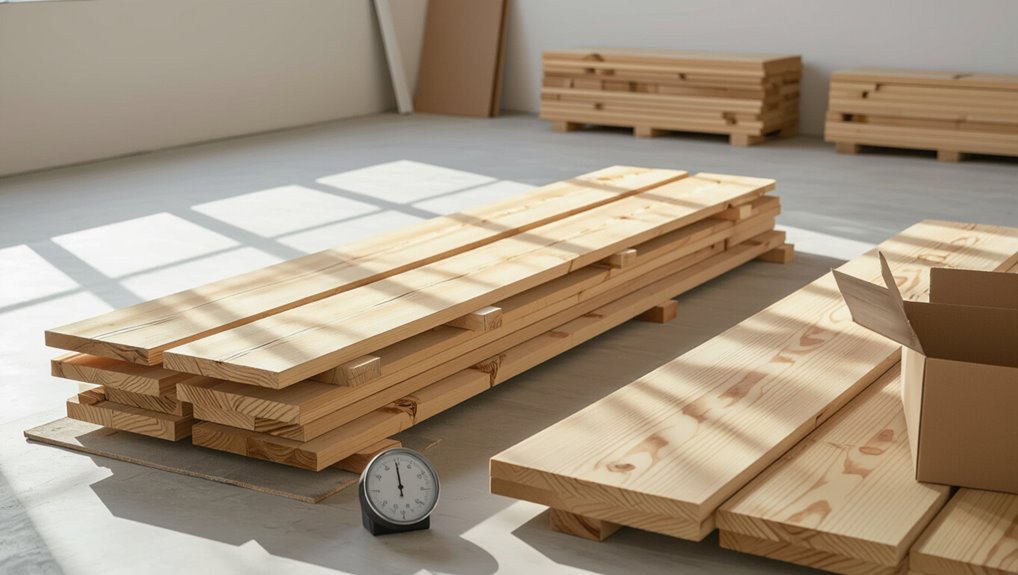
Once you’ve prepped and fully cured the concrete, let the timber acclimatise in the room where it’ll be laid so it can reach equilibrium with the ambient temperature and humidity.
Stack boards flat, off the floor on battens, leaving air gaps.
Maintain normal heating and ventilation, 18–23°C and 40–60% RH.
Leave planks for 7–14 days, checking moisture content before installation.
Primary Installation Methods
Now you’ll look at the four main ways to lay timber on concrete: floating engineered boards, glue-down engineered boards, secret-nailed or screwed battens with solid timber, and timber on sleepers.
For each method I’ll list clear step-by-step actions and show when each approach makes the most sense.
That way you can pick the fastest, most stable, or most traditional option for your project.
Method 1 Floating engineered timber over underlay (Step 1…Step 6)
Begin by laying out your tools, underlay and engineered boards so you can work efficiently and maintain a straight starting line.
You’ll cut, click and stagger boards, leaving expansion gaps and checking alignment as you go.
Follow these emotional checkpoints:
- Pride — when the first row clicks perfectly.
- Relief — when joints stay tight.
- Joy — when the room transforms beneath your feet.
Method 2 Glue-down engineered timber (Step 1…Step 6)
Choose the glue-down method when you want a solid, permanent bond between engineered timber and concrete; it gives better stability and acoustic performance than floating floors but needs careful surface prep and precise adhesive application.
You’ll clean, primer, trowel adhesive, lay boards, roll, and trim. Follow steps to avoid gaps, squeaks, and failures.
- Pride
- Relief
- Confidence
Method 3 Secret-nailed or screwed battens with solid timber (Step 1…Step 8)
Lay solid timber over concrete by fixing secret-nailed or screwed battens to create a raised, ventilated subframe that hides fixings and lets the floor move with humidity changes.
You’ll level, damp-proof, space battens, then fix tongue-and-groove boards onto them, allowing airflow and controlled movement.
- Pride in a flawless finish
- Relief from seasonal gaps
- Confidence in longevity
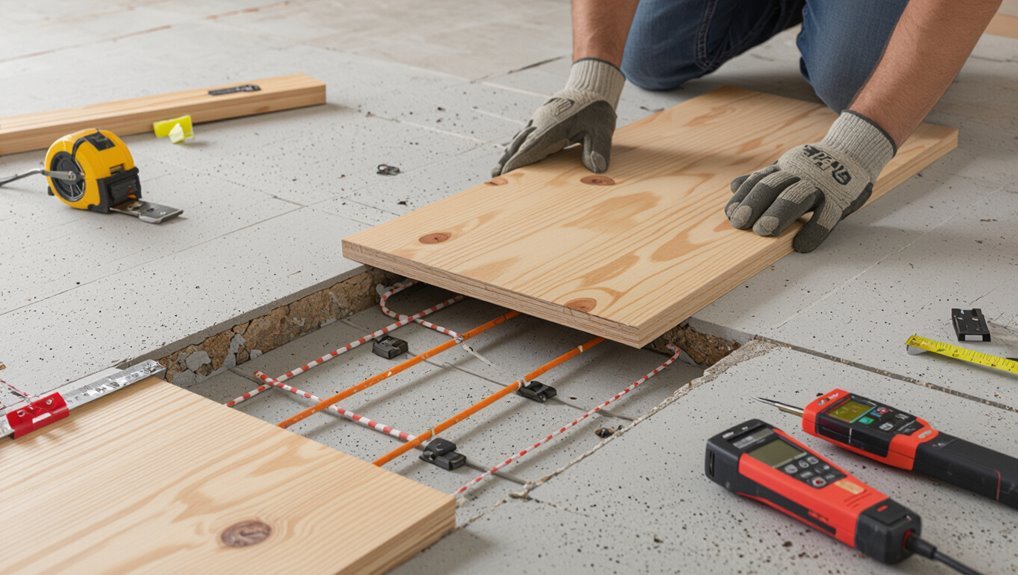
Method 4 Timber on sleepers (raised subfloor) (Step 1…Step 7)
Raise the timber on sleepers to create a ventilated, level subfloor that isolates the boards from concrete dampness and allows services to run underneath.
You’ll set damp-proof membrane, pack and level treated sleepers on battens, fix joist screws, install insulation, lay plywood or battens, then nail or screw the finish boards.
Follow these steps to feel confident and proud.
- Relief
- Control
- Pride
When to use each method: quick decision guide
Now that you’ve seen how sleepers create a ventilated, level subfloor, you’ll want a quick way to pick the right installation method for other situations. Use this guide: choose floating for moisture-controlled rooms, glued for permanent finish, sleepers when height or ventilation’s needed.
| Scenario | Recommended Method | Why |
|---|---|---|
| Moisture stable | Floating | Fast, reversible |
| High moisture | Glued | Seals, permanent |
| Uneven slab | Sleepers | Levels, ventilates |
Materials, Underlays and Adhesives Explained
Now you’ll look at the materials that make the job work: underlays (acoustic, thermal and moisture-resistant) each have trade-offs you’ll need to weigh for sound, insulation and damp protection.
I’ll explain adhesive types suited to concrete and how to choose based on porosity and movement, plus how and where to fit damp-proof membranes and vapor control layers with correct overlaps.
Finally, you’ll get a quick guide to screws, nails, bolts and fixing systems used with batten installations so you can pick the right fasteners.
Types of underlay: acoustic, thermal, moisture-resistant pros and cons
When you’re choosing an underlay for timber over concrete, think about the three main jobs it must do—reduce sound, add thermal comfort, and block moisture—because each type trades off performance, cost, and installation complexity. Choose acoustic for noise control, thermal for warmth, and moisture-resistant for damp concrete; sometimes you’ll combine features based on room needs.
| Type | Best for |
|---|---|
| Acoustic | Flats, upstairs rooms |
| Thermal | Cold floors, conservatories |
| Moisture-resistant | Basements, ground floors |
| Hybrid | Mixed requirements, compromises |
Adhesive types and selection criteria for concrete
Having picked an underlay that balances sound, warmth and moisture control, you’ll need to match the right adhesive to both your timber and the concrete subfloor.
Choose epoxy for high moisture or heavy traffic, polyurethane for flexibility with engineered boards, and MS polymer for low odour and good bond.
Check manufacturer recommendations, pot life, cure time and trowel size for proper coverage.
Damp-proof membranes and vapor control layers placement and overlaps
Because concrete can wick moisture up into timber, you should lay a continuous damp-proof membrane (DPM) or vapour control layer (VCL) directly over the slab before installing underlay or adhesive.
Seams must overlap and be taped to create an unbroken barrier that directs moisture to designated drainage or perimeter vents.
Cut overlaps 100–150mm, seal joints with compatible tape, run up perimeters, and inspect for pinholes before proceeding.
Screws, nails, bolts and fixing systems for batten methods
With the damp-proof layer in place and checked for pinholes, you’ll next secure the timber battens to the concrete using a range of mechanical fasteners.
Choosing the right screws, nails, bolts or chemical anchors affects long-term stability, load transfer and moisture performance.
Use concrete screws or coach bolts for heavy loads, stainless or galvanised fixings for moisture, and resin anchors where drilling limits pull-out risk.
Common Problems and How to Avoid Them
You’ll want to watch for a few common issues—moisture-related failures, gaps, cupping or crowning, squeaks and movement, and adhesive delamination—that can ruin a timber floor if left unchecked.
I’ll explain what causes each problem and show practical fixes and prevention steps so you can stop trouble before it starts.
Follow these tips and your floor will stay stable, quiet, and attractive.
Moisture-related failures and prevention
If moisture gets into the subfloor or the timber, you’ll see cupping, staining, mold, and a quick finish failure; preventing those problems starts with testing, isolating, and managing water before you lay any boards.
Check concrete moisture with a reliable meter, install a vapor barrier or suitable membrane, fix leaks, guarantee drainage and HVAC control, and acclimatize timber until humidity stabilizes.
Gaps, cupping and crowning causes and fixes
Wood movement causes most gaps, cupping, and crowning, so you’ll need to control moisture and install correctly to avoid them.
Keep concrete moisture low with a vapour barrier, acclimatise boards, and maintain stable indoor humidity.
Use proper subfloor flatness, correct expansion gaps at walls and around fixed objects, and follow manufacturer fastening or floating guidelines to minimize distortion and visible separations.
Squeaks and movement: root causes and remedies
Squeaks and movement usually come from friction between boards, fasteners loosening, or the subfloor shifting, so you’ll want to diagnose and address the specific source before repairing.
Check fasteners and tighten or replace loose screws, secure joists or sleepers to concrete, sand or plane high spots, add shims where gaps allow movement, and use targeted lubricant or felt strips to stop board-on-board rubbing.
Adhesive failures and delamination troubleshooting
When adhesive lets go and boards lift or peel, you’ll see gaps, blistering, or whole planks coming loose from the concrete — and addressing those signs quickly prevents wider delamination.
Inspect moisture, adhesive compatibility, and substrate cleanliness. Remove failed boards, scrape old glue, test concrete moisture, then use recommended primer and adhesive.
Clamp or weight new boards, allow proper cure time, and monitor for recurrence.
Best Practices and Pro Tips
You’ll want to plan for proper expansion gaps, neat perimeter trims, and secure connection strips and thresholds to keep the floor stable and looking professional.
Check underfloor heating compatibility and follow manufacturer constraints before installation to avoid warping or warranty issues.
Finally, set a simple cleaning and maintenance routine so your timber stays protected and performs well for years.
Expansion gaps, perimeter details and trims
A small but essential gap around the room lets the floor move without buckling, so maintain the manufacturer’s recommended expansion space—typically 8–10 mm for floating timber—at all edges and around fixed objects like posts and pipes.
Use compressible foam or cork underlay at perimeters, secure skirtings to walls (not flooring), and fit flexible trims at service penetrations to allow unobstructed movement.
Transition strips and door thresholds installation
Because connections bridge different flooring heights and types, installing the right strips and thresholds keeps your timber floor looking professional and performing correctly.
Measure height differences, choose compatible profiles (reducer, T-molding, end cap), and cut tight fits.
Secure with adhesive or screws to substrate, allow expansion gaps, and finish edges neatly.
Test junctions for smooth, safe foot traffic before final sealing.
Heating considerations: underfloor heating compatibility and constraints
After you’ve tied off thresholds and strips, consider how heat systems will interact with your timber floor—some floors handle radiant warmth much better than others.
Check manufacturer compatibility for engineered or solid timber, maximum surface temperatures, and moisture barriers.
Use a suitable underlay and adhesive, keep gradual temperature changes, and allow acclimation.
Consult installers and test system output before final fixing to avoid warping.
Cleaning, maintenance and long-term care tips
When you finish installing your timber floor, regular cleaning and timely maintenance will keep it looking great and prevent costly repairs down the line.
Sweep or vacuum weekly, mop with a damp (not wet) microfiber cloth, and use manufacturer-approved cleaners.
Protect high-traffic zones with rugs, use felt pads under furniture, control humidity (40–60%), and refinish or repair scratches promptly to extend lifespan.
Cost, Time and Project Planning
You’ll want a clear cost breakdown—materials, labor, and prep—to budget properly before you start.
Estimate timelines for each installation method so you can plan work and drying times.
Finally, weigh complexity, tools, and your skill to decide when to hire a pro versus tackling it as a DIY.
Typical cost breakdown (materials, labor, prep)
Budgeting for a timber floor over concrete means breaking costs into three clear buckets: materials, labor, and site prep. You’ll estimate timber, underlay, adhesives; trades, fitting and finishing; and moisture barrier, leveling and disposal. Prioritize quality where moisture control and subfloor prep matter most.
| Category | Typical cost share |
|---|---|
| Materials | 40% |
| Labor | 35% |
| Prep | 25% |
Estimated project timeline for each method
Because each installation method has different steps and risks, you should plan timelines method-by-method rather than using a one-size-fits-all estimate.
Floating floors: 1–3 days for prep, acclimation, and installation.
Glue-down: 2–5 days including moisture mitigation and adhesive curing.
Nail-down/plywood subfloor: 3–7 days for subfloor build, nailing, and finishing.
Allow extra for complex layouts.
When to hire a professional vs DIY
When weighing whether to hire a pro or tackle the job yourself, consider three practical factors: your skill level, the amount of time you can commit, and the true costs — including tools, materials, and potential mistakes.
If you lack experience, face tight deadlines, or can’t absorb repair costs, hire a pro.
DIY suits confident, patient homeowners prepared to invest time and rent specialty tools.
Mistakes to Avoid
Don’t skip moisture testing or cut corners on mitigation, because damp concrete wrecks timber floors.
Make sure boards are properly acclimatised and the room’s conditions match the manufacturer’s specs before you install.
Use the correct adhesive and underlay, and always leave prescribed expansion gaps or movement joints.
Skipping moisture tests or inadequate mitigation
If you skip moisture tests or rely on guesswork, you risk costly warping, cupping, or adhesive failure down the line.
You should measure concrete moisture with a calibrated meter and check relative humidity. If levels exceed manufacturer limits, install appropriate damp-proof membranes, moisture barriers, or use engineered boards specified for higher moisture.
Don’t assume concrete is dry—prove it and mitigate accordingly.
Incorrect acclimatisation or installation environment
Because wood reacts to room conditions, failing to acclimatise boards or control the installation environment will almost always lead to gaps, buckling, or noisy joints.
You should store and acclimatise packs in the installation space for the manufacturer’s recommended time, maintain stable temperature and humidity during and after fitting, and avoid installing in extreme cold, heat, or damp conditions that force timber to move.
Using wrong adhesive or underlay for the subfloor
Many common problems come from choosing the wrong adhesive or underlay for your concrete subfloor, so you should match products to both the timber type and the slab conditions.
Use adhesives rated for concrete and engineered or solid timber as specified, and select underlays that manage moisture and sound without compressing.
Incorrect choices cause bonding failure, cupping, and noise—so always follow manufacturer guidance.
Ignoring expansion gaps or movement joints
When you skip expansion gaps or movement joints, the timber has nowhere to release natural seasonal movement.
As a result, boards can buckle, cup, or push up against walls and doorways.
You should leave recommended clearances at perimeters and around fixed objects, and install movement joints in large areas.
Follow manufacturer guidelines, account for humidity changes, and trim door casings to prevent binding.
Quick Checklist Before You Start
Before you start laying timber on concrete, check you’ve got the right tools, materials and moisture/level tests ready.
Walk through a final pre-lay inspection—confirm the slab is clean, dry, flat and at the correct temperature.
If anything’s off, fix it now rather than later.
Pre-installation checklist (tools, tests, materials)
One clear checklist will save you time and prevent costly mistakes, so gather the right tools, run moisture and flatness tests, and confirm materials before you start.
You’ll need accurate tools, reliable tests, and certified materials. Prioritize safety and compatibility.
- Tools: saw, spacers, vapour barrier, level
- Tests: moisture meter, straightedge, humidity readings
- Materials: acclimated timber, adhesive, trims
Final pre-lay inspection checklist
You’ve checked tools, run tests, and confirmed materials—now do a final pre-lay inspection to catch anything that could stop work or damage the floor.
Verify moisture readings, guarantee slab is level and clean, check room temperature and humidity, confirm skirting and thresholds are removed or protected, locate expansion gaps, inspect underfloor services, and lay out boards for color match.
Sign off before starting.
FAQ
You probably have specific questions like whether solid hardwood can go straight on concrete and how long timber needs to acclimatise.
You’ll also want to know about underfloor heating compatibility, acceptable moisture levels, and if you can lay timber over existing floor coverings.
Below are clear answers to each of these common concerns.
Can I lay solid hardwood directly on concrete?
Curious if you can lay solid hardwood directly on concrete? You generally shouldn’t.
Solid hardwood needs a moisture-stable, ventilated substrate; concrete can wick moisture and cause cupping or rot.
Use a moisture barrier, plywood subfloor, or install engineered wood specifically designed for concrete.
Test slab moisture first and follow manufacturer guidelines to avoid costly failure and voiding warranties.
How long should timber acclimatise before installation?
How long should timber acclimatise before installation?
You should let timber sit in the room where it’ll be installed for 7–14 days, stacked off the floor with spacers for airflow.
Maintain typical living conditions—temperature and humidity—during this period.
Check moisture content with a meter; boards should match subfloor moisture within 2% (engineered) or 3% (solid) before fitting.
Is underfloor heating compatible with timber on concrete?
Although timber can work over underfloor heating, you’ll need the right type and installation method to avoid problems.
Choose engineered timber with stable cores, keep boards thinner for better heat transfer, and use recommended adhesives or floating systems compatible with heating.
Control maximum surface temperature (usually ~27°C), follow manufacturer guidelines, and use a gradual heating schedule to prevent warping and gaps.
What moisture level is acceptable for laying timber on concrete?
If you’ve got underfloor heating, you already need to keep timber surface temperatures and installation methods in check—moisture control is just as important.
Aim for concrete moisture content below 2.5% by calcium chloride test or a relative humidity (RH) of 75% or less per in-situ probe.
Always follow timber manufacturer limits, allow proper drying, and use a vapour barrier where specified.
Can I lay timber over an existing floor covering on concrete?
Can you lay timber over an existing floor covering on concrete? Yes, sometimes — if the covering is stable, level, dry and firmly bonded.
Remove loose tiles, re‑adhere or skim uneven areas, and verify no cushioning underlays remain.
Use a suitable adhesive or floating system and check manufacturer limits.
When in doubt, remove the old covering to confirm a durable timber installation.