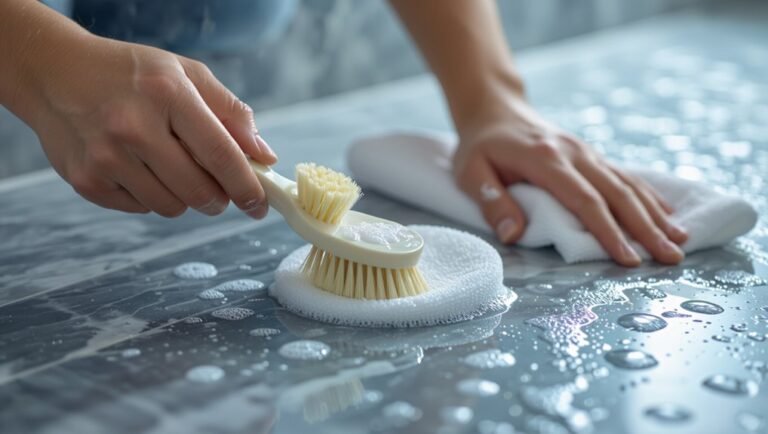
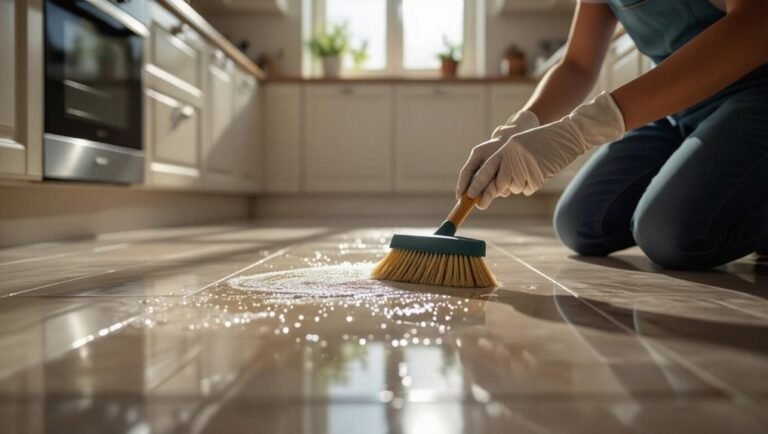
How to Clean Grout in Floor Tiles Without Ruining the Surface
You can clean grout without damaging tiles by testing a mild, pH-neutral cleaner on a hidden spot, then using a soft-bristle grout brush and warm water to work grime loose. Try a baking soda paste for stubborn spots or hydrogen peroxide for mildew; avoid acidic cleaners on stone and abrasive pads on tiles. Rinse and dry fully, then reseal if grout is porous. Keep tools gentle and follow manufacturer notes, and continue for more tips and cautions.
Safe, Effective Grout Cleaning Without Damaging Tiles
You’ll start by testing a gentle cleaner on a small, hidden area to make sure it won’t harm the tile or grout.
Use a soft brush, mild cleaner (like diluted vinegar for unsealed grout or a pH-neutral commercial product for sealed tiles), and short, controlled scrubs rather than abrasive tools or strong acids.
Rinse thoroughly and dry the area before deciding whether to repeat or try a stronger, tile-safe treatment.
One-paragraph direct method summary
When grout’s dirty but your tiles are delicate, mix a gentle cleaner—warm water with a few drops of dish soap or a 1:4 solution of white vinegar and water for unsealed grout—and scrub with a soft-bristled brush, rinsing often to avoid residue.
For stubborn stains, apply a paste of baking soda and water, let it sit 5–10 minutes, then scrub and rinse.
Always test any method on a small inconspicuous area first and finish by drying the grout to prevent re-soiling.
- Use gentle cleaners for how to clean the grout in floor tiles.
- Spot-test before full application.
- Dry thoroughly to prevent re-soiling.
Understanding Grout and Tile Surfaces
Grout is the porous mortar between tiles that traps dirt, mold, and spills, so you’ll need targeted cleaning to restore its appearance.
Different tile types—ceramic, porcelain, natural stone, and vinyl—react differently to cleaners, and you’ll want to pick products safe for each material.
Be careful: overly abrasive scrubbing, harsh chemicals, or prolonged soaking can damage tile surfaces or break down sealants.
What grout is and why it gets dirty
Think of grout as the mortar between tiles: a porous cement—or sometimes epoxy—compound that fills gaps and keeps tiles aligned and sealed.
Because it’s porous and often lighter in color, it traps dirt, oils, soap scum, mildew, and bacteria. Foot traffic, spills, humidity, and inadequate sealing speed staining.
Regular cleaning and proper sealing slow buildup and keep grout looking fresh.
Common tile materials and how they react to cleaners (ceramic, porcelain, natural stone, vinyl)
Because different tile materials respond differently to cleaners, you should match your cleaning method to the surface: ceramic and porcelain resist mild acids, natural stone needs pH-neutral cleaners, and vinyl tolerates gentle detergents. Test first.
| Tile | Reaction | Cleaner |
|---|---|---|
| Ceramic | Durable | Mild acid OK |
| Porcelain | Very durable | Mild acid OK |
| Stone | Sensitive | pH-neutral |
| Vinyl | Stable | Mild detergent |
When grout cleaning can damage tiles or seals
Matching cleaners to tile types helps prevent surface harm, but the grout itself and the seals around tiles can still be at risk during cleaning.
You can erode grout with harsh acids or abrasive scrubbing, which also lifts sealant and loosens tiles. Avoid prolonged soaking, high-pressure washers, and bleach on porous grout.
Test cleaners, work gently, and re-seal grout after deep cleaning to restore protection.
Before You Start Preparation and Safety
Before you begin, gather the right tools and supplies so you won’t have to stop mid-job.
Wear gloves, eye protection, and keep the area well ventilated to avoid fumes.
Test any cleaner on a small, inconspicuous patch of grout to make sure it won’t damage the tile or finish.
Tools and supplies checklist
Gathering the right tools and supplies makes grout cleaning faster and protects your floors from damage.
You’ll want quality, nonabrasive tools and appropriate cleaners so you remove grime without etching tile. Keep everything organized and within reach before you begin.
- Soft-bristle grout brush, microfiber mop, bucket
- pH-neutral grout cleaner, baking soda, distilled white vinegar
- Gloves, kneepads, old towels
Safety precautions and ventilation
Because grout cleaners and scrubbing can stir up dust and fumes, take steps to protect yourself and your home: open windows, run a fan, wear gloves and eye protection, and use a mask if you’re working with vinegar or commercial cleaners.
Keep children and pets away, remove rugs, cover vents, and avoid mixing cleaners.
Have water and first-aid supplies handy in case of splashes.
How to test cleaners on a small area (spot test)
1 simple spot test can save you time and prevent damage: pick a hidden or inconspicuous area, apply a small amount of the cleaner, wait the recommended dwell time, then rinse and check for discoloration, softening, or surface etching.
Repeat with any diluted or mixed solutions. If the tile and grout look unchanged after 24 hours, proceed; if not, try a milder cleaner or consult manufacturer guidance.
Step-by-Step Safe Grout Cleaning Methods
Start by dry-cleaning grout and removing loose debris so cleaners can work more effectively.
Use a mild homemade paste for routine grime—baking soda and water—or a vinegar mix only on non‑sensitive tiles, and reserve enzyme or pH‑neutral products for natural stone and sealed surfaces.
For tougher jobs, learn safe steam settings and distance for compatible tiles, and treat mold or mildew with hydrogen peroxide or oxygen bleach instead of harsh acids.
Step 1 Dry cleaning and debris removal
Begin by removing loose dirt and debris from the grout lines and tile surface so cleaners can work effectively.
Sweep or vacuum thoroughly, then use a stiff-bristled brush or dry microfiber to dislodge trapped grit.
Pay corners and grout joints, empty the vacuum frequently, and inspect under edge tiles.
This prevents scratching and improves cleaner contact without introducing moisture prematurely.
Step 2 Mild DIY cleaner for routine dirt (baking soda + water, vinegar mixes caveat)
While you’ve removed loose grit, use a mild DIY paste of baking soda and water to tackle routine grout dirt without harsh chemicals.
Apply paste, scrub gently with a soft brush, then rinse.
Avoid regular vinegar on unsealed or acid-sensitive grout and tiles; occasional diluted vinegar on well-sealed ceramic is okay.
Test a hidden spot first and repeat only as needed.
Step 3 Enzyme and pH-neutral cleaners for delicate tiles (natural stone, sealed tiles)
After using a baking soda paste for everyday grime, switch to enzyme or pH-neutral cleaners when you’re working on delicate tiles like natural stone or recently sealed grout.
Test cleaner on an inconspicuous spot, follow label dilution, apply gently with a soft brush, let enzymes break down organic stains, rinse thoroughly, and dry.
Repeat only as needed to protect sealant and finish.
Step 4 Using a steam cleaner safely (settings, distance, tiles that tolerate steam)
If you’re tackling stubborn grout without harsh chemicals, a steam cleaner can be highly effective—just use it carefully: Set low to medium steam, avoid high pressure, and test a small area first.
Hold the nozzle 1–3 inches from grout, move steadily, and don’t linger.
Avoid unsealed natural stone, some laminate, and damaged grout; these won’t tolerate steam well.
Step 5 Targeting mold and mildew with safe alternatives (hydrogen peroxide, oxygen bleach)
Because mold and mildew thrive in damp grout, you’ll want to use gentle oxidizers like hydrogen peroxide or oxygen bleach to kill spores without harsh fumes or staining.
Apply a 3% hydrogen peroxide or mixed oxygen bleach paste, let it sit 10–15 minutes, scrub with a soft brush, then blot excess.
Repeat stubborn spots; ventilate and wear gloves.
Step 6 Rinsing and neutralizing cleaners to protect grout and sealant
While the cleaner’s job is to lift dirt and kill spores, rinsing and neutralizing is what actually protects your grout and sealant from residue and deterioration.
You should flush cleaners thoroughly, use a neutral pH rinse, and dry to prevent re-soiling.
- Rinse with warm water and a microfiber mop.
- Neutralize with diluted baking soda or commercial neutralizer.
- Blot dry and ventilate.
Tools and Techniques Brushes, Machines, and Application Tips
You’ll want a grout brush with the right stiffness and size—too stiff can scratch tiles, too soft won’t clean well.
Reserve electric grout scrubbers or oscillating tools for large or stubborn areas to save time, and use them gently.
For deep cleaning, steam cleaners and extraction tools work best when you follow the manufacturer’s directions and avoid over-wetting the grout.
Choosing the right brush (stiffness, size) and avoiding abrasive scrubbing
Picking the right brush starts with matching stiffness and size to your grout’s condition: soft, aged, or discolored grout needs a medium- to soft-bristled brush to prevent damage, while tougher, well-cured grout can handle a stiffer brush for quicker scrubbing.
Use a narrow head for tight lines and a wider one for larger areas, and scrub gently—avoid abrasive pads that erode grout.
When to use an electric grout scrubber or oscillating tool
Consider an electric grout scrubber or oscillating tool when you’ve got large areas, stubborn stains, or limited time—these machines cut work by mechanically agitating grout without the elbow grease.
Use them on durable grout and sealed tiles, start with a low-speed attachment, test a small inconspicuous patch, and keep pressure light.
They speed cleaning but can damage soft grout if misused.
Proper use of steam cleaners and extraction tools
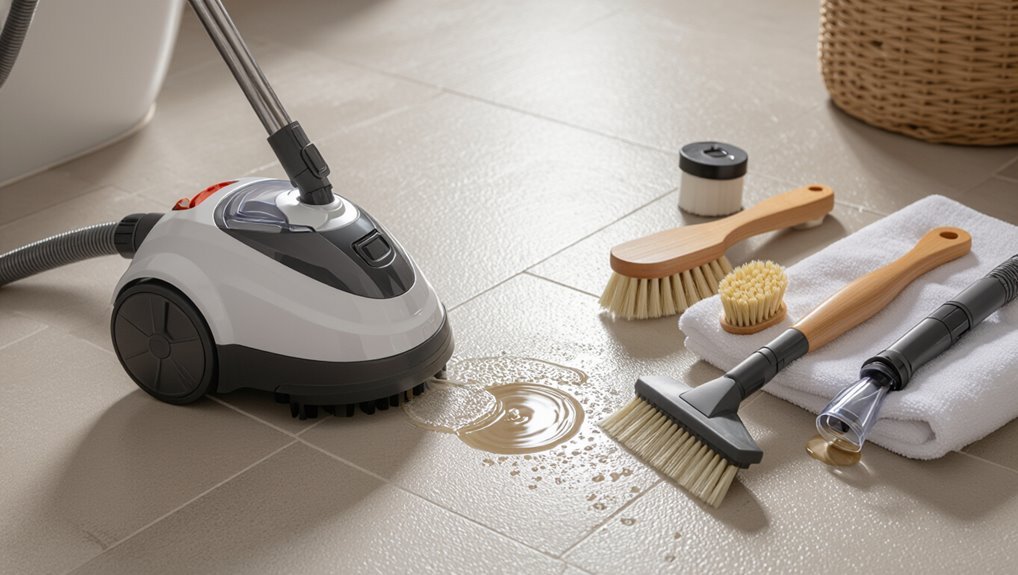
Steam-cleaning and extraction tools deliver high heat and suction that loosen and remove grime from grout without harsh chemicals, but you should use them carefully to avoid damage.
Test a hidden area, keep heat and pressure moderate, and move steadily along grout lines.
Use appropriate nozzles, avoid prolonged steaming on aged grout, and dry thoroughly to prevent moisture issues.
Comparison of Common Cleaning Agents
You’ll weigh mild cleaners against stronger ones to balance effectiveness with potential tile or grout damage.
You’ll also compare homemade solutions—like baking soda and vinegar—with commercial products for cost, convenience, and safety.
Use this to pick an approach that matches your stain level and surface type.
Mild vs. strong cleaners effectiveness and risk
While mild cleaners like baking soda or vinegar tackle everyday grout grime with low risk to you and your tiles, stronger acids or bleach work faster on deep stains but raise hazards—fumes, surface etching, and grout discoloration—if you misuse them. You should test a spot, use ventilation, gloves, and neutralize stronger agents promptly.
| Cleaner | Effectiveness | Risk |
|---|---|---|
| Baking soda | Low–moderate | Low |
| Vinegar | Moderate | Mild on stone |
| Bleach | High | Fumes/discoloration |
| Acid cleaners | High | Etching/risk |
Homemade solutions vs. commercial products pros and cons
When deciding between homemade solutions and commercial cleaners, weigh convenience, cost, and tile safety: you can mix baking soda, vinegar, or hydrogen peroxide for cheap, gentle cleaning, but they’ll need more elbow grease and may not tackle deep stains.
Commercial products offer stronger, faster results and stain-specific formulas, yet they cost more and can harm grout or tile finishes if misused—follow labels carefully.
Common Mistakes That Ruin Tile Surfaces
Watch out for common mistakes that can damage tiles and grout: you shouldn’t use acidic cleaners on natural stone or sealed grout, scrub with abrasive pads, or apply bleach in ways that leave residue.
Always spot-test new products and follow the manufacturer’s guidelines before treating the whole floor. Those simple precautions will prevent costly surface damage.
Acidic cleaners on natural stone and sealed grout
If you use acidic cleaners on natural stone or recently sealed grout, you can etch the surface and strip away the sealer in short order.
Don’t use vinegar, citrus, or harsh acid cleaners on marble, travertine, limestone, or newly sealed grout.
Test any product in an inconspicuous spot, choose pH-neutral cleaners, and re-seal grout as recommended to protect surfaces.
Over-scrubbing and abrasive pads
After avoiding acidic cleaners on delicate stone and freshly sealed grout, turn your attention to mechanical damage: over-scrubbing and the wrong abrasive pads can wear away grout and scratch tile surfaces just as quickly.
You should use soft nylon brushes or non-scratch pads, apply gentle pressure, and test a hidden spot first.
Let cleaners soak briefly instead of vigorous scrubbing.
Using bleach incorrectly and leaving residue
Although bleach seems like a quick fix, using it incorrectly or failing to rinse it off can discolor grout, etch tile surfaces, and leave harmful residue that attracts dirt.
Don’t pour full-strength bleach or leave it soaking; dilute per label, apply briefly, then rinse thoroughly with clean water.
Wear gloves, ventilate the area, and avoid mixing bleach with other cleaners to prevent toxic fumes.
Skipping spot tests and ignoring manufacturer guidelines
When you skip a spot test or ignore the manufacturer’s care instructions, you risk permanently damaging tiles or grout with the wrong cleaner or technique.
Always test cleaners in an inconspicuous area first and follow product guidance. Manufacturers know material limits and recommended products; ignoring them can void warranties, etch surfaces, or discolor grout.
Protect your floors by reading labels and testing before full application.
Preventing Future Grout Damage and Keeping Grout Clean
To keep grout looking good, you should stick to regular maintenance like mopping with a neutral cleaner and spot-cleaning spills right away.
Reseal grout every one to three years or whenever water stops beading on the surface, and follow the sealer’s instructions when applying.
Use entry mats, area rugs, and quick wipe-ups to protect grout from stains and wear.
Best practices for regular maintenance (mopping, spot cleaning)
Keep grout looking fresh by committing to simple, consistent maintenance routines you can do weekly and after spills.
Mop with a neutral pH cleaner and warm water, wringing the mop to avoid excess moisture.
Tackle spots immediately using a soft brush and diluted cleaner or baking soda paste.
Dry grout after cleaning to prevent mold, and rotate deep cleaning to avoid buildup.
When and how to reseal grout
If grout looks dull, stains penetrate after cleaning, or water no longer beads on the surface, you should reseal it to prevent further damage and staining.
Wait 48–72 hours after cleaning, choose a penetrating sealer for porous grout, apply evenly with a brush or applicator, wipe excess, and let cure per label.
Reseal every 1–3 years as needed.
Protecting grout from stains (mats, quick wipe-ups)
Prevention starts with small habits: place absorbent mats at entrances and high-traffic areas and wipe spills promptly so stains never set into grout.
- Use washable, nonrubber mats to trap dirt and moisture.
- Keep a microfiber cloth and mild cleaner nearby for quick spot cleaning.
- Establish a weekly dry-sweep and immediate spot-check routine to catch stains before they penetrate.
When to Call a Professional
If your grout is crumbling, permanently stained, or mold keeps coming back despite cleaning, you’ll need professional restoration or regrouting.
A pro can assess the damage, remove and replace grout where necessary, and use specialized cleaners or sealants to restore appearance and durability.
Expect a thorough inspection, transparent cost estimate, and work that may include deep cleaning, steam or chemical treatments, and grout removal and replacement if needed.
Signs you need professional restoration or regrouting
When grout shows deep cracks, large missing sections, persistent staining despite repeated cleaning, or chronic moisture and mold that won’t go away, you should call a professional for restoration or regrouting.
You’ll also seek help if tiles are loose, grout keeps crumbling, or odors persist.
Professionals diagnose substrate damage, advise regrouting versus replacement, and prevent recurring problems.
What to expect from professional cleaning services
After you decide to call a pro, expect a structured process: they’ll inspect the tiles and substrate, explain whether cleaning, sealing, or full regrouting is best, and give a clear quote and timeline.
You’ll see pre- and post-clean assessments, safe-use of professional cleaners and machines, and recommendations to prevent recurrence.
Ask about warranties, drying time, and any required follow-up maintenance.
FAQ Quick Answers to Common Questions
You probably have quick questions like whether you can use vinegar on grout or if steam alone will clean it.
We’ll answer how often to reseal, ways to whiten grout without harsh chemicals, and whether bleach is safe to use.
Read on for straightforward, practical answers.
Can I use vinegar on grout?
Wondering whether vinegar is safe for grout? You can use diluted white vinegar on unsealed, ceramic, or porcelain tile grout for light stains, but avoid it on natural stone or sealed grout—acid can etch stone and degrade some sealers.
Test a small area first, rinse thoroughly, and don’t let vinegar sit.
For stubborn grime, choose a pH-neutral cleaner instead.
Will steam clean grout without chemicals?
If vinegar’s off the table for your grout, steam cleaning offers a chemical-free alternative that actually works for many situations.
You’ll lift dirt, grease, and some mildew with high-temperature steam and agitation. It won’t restore severely stained or deteriorated grout, and porous grout may need sealing afterward.
Test a small area first and use a quality steam cleaner for best results.
How often should I reseal grout?
How often you should reseal grout depends on traffic, exposure, and the type of sealer you used: high-traffic floors and shower grout usually need resealing every 6–12 months, while low-traffic areas can go 1–3 years.
Check the seal by sprinkling water—if it beads, you’re good. If it soaks in or stains appear, clean then reapply the recommended sealer.
Can I whiten grout without harsh chemicals?
You can brighten grout without resorting to harsh chemicals by using gentle, common ingredients and a bit of elbow grease.
Mix baking soda with water into a paste, apply to grout, scrub with a nylon brush, then rinse.
For stubborn stains, use a diluted vinegar spray or hydrogen peroxide spot treatment.
Dry thoroughly and consider resealing to protect results.
Is it safe to use bleach on grout?
Curious whether bleach is a good way to whiten grout? You can use diluted bleach sparingly for stubborn stains, but it risks discoloring colored grout, weakening grout lines, and damaging nearby tile or sealant.
Ventilate well, wear gloves and eye protection, and rinse thoroughly. Test a hidden spot first.
For frequent cleaning, choose gentler cleaners or oxygen bleach alternatives.
Resources and Product Recommendations
You’ll want pH-neutral cleaners and a good sealer to protect grout without damaging tile finishes.
Check manufacturer care guides and product labels to match recommendations to your specific tile and grout.
For more detail, I’ll point you to reliable brands and further reading so you can choose what fits your needs.
Recommended pH-neutral cleaners and sealers
Picking the right pH-neutral cleaner and sealer makes grout maintenance easier and protects your tiles, so choose products formulated specifically for porous grout and natural stone.
Use test spots, follow label dilution, and reapply sealer per instructions.
- Stone-safe pH-neutral cleaner for regular cleaning
- Penetrating grout sealer for porous joints
- Spray sealer for quick refreshes
Further reading and manufacturer care guides
When you’re ready to dig deeper, consult manufacturer care guides and trusted resources that match your tile and grout type—these give product recommendations, dilution ratios, and reapplication schedules specific to your materials.
Check tile maker sites, grout brands, and industry bodies for PDFs, FAQs, and verified videos. Follow their steps, note warranty conditions, and use recommended products to avoid damage and preserve finishes.