How to Clean Bathroom Tiles and Floors: A Deep-Clean Method That Works
You can get brighter tiles and cleaner grout by prepping, matching a pH-appropriate cleaner to your surface, and working in small sections: sweep, apply diluted cleaner, let it dwell 5–10 minutes, then scrub grout with a stiff brush and mop tiles with a microfiber. Rinse until water runs clear, neutralize strong cleaners, and seal grout when dry. Wear gloves and ventilate. Follow this routine every 3–6 months (with weekly touch-ups) to keep floors lasting—details and tips follow.
Best Way to Deep-Clean Bathroom Tiles and Floors
To deep-clean tiles and floors, you’ll scrub grout and surfaces with a strong cleaner, rinse thoroughly, and finish with a sealer for lasting results.
Expect noticeably brighter tiles and cleaner grout after about 30–60 minutes for an average bathroom, with a full deep clean needed every 3–6 months.
You’ll need a stiff brush or scrub pad, a pH-appropriate cleaner, bucket, mop, gloves, and optional grout sealer.
Short summary of the method and expected results
When you deep-clean bathroom tiles and floors, you’ll remove soap scum, mildew, and grime using a clear sequence: pre-soak with a suitable cleaner, scrub grout and tile surfaces, rinse thoroughly, and dry to prevent residue and new growth.
You’ll see brighter tiles, cleaner grout lines, and reduced odors. If you’ve wondered how do you clean bathroom tiles and floor, this method delivers reliable, lasting results.
Time, frequency, and tools required
Now that you know the steps and expected results, plan the time, frequency, and tools so cleaning stays effective and manageable.
Schedule a 45–90 minute deep clean monthly, quick touch-ups weekly, and grout checks quarterly.
Use a stiff brush, microfiber mop, and pH-appropriate cleaner. Pack gloves and a scrub sponge for stubborn spots.
- 45–90 minute monthly deep clean
- Weekly 15–20 minute touch-up
- Stiff brush, microfiber mop, cleaner
Why Deep-Cleaning Bathroom Tiles Matters
You should deep-clean bathroom tiles because it removes bacteria, mold, and grime that can harm your health.
Regular deep-cleaning also protects grout and tile surfaces, helping them last longer and avoid costly repairs.
If you skip it, you’ll likely face discoloration, deterioration, and persistent odors that are harder to fix.
Health and hygiene benefits
Although bathroom tiles might look clean at a glance, deep-cleaning them removes hidden mold, bacteria, and soap scum that can trigger allergies and illness.
You’ll reduce respiratory irritants, prevent skin infections, and cut odor sources by scrubbing grout and seals.
Regular deep-cleans lower pathogen loads, support a healthier home, and give you confidence that the bathroom is genuinely sanitary.
Longevity of grout, tiles, and flooring materials
Regular deep-cleaning helps protect grout, tiles, and flooring materials from premature wear by removing abrasive grime, mineral deposits, and mold that degrade surfaces and joints over time.
You’ll extend tile life, preserve grout integrity, and prevent sealant failure by routinely flushing contaminants and reapplying sealers when needed.
That lowers maintenance costs and keeps surfaces looking newer, longer, without invasive repairs.
Common problems caused by neglect
When grime, soap scum, and moisture build up, they don’t just look bad—they damage surfaces and create health hazards you’ll eventually have to fix.
You’ll face stained grout, weakened sealants, warped flooring, and mold that spreads fast.
Neglect raises repair costs, shortens tile life, and can trigger allergies or respiratory issues.
Regular deep-cleaning prevents these costly, unhealthy problems.
How Bathroom Tiles and Floors Differ: Materials and Challenges
You’ll want to treat different bathroom surfaces according to their materials: ceramic and porcelain resist many stains but often need grout attention, while natural stone like marble, travertine, and slate is sensitive to acids and needs gentle, pH-neutral care.
For vinyl, laminate, and painted floors you’ll avoid harsh abrasives and excess water to prevent warping or finish damage.
Finally, pay attention to grout type—sanded, unsanded, or epoxy—as each has typical degradation issues like cracking, staining, or delamination that need different fixes.
Ceramic and porcelain tiles characteristics and common stains
Although both ceramic and porcelain look similar at a glance, they’re made and finished differently, which affects durability, water resistance, and how stains behave.
You’ll find ceramic is softer, glazed, and more prone to chipping and staining, while porcelain’s denser, less porous surface resists moisture and most spills.
Common stains include soap scum, hard water mineral deposits, and mildew in grout lines.
Natural stone (marble, travertine, slate) sensitivity and precautions
Because natural stone soaks up moisture and acids more readily than ceramic or porcelain, you’ll need to treat marble, travertine, and slate with extra care to avoid etching, staining, or dulling the finish.
Use pH-neutral cleaners, blot spills immediately, avoid acidic or abrasive products, and test cleaners in an inconspicuous spot.
Seal porous stone regularly and use soft tools to protect the surface.
Vinyl, laminate, and painted bathroom floors what to avoid
Natural stone needs gentle, pH-neutral care, but vinyl, laminate, and painted bathroom floors call for a different approach since they can warp, peel, or lose finish when exposed to excess moisture or harsh chemicals.
Don’t use steam cleaners, abrasive scrubbers, or bleach. Avoid soak-and-scrub mopping; instead wipe spills quickly, use damp microfiber mops, and choose cleaners labeled safe for each surface.
Grout types and typical degradation issues
When you clean or renovate tile, grout often tells the true story of wear: sanded, unsanded, epoxy, and urethane grout each age and fail in different ways, from hairline cracking and powdering to staining and adhesive breakdown. You’ll inspect, test, and choose repair methods based on type and damage.
| Grout Type | Typical Issue |
|---|---|
| Sanded | Crumbling |
| Epoxy | Yellowing |
Safety and Preparation Before You Start
Before you start cleaning, put on gloves and eye protection, open windows or run a fan for ventilation, and gather a checklist of tools and approved cleaners.
Test any product on a hidden spot to make sure it won’t damage grout or tile, and remove rugs, toiletries, and small fixtures so you have clear access.
With PPE on, ventilation running, and your supplies confirmed, you’ll work faster and avoid surprises.
Personal protective equipment and ventilation
If you’re using strong cleaners or scrubbing for a long time, suit up and ventilate the room to protect your lungs and skin.
Wear gloves, goggles, and a mask, open windows, and run a fan. Keep cleaners sealed when not in use and avoid mixing chemicals.
Follow label directions and wash hands after cleaning.
- Nitrile gloves
- Eye protection
- Ventilation (window + fan)
Surface testing and spot-checking cleaners
Because bathroom surfaces vary in finish and durability, always test cleaners on a small, hidden spot first; you’ll confirm compatibility and avoid damage to tiles, grout, or sealants.
Apply diluted cleaner, wait recommended time, then rinse and dry. Check for discoloration, etching, or sticky residue.
Repeat with any new product or stronger mix until you’re certain it’s safe for the whole area.
Clearing the area and removing fixtures or rugs
Clear the room and remove any movable items—towels, rugs, toiletries, and small decor—so you’ve got unobstructed access to tiles and grout.
Unplug and detach removable fixtures like shower caddies or soap dishes. Lift mats and move lightweight furniture.
If you must shift heavy fixtures, enlist help to avoid damage. Keep a basket for items you’ll return after cleaning.
Tools and cleaning products checklist
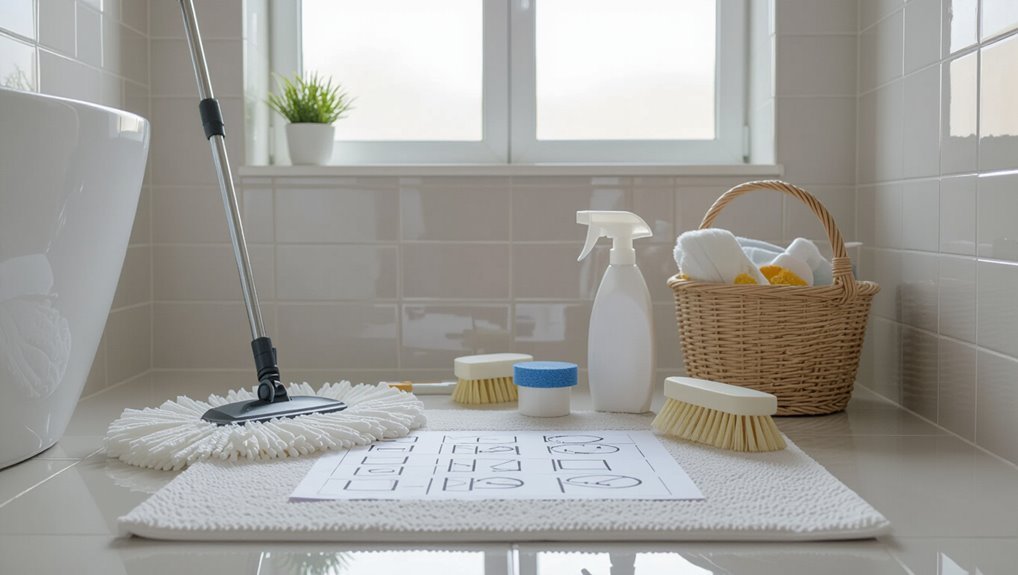
Before you start scrubbing, gather the right tools and products so you won’t have to stop mid-job: rubber gloves, a stiff-bristled grout brush, a mop or sponge, a bucket, microfiber cloths, a plastic scraper, and a spray bottle for diluted cleaners.
Collect pH-appropriate tile cleaner, bleach or oxygen cleaner for mold, and a gentle degreaser for soap scum.
- Gloves and mask
- Grout brush and scraper
- Bucket and microfiber cloths
Step-by-Step Deep-Clean Method (Main Procedure)
Start by removing loose dirt—sweep and vacuum thoroughly, then clear dust from grout lines so cleaners can work effectively.
Pick a cleaner that’s safe for your tile or floor material, or mix a DIY solution using recommended ratios and safety precautions.
Apply the cleaner with the right tools, allow proper dwell time, and cover the surface evenly before scrubbing.
Step 1 Initial dry cleaning: sweeping and vacuuming techniques
Grab a stiff broom or vacuum and work outward from the center of the bathroom, sweeping debris into a pile so you remove loose dirt, hair, and grit before any wet cleaning.
You’ll get better contact with tiles and prep corners.
- Push debris toward the door with short, firm strokes.
- Use crevice tool along baseboards.
- Empty vacuum canister immediately.
Step 2 Dust and loose debris removal from grout lines
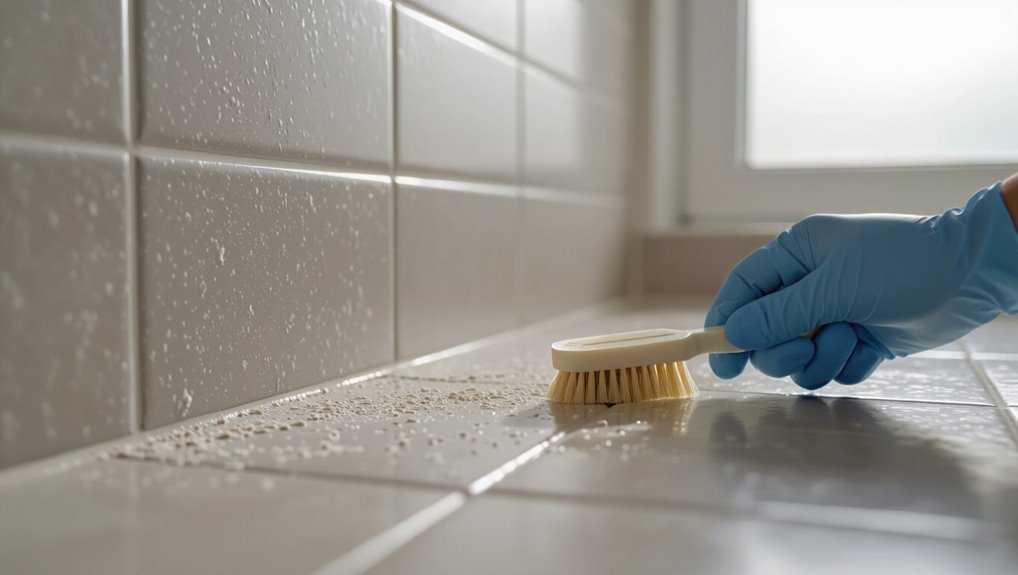
With loose dirt and hair removed from the tile surface, focus on the grout lines where dust and grit hide; you’ll get better cleaning results if you clear that debris first so cleaners can reach the grout.
Use a stiff nylon brush, a dry microfiber cloth, or a handheld vacuum with a crevice tool to dislodge and remove particles.
Check corners and edges thoroughly.
Step 3 Choosing the right cleaner for your tile/floor type
Because different tiles and floors react to cleaners in different ways, you should match the product to the material before you apply anything. Check labels: pH-neutral for natural stone, mild detergent for vinyl, enzyme or bleach options for grout and porcelain. Test in a hidden spot first.
| Surface | Cleaner |
|---|---|
| Marble | pH-neutral |
| Porcelain | Mild bleach |
| Vinyl | Mild detergent |
| Grout | Enzyme/bleach |
Step 4 Mixing DIY cleaner solutions (ratios and safety)
Once you’ve identified the right cleaner for your surface, mix DIY solutions in the correct ratios and follow safety steps to avoid damage or injury.
Measure precisely, dilute concentrated cleaners per label, and never mix bleach with acids or ammonia. Wear gloves and ventilate the room.
- Use a plastic measuring cup and funnel.
- Label mixed bottles with date and ratio.
- Keep children and pets away.
Step 5 Applying cleaner: tools, dwell time, and coverage
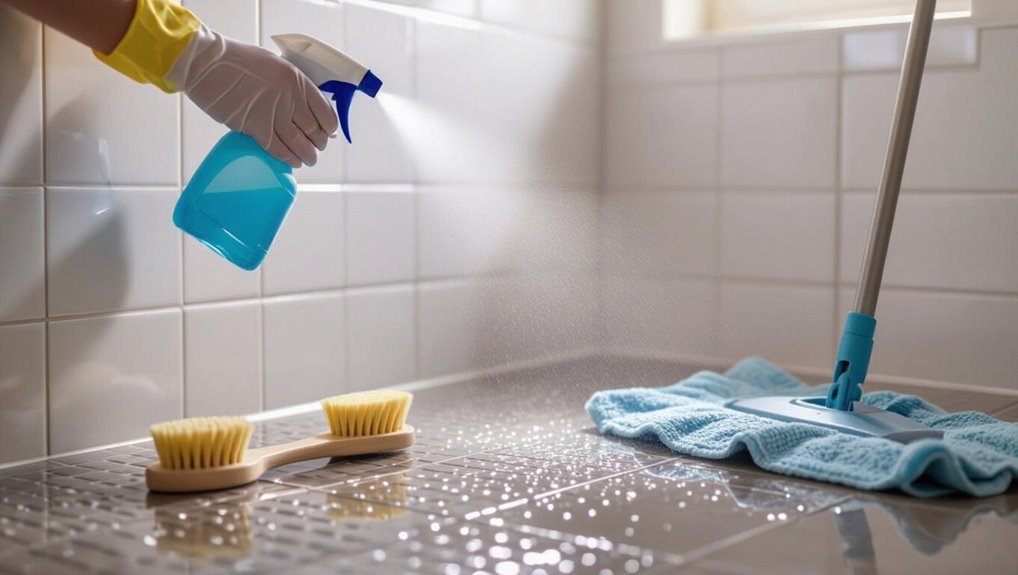
Step 5 is where you actually apply the cleaner: gather the right tools—mop, scrub brush, sponge, spray bottle—and work in small sections so the solution stays wet long enough to act.
Apply evenly, saturating grout lines and tile surfaces without puddling. Note recommended dwell time on the bottle, usually 5–10 minutes.
Rinse or blot thoroughly and change solution as it gets dirty.
Step 6 Agitation: scrubbing methods for tiles and grout (manual vs. powered)
Scrub thoroughly: agitation is what removes built-up grime from tile and grout, so choose the method that fits the soil level and your energy.
You’ll focus force and motion where cleaner soaked, using short strokes on grout and broader passes on tile. Pick manual brushes for control or a powered scrubber for stubborn areas.
- Stiff grout brush for corners and joints
- Sponge mop for tile surfaces
- Battery scrubber for heavy buildup
Step 7 Rinsing and neutralizing residues
Rinse thoroughly to wash away loosened dirt and dissolved cleaner so nothing’s left to attract soap scum or discolor grout.
Use clean water and a microfiber mop or sponge, changing rinse water frequently.
For acidic or alkaline cleaners, apply a neutralizing solution per product instructions, then rinse again.
Check grout and corners for residue, repeating rinses until water runs clear and surfaces feel residue-free.
Step 8 Drying, buffing, and finishing touches
Once the rinse water runs clear and surfaces feel residue-free, dry the tiles and grout promptly to prevent water spots and mildew.
Use microfiber towels or a squeegee, working corner to corner. Buff tiles with a dry cloth for shine and check grout lines for damp pockets.
Replace fixtures and mats only when fully dry to avoid trapping moisture and dirt.
Step 9 Sealing grout and when to reseal tiles (materials and timing)
After the tiles and grout are fully dry, seal the grout to protect it from stains and moisture; you’ll also want to know when resealing is necessary so you can keep the surface performing well over time.
Choose a penetrating, water-based grout sealer, apply with a small brush or applicator, wipe excess, and let cure.
Reseal every 1–3 years or when water no longer beads.
Targeted Solutions for Specific Problems
When plain cleaning won’t cut it, you’ll need targeted fixes for common bathroom problems.
You’ll learn how to remove soap scum and hard‑water stains, treat mold and mildew safely, and handle rust, efflorescence, and mineral buildup.
I’ll also show ways to tackle grout discoloration, deep‑set stains, and repair cracked grout or small tile damage.
Removing soap scum and hard water stains
Soap scum and hard water stains form stubborn, streaky residues that dull tile and grout, but you can remove them with the right cleaners and a bit of elbow grease.
Mix equal parts white vinegar and water for tiles (avoid on natural stone), apply, let sit 5–10 minutes, scrub with a nylon brush or scouring pad, rinse thoroughly, and dry to prevent return.
Eliminating mold and mildew safely
Because mold and mildew can damage grout and pose health risks, you’ll want to tackle them promptly and safely.
Ventilate the area, wear gloves and a mask, and test cleaners on a small patch.
Use diluted bleach (1 part bleach to 10 parts water) or a commercial mold remover; scrub with a stiff brush, rinse thoroughly, and dry.
Re-caulk or reseal if needed.
Treating rust, efflorescence, and mineral buildup
While you’ve handled mold and mildew, other stubborn stains like rust, efflorescence, and mineral deposits need different approaches.
For rust, use a commercial rust remover or oxalic acid, test first, then rinse.
For efflorescence, dry-brush and apply diluted muriatic acid carefully, neutralize afterward.
For mineral buildup, descale with vinegar or a citric solution, scrub, and rinse thoroughly.
Tackling discoloration and deep-set grout stains
Deep-set grout stains and tile discoloration demand a targeted approach, since everyday cleaners often can’t reach the porous grout or chemically altered tile surfaces.
Start by testing a pH-appropriate cleaner on a hidden spot. Use a stiff nylon brush, apply poultices or oxygen bleach for organic stains, and rinse thoroughly.
Repeat only as needed to avoid weakening grout.
Repairing cracked grout and small tile damage
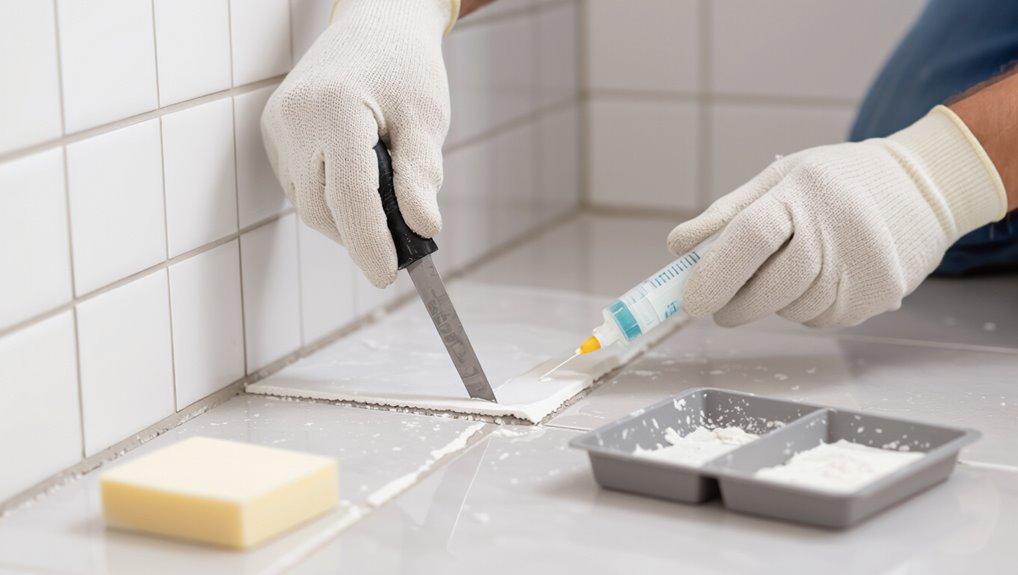
Start by evaluating the damage so you know whether to regrout or make a simple patch.
You’ll remove loose grout, clean the joints, and decide if a small tile needs replacing. Work carefully to match grout color and tile size for a seamless finish.
- Chip: replace tile, thin-set, grout
- Crack: epoxy filler, smooth, seal
- Loose grout: remove, regrout, cure
Tools and Products Compared
You’ll compare brushes, scrapers, and powered scrubbers to see which ones cut grime fastest and which can damage grout.
You’ll weigh commercial cleaners against DIY mixes for effectiveness and cost so you can choose what fits your budget and seriousness of stains.
You’ll also look at recommended sealants and protective coatings to keep tiles cleaner longer.
Best brushes, scrapers, and powered scrubbers (pros/cons)
Choosing the right brush, scraper, or powered scrubber can make tile and grout cleaning faster and far more effective, so you’ll want to match the tool to the job: You’ll use stiff nylon brushes for grout, plastic scrapers for sticky gunk, and battery scrubbers for large areas—each has wear, damage, and cost trade-offs.
| Tool | Emotion | Tip |
|---|---|---|
| Nylon brush | Relief | Target grout |
| Scraper | Caution | Avoid deep scratches |
| Powered scrubber | Joy | Save time |
Commercial cleaners vs. DIY mixtures effectiveness and cost
Having the right brush or scrubber helps, but the cleaner you pair with it matters just as much: commercial cleaners and DIY mixtures both tackle soap scum, mildew, and hard water stains, but they differ in speed, long-term results, safety, and cost. You’ll choose based on urgency, sensitivity, and budget.
| Type | Cost | Effectiveness |
|---|---|---|
| Commercial | $$$ | Fast |
| DIY | $ | Gentle |
Recommended sealants and protective coatings
When you want tiles and grout to stay cleaner longer, pick a sealant or protective coating that matches the material and traffic level.
Use penetrating sealers for porous stone and grout, topical sealers for ceramic and low-slip needs, and water‑based polyurethane for high-traffic floors.
Reapply per label, test a small area first, and avoid solvent sealers on moisture‑sensitive substrates.
Common Mistakes and How to Avoid Them
Don’t grab just any cleaner—use one suited for your tile or grout to avoid etching or discoloration.
Don’t over-scrub or use abrasive tools that can strip finishes, and always test cleaners in an inconspicuous spot to prevent permanent stains.
Finally, rinse thoroughly after cleaning to prevent residue buildup that attracts dirt.
Using the wrong cleaner for the material
If you pick a cleaner without checking your tile or grout type, you can cause discoloration, etching, or weakened grout bonds.
Read labels and use pH-appropriate cleaners: neutral for natural stone, mild acidic for glazed ceramic only when safe, and enzyme or oxygen cleaners for organic stains.
Test a hidden spot, dilute as directed, and rinse thoroughly to protect finishes and grout integrity.
Over-scrubbing or using abrasive tools that damage finishes
After choosing the right cleaner, be careful how you scrub: aggressive scrubbing or abrasive tools can wear away glazes, dull finishes, and grind grout loose.
Use soft-bristle brushes, non-abrasive pads, or microfiber cloths. Apply gentle pressure, let cleaners sit briefly to loosen grime, and rinse often.
Test a small hidden area first, and replace worn tools to avoid unintended damage.
Skipping testing and causing permanent stains
Because cleaners and DIY solutions can react unpredictably with glazes, dyes, or old grout, you should always test a product in an inconspicuous spot before treating the whole surface.
If a test shows discoloration, stop and try a milder cleaner or consult the manufacturer.
Patch-testing prevents irreversible stains and saves time, money, and tile from permanent damage.
Improper rinsing and residue buildup
When you don’t rinse cleaners off thoroughly, residues build up on tiles and grout, leaving dull film, sticky spots, or grout that attracts dirt faster.
Rinse with warm water after cleaning, use a microfiber mop or sponge, and change rinse water often.
For stubborn residue, repeat rinsing or use a vinegar-water final rinse, then dry surfaces to prevent streaks and grime return.
Preventive Care and Maintenance Plan
To keep tiles looking great with less effort, set up simple daily and weekly quick-clean routines and a monthly deeper-clean checklist you can stick to.
Add seasonal tasks—like grout touch-ups and a resealing schedule—for long-term protection.
Small habits, such as wiping splashes and using bath mats, will cut down how often you need intensive scrubs.
Daily and weekly quick-clean routines
A simple daily wipe and a short weekly scrub will keep bathroom tiles and floors looking fresh and prevent grime buildup from becoming a chore.
Wipe splashes after showers, sweep or vacuum hair daily, and do a quick scrub of grout and corners once a week. Use mild cleaner, a microfiber cloth, and grout brush for best results.
- Wipe splashes immediately
- Sweep daily
- Weekly grout spot-scrub
Monthly deeper-clean checklist
You’ve kept up with daily wipes and weekly grout spot-scrubs; once a month spend a bit more time to prevent buildup and prolong tile life.
Remove mats and rinse surfaces. Deep-clean grout with a brush and a pH-neutral cleaner, mop with warm water, and check caulk lines for mildew.
Dry thoroughly, replace fixtures, and note any repairs needed for next maintenance cycle.
Seasonal tasks and long-term upkeep (resealing schedule)
When seasons change, schedule a few targeted tasks—spring for deep grout resealing and summer for checking outdoor tile joints—so you’ll prevent damage and extend tile life.
Every 1–3 years reseal grout depending on wear; tile sealants may last 5–10 years.
Inspect caulk annually, repair cracks promptly, and document dates.
Staying on this schedule saves repairs and keeps tiles looking fresh.
Small habits that reduce deep-clean frequency
Because small daily habits cut grime buildup, you’ll spend far less time on heavy scrubs—wipe wet surfaces after use, squeegee shower walls, and dry floors in high-traffic spots to prevent soap scum and mineral deposits from setting.
Empty and rinse shower caddies, run a quick vinegar spray weekly on grout, replace damp mats, and ventilate after bathing so mildew won’t gain a foothold.
Cost, Time, and Effort Estimates
You’ll spend about 15–45 minutes on a small bathroom and up to 1.5–2 hours on a larger one, depending on how grimy the tiles and grout are.
DIY cleaning usually costs a few dollars for supplies while professionals charge $75–$250 or more, so weigh savings against convenience.
Consider hiring a pro if stains or mold persist, the job’s too big for one session, or you lack the tools and time.
Typical time breakdown for average bathroom sizes
For an average bathroom, expect cleaning to take roughly 20–60 minutes depending on size and soil level: a small half-bath usually needs 15–25 minutes, a standard full bathroom about 30–45 minutes, and a large master bath or heavily soiled space can run 45–60+ minutes. Plan tasks: quick wipe, grout spot clean, scrub and rinse.
| Task | Time |
|---|---|
| Wipe surfaces | 5–10 min |
| Scrub tiles | 10–25 min |
| Rinse/dry | 5–15 min |
Cost comparison: DIY vs. professional cleaning
When weighing whether to DIY or hire a pro, consider cost, time, and physical effort together: doing it yourself usually saves money on a per-clean basis but costs you time and elbow grease, while professionals charge more up front yet finish faster and may deliver deeper results with less hassle.
DIY: buy supplies, expect longer sessions.
Pro: higher fee, less effort, faster turnaround.
When to hire a pro signs you should outsource
If stains are stubborn despite your best efforts, or the grout’s soiled areas have spread across large sections, it’s time to contemplate hiring a pro.
Estimate costs versus DIY supplies, expect professional deep cleans to run higher but save time.
You’ll recoup effort and avoid mistakes when mold, extensive damage, or limited time make thorough restoration impractical—get quotes and compare timelines.
FAQ
You probably have a few practical questions about cleaning frequency, safe products, and dealing with mold—and this FAQ will answer them.
You’ll learn how often to deep-clean tiles and grout, when bleach or vinegar is appropriate, and how to remove black mold safely.
It also covers how long you should wait to use the bathroom after sealing.
How often should I deep-clean bathroom tiles and grout?
How often should you deep-clean bathroom tiles and grout to keep them looking fresh and prevent mold buildup?
Aim for a thorough deep-clean every 3–6 months, depending on humidity, shower frequency, and visible grime.
Spot-treat stains and mildew as soon as you see them.
Maintain weekly light cleaning and good ventilation to extend time between deep cleans and prevent recurring mold.
Can I use bleach on bathroom tiles and grout?
Because bleach kills mold, mildew, and many bacteria, it’s a useful option for whitening grout and disinfecting tiles—but use it carefully.
You can dilute household bleach (follow label) to spot-treat grout, ventilate well, and wear gloves and eye protection.
Don’t mix bleach with ammonia or other cleaners. Rinse thoroughly after treatment and test a hidden area first to verify tile finish isn’t harmed.
Will vinegar damage my tiles or grout?
If you’re weighing vinegar as an alternative to bleach, know that it’s gentler on people and the environment but not safe for all surfaces.
You can use diluted white vinegar on glazed ceramic and porcelain tiles and sealed grout.
Avoid vinegar on natural stone (marble, travertine, limestone) and unsealed grout—it etches stone and can weaken grout over time.
Test first in an inconspicuous spot.
How do I remove black mold from grout safely?
Want to get rid of black mold in grout without harming yourself or the tile?
Wear gloves, goggles, and a mask. Ventilate the room.
Use a diluted bleach solution (1 cup bleach to 1 gallon water) or a commercial mold cleaner; apply, let sit 10–15 minutes, scrub with a stiff brush, then rinse thoroughly.
Dry completely and address leaks or humidity to prevent return.
How long after sealing can the bathroom be used?
How long should you wait after sealing grout or tile before using the bathroom?
Wait at least 24 hours for most sealers to cure enough for light use; full cure can take 48–72 hours.
Keep the room ventilated and avoid showering, mopping, or heavy traffic during this time.
Check the product label for specific curing times and follow manufacturer instructions for best results.
Quick Reference: Do’s and Don’ts Cheat Sheet
Keep this cheat sheet handy so you can clean bathroom tiles and floors faster and avoid common mistakes.
Follow quick do’s and don’ts to save time, protect surfaces, and keep grout bright. Carry microfiber, gloves, and proper cleaners. Rinse thoroughly and dry to prevent streaks.
- Do: test cleaner, ventilate, scrub grout gently
- Don’t: use bleach on colored grout
- Do: seal periodically and wipe spills promptly