How to Seal a Concrete Floor: A Complete Guide to Long-Lasting Protection
You’ll protect your concrete by choosing the right sealer, prepping the surface, and applying coatings correctly. Start by testing porosity and moisture, clean and repair cracks, then pick a sealer—penetrating silanes for outdoor moisture resistance, epoxy for heavy-use garages, or water‑based finishes for indoor floors. Follow coverage and cure times, ventilate, and maintain with regular cleaning. Do this and you’ll extend lifespan and prevent stains; keep going to learn detailed steps, products, and troubleshooting.
How to Seal a Concrete Floor and Overview
To seal a concrete floor, you’ll generally clean and repair the surface, then apply a compatible sealer—epoxy or penetrating silane/siloxane for most uses.
You should seal when the slab is new (after cure), stained, exposed to moisture, or getting heavy wear to protect it and improve appearance.
Proper sealing can extend the floor’s life by years, reduce maintenance, and resist stains and moisture.
Direct answer: Best approach in a nutshell
Start by cleaning and repairing the slab.
Then choose a sealer that matches your floor’s use—penetrating silicates for durability and breathability, acrylic or epoxy coatings for high gloss and protection—and apply per manufacturer instructions, usually with a roller or sprayer after priming and allowing proper cure times.
If you wonder how do I seal a concrete floor, follow prep, choose sealer, apply, and cure.
When sealing a concrete floor is necessary
Now that you know the basic steps—clean, repair, choose a sealer, apply, and cure—you’ll want to decide whether your slab actually needs sealing.
Seal if the floor is porous, dusty, prone to stains, or exposed to moisture, chemicals, or heavy traffic.
Skip sealing for finished, nonporous surfaces or short-term temporary slabs.
Test porosity with a water drop before committing.
Expected lifespan and benefits of sealing
A properly applied sealer can protect your concrete for years, often extending a floor’s useful life by 3–10+ years depending on the product and conditions.
You’ll reduce staining, abrasion, moisture intrusion, and chemical damage while making maintenance easier.
Depending on traffic and environment, recoat every 1–7 years.
Choosing the right sealer improves durability, appearance, and long-term cost-effectiveness.
Understanding Concrete Floors and Sealers
Before you pick a sealer, you’ll want to understand concrete porosity and how it affects absorption and durability.
Different floors—garage, basement, patio, or polished—have distinct needs, and sealers work differently: topical films, penetrating sealers, and densifiers each protect in their own way.
I’ll explain how each type works and the main pros and cons so you can choose the right option for your floor.
What is concrete porosity and why it matters
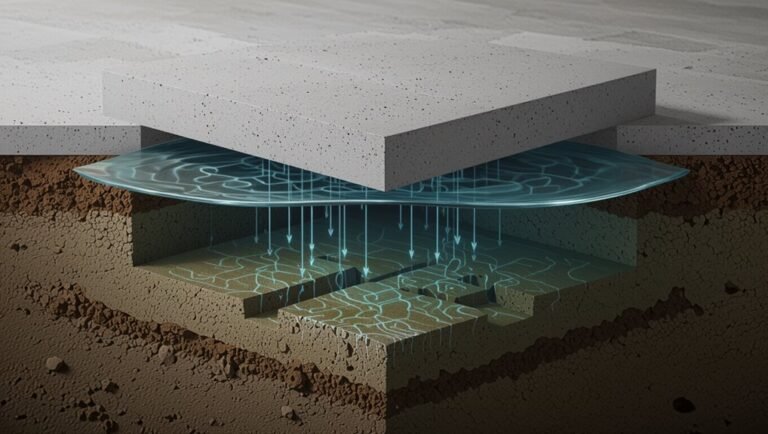
Because concrete is a mix of cement, water, and aggregate, it’s inherently porous—full of tiny interconnected voids that let water, salts, and oils move through the slab.
You need to understand porosity because it controls absorption, stain risk, freeze-thaw damage, and how well sealers penetrate.
Measure or test porosity to choose a sealer and application method that actually protects the slab.
Types of concrete floors (garage, basement, patio, polished)
Concrete floors come in several distinct types—garage, basement, patio, and polished—each with different exposure, traffic, and moisture conditions that affect which sealer you should pick and how you apply it.
You’ll treat garages for oil, abrasion, and salt; basements for humidity and vapor; patios for UV and freeze-thaw; and polished concrete for gloss and stain resistance, adjusting prep and finish accordingly.
How sealers work: topical vs penetrating vs densifiers
When you choose a sealer, you’re really deciding how the surface will be protected and how the concrete will behave.
Topical sealers sit on the surface to enhance gloss and repel stains.
Penetrating sealers soak in to block moisture and salts without changing appearance.
Densifiers chemically react with the slab to harden and reduce dusting while keeping the finish natural.
You’ll pick based on desired look, exposure, and maintenance.
Pros and cons of each sealer type
Although each sealer type protects concrete, they do so in different ways that affect appearance, durability, and maintenance, so you’ll want to match the sealer to the job. You’ll weigh gloss, breathability, lifespan, and recoat needs. Choose topical for shine, penetrating for protection without film, densifiers for hardness.
| Type | Pro | Con |
|---|---|---|
| Topical | High gloss | Peels |
| Penetrating | Breathable | Less sheen |
| Densifier | Hardens | Not waterproof |
| Acrylic | Cheap | Short life |
Preparing to Seal Assessing the Floor Condition
Before sealing, you’ll inspect the slab for cracks, spalling, moisture, and contaminants that could ruin adhesion.
You’ll run a moisture test (plastic sheet or meters) and check for any previous coatings and adhesion problems.
Gather the right tools and safety gear so you can repair, clean, and test the floor safely.
Inspecting for cracks, spalling, moisture, and contaminants
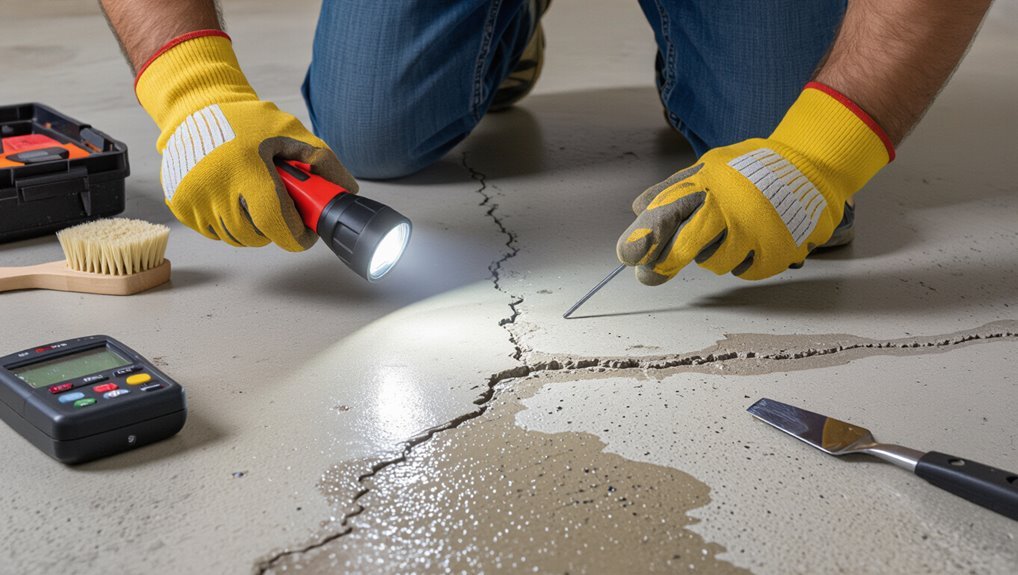
Start by walking the entire floor and looking closely for cracks, spalling, damp spots, oil, paint, or any other contaminants that would prevent a sealer from bonding properly.
Mark defects, note depth and length of cracks, and identify areas needing patching or etching.
Remove visible debris and grease, and assess whether heavy damage requires professional repair before you proceed with sealing.
Performing a moisture test (plastic sheet / meters)
After you’ve identified cracks, spalling, and any contaminants, check the slab’s moisture level so the sealer will bond and cure properly.
Tape a 2×2 ft plastic sheet to the concrete, seal edges, wait 24–48 hours; if condensation or darkening appears, moisture is high.
Use a relative humidity or pin meter for precise readings and follow sealer manufacturer limits before proceeding.
Determining previous coatings and adhesion issues
Because old coatings can trap moisture and prevent a new sealer from bonding, you’ll need to identify any previous films and test their adhesion before you proceed.
Inspect visually for sheen, peeling, or discoloration.
Perform a simple tape or pull test on suspect areas, and scrape small spots to see if coating flakes.
Note locations needing stripping or stronger prep before sealing.
Tools and safety gear checklist
Gathering the right tools and safety gear cuts prep time and keeps you protected while you assess and seal the floor.
You’ll need reliable equipment to clean, test, and repair before sealing. Keep everything organized and inspect gear for damage.
- Gloves, N95 respirator, safety goggles
- Wire brush, floor sander, scraper
- Moisture meter, concrete patch, bucket
Materials and Products Selection
You’ll pick a sealer based on where the floor is and how it’s used—acrylic for light protection, epoxy or polyurethane for heavy wear, and silane/siloxane for penetrating water repellency.
Check product specs for coverage rates so you can estimate how much you’ll need per coat and buy a little extra for overlap and touch-ups.
Also compare VOC levels and environmental recommendations to keep the job safe indoors or in enclosed spaces.
Choosing the right sealer by location and use
When picking a sealer, match the product to the room’s traffic, moisture exposure, and the finish you want—garage and exterior slabs need tougher, abrasion-resistant sealers, while basements and living areas benefit from breathable, low-VOC options.
Consider slip resistance for kitchens, UV resistance for sunlit patios, and chemical resistance for workshops.
Also factor cure time, maintenance needs, and local climate when choosing.
Recommended products and specs (acrylic, epoxy, polyurethane, silane/siloxane)
After weighing room use and exposure, pick a sealer type that meets those needs—each chemistry offers distinct performance and application specs.
For quick, UV-stable protection use acrylics (water or solvent).
Choose epoxies for heavy traffic and chemical resistance; expect longer cure times.
Use polyurethanes for abrasion and gloss retention.
Apply silane/siloxane for breathable, penetrating waterproofing on exterior slabs.
Estimating quantities and coverage
Start by measuring the slab’s length and width (and any cutouts or steps) to calculate square footage, then factor in the product’s stated coverage rate and the number of coats you plan to apply. Use a small waste allowance (5–10%) and round up container counts.
| Item | Tip |
|---|---|
| Coverage | Check label sqft/gal |
| Coats | Multiply per-coat need |
Environmental and VOC considerations
Once you’ve calculated coverage and coats, pick sealers that meet your performance needs without compromising indoor air quality.
Choose low-VOC or water-based formulas to reduce odors and health risks. Check labels for VOC limits, certified eco-friendly claims, and proper disposal guidance.
Ventilate during application and curing, use respiratory protection if needed, and avoid high-VOC solvent-based products in occupied spaces.
Step-by-Step Sealing Process (Preparation to Finish)
Start by thoroughly cleaning the concrete with the right cleaners or pressure-washing to remove grease, dirt, and efflorescence.
Next, repair cracks and surface defects, then grind or etch as needed for proper adhesion, neutralize residues, and do a final cleaning.
Finish by applying the sealer with the appropriate tools, technique, and timing to guarantee an even, durable coat.
Step 1: Cleaning the surface methods and cleaners
Before you apply any sealer, you need a clean, dry surface free of dust, oil, grease, and loose material so the coating can bond properly.
Sweep and vacuum thoroughly, degrease stained areas, then rinse and let dry.
Use appropriate cleaners for the contamination:
- Trisodium phosphate or heavy-duty degreaser
- Mild detergent and warm water
- Concrete cleaner/etcher for heavy residue
Step 2: Repairing cracks and surface defects (patching compounds, fillers)
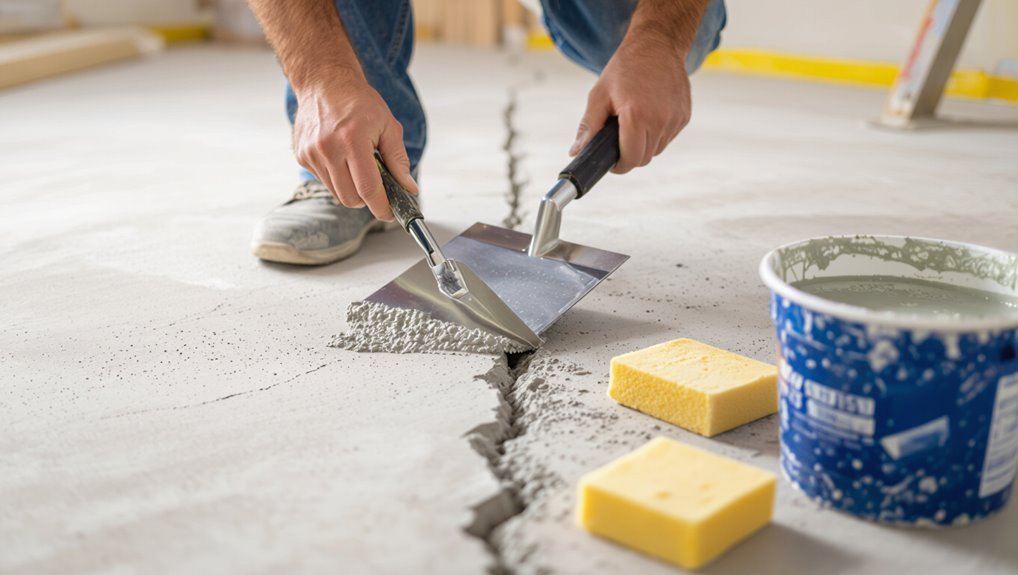
Address cracks and surface defects so the sealer can bond evenly and prevent water intrusion. Small hairline cracks can be filled with a concrete crack filler or epoxy, while wider gaps and spalled areas need a patching compound or polymer-modified cement applied to a roughened, clean surface.
After curing, sand or feather edges, remove dust, and verify repairs are flush and dry before sealing.
Step 3: Grinding or etching for adhesion methods and when to use each
Step 3 is where you make the concrete surface ready to accept a sealer—either by grinding to mechanically profile and remove contaminants or by etching to open the pores chemically—so you get consistent adhesion and a long-lasting finish.
Choose grinding for heavy coatings, paint removal, or dense concrete; use etching for light contaminants and older, porous slabs.
Wear PPE; test a small area first.
Step 4: Neutralizing and final cleaning
Once you’ve ground or etched the slab and removed loose debris, neutralizing and performing a final cleaning will make sure the surface won’t react with your sealer.
Rinse away etchant residue with clean water or a neutralizing solution, scrub stubborn spots, then vacuum and mop to remove dust and contaminants.
Allow the concrete to dry fully before proceeding.
Step 5: Applying the sealer tools, techniques, and timing
Gather your tools and plan your timing before you open the sealer—having the right roller, brush, pump sprayer, extension pole, mixing paddle, and PPE ready will make application faster and more consistent.
Work in thin, even coats, overlap passes, and keep a wet edge to avoid lap marks. Don’t rush; follow pot-life and temperature guidelines.
- Roll for flats
- Brush edges
- Spray for texture
Step 6: Curing, recoat windows, and ventilation requirements
After you’ve applied the sealer, let it cure under stable temperature and humidity—this stage determines final hardness and adhesion, so don’t shortcut the wait.
Keep windows closed if dust or rain threaten, but guarantee fresh air exchange per product instructions. Use fans or controlled ventilation to remove fumes without creating drafts.
Follow manufacturer cure times before light traffic or recoating.
Step 7: Final inspection and testing adhesion
With the sealer cured and fumes cleared, it’s time to inspect the job and verify adhesion.
Walk the area, looking for missed spots, blisters, or peeling.
Press a fingernail or tape a small patch, then pull to test bond.
Note any failures, clean affected areas, and reapply sealer per manufacturer guidelines.
Document results and confirm full coverage before reopening the space.
Sealing Specific Floor Types Tailored Instructions
Next you’ll get tailored instructions for the most common concrete floor types so you can choose the right protection.
For garages, I’ll cover oil stain prep, high-traffic durability, and when to pick a coating over a sealer.
You’ll also learn moisture-sensitive methods for basements, weather- and UV-resistant options for patios and driveways, and how to approach polished concrete with densifiers versus topical sealers.
Garage floors: oil stains, high traffic, and coating vs sealer
Because garage floors face oil drips, heavy traffic, and occasional impact, you’ll need a tailored approach that balances stain removal, durability, and finish type.
Start by degreasing and etching; repair cracks.
Choose epoxy or polyaspartic coatings for impact and abrasion resistance, or use penetrating silane/siloxane sealers if you want breathable protection with less buildup.
Prioritize surface prep and periodic maintenance to extend lifespan.
Basement floors: moisture-sensitive approaches
Garage strategies don’t fully apply below grade, since basement slabs face persistent moisture, hydrostatic pressure, and vapor drive that can ruin coatings or trap water.
You should test moisture with a calcium chloride or moisture meter, repair cracks and efflorescence, install a vapor barrier or breathable vapor-reducing sealer, and choose moisture-tolerant coatings like epoxy primers or specialized sealers formulated for basements.
Outdoor patios and driveways: weather resistance and UV concerns
When sealing outdoor patios and driveways, you’ll focus on durability against weather, UV degradation, freeze–thaw cycles, and oil or salt exposure—conditions that indoor sealers rarely face.
Choose a UV-stable, breathable sealer with high abrasion and chemical resistance.
Prep by cleaning, repairing cracks, and ensuring proper drainage.
Apply per manufacturer’s temperature and recoat guidelines to maintain protection and avoid yellowing or peeling.
Polished concrete: densifier vs topical sealer considerations
If you want a durable, low-maintenance polished concrete floor, decide whether a densifier or a topical sealer—or a combination—best fits your goals:
Densifiers harden and reduce dusting without changing the look, while topical sealers add surface protection and sheen but can alter texture and require more upkeep.
Choose densifiers for longevity and minimal care; use topical sealers where chemical resistance, gloss, or enhanced slip control matters.
Common Problems and How to Fix Them
You’ll run into issues like bubbling, peeling, flaking, and adhesion failures over old coatings, and each has a specific cause and fix.
Check for moisture problems and improper surface prep if the sealer looks discolored or has an uneven sheen, and perform a moisture test before reapplying.
I’ll walk you through diagnosing sealer failure, corrective actions, and the right prep to guarantee a long-lasting finish.
Bubbling, peeling, or flaking causes and remedies
Though a smooth, glossy finish looks great, bubbling, peeling, or flaking undercuts the whole job and usually signals a problem with surface prep, moisture, or product selection.
You should remove loose coating, clean and etch the concrete, test and mitigate moisture vapor, and choose a compatible sealer.
Recoat only after proper drying; if damage is extensive, grind and reseal for a durable bond.
Discoloration or uneven sheen troubleshooting steps
When sealers look blotchy or some areas shine while others stay dull, start by isolating the cause—surface contamination, uneven application, or moisture can all create patchy color and sheen.
Clean affected spots, then test a small area with the same sealer and finish technique.
If uneven sheen persists, sand lightly and recoat evenly, using proper tools and thin, consistent coats to blend appearance.
Sealer failure due to moisture diagnosis and corrective action
If moisture’s trapped beneath the concrete, the sealer will peel, blister, or stay soft—so start by confirming whether moisture is the culprit before reapplying anything.
Test with a calcium chloride test or moisture meter. If elevated, stop and fix the source: improve drainage, install a vapor barrier, or use a moisture-tolerant sealer/epoxy primer.
Let slab dry fully before resealing.
Adhesion issues over previous coatings
Once you’ve ruled out moisture problems, the next common headache is poor adhesion over existing coatings—old paint, sealers, or epoxy residues can prevent new products from bonding.
You’ll need to test adhesion, remove incompatible layers by stripping or mechanically grinding, clean thoroughly, and guarantee surface profile and porosity match the new sealer’s requirements.
Primer or adhesion-promoting products can restore bond strength.
Best Practices, Maintenance, and Longevity Tips
Keep a simple maintenance routine—regular sweeping, mopping with a pH-neutral cleaner, and prompt spill cleanup—to protect your sealer and finish.
Watch for signs you need to reseal, like increased water absorption, dulling, or wear in high-traffic areas, and plan resealing on the manufacturer’s recommended timeline.
Use mats, furniture pads, and season-specific precautions (freeze/thaw or humidity control) to extend the life of your sealed concrete.
Regular maintenance routine and cleaning products to use
Although sealing protects your concrete, maintaining that barrier takes regular care: you should sweep weekly, mop with pH-neutral cleaner, and address spills immediately to prevent staining.
Use nonabrasive tools and soft microfiber mops to preserve the finish.
- Sweep or dust-mop weekly
- Clean with pH-neutral concrete cleaner
- Wipe spills promptly with soft cloths
When to reseal: signs and timelines
Along with routine sweeping and gentle cleaning, you’ll need to know when the sealer itself is wearing thin so you can reseal before damage sets in.
Check annually for water beading loss, dull or chalky patches, increased staining, or surface erosion. High-traffic areas may need resealing every 1–2 years; low-traffic spaces last 3–5 years.
Test with water droplets to confirm.
Extending longevity with mats, pads, and surface protection
To protect your sealed concrete and extend its life, use targeted surface protection like entry mats, furniture pads, and specialty area rugs that stop abrasion, grit, and chemical exposure before they reach the finish.
Place heavy-duty mats at doorways, use nonstaining felt or rubber pads under furniture, rotate rugs to avoid wear patterns, and clean pads regularly to prevent trapped debris from scratching the sealer.
Seasonal considerations and climate-specific tips
When seasons shift, adjust your sealing strategy so temperature, moisture, and local salt or pollen loads don’t undermine the finish.
You should schedule resealing and maintenance during mild, dry periods, avoid applying sealer when overnight lows dip below the product’s recommended temperature, and take extra precautions in wet or freeze-thaw climates to prevent trapped moisture and edge lifting.
Inspect, clean, recoat as needed, use breathable sealers in damp areas, and remove deicing salts promptly.
Cost, Time, and DIY vs Professional Considerations
You’ll want to budget for materials, tools, and possible labor, and I’ll outline typical price ranges so you know what to expect.
I’ll also give time estimates for small, medium, and large jobs and tell you when it makes sense to hire a pro plus key questions to ask them.
Finally, we’ll cover permits, warranties, and manufacturer recommendations that can affect cost and your choice of installer.
Typical cost breakdown (materials, tools, labor)
Expect to spend anywhere from a few hundred to several thousand dollars depending on materials, tools, and whether you do the work yourself or hire pros. Breakdown: materials (sealer, primer), rental tools (grinder, sander), consumables, and labor. Choose DIY to save on labor but factor time and skill.
| Item | Typical Cost |
|---|---|
| Sealer | $50–$300 |
| Tools rental | $30–$150/day |
| Consumables | $20–$100 |
| Pro labor | $300–$3,000 |
Time estimates for projects of different sizes
Project size directly affects how long sealing a concrete floor will take, and whether you tackle it yourself or hire pros will change those timelines considerably.
Small rooms (under 200 sq ft) take a weekend for prep, sealing, and drying.
Garages or basements (200–800 sq ft) require 2–4 days.
Large commercial areas can need several days to a week, depending on cure times.
When to hire a professional criteria and questions to ask
When should you call in a pro? Consider job size, surface damage, and your schedule.
If costs, tight timelines, or complex prep (repair, moisture mitigation, leveling) exceed your skills, hire one.
Ask about experience with concrete sealers, project timeline, total cost breakdown, cleanup, warranty on labor, and references.
Get written estimates and compare before deciding.
Permits, warranties, and manufacturer recommendations
Before you start, check whether local building codes, HOA rules, or your municipality require permits or specific products for sealing concrete—especially in commercial, multi-unit, or exterior-draining situations—because failing to comply can cost time and money.
Also review manufacturer instructions and warranties: improper prep or DIY shortcuts can void coverage.
Factor permit fees, inspection delays, and warranty terms when weighing DIY versus hiring a pro.
Frequently Asked Questions
You probably have questions about timing, compatibility, and performance before you seal your floor.
We’ll cover how long sealers need to dry and cure, whether you can coat over paint or old sealers, and whether sealing stops cracks.
You’ll also get tips on stripping failed coatings and options for eco-friendly sealers and how well they work.
How long does sealer take to dry and cure before use?
How long will the sealer take to dry and cure before you can use the floor?
Dry time varies: most sealers are touch-dry in 1–4 hours, but you shouldn’t walk on sealed concrete for 6–24 hours.
Full cure takes 24–72 hours for water-based types and up to 7 days for solvent-based or heavy-traffic areas.
Follow manufacturer instructions and avoid heavy loads until fully cured.
Can I seal over painted or previously coated concrete?
Can you seal over painted or previously coated concrete? Yes, but only after proper prep.
Remove loose paint, degrease, and sand glossy surfaces for adhesion.
Test a small area with your chosen sealer to verify compatibility and look.
If the old coating’s failing or incompatible, strip it and repair substrate first.
Follow manufacturer guidelines for primers and application.
Will sealing prevent concrete from cracking?
Having a sound old coating or stripping a failing one first helps protect the slab, but sealing alone won’t stop all cracks.
Sealer reduces moisture movement, surface wear, and mild spalling, so you’ll slow deterioration. It won’t fix structural issues, hairline shrinkage, or movement from subgrade settlement.
Address joints, control cracks, proper reinforcement, and slab preparation to minimize future cracking.
How do I remove a sealer if it fails or I want a different finish?
Looking to change a finish or strip a failed sealer? You’ll assess adhesion, test a small area, then choose between chemical strippers, mechanical grinding, or shot blasting.
Follow product instructions, wear PPE, ventilate, and remove residue with scrubbers and rinsing.
After drying, repair any damage and profile the surface for the new sealer to guarantee proper bonding and even appearance.
Are there eco-friendly sealer options and how effective are they?
Wondering whether greener sealers actually work? You can choose low-VOC water-based acrylics, silanes/siloxanes, or plant-derived hybrids. They reduce odor and emissions, resist staining, and repel moisture, though some need more frequent reapplication than solvent-based options.
Match the sealer to your traffic and exposure: for patios or driveways pick penetrating silanes; for indoor floors pick high-quality water-based films.