
How to Remove Tile From a Concrete Floor Without Damaging the Surface
You can remove tile from concrete without harming the slab by working slowly, starting with scored grout and perimeter tiles, and using low-impact tools like an oscillating tool, hand chisel, and floor scraper rather than heavy hammers. Keep tools at a low speed, maintain a shallow angle, and vacuum dust with a HEPA shop vac. Inspect and patch any chips with polymer-modified concrete, and protect the area—follow the step-by-step method below to learn the full process.
How to Remove Tile from a Concrete Floor Without Damaging the Surface
You’ll get the best results by working slowly and using the right tools to protect the concrete.
Start by softening adhesive with a heat gun or chemical remover, then pry tiles gently with a chisel and hammer, keeping tools at a low angle to avoid gouging.
Finish by grinding high spots and removing residue with a floor scraper so the surface stays intact.
Short Summary of the Safest Method
Start by scoring and loosening grout, then gently pry up tiles with a chisel and hammer while keeping the tool angled to protect the concrete; work slowly across a small area so you can adjust technique and stop before you gouge the slab.
You’ll ask how do you remove tile from a concrete floor and follow these steps:
- Score grout, pry edges
- Use light taps, angled chisel
- Clean adhesive residue carefully
Basic Understanding: Why Tile Removal Can Damage Concrete
When you pull up tile, you’re breaking the bond that thinset, mastic, or mortar formed with the concrete, and that bond can peel off chunks of the slab.
Porcelain, ceramic, and natural stone each grip differently—porcelain often holds tight while some ceramics and thin-set installations can fail more cleanly.
Look for hairline cracks, crumbling edges, or hollow-sounding spots before you start, because those signs mean the concrete is already vulnerable.
How tiles are bonded to concrete (thinset, mastic, mortar)
Because tiles stick to concrete with strong adhesives—thinset mortar, organic mastics, or thicker cement mortars—you’re often removing more than just the tile itself.
These materials cure into rigid bonds; thinset grips pores, mastics soak and adhere, mortars interlock. When you pry tiles, the adhesive or the concrete surface can fracture.
Knowing adhesive types helps you choose gentler removal methods.
Common types of tile and their adhesion characteristics
Although different tiles look similar at a glance, their materials and backings change how strongly they bond to concrete and how likely they’ll damage the slab during removal.
Porcelain is dense and often glued with thinset; ceramic has a porous body that may release easier.
Natural stone is heavy and bonded strongly.
Vinyl and engineered tiles use adhesives that can smear or pull thin surface layers.
Signs of vulnerable or already-damaged concrete
Anyone tackling tile removal should first look for clear signs that the concrete underneath is vulnerable or already compromised.
Check for cracks, spalling, powdery or chalky surfaces, and delamination where layers separate.
Look for moisture stains, efflorescence, or soft spots that crumble under pressure.
If rebar is exposed or you see uneven settling, proceed cautiously and consider professional assessment before prying tiles.
Tools, Protective Gear, and Materials You’ll Need
You’ll want the right mix of power tools (hammer drill, rotary hammer, oscillating tool, angle grinder) and manual tools (chisels, pry bars, floor scrapers, mallet) to remove tile efficiently.
Don’t forget proper safety gear and dust control—PPE, plastic sheeting, and a shop vac with a HEPA filter—to protect yourself and contain debris.
Finally, have concrete repair and finishing materials on hand so you can patch and smooth the slab once the tile and adhesive are gone.
Power tools (hammer drill, rotary hammer, oscillating tool, angle grinder)
Power up the right heavy-duty tools before you start chipping tile off concrete: a hammer drill or rotary hammer for stubborn adhesive and thinset, an oscillating multi-tool for cutting grout and trimming edges, and an angle grinder with a diamond cup wheel when you need to grind down high spots or remove mortar.
Use PPE, control dust, and work methodically.
- Hammer drill or rotary hammer for heavy removal
- Oscillating tool for precise cuts
- Angle grinder with diamond cup for grinding
Manual tools (chisels, pry bars, floor scrapers, mallet)
After you’ve softened or removed the worst of the adhesive with your hammer drill or grinder, switch to hand tools for controlled, precise work around edges and delicate areas.
You’ll want sturdy chisels, a flat pry bar, and a long-handled floor scraper plus a mallet to tap and lift tiles gently.
- Cold chisel for seams and grout
- Pry bar for edges
- Scraper for adhesive remnants
Safety equipment and dust control (PPE, plastic sheeting, shop vac, HEPA filter)
Because tile removal kicks up a lot of dust and debris, you should gear up with proper PPE and dust-control tools before you begin work.
Wear goggles, N95 or P100 respirator, gloves, and knee pads. Seal off the area with plastic sheeting and use a shop vac with a HEPA filter to capture dust as you work.
- Goggles, respirator, gloves
- Plastic sheeting, tape
- Shop vac + HEPA
Repair and finishing materials for concrete after removal
Gather the right tools and materials before you start repairing the concrete so the job goes smoothly and lasts.
You’ll need PPE, cleanup gear, and repair products. Use a stiff broom and vacuum, patching compound, and finishing tools to restore the slab.
- Gloves, goggles, dust mask
- Polymer-modified concrete patch
- Trowel, float, and sanding block
Pre-Work Assessment and Preparation
Start by closely inspecting the tile, grout, and concrete for cracks, adhesive residue, or loose pieces so you know what you’re up against.
Test a small, out-of-the-way area to see how easily tiles and grout come up and whether the concrete stays intact.
Clear the room, protect nearby surfaces, and decide whether you’ll remove grout first or pull whole tiles to minimize damage.
Inspecting tile, grout, and concrete condition
Before you pick up a chisel or hammer, take a close look at the tile, grout, and concrete to assess damage, adhesion, and any hidden issues that could affect removal.
Check for cracked or loose tiles, soft or crumbly grout, and surface contaminants like thinset or paint.
Note hairline concrete cracks, drains, or embedded metal that may complicate removal and plan accordingly.
Testing a small inconspicuous area
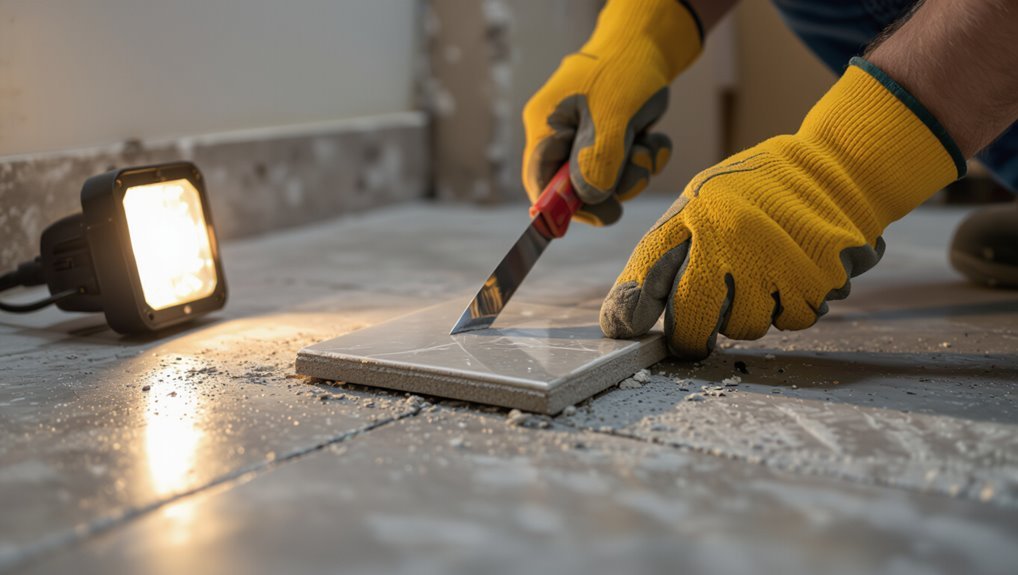
Now that you’ve inspected the tiles, grout, and concrete, test a small inconspicuous area to confirm how the materials will respond during removal.
Choose a corner or closet spot, remove grout around one tile, and pry gently with a chisel and hammer.
Note adhesion, cracking, and dust. This informs tool choice, pressure, and whether chemical softeners or wet methods are needed.
Clearing the room and protecting nearby surfaces
Clear the room of furniture, rugs, and loose items so you’ll have unobstructed space to work and move debris.
Remove pictures and electronics from walls and shelves, and roll up or take out any baseboard trim you don’t want damaged.
Protect surfaces and contain dust with plastic sheeting and tape.
Consider:
- Cover vents, doorways, and nearby floors
- Lay down drop cloths and rosin paper
- Tape plastic to baseboards and outlets
Deciding whether to remove tile, grout, or both first
With the room cleared and surfaces protected, you’re ready to assess whether to remove the grout, the tiles, or both first.
If grout is crumbly or thin-set is weak, scraping grout first loosens tiles for cleaner removal.
If tiles are intact and thin-set strong, chip tiles off first.
Consider tile size, adhesive condition, and your tools to choose the most efficient sequence.
Step-by-Step Tile Removal Process (Safe Sequence)
Start by raking out grout with a grout saw or rotary bit so individual tiles can come out cleanly.
Then pop perimeter tiles first to reduce leverage on the concrete, switching to a hammer and chisel for fragile or thin areas where manual removal is safer.
When you use power tools, pick the correct settings and attachments, work in small sections, and keep the surface cool to prevent spalling.
Step 1 Remove grout lines first (tools and technique)
Begin by scoring and removing the grout around each tile so you can get clean access to the edges without prying against sealed joints.
Use a grout saw or oscillating tool, work steadily, and keep dust down. Protect yourself with goggles and a mask.
- Grout saw or oscillating blade for control
- Vacuum or HEPA dust extractor
- Safety goggles and respirator
Step 2 Start with perimeter tiles to reduce leverage on concrete
Pick a corner and work the perimeter tiles first so you reduce leverage and minimize stress on the concrete slab.
Pry each edge gently with a flat pry bar or putty knife, removing trim and baseboard as needed. Keep pulls shallow, lift tiles outward rather than upward, and clear debris frequently.
This prevents cracking and gives you stable access to interior tiles.
Step 3 Use manual removal for fragile or thin concrete areas
With the perimeter cleared and stress on the slab reduced, switch to manual removal when you hit thin or fragile concrete to avoid cracking.
Work slowly with a flat pry bar, chisel, and rubber mallet, lifting small sections. Support edges while prying, keep tools angled shallow, and clear debris frequently.
Stop if you see hairline fractures and reassess before proceeding.
Step 4 Use power tools safely: correct settings and attachments
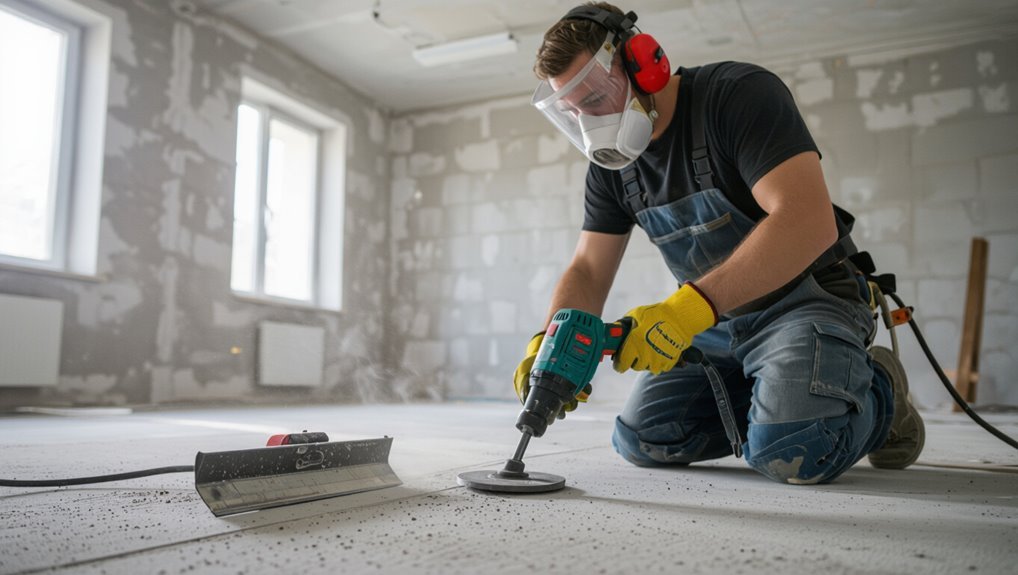
Step 4 shifts you to power tools—set them correctly and use the right attachments to remove tile quickly without damaging the slab or injuring yourself.
Choose a variable-speed rotary hammer or oscillating tool; keep speed low to medium. Use carbide or diamond-tipped blades sized for grout and thinset.
Wear eye, ear, and respiratory protection, secure loose debris, and test settings on a scrap area first.
Step 5 Work in small sections and keep surface cool to avoid spalling
Start by dividing the floor into manageable squares—work a few square feet at a time so you can control force and cooling.
Tackle one square fully before moving on, using short tool bursts. Pause frequently to let the concrete cool, mist lightly if needed, and inspect for hairline cracks.
Keeping sections small prevents overheating and reduces risk of spalling or unintended damage.
Step 6 Remove thinset/mortar residue without gouging (chemical softeners, diamond scrapers)
Break down the remaining thinset carefully so you clear the floor without gouging the concrete: use chemical softeners to loosen stubborn mortar, then follow up with diamond scrapers or a rotary diamond cup to remove residue evenly.
Apply softener per directions, wait, test a small area, then work slowly with light passes. Keep tools level, avoid concentrated pressure, and inspect frequently.
Step 7 Clean debris and vacuum thoroughly after each section
Once the thinset’s been softened and scraped, clean up the loose chunks and dust before you move on to the next area.
Use a stiff broom to gather debris, then pick up larger pieces by hand.
Follow with a shop vacuum using a HEPA filter to remove fine dust.
Keeping each section clean prevents scratches, improves adhesion for repairs, and reduces airborne silica hazards.
Alternative Methods Based on Tile and Adhesive Type
Your approach will change depending on the tile and adhesive: ceramic or glazed tiles usually come up easier than porcelain or large-format pieces.
You’ll need different tools and techniques for porcelain and big tiles to avoid cracking the slab or the tiles you want to save.
For epoxy or heavy mortar, plan on stronger demolition tools and possibly mechanical grinding to remove stubborn adhesive.
Removing ceramic/glazed tiles
When removing ceramic or glazed tiles, pick a method that matches both the tile’s thickness and the type of adhesive used, since glazed surfaces can be brittle and some mastics grip far more stubbornly than thin-set mortar.
Start by scoring grout, test a corner with a chisel and hammer, and switch to a rotary hammer with a scraper bit for stubborn areas.
Work slowly to protect concrete.
Removing porcelain and large-format tiles
Although porcelain and large-format tiles look durable, they’re heavier and bonded more tenaciously than typical ceramic, so you’ll need different tools and techniques depending on tile thickness and the adhesive type.
Start by scoring grout and testing a corner with a pry bar and thin chisel.
For thinner porcelain use a floor scraper; for thick slabs employ a rotary hammer with carbide chisel, working slowly to protect concrete.
Handling tiles stuck with epoxy or heavy mortar
Expect a tougher job with tiles bedded in epoxy or heavy-setting mortar, because those adhesives bond far stronger and resist common prying tools. You’ll need cutters, grinders, and patience: score grout, grind adhesive in small zones, chip carefully, and use heat or solvent where safe. Protect the slab; work slowly to avoid gouging concrete.
| Frustration | Resolve | Relief |
|---|---|---|
| Anger | Steady | Calm |
| Doubt | Skill | Pride |
How to Repair and Restore Concrete After Tile Removal
Once the tile’s up, you’ll inspect the slab for chips, spalls, and adhesive residue and decide whether to grind or patch based on depth and extent of damage.
For shallow imperfections you’ll use a patch or skim coat, while larger or uneven areas usually need grinding before repair.
Finally, you’ll choose a finish—smooth, polished, or a thin coat—that suits the new flooring and follow proper prep to guarantee adhesion.
Assessing and repairing minor chips and surface spalls
Before you patch anything, take a close look at the slab to identify chips and surface spalls and decide which ones need repair.
Clean debris and dust, then widen tiny spalls with a chisel to sound concrete.
Use a compatible repair mortar or epoxy, press into voids, smooth to match surrounding finish, and allow proper cure before light trafficking or further restoration steps.
Grinding vs. patching: when to choose which
When you’re deciding how to fix the slab after tile removal, choose grinding when the surface is mostly intact but uneven or has adhesive and thin ridges.
Opt for patching when you’ve got deeper gouges, missing concrete, or large chips.
Grinding evens and cleans; patching rebuilds profile.
Match method to damage depth, timeline, and final use to avoid unnecessary work.
Finishing options: smooth, polished, or skim coat
After you decide whether to grind or patch, pick a finish that fits the room’s use and look: smoothing gives a flat, paint-ready surface; polishing produces a durable, low-maintenance sheen that can stand on its own; and a skim coat masks imperfections and creates a fresh layer for new flooring or coatings.
Choose based on traffic, aesthetics, and maintenance. Apply sealer to protect and ease cleaning.
Preparing concrete for new flooring
Once you’ve cleared the debris and felt the slab, assess cracks, adhesive residue, and high or low spots so you can plan repairs that guarantee a flat, stable substrate for your new flooring.
Remove stubborn adhesive with a grinder or solvent, fill gaps and low areas with patching compound, level high spots by grinding, and finish with primer or moisture barrier before installing new flooring.
Common Mistakes That Damage Concrete and How to Avoid Them
Don’t grab the biggest jackhammer or pry bar first—overusing heavy demolition tools and forcing the job can chip or crack the slab.
Move methodically instead of rushing or applying excessive leverage, and always check for hidden substrates, pipes, or radiant heating before you start.
Test materials and control dust to avoid unseen damage and health hazards.
Overuse of heavy demolition tools
When you reach for a jackhammer or heavy pry bar every time a tile won’t budge, you risk carving gouges, cracking the slab, and creating uneven surfaces that are costly to repair.
Use light, controlled tools—manual scrapers, oscillating multi-tools, or a small chisel and hammer—and work methodically.
Reserve heavy equipment for truly stubborn areas after evaluating risk and protecting surrounding concrete.
Working too fast or applying excessive leverage
Hurry through tile removal and you’ll invite chips, hairline cracks, or even larger fractures in the concrete beneath.
Slow down, score grout lines, and pry tiles gently with a flat chisel or putty knife. Apply steady, controlled leverage—don’t use pry bars like wrecking tools.
Pause when you meet resistance, change angles, and protect the slab with thin plywood when levering near edges.
Ignoring hidden substrates, pipes, or radiant heating
After you’ve mastered slow, controlled prying, shift your focus to what’s under the surface—hidden substrates, plumbing, or radiant heating can sit just below the tile and a careless blade or chisel can nick pipes, loosen heating tubes, or crack thin-set layers that bond the slab.
Locate plans or use a detector, mark utility zones, work from edges, and use hand tools near suspected runs.
Skipping testing and insufficient dust control
Because dust and unknown substrates can ruin your work, don’t skip testing or neglect containment—tiny concrete particles and silica dust will travel fast and testing shows what chemicals, adhesives, or moisture you’re dealing with before you start.
Do a spot adhesive/paint test, use HEPA vacuums, run dust barriers, wear proper PPE, and control ventilation so you protect the slab, your lungs, and adjacent areas.
Tips, Best Practices, and Time-Saving Strategies
Decide early whether the job’s size or hidden issues mean you should hire a pro or tackle it yourself, since that affects time, cost, and safety.
Sequence work to strip large areas first, protect and limit chipping near edges, and keep the right blades and bits sharp to avoid concrete damage.
Budget time for careful removal and arrange waste disposal or recycling before you start so you’re not stuck at the end.
When to hire a pro versus DIY
Wondering whether to tackle tile removal yourself or call a pro? Assess scope, tools, and skill: small rooms, intact tiles, and basic tools suit DIY; expect slower work.
Hire a pro for large areas, stubborn adhesives, or cracks risk. Consider your schedule, budget, and injury risk.
Pros speed up work, protect concrete, and handle unexpected problems you mightn’t foresee.
Efficient sequencing to minimize concrete damage
If you sequence the work thoughtfully, you’ll speed removal and protect the slab.
Begin by scoring grout lines, remove loose tiles first, then tackle stubborn areas.
Work in manageable sections, alternating between mechanical and manual methods to avoid overworking one spot.
Clear debris frequently, inspect for thinset residues, and adjust technique as you go to prevent chipping and unnecessary surface damage.
Tool maintenance and correct blade/bit choices
Keep your tools sharp, clean, and properly adjusted so they cut efficiently and don’t damage the concrete.
Inspect blades and bits for wear, replace chipped diamond blades, and use masonry-specific bits. Match blade grit and bit type to tile material—porcelain needs tougher diamonds.
Keep guards, mounts, and coolant systems aligned. Store and sharpen blades per manufacturer guidelines to extend life and guarantee safe, precise cuts.
Budgeting time and disposal of tile waste
Because tile removal often takes longer than expected, plan your schedule around realistic daily progress—estimate how many square feet you can strip per hour, include breaks for blade changes and cleanup, and add buffer time for unexpected stubborn adhesive or repairs.
You’ll also coordinate waste removal, rent a dumpster if needed, and protect disposal routes.
- Bag and label sharp debris
- Stack tiles on pallets
- Arrange recycling pickup
FAQ Frequently Asked Questions
You probably have a few quick questions before you start—like whether you can remove tile without power tools, how to spot concrete damage, or if thinset always means grinding.
You’ll also want realistic timelines for removal and repair, and to know if a coating can hide minor flaws without full repair.
I’ll answer each so you can choose the right tools and plan your work.
Can I remove tile without any power tools?
Wondering if you can remove tile without any power tools? Yes — you can, using hand tools like a cold chisel, masonry hammer, putty knife, and sturdy pry bar.
Work slowly, score grout first, lift tiles from edges, and tap gently to avoid chipping concrete. Expect more effort and time; protect knees, wear eye protection, and clear debris as you go.
How can I tell if the concrete is damaged under the tile?
How can you tell if the concrete under your tile is damaged?
Tap the tile: a hollow sound suggests delamination.
Look for loose, cracked, or crumbling tiles and grout; these often mirror substrate problems.
After removing a tile, inspect the slab for spalling, deep pits, or powdery residue.
Hairline surface cracks are common; wider, uneven gaps or movement indicate structural concern requiring repair.
Will thinset removal require grinding the slab?
If the slab beneath your tile shows only minor surface imperfections, you often won’t need heavy grinding—scraping and a rotary chisel can remove most thinset.
However, stubborn adhesive, high spots, or a rough skim may force light grinding or a floor grinder with diamond pads.
Test a small area first, work progressively, and stop grinding once the surface is uniformly flat and clean for new flooring.
How long does tile removal and concrete repair usually take?
In most cases, you can expect tile removal and basic concrete repair to take anywhere from a single day for a small room to several days for larger areas or stubborn adhesive.
Plan for 1–3 days for a typical 10×10 to 12×12 room. Time depends on tile type, adhesive, damage extent, and drying/cure times.
Expect longer for deep repairs, full slab grinding, or structural fixes.
Are there coatings that hide minor concrete damage without repair?
Wondering whether you can simply coat over small chips and hairline cracks? You can use pigmented concrete sealers, epoxy coatings, or microtoppings to mask minor flaws temporarily, but they don’t replace proper repair.
Clean and stabilize the surface first; loose material will telegraph through coatings.
For durable, long-term results, fill and level defects before coating—even thin cosmetic layers benefit from sound substrate preparation.
