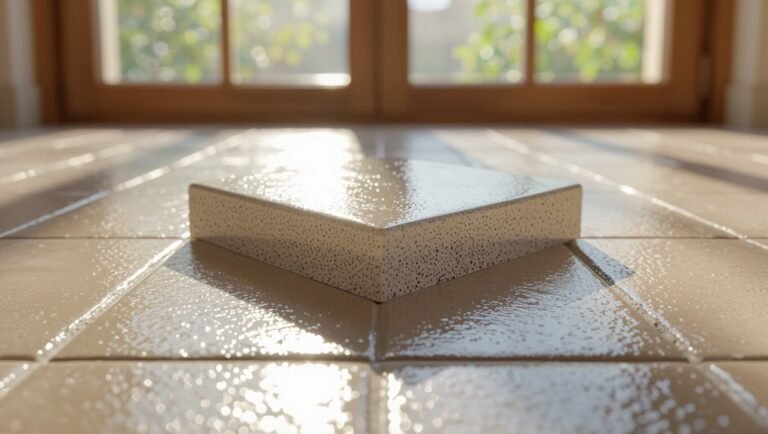
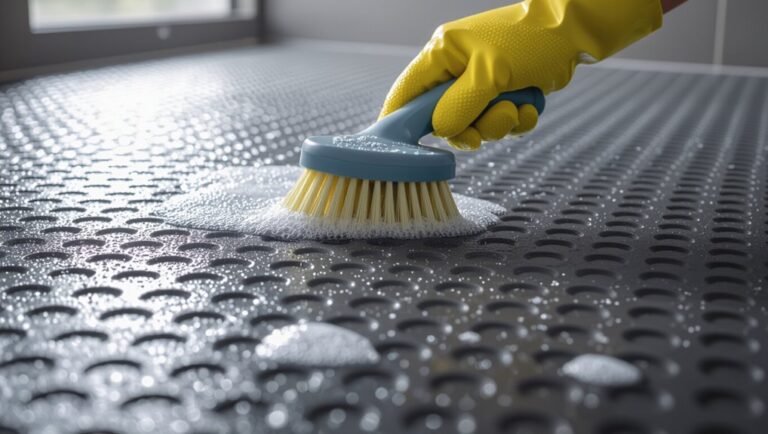
How to Install Linoleum Flooring Like a Pro (No Experience Needed)
You can install linoleum like a pro even with no experience by prepping a stable, dry subfloor, measuring precisely, and planning seam placement; acclimate sheets, dry-lay and trim them, then spread the recommended adhesive and lay sheets carefully, rolling seams and edges with a heavy roller for full contact. Trim, allow proper cure time, and maintain humidity during curing. Follow simple troubleshooting and maintenance tips to keep it lasting—keep going to pick up step-by-step methods and pro tricks.
Can You Install Linoleum Flooring Like a Pro with No Experience?
You can tackle a basic linoleum install even without prior experience if you follow clear steps: measure and prep the subfloor, cut and lay the sheets, and secure or glue them down.
Expect a few hours to a weekend depending on room size and drying times, with moderate difficulty if you take your time.
You’ll need a straightedge, utility knife, adhesive or seam sealer, roller, and basic safety gear.
Short summary of the process and expected time, difficulty, and tools
Although linoleum lays down quicker than many floor types, expect a weekend for a single room if you’re organized and have basic DIY skills.
You’ll learn how to install linoleum floor with patience and planning.
Essentials:
- Measure and prep subfloor
- Cut and fit sheets
- Apply adhesive or use loose lay
- Roll seams and trim edges
- Let adhesive cure; reinstall trim
What Is Linoleum and Why Choose It?
Linoleum is a resilient floor material made from natural ingredients like linseed oil, cork and wood flour, and a jute backing, so you’ll be choosing a mostly renewable product.
You’ll appreciate its durability, low cost, and eco-friendly profile for high-traffic areas.
It’s commonly used in kitchens, bathrooms, mudrooms, and other busy rooms where you want a hard-wearing, easy-to-clean surface.
Definition and composition
Flooring made from natural materials, linoleum combines linseed oil, wood or cork flour, resin, and pigment pressed onto a jute backing, creating a durable, flexible sheet you can roll out and glue down.
You’ll find variations in thickness, surface finish, and pattern printing; some have protective coatings.
Cut, seam, and adhere it to a smooth subfloor, then trim and roll seams for a tight fit.
Key benefits (durability, eco-friendliness, cost)
Those basic components give linoleum strengths that make it worth considering for many rooms: it stands up to heavy foot traffic, comes from renewable materials, and usually costs less than high-end resilient floors.
You’ll get practical benefits like:
- Long-lasting wear
- Natural, low-VOC makeup
- Biodegradable content
- Easy maintenance
- Lower upfront cost
You’ll save money and choose a greener option.
Common use cases and ideal rooms
Because it resists wear and handles spills well, linoleum works great in high-traffic, moisture-prone, and utility spaces—you’ll commonly see it in kitchens, mudrooms, laundry rooms, hallways, and classrooms.
You’ll also use it in nurseries, home offices, and basements for easy maintenance and resilient comfort underfoot.
Choose patterns and colors to match style while keeping functionality top priority.
Tools, Materials, and Cost Breakdown
Before you start, you’ll want a clear list of essential tools—measuring tape, utility knife or vinyl cutter, trowel and adhesive, seam roller and floor roller—to guarantee accurate cuts and a secure bond.
You can also consider optional pro tools like a power seamer or a straight-edge cutting table to speed the job on larger installs.
Finally, I’ll give a materials checklist and rough quantities based on square footage so you can estimate costs by project size.
Essential tools (measuring, cutting, adhesive, rollers)
A few basic tools will make your linoleum installation faster and neater:
- Tape measure and chalk line for accurate layout
- Utility knife with fresh blades for clean cuts
- Straightedge or metal ruler to guide cuts
- Flooring adhesive (recommended type) and notched trowel
- Seam roller and 100 lb floor roller to press adhesive and remove bubbles
You’ll work confidently and get professional results.
Optional pro tools that speed work
One or two pro-grade tools can shave hours off a job and raise the finish quality: a powered flooring cutter for long straight runs, a pneumatic flooring nailer or stapler for fast perimeter fastening, and a heated seam roller or edge sealer for tighter, nearly invisible seams.
Rent or buy a chalk snap line, heavy-duty utility knife, and knee pads; consider a panel cart for transport and a carpet tucker for tight edges.
Materials checklist by project size (sq ft)
Think of this checklist as your project blueprint: it tells you exactly what tools and materials you’ll need per square foot so you can order efficiently, avoid extra trips, and estimate costs. Use the table to scale supplies—adhesive, underlayment, seams, waste, and tools—by room size so you buy right and stay on budget.
| Item | Qty per 100 sq ft |
|---|---|
| Linoleum | 100 sq ft |
| Adhesive | 1 gal |
| Underlayment | 100 sq ft |
| Seam tape | 1 roll |
| Waste allowance | 10% |
Preparing Your Space Surface, Removal, and Subfloor Prep
Before you lay linoleum, check the existing floor for damage, levelness, and moisture so you know what fixes are needed.
Remove old flooring carefully to avoid damaging the subfloor, then repair or level concrete or plywood as required.
Finally, run moisture tests and install a vapor barrier if the results indicate it’s necessary.
How to assess the existing floor condition
Because your linoleum will only last as long as the surface beneath it, you need to inspect the room carefully before you start installing.
Check for sagging, soft spots, moisture stains, mold, cracks, and unevenness. Measure flatness with a straightedge, note loose boards or tiles, and identify high or low areas.
Document issues and plan repairs so your subfloor is stable and dry.
Removing old flooring safely
Clear the room and make a plan: remove furniture, disconnect appliances, roll up rugs, and protect doorways and vents with plastic sheeting to contain dust.
Wear safety gear—gloves, goggles, mask—and test for asbestos if home is old.
Pry up baseboards, cut and lift old flooring in manageable sections, dispose materials properly, and vacuum debris frequently to keep the area clean and safe.
Repairing and leveling subfloor (concrete vs. plywood)
1 essential step is making sure your subfloor is solid and perfectly level, since linoleum follows every bump and imperfection beneath it.
On plywood, secure loose boards, replace rotten sections, and sand high spots; fill gaps with exterior-grade plywood or floor patch.
On concrete, grind high areas and use a cement-based patch or self-leveling compound for low spots.
Check flatness with a straightedge.
Moisture testing and vapor barriers
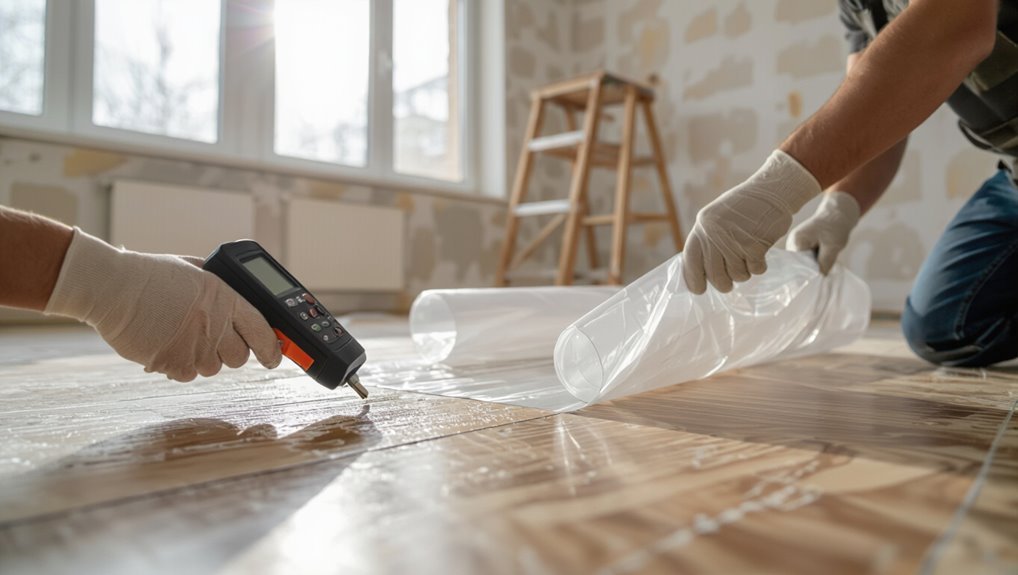
Before you lay linoleum, test the subfloor for moisture and plan a vapor barrier if needed—too much dampness will ruin adhesive and cause warping or mold.
Use a reliable moisture meter on concrete and plywood, following manufacturer specs. For concrete over 3% or high readings, install a vapor barrier or epoxy sealer.
Confirm seams are sealed and edges overlap to protect the flooring.
Measuring and Planning for a Perfect Layout
Before you cut or glue, measure the room accurately and calculate how much linoleum and underlayment you’ll need, adding waste for seams and pattern repeat.
Plan seam locations, the direction of the pattern, and how you’ll match motifs so joins are least visible.
For irregular rooms, make and trim cardboard templates to transfer exact cuts to the flooring before you lay anything down.
How to measure the room and calculate material needs
Start by measuring the room’s length and width with a tape measure and note any alcoves, doorways, or built-ins that affect layout.
Multiply length by width for square footage, add 10% waste for cuts and pattern repeat, and measure odd areas separately.
Convert to roll length by dividing total square feet by roll width, then round up and buy extra for mistakes.
Planning seams, pattern matching, and direction
Good planning makes seams nearly invisible and patterns flow naturally, so lay out your linoleum on the subfloor to visualize seam placement, pattern repeats, and the running direction before you cut.
Align seams away from high-traffic sightlines, match patterns across seams using the same repeat, and orient sheets so the design runs with room length.
Mark seam lines and plank edges clearly.
Cutting layout templates for irregular rooms
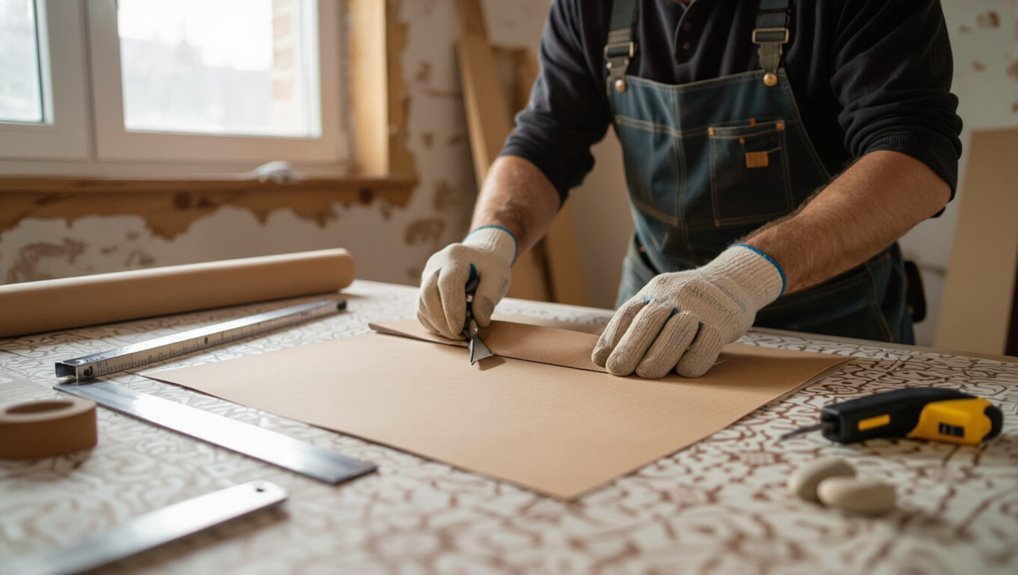
Once you’ve visualized seam placement and pattern direction, you’ll need accurate templates for any nooks, bays, or oddly shaped areas so your cuts fit perfectly.
Trace cardboard or kraft paper directly against baseboards, doorways, and fixtures, mark utility cutouts, then transfer outlines to linoleum.
Label each template with orientation and seam reference, test fit, adjust, and cut with a sharp knife for clean seams.
Step-by-Step Installation Guide
Now you’ll follow a clear sequence to get the sheets fitted and glued correctly.
Start by acclimating and inspecting the linoleum, dry-laying and marking your layout, then cut sheets for straight runs and curves.
Finally, spread the adhesive with the proper technique and open time, lay the sheets, and align seams carefully.
Step 1 Acclimate and inspect linoleum sheets
Before you lay a single sheet, let the linoleum sit in the room where it’ll be installed for at least 48 hours so it can acclimate to temperature and humidity; this prevents buckling and seams from opening later.
Unroll sheets, check for damage, color consistency, and manufacturer’s markings. Measure thickness and pattern alignment, note batch numbers, and report defects before adhesive or cutting.
Step 2 Dry lay and mark layout lines
1. Dry lay each sheet in the room, unrolling them and aligning patterns. Let seams meet but don’t force edges.
Work from the longest wall, centering the layout and balancing cut widths at opposite walls. Snap chalk lines at seam centers and along reference edges for alignment.
Mark trim lines lightly on the backing so you’ll know where to cut and fit.
Step 3 Cutting linoleum to size (straight cuts and curves)
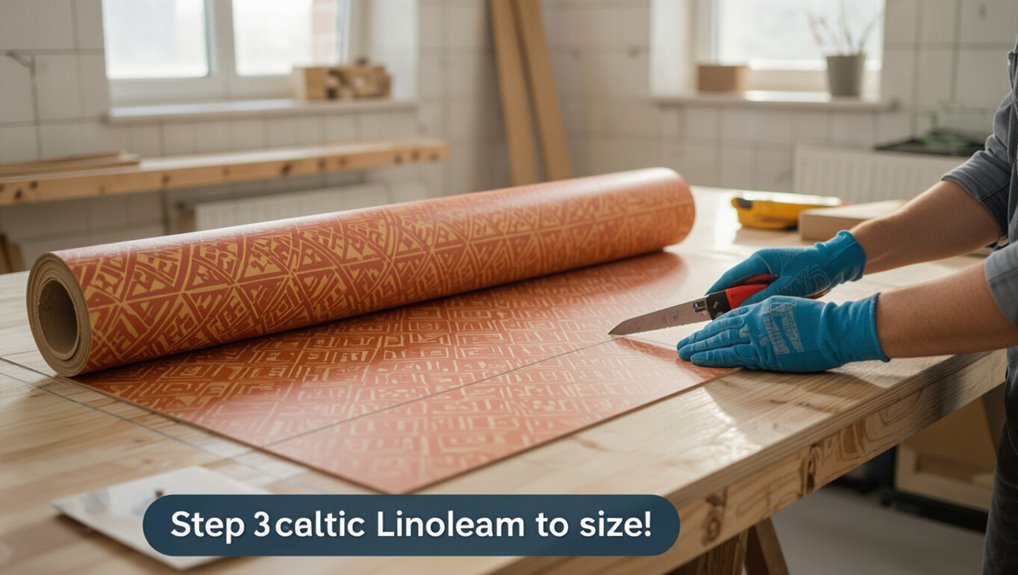
Measure and cut each sheet to those chalked lines, working from the room’s center toward the walls so seams stay true.
Use a straightedge and sharp utility knife for straight cuts; score several passes, then snap the waste away.
For curves, trace with a template, cut slowly, and refine with scissors or a fine knife.
Keep blades sharp and verify fit before trimming edges.
Step 4 Applying adhesive (spread techniques and open time)
With your sheets trimmed and dry-fitted, it’s time to apply the adhesive so the linoleum will bond properly.
Choose the manufacturer-recommended adhesive and a notched trowel size matching the backing.
Spread evenly, maintaining consistent ridges, work in manageable sections, and observe the open time—wait until tacky but not skin-forming.
Clean tools and avoid walking on wet adhesive.
Step 5 Laying linoleum and aligning seams
Now you’ll unroll the first sheet onto the adhesive, pressing it gently into the ridges with a floor roller or a weighted roller to guarantee full contact.
Keep the sheet aligned to your chalk lines and avoid sliding it once it’s set to the adhesive.
Butt seams tightly, use a seam roller and a straightedge, trim excess with a utility knife, and check alignment before proceeding.
Step 6 Rolling and ensuring full contact
Start rolling the floor immediately after laying each sheet to squeeze out any trapped air and force the adhesive into full contact with the backing.
Use a 100–150 lb laminate or linoleum roller, pass slowly in overlapping strokes, then roll again perpendicular.
Check for bubbles, pressing seams and edges firmly.
Repeat rolling after adhesive sets to guarantee continuous bonding and a flat, secure surface.
Step 7 Trimming edges and fitting to fixtures
Measure carefully and trim each sheet so it fits snugly against walls, cabinets, and fixtures—leave about 1/8″ for expansion unless the manufacturer specifies otherwise.
Use a straightedge and sharp utility knife, cutting in several light passes. Tuck edges into gaps with a flexible trim or putty knife.
Fit around pipes and door jambs by notching and trimming; test-fit before final rolling.
Step 8 Seaming techniques and seam sealing
With edges trimmed and test-fitted, you’ll move on to joining sheets so seams stay flat and watertight.
Butt edges tightly, use a straightedge, then roll a seam roller to compress.
Cut a narrow V-groove if recommended, apply manufacturer-approved seam adhesive sparingly, wipe excess, and press with a weighted seam iron or roller.
Allow full cure before traffic.
Step 9 Installing transition strips and trim
Finish the job by installing junction strips and trim to protect edges and create a clean, professional look between linoleum and adjacent floors.
Measure gaps, cut strips to fit, and dry-fit before fastening. Use adhesive or screws per manufacturer instructions, ensuring trim sits flush and won’t catch.
Caulk seams where needed, wipe away excess, and check connections for smooth, safe movement.
Finishing, Curing, and First Use
After installation you’ll need to respect the adhesive cure time and keep the area well ventilated to guarantee a strong bond and reduce odors.
Clean the surface with a manufacturer-recommended cleaner and apply any protective finish if specified.
Wait the full curing period before moving furniture back and allowing only light foot traffic until the floor reaches its final hardness.
Adhesive cure time and ventilation
Although the adhesive may seem dry to the touch within a few hours, you should allow the full manufacturer-recommended cure time—typically 24 to 72 hours—before heavy traffic or moving furniture onto the linoleum.
During curing, keep windows open and use fans to maintain 4–6 air exchanges per hour. Control temperature/humidity per instructions, and avoid sealing the room until odors dissipate.
Cleaning and protective finishes
A damp mop and a soft-bristled broom will be your main tools for keeping linoleum clean during its initial cure and beyond; you’ll want to remove grit and spills gently to avoid scratching the surface while the finish fully settles.
Use pH-neutral cleaner, avoid waxes unless recommended, and apply a manufacturer-approved protective finish sparingly.
Follow curing times before heavy cleaning.
When to move furniture back and light foot traffic
Wait at least 48 hours before moving light furniture back onto newly installed linoleum, and keep foot traffic minimal until the adhesive and protective finish reach their specified cure times.
Use felt pads under legs, lift heavy pieces, and avoid rolling casters for a week.
Check manufacturer cure guidelines; longer waits may be needed for full adhesion or finish hardness.
Clean gently before replacing rugs.
Common Problems and How to Fix Them
You’ll likely run into a few common issues—bubbles or wrinkles, visible seams or misaligned patterns, and adhesive failure with edge lifting—and each has a straightforward fix.
For bubbles and wrinkles you can press out air and reheat or re-adhere the area; for seams or pattern misalignment you can trim, realign, and use seam sealer; for adhesive or edge lifting you’ll clean the substrate, apply the correct adhesive, and roll or weight the edges until set.
Follow the simple repair steps and you’ll restore a smooth, secure floor.
Bubbles and wrinkles causes and remedies
If bubbles or wrinkles appear after you’ve laid linoleum, they’re usually caused by trapped air, inadequate adhesive coverage, or moisture beneath the sheet; diagnosing which is key to fixing them quickly.
For trapped air, roll from center to edge and puncture tiny bubbles to press out air.
For adhesive gaps, lift, reapply adhesive, and firmly roll.
For moisture, remove, dry subfloor, and reinstall.
Visible seams or misaligned patterns correction methods
When seams show or patterns don’t line up, you can correct most issues without ripping out the whole floor by identifying the cause—poor stretching, uneven trimming, or seams that weren’t seated—and then taking targeted steps like re-cutting, realigning, or using seam sealers and heat to snug edges.
Trim ragged edges, re-stretch or lift short sections, clamp seams, and press patterns tight before sealing.
Adhesive failure and edge lifting repair steps
Catch adhesive failure early to prevent curled edges and larger sections peeling up. You can repair lifted edges quickly: clean, dry, inject adhesive, press, and weight. Follow these steps:
- Remove debris and old glue
- Dry the area thoroughly
- Inject recommended adhesive under the lift
- Roll and press firmly
- Weight for 24 hours and trim excess once set
Pro Tips and Best Practices for a Long-Lasting Floor
Keep a simple maintenance routine—sweep or vacuum weekly and spot-clean with manufacturer-approved, pH-neutral cleaners while avoiding harsh solvents or abrasive pads.
Control indoor temperature and humidity to prevent expansion, contraction, and edge lifting, aiming for a stable environment year-round.
Pay attention to small details like tight seams, proper adhesive coverage, and neatly trimmed edges for a truly professional, long-lasting finish.
Maintenance routine and cleaning products to avoid
Although linoleum’s natural resilience makes it fairly low-maintenance, you’ll get the longest life and best appearance by following a simple, consistent care routine and avoiding harsh cleaners that can damage the surface.
Sweep or vacuum regularly, mop with a pH-neutral cleaner, blot spills promptly, and use felt pads under furniture.
Don’t use bleach, ammonia, abrasive scrubs, or oil-based polishes.
Temperature and humidity control for longevity
Along with regular cleaning, controlling the room’s temperature and humidity will help your linoleum hold its shape and finish over time.
Keep indoor temperature between 60–80°F and relative humidity around 35–55%.
Use a humidifier or dehumidifier seasonally to prevent cupping or shrinking.
Sudden swings stress seams and adhesives, so maintain steady conditions and ventilate after spills or wet cleaning for durable results.
Small details that give a professional finish
When you focus on the small details—precise seam alignment, tight trim cuts, and consistent adhesive coverage—you’ll get a floor that looks and lasts like it was installed by a pro.
Use a sharp knife for clean edges, press seams with a roller, wipe excess adhesive immediately, and allow proper curing.
Check junctions, fasten thresholds securely, and protect the new floor during final construction.
Cost, Time Estimates, and When to Hire a Pro
Installing linoleum yourself can save on labor but you’ll still pay for materials and tools, while pros charge more up front for expertise and speed.
Expect a small room to take a few hours to a day if you’re handy, while larger rooms or beginners might need a weekend or more.
Hire a pro if the layout is complex, subfloor repairs are needed, or you want a guaranteed, fast finish.
DIY cost vs. professional installation cost comparison
You can save a significant amount by installing linoleum yourself, but it’s important to weigh material costs, tools, and your time against professional rates; DIY typically costs $1–$3 per square foot for materials plus any tool purchases, while pros usually charge $3–8 per square foot including labor. Consider skill, warranties, and complexity before deciding.
| Option | Typical Cost | Notes |
|---|---|---|
| DIY | $1–$3/ft² | Save money, buy tools |
| Pro | $3–$8/ft² | Faster, warranty |
| Hybrid | Varies | DIY prep, pro finish |
Time estimates by room size and experience level
Because room size and your experience level directly shape how long a linoleum install will take, plan realistically:
Small rooms (up to 100 sq ft) typically take a beginner 4–8 hours; intermediate DIYers 2–4 hours.
Medium rooms (100–300 sq ft) run 1–2 days for beginners, 6–10 hours for experienced DIYers.
Large or complex layouts add another day or more, mainly for cutting and fitting.
When hiring a pro is recommended
If your project involves uneven subfloors, intricate patterns, or a layout with many doorways and seams, plan on hiring a pro—these conditions add time, require specialized tools, and increase the risk of costly mistakes if handled DIY.
Expect pros to charge more for complexity; get written estimates, ask about timeline and warranties, and hire a pro when skill, speed, or guarantees matter.
Frequently Asked Questions
You probably have a few quick questions about linoleum—like whether you can lay it over existing vinyl, how long it lasts with care, and if it’s waterproof.
You’ll also want to know if bathrooms or basements are OK and how to match patterns when replacing a damaged section.
Below are clear, practical answers to those common concerns.
Can linoleum be installed over existing vinyl?
Wondering whether you can lay linoleum over existing vinyl? You can in some cases if the vinyl is smooth, well-adhered, and level.
Remove loose edges, repair seams, and clean thoroughly. Use a suitable underlayment or recommended adhesive for linoleum to guarantee bond and moisture protection.
If the old vinyl is cushioned, damaged, or uneven, remove it first for reliable results.
How long does linoleum last with proper care?
How long will linoleum keep looking good with proper care?
With routine sweeping, damp mopping, and prompt spill cleanup, you can expect 20–40 years from quality linoleum.
Use recommended cleaners, avoid abrasive tools, and refinish or reseal when finish dulls.
Proper underlayment and stable indoor humidity also extend life, so maintain environment and address damage early to preserve appearance.
Is linoleum waterproof?
Is linoleum waterproof? Not completely.
Linoleum’s natural composition resists light spills and moisture, but prolonged exposure can seep through seams or damaged areas. You should seal edges and maintain surface finishes to limit water penetration.
For regular kitchens or mudrooms, occasional spills are fine, but you’ll need vigilant cleanup and proper installation to prevent warping or adhesive failure over time.
Can I install linoleum in bathrooms and basements?
Since linoleum isn’t fully waterproof, you’ll want to weigh risks before putting it in moisture-prone rooms like bathrooms and basements.
You can install it if you control humidity, use a proper vapor barrier, seal seams and edges, and slope wet areas to drains.
For showers or below-grade spaces with chronic dampness, pick a more water-resistant option to avoid warping and mold.
How do I match patterns when replacing a damaged section?
Want a seamless repair? Cut a replacement from leftover roll, matching grain, direction, and pattern orientation.
Use the smallest possible patch from an inconspicuous area. Align print carefully, then tape and trim for a tight seam.
Apply pressure-sensitive adhesive or heat-weld seam for durability. Blend edges with seam sealer or color-matched filler so the repair disappears.