
How to Clean Grout Between Floor Tiles and Keep It That Way
You can restore grout by sweeping and mopping, then applying an appropriate cleaner (baking soda paste, hydrogen peroxide for colored grout, or diluted bleach for white grout), letting it sit, scrubbing with a nylon brush, and rinsing thoroughly. Wear gloves and ventilate the area, test cleaners on a hidden spot, then let grout dry and apply a quality sealer every 6–12 months. Keep spills wiped and mop with a pH-neutral cleaner, and more tips follow below.
How to Clean Grout Between Floor Tiles and Keep It Clean
Now that the grout’s clean, keep it that way with a simple routine you can stick to.
Start by sweeping and mopping regularly, spot-treating stains, and resealing grout every 6–12 months.
Follow these steps and you’ll cut down on deep cleanings and keep tiles looking fresh.
Short step-by-step summary
Start by sweeping or vacuuming the floor to remove loose dirt.
Then tackle stains and scrub grout lines with a cleaner and brush. Rinse and dry, then seal to protect.
- Use a grout cleaner or baking soda paste.
- Scrub with a stiff brush along grout lines.
- Seal every 6–12 months to maintain cleanliness.
Ask yourself: how do you clean grout between floor tiles efficiently?
Basic Understanding What Grout Is and Why It Gets Dirty
Grout is the porous mixture of cement, sand, and sometimes epoxy or additives that fills gaps between tiles, so it soaks up spills and dirt more easily than the tile itself.
You’ll see discoloration from tracked-in soil, soap or cleaning residue, and biological growth like mold or mildew in damp areas.
The type of tile—glazed ceramic, natural stone, or porcelain—changes how much grime reaches the grout and which cleaners are safe to use.
What grout is (materials and porosity)
Think of grout as the mortar between tiles: it’s a cement-based or epoxy compound that fills joints, bonds tiles, and helps keep moisture and dirt out of the substrate.
You’ll encounter sanded, unsanded, and epoxy types—each varies in strength and porosity. Cement grout soaks up moisture and stains more than epoxy, so sealing matters when you’re aiming for long-lasting, low-maintenance joints.
Common causes of grout discoloration (dirt, mold, mildew, residue)
Because grout is porous and often sits where moisture and traffic meet, it attracts more than just dirt—so you’ll notice discoloration over time.
Dirt and grime embed from foot traffic and spills, while soap and cleaning residues leave filmy buildup. Persistent dampness fosters mold and mildew, staining grout dark.
Chemical reactions and mineral deposits from hard water also cause cloudy or rusty discoloration.
How different floor tiles affect grout cleaning needs
When you pick a tile type, you’re also choosing how often and how you’ll need to clean the grout; porous natural stones like unsealed travertine or limestone soak up moisture and stains quickly, while glazed ceramics and porcelain resist penetration and keep grout cleaner longer.
You’ll need sealers for porous tiles, gentler cleaners for delicate stone, and stronger scrubbing for textured surfaces.
Safety and Preparation Before You Clean
Before you start, make sure you’re wearing gloves, eye protection, and that the room is well ventilated to avoid fumes.
Gather a checklist of brushes, scrubbers, pH-appropriate cleaners, and a bucket so you won’t stop mid-task.
Always test any cleaner on a small, hidden patch of grout to confirm it won’t discolor or damage the tile.
Safety gear and ventilation
Gloves, goggles, and a mask will protect you from harsh cleaners and airborne dust while you work on grout.
Open windows and run a fan to keep air moving. Don’t stay in a concentrated chemical cloud; take breaks.
- Ventilate the room before, during, and after cleaning
- Use chemical-resistant gloves and eye protection
- Choose a respirator if fumes are strong
Tools and products checklist
Grab these essentials before you start: a stiff-bristled grout brush or old toothbrush, a bucket, microfiber cloths, a spray bottle, and a small putty knife or grout scraper for stubborn residue.
You’ll also want cleaners and protection. Gather:
- pH-neutral tile cleaner and a bleach-free grout cleaner
- rubber gloves and safety goggles
- a spare towel and a pumice or magic eraser for tough spots
How to test cleaners on a small area
Now that you’ve gathered brushes, cleaners, and protective gear, test any product on an inconspicuous patch of grout and tile to avoid surprises.
Apply a small amount, wait the recommended time, then blot and rinse. Look for discoloration, surface damage, or residue.
If it’s safe, proceed; if not, try a milder cleaner or consult manufacturer guidance before treating larger areas.
Full How-To Cleaning Process
Start by sweeping and vacuuming thoroughly so loose dirt won’t scratch tiles or clog grout.
Then remove surface residue with a neutral-mopping solution, pick a cleaner that fits the stain (organic, bleach, oxygen bleach, or a commercial product), and apply it following recommended dwell times.
Finish by scrubbing the grout with the right brush or an electric scrubber for tougher spots.
Step 1: Dry prep sweep and vacuum
Before you wet anything, give the floor a thorough dry clean: sweep with a stiff-bristled broom to loosen dirt, then vacuum with a hard-floor setting and crevice tool to lift grit from grout lines.
Check corners, edges, and under furniture. Replace or empty the vacuum bag/container as needed.
Repeat high-traffic areas until no loose debris remains, ensuring grout is ready for deeper cleaning.
Step 2: Remove surface residue (mopping with neutral cleaner)
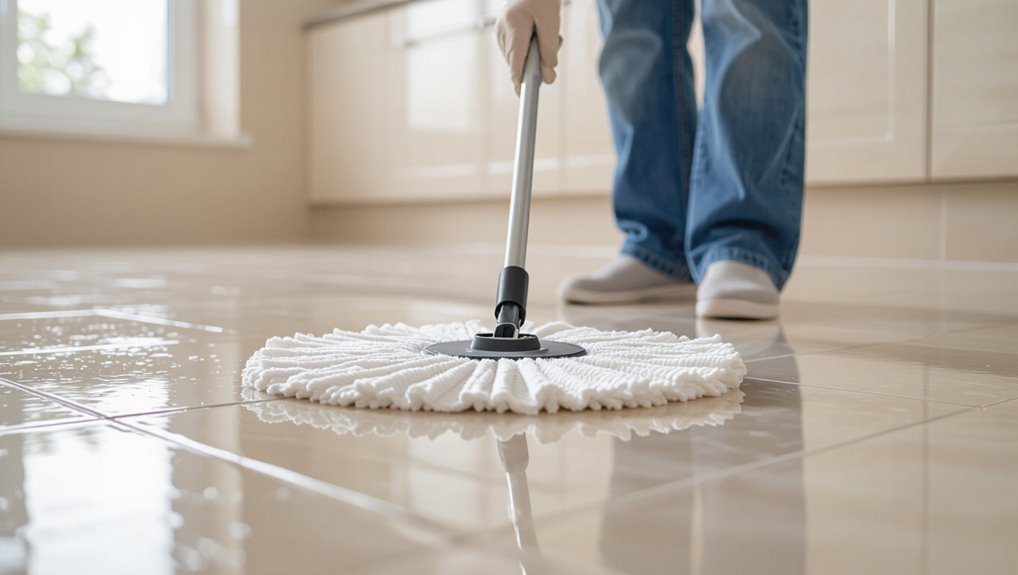
Wet a mop with a neutral pH cleaner diluted per the label and glide it across the tiles to lift surface grime without harming the grout or tile finish.
Work in sections, rinsing or changing the mop water frequently to avoid redepositing dirt.
Let the floor air-dry or buff with a microfiber cloth for streak-free results before any deeper grout work.
Step 3: Choose the right cleaner (organic, bleach, oxygen bleach, commercial)
When you’re ready to tackle stained grout, pick a cleaner that matches the soil and your tile type so you don’t damage the surface or waste effort. Choose organic for mild stains, oxygen bleach for color-safe deep cleaning, and chlorine bleach or commercial for mold on durable grout. Test a small area first.
| Type | Strength | Best for |
|---|---|---|
| Organic | Low | Light soil |
| Oxygen bleach | Medium | Deep stains |
| Chlorine/commercial | High | Mold on durable grout |
Step 4: Apply cleaner and let sit dwell time guidelines
Once you’ve picked the right cleaner, apply it directly to the grout lines and brush or squirt it so the product fully contacts the stained areas; then let it dwell for the recommended time—usually 5–15 minutes for oxygen-based cleaners and up to 10 minutes for organic solutions, while chlorine-based products may need only a few minutes but should never be left to dry on the surface.
Allow full dwell, then rinse.
Step 5: Scrubbing techniques and best tools (brush types, electric options)
Grab the right tool and get ready to scrub: a stiff nylon grout brush or a small-handled toothbrush works for light stains, while medium to heavy buildup benefits from a brass-bristled brush on unglazed grout or a carbide-tipped rotary brush for electric scrubbers—always test a small area first to avoid damage.
Work in short strokes, apply steady pressure, and let the brush reach into joints; replace worn brushes.
Step 6: Rinse and neutralize cleaners
After scrubbing, rinse the grout thoroughly to remove all cleaner residue and loosened grime; you’ll want to work in small sections so the surface stays wet long enough for a complete rinse.
Use clear water and change it often. If you used a chemical cleaner, follow with a mild neutralizer (vinegar diluted or commercial neutralizer) per label, then rinse again until no film remains.
Step 7: Drying and final inspection
Step 7: Let the grout dry fully and then inspect the area closely for any remaining stains or mortar gaps.
Once dry, run your hand over grout lines to feel inconsistencies, and use a magnifier or bright light to spot stains.
Touch up stubborn spots with targeted cleaner or replace missing grout.
Finish by sealing repaired areas to protect against future dirt and moisture.
Deep Cleaning Stubborn or Specialty Stains
When regular scrubbing won’t cut it, you’ll need targeted methods for tough stains like mold, oil, rust, or colored grout discoloration.
You’ll learn when to use bleach or hydrogen peroxide for mildew, which solvents or poultices work on oil and rust, how to treat or restore pigmented grout, and when steam cleaning or a pro is the safer choice.
Follow the right method for each stain to avoid damage and get lasting results.
Removing mold and mildew (bleach vs. hydrogen peroxide)
Mritual stains like mold and mildew need more than soap and scrubbing—you’ll want a targeted disinfectant to kill spores and lift discoloration.
Use diluted bleach (1 part bleach to 10 parts water) for white grout and well-ventilated areas; apply, wait 10–15 minutes, then rinse.
For colored grout or gentler action, use 3% hydrogen peroxide; let it sit, scrub, then rinse.
Removing oil, grease, and rust stains
If oil, grease, or rust has stained your grout, you’ll need stronger, targeted cleaners and a bit of elbow grease to lift them without damaging the tile or grout.
For oil/grease, apply a degreaser or dish soap paste, scrub with a nylon brush, then rinse.
For rust, use a commercial rust remover or a paste of lemon juice and baking soda; test first on a hidden spot.
Cleaning colored or stained grout
After treating oil, grease, or rust, you may still find grout that’s permanently stained or was originally colored to hide dirt — these require a different approach.
For colored grout, test a hidden area with a mild cleaner.
For stubborn pigment or dye stains, use an oxygen-based bleach paste and scrub gently.
If color won’t lift, consider grout paint or epoxy grout restoration for a uniform finish.
When to use steam cleaning or professional services
When should you call in steam cleaning or a pro?
If grout stays discolored after scrubbing, harbors mold you can’t remove, or covers large areas, hire steam or pros. They’ll restore deep-set stains, sanitize, and advise sealing.
Choose licensed services, check reviews, and get written quotes.
Use pros for delicate stone or historic tiles to avoid damage and guarantee lasting results.
Comparison of Common Grout Cleaners and Tools
Now you’ll compare common grout cleaners and the tools used to apply them so you can pick what fits your situation.
Homemade mixes like vinegar, baking soda, or hydrogen peroxide are cheap and accessible but have trade-offs for effectiveness and surface safety.
You’ll also weigh commercial cleaners and grout pens against manual and electric scrubbing tools for speed, cost, and how gentle they’re on different tiles.
Homemade cleaners (vinegar, baking soda, hydrogen peroxide) pros and cons
You’ve probably heard that vinegar, baking soda, and hydrogen peroxide are go-to DIY grout cleaners, and each has clear strengths and limits: you can use vinegar for mild stains, baking soda for scrubbing, and peroxide for whitening, but avoid vinegar on stone.
| Cleaner | Strength | Limitation |
|---|---|---|
| Vinegar | Cuts grease | Damages stone |
| Baking soda | Abrasive lift | Needs scrubbing |
| H2O2 | Whitens | Slower action |
Commercial cleaners and grout pens effectiveness and safety
Although DIY solutions work for mild grime, commercial grout cleaners and grout pens tackle tougher stains faster and with less elbow grease. You should choose based on stain type, tile safety, and ventilation needs. Use gloves, test hidden areas, and follow label directions to avoid discoloration or fumes.
| Product type | Best for |
|---|---|
| Oxygen bleach | Organic stains |
| Grout pen | Recoloring and small touch-ups |
Manual vs. electric scrubbing tools speed, cost, tile safety
When deciding between manual and electric scrubbing tools, weigh speed against cost and tile safety so you get the right balance for your job. You’ll choose manual for delicate tiles and tight spots; electric saves time on large areas but risks grout or glaze damage if too abrasive. Match brush type and pressure to tile material.
| Tool | Speed | Tile Safety |
|---|---|---|
| Hand brush | Slow | High |
| Electric brush | Fast | Variable |
| Rotary machine | Very fast | Lower |
How to Restore or Replace Grout
If deep cleaning can’t remove stains, you’ll need to decide whether to regrout or just restore damaged spots.
I’ll walk you through safely removing old grout, the basic regrouting steps (mixing, applying, and curing), and how to finish with a color seal or grout stain.
With the right tools and timing, you’ll get durable, even-looking grout without surprises.
When to regrout vs. deep clean
Before you grab a grout saw or a bottle of cleaner, determine whether the problem is surface grime or failing grout: deep cleaning can revive discolored but intact grout, while cracked, crumbling, or missing grout needs regrouting to restore waterproofing and strength.
Inspect for hairline cracks, loose grout, or persistent stains after cleaning; choose regrouting if structural integrity or water resistance is compromised.
How to remove old grout safely (tools and steps)
Start by clearing the area and gathering the right tools so you can remove old grout safely and efficiently.
Wear eye protection, gloves, and a dust mask. Use a grout saw, oscillating tool with a grout blade, or a carbide grout removal bit.
Work slowly along joints, keep edges intact, and vacuum debris frequently.
Stop if tile loosens; reassess before proceeding.
Regrouting process overview (mixing, applying, curing)
Mix the grout to a smooth, peanut-butter consistency—follow the manufacturer’s water-to-powder ratio and let it slake (rest) the suggested time—then stir again before you apply.
Pack grout firmly into joints with a rubber float, working diagonally. Remove excess, shape joints with a grout rake or finger, then mist for proper curing.
Allow full cure per instructions before light traffic.
Color sealing or grout stain options
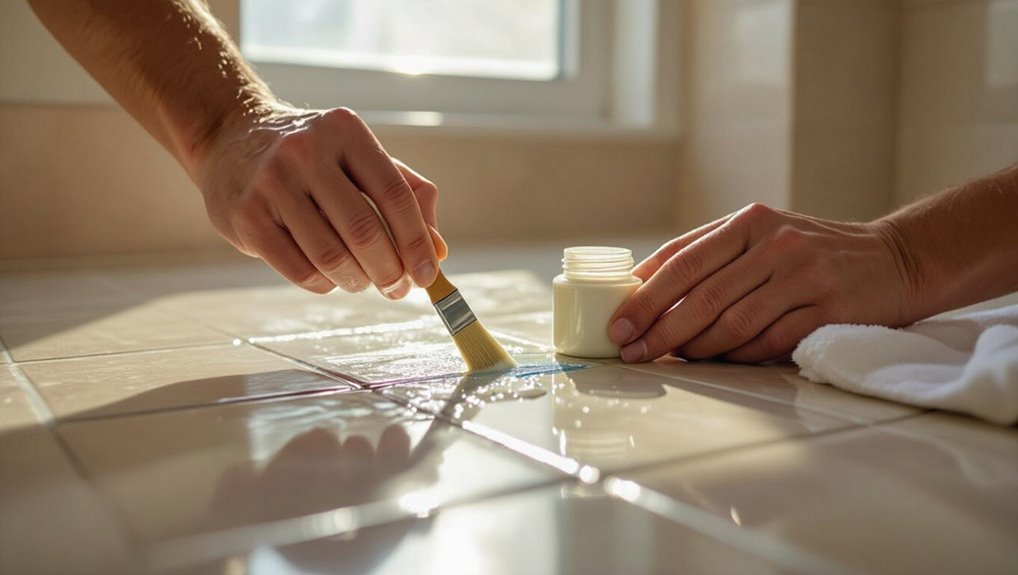
1 simple way to refresh tired grout is to change its color—either by sealing with a tinted sealer or by applying a grout stain—so you can restore uniformity, hide stains, or update the look without regrouting.
Choose water- or solvent-based products, match sheen to tiles, test a small area, apply evenly with a brush or applicator, and seal if required for durability and stain resistance.
Preventive Maintenance Keep Grout Clean Long-Term
To keep grout looking good, you’ll want a simple preventive plan that covers sealing (what type to use and how often), quick daily or weekly cleaning habits, and special care for bathrooms and high-traffic zones.
I’ll also point out common products and routines that speed up grime so you can avoid them.
Follow these steps and you’ll cut down on heavy restorations.
Sealing grout: types, application frequency, and how to seal properly
When you want grout to resist stains and moisture long-term, sealing is the key protective step you shouldn’t skip; choosing the right sealer and applying it correctly will keep grout cleaner and extend its life.
Pick a penetrating sealer for porous grout or a topical sealer for surface protection. Reapply every 1–3 years depending on traffic.
Clean grout, follow manufacturer directions, and use a brush for even coverage.
Daily and weekly cleaning routines
Although sealing and deep cleaning tackle the big problems, keeping grout looking fresh mostly comes down to simple daily and weekly habits you can stick with; wipe up spills immediately, sweep or vacuum to remove grit, and mop with a mild, pH-neutral cleaner once or twice a week to prevent buildup.
- Dry spots after mopping to avoid residue.
- Use a soft brush on grout lines weekly.
- Rinse mop heads often to prevent redepositing dirt.
Tips for high-traffic areas and bathrooms
High-traffic zones and bathrooms demand a bit more attention because moisture and heavy use accelerate grime and staining; you’ll want to adopt a few targeted habits to keep grout lasting and looking clean.
Mop or squeegee shower walls after use, dry floors quickly, place washable mats at entries, clean grout weekly with a gentle brush, and reseal annually to repel moisture and stains.
Products and habits that accelerate grime (what to avoid)
Keeping up those weekly scrubs and yearly reseals helps, but certain products and habits will still speed up grime if you’re not careful.
Avoid oil-based cleaners, waxes, and harsh bleach that break sealers or trap dirt. Don’t mop with dirty water, skip drying, or let spills sit.
Use pH-neutral cleaners, rinse thoroughly, dry tiles, and ventilate to slow grime buildup.
Common Mistakes and How to Avoid Them
Don’t grab the strongest cleaner or a stiff brush without checking first, because the wrong products and over-scrubbing can eat away grout and damage tiles.
Always test cleaners in an inconspicuous spot and ventilate the area to avoid fumes and reactions.
Finally, pick the right sealer and apply it correctly—poor sealing or the wrong type will let stains return faster.
Using the wrong cleaner for your grout/tile
One common mistake is reaching for a cleaner without checking whether it’s safe for both your grout and tile—what works on porcelain can damage natural stone or strip grout sealer.
Always read labels, test in an inconspicuous spot, and choose pH-neutral or manufacturer-recommended products.
If unsure, use mild detergent and warm water.
Avoid bleach or acidic cleaners on sensitive surfaces.
Over-scrubbing and damaging grout or tiles
If you scrub too hard thinking you’ll speed things up, you can actually wear away grout and scratch tiles, especially softer stone or aged grout lines.
Use gentle, circular motions with a soft brush, avoid wire brushes or abrasive pads, and test on an inconspicuous area first.
Let cleaners sit briefly rather than forcing scrubbing, and reapply only as needed to prevent damage.
Skipping testing and ventilation risks
Over-scrubbing can damage grout, but using strong cleaners or working in a closed room can cause different kinds of harm—faded finishes, respiratory irritation, or lingering chemical residues.
You should always patch-test cleaners on an inconspicuous area, follow label instructions, and ventilate while cleaning. Open windows, run fans, and wear a mask if fumes appear.
Stop if surfaces or air feel off.
Ineffective sealing or using the wrong sealer
When grout isn’t sealed properly—or you pick a sealer that’s wrong for your tile—you’ll see stains, water damage, and faster wear despite your cleaning efforts.
Choose a penetrating sealer for porous grout and a membrane sealer for wet areas. Test on a small patch, follow manufacturer cure times, and reapply every few years.
Proper sealing saves time and prevents recurring deep cleaning.
Cost and Time Estimates
Expect a DIY grout cleaning to take anywhere from 1–3 hours per room depending on size and how stained the grout is, while a pro can often finish faster but will add labor costs.
Budget $10–50 for cleaners and basic tools, $50–200 for a good sealer, and $300–800 or more if you need full regrouting or a professional service.
In the next section we’ll break down typical time estimates and price ranges so you can pick the most cost-effective option.
Typical time per room for DIY cleaning vs. professional service
A typical DIY grout-cleaning session for a medium-sized room (about 100–200 sq ft) usually takes you 1–3 hours, depending on how dirty the grout is and whether you need to do spot treatments or full deep-cleaning.
A professional crew can often finish the same room in 30–90 minutes because they use commercial equipment and stronger solutions.
Expect faster results with pros, but you save time by preparing and clearing the room yourself.
Cost ranges for cleaners, tools, sealing, and regrouting
Costs vary widely depending on whether you tackle grout cleaning yourself or hire pros, but you can roughly plan for budget, midrange, and premium options:
| Item | Budget | Premium |
|---|---|---|
| Cleaners/tools | $10–$50 | $80–$200 |
| Sealing | $15–$40 | $50–$150 |
| Regrouting | DIY $20–$100 | Pro $200–$800 |
You can pick based on scale, time, and desired longevity.
FAQ Frequently Asked Questions
You probably have a few quick questions before you start, so let’s answer the most common ones.
You’ll learn how often to deep-clean grout, whether vinegar or bleach will harm colored grout or tiles, and how long sealers typically last.
We’ll also cover whether steam cleaners can damage grout or tile.
How often should I deep clean grout?
Generally, deep clean grout about once or twice a year, though high-traffic or damp areas may need it every 3–4 months.
Check grout quarterly for discoloration, mold, or odor. Spot-treat stains as they appear and do a thorough cleaning before seasonal deep-clean tasks.
If grout looks dingy despite regular care, increase frequency or reseal to protect it.
Is vinegar safe for grout?
If you’ve been deep-cleaning grout regularly, you’ve probably wondered whether common household items like vinegar are safe to use.
Vinegar’s acidity can break down mortar and wear sealant over time, so avoid regular use on unsealed or older grout.
You can use diluted vinegar sparingly on sealed grout for spot cleaning, then rinse thoroughly and reseal as needed to protect the joint.
Will bleach damage colored grout or tiles?
Will bleach strip color from grout or tiles? Yes, it can.
Bleach may lighten pigmented grout and damage some glazed or porous tiles’ finishes.
Don’t use full-strength bleach on colored grout or delicate tile; test a hidden spot first.
For safer whitening, try oxygen bleach or a manufacturer-recommended cleaner, and rinse thoroughly to avoid lingering damage.
How long does grout sealer last?
How long your grout sealer lasts depends on the type of sealer, where it’s applied, and how much traffic and moisture it endures.
Typically, penetrating sealers last 1–3 years in high-traffic or wet areas and up to 5 years in low-traffic spots.
Surface sealers may need reapplying every 1–2 years.
Test periodically and reseal when water no longer beads.
Can steam cleaners damage grout or tile?
After you’ve determined when to reseal grout, you might wonder whether steam cleaners can harm grout or tile.
Steam can loosen grout if it’s already cracked or unsealed, and high heat may damage some glazed or natural stone tiles.
Use low-pressure steam, test a small area, avoid prolonged exposure, and reseal grout first to minimize risk and preserve surfaces.
