
Do You Really Need Underlayment for Laminate Flooring?
You usually need underlayment for laminate unless your planks have a built-in pad and your subfloor is dry, flat, and level; it provides moisture protection, cushioning, sound control, and minor leveling. Concrete, OSB, or uneven plywood almost always require a vapor barrier or specific underlayment, and warranties or manufacturer rules may mandate it. Use the right thickness and type for noise, insulation, and locking systems, and keep gaps for expansion — more details follow if you want.
Do You Really Need Underlayment for Laminate Flooring? Quick Answer
Short answer: sometimes—you’ll need underlayment in many situations but not always.
You should use it when you’re installing laminate over concrete, uneven subfloors, or need moisture or sound protection.
If you’re laying over a smooth, dry, level wood subfloor and the laminate has built-in underlayment, you can sometimes skip it.
Direct short answer (Yes/No nuance based on conditions)
If your laminate floor will sit over concrete, uneven plywood, or you want better sound control and moisture protection, you should use underlayment; if you’re installing over a smooth, dry, and structurally sound floating-floor-rated subfloor and the laminate already has a built-in pad, you can often skip it.
In short: do you have to have underlayment for laminate flooring? Usually yes, unless conditions allow omission.
One-sentence summary of when underlayment is essential
When your subfloor is concrete, uneven, prone to moisture, or you need extra sound or cushioning—or the laminate lacks a built-in pad—you should use underlayment; if the subfloor is smooth, dry, structurally sound, and the planks include padding, you can usually skip it.
You’ll want underlayment whenever moisture control, level correction, insulation, or impact/sound reduction is required for long-lasting, comfortable flooring.
Basic Understanding What Is Underlayment and Why It Matters
Underlayment is the thin layer you lay between subfloor and laminate—commonly foam, cork, felt, or polyethylene—to provide a moisture barrier, sound reduction, cushioning, and minor leveling.
You’ll find some underlayments have built-in vapor barriers, while others focus on acoustics or firmness. For click-lock laminate you usually use a compressible underlayment, whereas glue-down systems may require a specific type or none at all, so check manufacturer recommendations.
Definition and common materials for underlayment
Think of underlayment as the thin, often unseen layer that sits between your subfloor and laminate planks, and serves several key roles: it cushions and levels minor imperfections, reduces noise, provides a moisture barrier when needed, and improves comfort underfoot.
You’ll find common materials include:
- Foam or polyethylene rolls
- Cork sheets or tiles
- Rubber or felt blends
Primary functions: moisture barrier, sound reduction, cushioning, leveling
Because it sits between your subfloor and laminate planks, underlayment performs four essential jobs: it blocks moisture, reduces sound, cushions foot traffic, and evens out small surface imperfections.
You’ll protect the laminate from dampness, cut impact and airborne noise, add a slight feel-underfoot, and mask minor dips or bumps so installation’s smoother and the floor wears more evenly over time.
How underlayment interacts with laminate click-lock systems vs. glue-down
While both click-lock and glue-down laminate rely on underlayment for moisture control, sound reduction, and cushioning, the way you install it and its required properties differ:
Click-lock floors usually need a compressible, slip-resistant cushion that lets planks float and expand, whereas glue-down systems demand a stable, thin underlayment (or sometimes none at all) that won’t compress under adhesive and will maintain a firm bond.
You’ll choose based on movement, adhesive compatibility, and manufacturer specs.
When Underlayment Is Required vs. Optional
Whether you need underlayment depends largely on your subfloor: concrete, plywood, and OSB usually require a proper underlayment to smooth, insulate, and protect the laminate.
You can skip it in some cases—if your planks have a pre-attached pad or you’re floating over a suitable existing floor—but only when the surface meets flatness and moisture conditions.
Also check local building codes and your flooring warranty, because they can legally or contractually require specific underlayment.
Subfloor types that require underlayment (concrete, plywood, OSB)
When you’re deciding if underlayment is needed, the type of subfloor largely determines it:
- Concrete: you must add moisture and vapor barrier underlayment to protect laminate.
- Plywood: usually needs cushioning and minor leveling; underlayment is recommended.
- OSB: requires underlayment for moisture protection and to stabilize seams.
Choosing correct underlayment guarantees warranty compliance and long-lasting performance.
Situations where underlayment can be skipped (pre-attached pad, floating on existing floor)
If your laminate already has a factory-attached underlayment or you’re installing it as a floating floor over a stable, well-cushioned existing surface (like commercial-grade vinyl or certain engineered hardwood), you can often skip adding a separate underlayment; just confirm manufacturer instructions and check for moisture or major unevenness first.
- Verify manufacturer guidance
- Test for moisture and flatness
- Ascertain existing surface is sound
Building codes and warranty requirements affecting necessity
Because local codes and manufacturer warranties often set different expectations, you should check both before deciding on underlayment.
Codes may mandate vapor barriers or specific R-values in basements or over concrete, while warranties can require manufacturer-approved underlayment to keep coverage.
If requirements conflict, follow code for safety and consult the manufacturer to avoid voiding warranty—document approvals before installation.
How to Choose the Right Underlayment
When choosing underlayment, you’ll weigh key features like R-value, IIC/STC ratings, thickness, and moisture resistance to match your room’s needs.
You’ll also pick a material—foam, cork, rubber, felt, or a combo moisture-barrier—based on performance and budget.
Think about the cost versus performance trade-offs so you get the best long-term value.
Key features to consider: R-value, IIC/STC ratings, thickness, moisture resistance
Although underlayment might seem like a minor part of your laminate install, choosing the right one depends on four practical features: thermal resistance (R-value), sound performance (IIC/STC ratings), thickness, and moisture protection.
You should evaluate each based on room use and subfloor. Consider these priorities:
- R-value: comfort and insulation
- IIC/STC: noise reduction for multi-level living
- Moisture resistance and ideal thickness for stability
Underlayment types explained: foam, cork, rubber, felt, combination moisture-barrier products
If you’re weighing underlayment options, match the material to your priorities—foam for affordability and basic cushioning, cork for natural sound control and eco-friendliness, rubber for superior acoustic and moisture performance, felt for added thickness and stability on uneven subfloors, and combination products when you need an integrated moisture barrier.
| Foam | Cork | Rubber |
|---|---|---|
| Cheap | Natural | Dense |
| Basic | Quiet | Resistant |
Cost vs. performance trade-offs
Because your budget and performance needs rarely align perfectly, you’ll need to balance upfront cost against long-term benefits when choosing underlayment.
Consider how much sound reduction, moisture protection, and longevity matter to you. Cheap foam saves money now but may compress or let moisture through.
Higher-priced cork or rubber offers durability and acoustics, reducing replacement and complaints over time.
Prioritize based on room use.
Step-by-Step: Installing Laminate Flooring With Underlayment
Before you start, you’ll inspect the subfloor, test for moisture, and make any needed repairs so the surface is flat and dry.
Next you’ll lay a vapor retarder if required, seam and seal the underlayment, then install the laminate planks over it.
Finish with trims, changes, and acclimation notes to guarantee a stable, professional result.
Step 1: Preparatory steps: inspection, moisture testing, subfloor repair
Start by thoroughly inspecting the room and subfloor so you catch issues that’ll ruin your laminate later: look for loose or squeaky boards, uneven areas, gaps, and signs of water damage.
Then test for moisture with a reliable meter (or a plastic-sheet/adhesive-tape test) and repair or replace any compromised sections before you lay underlayment.
Remove debris, level high spots, fill gaps, and secure boards.
Step 2: Laying the moisture barrier or vapor retarder
Lay a moisture barrier or vapor retarder directly over the prepared subfloor to protect your laminate from dampness that can cause warping, cupping, or mold.
Unroll the barrier perpendicular to your flooring direction, overlap seams per manufacturer instructions, and tape overlaps.
Trim excess at walls, leave recommended expansion gaps, and smooth wrinkles so the barrier lies flat before you proceed to underlayment installation.
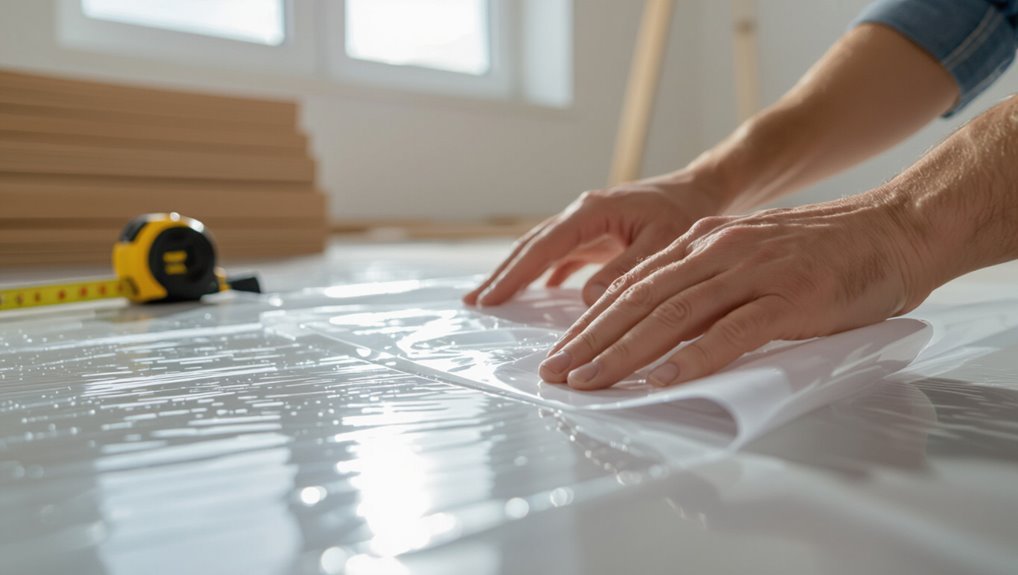
Step 3: Installing the underlayment seams and edge sealing
Carefully align each underlayment sheet so seams meet snugly without gaps, then tape them according to the manufacturer’s guidelines to create a continuous, stable layer; where sheets butt against walls or doorways, trim and seal edges with compatible tape or foam strip to maintain the moisture barrier and guarantee smooth alterations for your laminate.
Check for overlaps, press tape firmly, and seal connections around vents.
Step 4: Installing laminate planks over underlayment
Begin by positioning your first row of laminate with the tongue side facing the wall, leaving the manufacturer’s recommended expansion gap using spacers.
You’ll work left to right (or right to left depending on the room) and lock each plank into the previous one by angling and snapping the tongue-and-groove together.
Stagger end joints at least 8–12 inches, trim last planks to fit, and tap seams with a mallet and block.
Step 5: Finishing touches: trims, transitions, acclimation notes
Finish strong by installing trims, changes, and checking acclimation to guarantee a neat, functional edge and proper long-term performance.
Fit baseboards and quarter-round without pinching planks, leaving expansion gaps. Use threshold strips at doorways and different floor types.
Confirm moisture levels and room temperature matched manufacturer specs before finishing.
Recheck gaps and secure trims for a polished, flexible installation.
Comparison: Underlayment Options for Common Scenarios
When choosing underlayment, you’ll weigh different needs for concrete, wood, and radiant-heated subfloors because each requires specific moisture, cushioning, and heat-transfer properties.
You’ll also pick materials tailored for soundproofing, moisture control, or thermal insulation depending on the room and use.
Below we’ll compare the best underlayment options for those common scenarios so you can make the right choice.
Concrete subfloor vs. wood subfloor vs. radiant-heated floors
Wondering which underlayment suits your project? You’ll pick foam with vapor barrier over concrete, cork or thin foam over wood for stability, and specialized thin, heat-conductive underlayment for radiant-heated floors. Match thickness and moisture protection to subfloor type and floor height.
| Subfloor | Recommended underlayment |
|---|---|
| Concrete | Foam w/ vapor barrier |
| Wood | Cork or thin foam |
| Radiant | Thin heat-conductive underlayment |
Best underlayment picks for soundproofing, moisture control, and thermal insulation
Because underlayment affects sound, moisture control, and warmth differently, you’ll want to match the type to your priorities: dense rubber or bonded fiberglass for superior soundproofing, foam with an attached vapor barrier over concrete to stop moisture, and cork or thicker closed-cell foam to boost thermal insulation without compromising floor height.
Choose based on subfloor and budget:
- Dense rubber or bonded fiberglass for noise reduction
- Foam with vapor barrier for concrete moisture protection
- Cork or thick closed-cell foam for added warmth
Common Mistakes and Problems When Skipping or Installing Underlayment
If you skip or misinstall underlayment, you’ll likely hear squeaks, see uneven wear, or face moisture damage down the line.
Common installation errors—overlapping seams, laying the wrong side up, or using incompatible adhesives—make those problems worse.
After installation, check for gaps, soft spots, or edge lifting to diagnose whether the underlayment is to blame.
Problems from skipping underlayment: squeaks, uneven wear, moisture damage
Skip the underlayment and you’re inviting a handful of avoidable problems: squeaky planks, uneven wear patterns, and accelerated moisture damage.
You’ll hear creaks as boards rub, see high spots wear faster, and risk cupping or delamination from trapped moisture.
Underlayment cushions movement, evens load distribution, and blocks vapor—skip it and you shorten the floor’s lifespan and increase repair costs.
Installation mistakes: overlapping seams, wrong side up, incompatible adhesives
Those mechanical and moisture issues often trace back to basic installation errors with the underlayment itself.
You can cause problems by simple mistakes that compromise performance and warranty.
- Overlapping seams that trap moisture and impede expansion
- Laying the wrong side up, ruining vapor barrier or cushion
- Using incompatible adhesives that degrade foam or adhesive-backed layers
How to diagnose underlayment-related issues after installation

Wondering whether your laminate woes trace back to the underlayment? Check for hollow sounds, uneven spots, or cupping—these signal gaps, compression, or moisture.
Press seams and edges for movement; lift a plank to inspect padding, adhesive, and vapor barrier.
Use a moisture meter across subfloor and surface. If you find dampness, seams, or crushed foam, plan repairs or replacement promptly.
Tips and Best Practices
Decide whether moisture protection or sound control matters most for your room—moisture-first for basements and bathrooms, sound-first for upstairs or open-plan spaces.
Keep your laminate and underlayment clean and dry, check seams and expansion gaps periodically, and replace damaged underlayment promptly to extend flooring life.
Save money by choosing a combined vapor-barrier/sound-control underlayment and shopping mid-range brands that meet R-values and thickness requirements rather than the priciest options.
When to prioritize moisture protection vs. sound control
When should you prioritize moisture protection over sound control?
Choose moisture barriers in basements, over concrete, or where spills and humidity are likely—protecting core and warranty matters most.
Favor sound-dampening underlayment in apartments or upper floors to reduce impact noise.
If both risks exist, use combined vapor-and-acoustic underlayments to balance protection without compromising flooring performance.
Maintenance tips to prolong laminate life with underlayment
Because underlayment protects both the floor and the locking system, regular care will extend your laminate’s life and keep warranties intact.
You should clean gently, control moisture, and avoid heavy loads. Follow these quick practices:
- Wipe spills immediately and use pH-neutral cleaners.
- Maintain indoor humidity between 30–50%.
- Use furniture pads and avoid dragging heavy items across seams.
Cost-saving strategies without sacrificing performance
1 smart way to cut costs without sacrificing laminate performance is to choose the right underlayment for your needs—matching thickness and features (moisture barrier, sound reduction) to the room avoids overpaying for unnecessary extras.
Compare prices, buy quality remnants or rolls on sale, install carefully to prevent damage, and prioritize areas that need protection so you don’t overspend across the whole house.
Decision Checklist: Do You Need Underlayment for Your Project?
Before you start, answer a few quick questions about subfloor type, moisture levels, sound control, and the laminate’s install requirements to guide your choice.
Then compare your answers with sample scenarios—I’ve outlined 46 common homeowner cases with clear recommended actions so you can match your situation.
Use the checklist and scenarios to decide confidently whether underlayment is necessary for your project.
Quick decision flow (questions to answer before installing)
Wondering whether you need underlayment for your laminate flooring?
Answer these quick questions to decide before installing:
- Is your subfloor concrete, plywood, or existing flooring?
- Will you need moisture protection, sound reduction, or height adjustment?
- Are you installing floating planks with manufacturer requirements or warranty conditions?
Use yes/no answers to pick underlayment type and confirm compatibility with your laminate.
Sample scenarios with recommended actions (46 common homeowner cases)
How should you handle underlayment in real-world situations? Use this checklist:
if subfloor is uneven, add 3mm foam;
on concrete, use moisture barrier underlayment;
over radiant heat, pick compatible thin underlay;
soundproofing? Choose acoustic-rated product;
high traffic needs dense underlay;
floating vs glued? Match manufacturer guidelines.
When unsure, consult pros and follow warranty requirements.
FAQs
You’ve probably got specific questions—like whether you can lay laminate directly on concrete, if attached underlayment still needs a moisture barrier, or how much noise reduction to expect.
You’ll also want to know about compatibility with radiant heat and the ideal underlayment thickness.
Below are clear answers to each of these common FAQs.
Can I install laminate directly on concrete without underlayment?
Can you lay laminate directly on concrete without underlayment? You technically can, but it’s risky.
Concrete transfers cold, moisture, and sound; underlayment cushions, levels minor imperfections, and blocks moisture.
If concrete is perfectly dry, level, and sealed, you might skip it, yet most pros recommend at least a moisture barrier or thin foam to protect the floor and improve comfort and acoustics.
Does laminate with attached underlayment still need a moisture barrier?
Wondering if that pre-attached underlayment is enough?
Usually it provides basic cushioning and minor moisture protection, but it often isn’t a full vapor barrier for concrete slabs or high-moisture areas.
You should check manufacturer specs and local conditions; add a separate moisture barrier when required or when warranty demands it.
Better safe than risking warping or mold issues later.
Will underlayment reduce laminate installation noise significantly?
How much quieter will your laminate floor be with underlayment? You’ll notice a measurable reduction in impact and hollow-sounding noise—especially in high-traffic areas.
Foam, felt, or cork underlayments absorb vibration and dampen footsteps, making rooms feel quieter and more comfortable.
Expect variance by material thickness and quality; denser options perform best.
Underlayment won’t eliminate all sound but considerably reduces it.
Can I use underlayment with radiant floor heating?
If you’ve noticed quieter floors with underlayment, you’ll also want to know how it behaves over radiant heat.
Yes—you can use underlayment with radiant systems, but pick one rated for heat transfer and moisture control.
Thin, thermal-conductive foam or cork made for radiant floors works best.
Always follow the flooring, underlayment, and heating manufacturer’s specs to avoid voiding warranties.
How thick should underlayment be for laminate flooring?
What’s the right thickness for underlayment under your laminate?
You’ll typically pick 2mm to 3mm for basic cushioning and moisture control; 1mm works only for very flat subfloors.
Thicker options, 5mm or foam+fiber combos, improve sound and comfort but can affect locking systems.
Always follow manufacturer recommendations and account for subfloor flatness, moisture, and room acoustics when choosing thickness.