How to Clean Oil Off a Floor Without Spreading It Around
Act fast: block the area and stop foot traffic, then cover edges with towels or cardboard so the oil can’t spread. Sprinkle an absorbent like cat litter, cornstarch, or baking soda and let it soak, then work from the outside toward the center and scoop up the waste. Blot remaining residue with paper towels, apply dish soap or a commercial degreaser, scrub gently, then rinse and extract with a mop or wet vacuum. Keep going for surface-specific tips and prevention.
How to Clean Oil Off a Floor Without Spreading It Around
When oil first hits the floor, you’ll want to act fast: blot up excess with paper towels and sprinkle an absorbent like cat litter to keep it from spreading.
Work from the outer edge toward the center as you remove the bulk so you don’t push the stain wider.
If the spill’s large, has penetrated cracks, or involves hazardous fluids, call a professional rather than risking ineffective DIY cleanup.
Best Immediate Actions
Act quickly to contain the spill and keep it from spreading: block traffic away from the area, lay down cardboard or old towels around the edges, and avoid stepping through the oil so you don’t track it farther.
Next, sprinkle absorbent (cat litter or baking soda), press gently, let sit, then scoop up.
For how to clean oil from floor, finish with detergent and warm water rinses.
When to call a professional vs. DIY
If the spill’s small, contained, and you’ve got absorbents and degreaser on hand, you can usually handle it yourself; call a pro if the oil’s pooled near drains, covered a large area, soaked into concrete, or created a hazardous slick you can’t safely control.
You should also hire experts for unknown fluids, persistent odors, insurance claims, or when specialized cleanup and disposal are required.
Understanding Oil on Floors: Types, Risks, and Surfaces
You’ll encounter different oils—motor oil, cooking oil, hydraulic fluid, and grease—and each needs a slightly different approach.
Oil soaks and spreads differently on concrete, tile, wood, laminate, and painted floors, affecting how you clean it.
If you don’t act correctly you’ll risk stains, slippery surfaces, and environmental contamination.
Common types of oil spills (motor oil, cooking oil, hydraulic, grease)
Oil spills come in different forms, and knowing which type you’re dealing with helps you choose the right cleanup method.
You’ll encounter:
- Motor oil — dark, sticky, petroleum-based; stains and slicks.
- Cooking oil — vegetable or animal fats; can go rancid and smear.
- Hydraulic/grease — heavy, viscous, often industrial; clings and resists water.
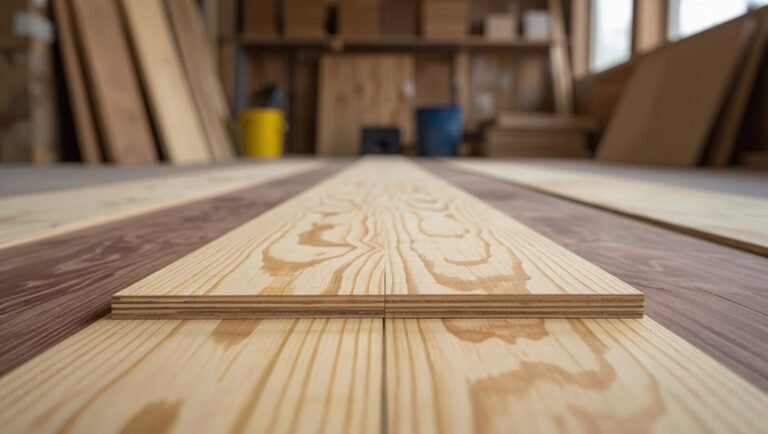
How oil behaves on different floor surfaces (concrete, tile, wood, laminate, painted)
Different spill types call for different responses, and they’ll also behave very differently depending on the floor you’re cleaning. You’ll see oil soak into porous concrete, bead on glazed tile, darken and warp unfinished wood, sit on sealed laminate, and thin on painted surfaces. Use absorbents or gentle cleaners matched to each.
| Surface | Behavior | Cleanup tip |
|---|---|---|
| Concrete | Absorbs | Poultice |
| Tile | Beads | Wipe |
| Wood | Darkens | Mild soap |
| Laminate | Sits | Blot |
| Painted | Spreads | Gentle rinse |
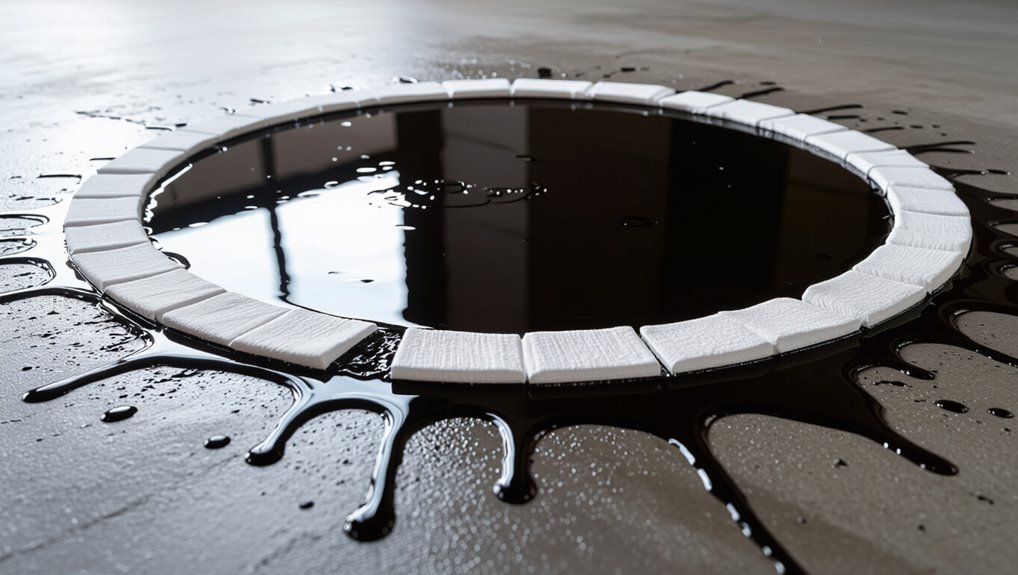
Risks of spreading oil (staining, slip hazards, environmental concerns)
When oil spreads across a floor, it doesn’t just leave a mark — it creates slip hazards, stubborn stains, and potential environmental contamination.
You risk tracked mess, ruined finishes, and long‑lasting dark patches if you smear it. Slips can cause injury; porous surfaces soak oil, making removal harder.
Contaminated runoff harms plants and drains, so contain spills and clean promptly to limit damage.
Safety and Preparation Before Cleaning
Before you start cleaning, put on gloves, eye protection, and make certain good ventilation so fumes don’t build up.
Contain the spill with absorbent barriers or rags to stop it spreading.
Gather your tools—absorbents, scrapers, brushes, detergents, and any binders—so you can work quickly and safely.
Personal protective equipment and ventilation
You’ll need the right protective gear and good airflow to keep yourself safe while cleaning oil off a floor.
Wear gloves, eye protection, and closed-toe shoes; avoid touching your face. Open windows or run a fan to disperse fumes.
Follow this checklist:
- Nitrile gloves
- Safety goggles
- Ventilation (fan or open windows)
Dispose of contaminated PPE properly.
Containment: how to isolate the spill to prevent spreading
Now that you’ve got your PPE on and fresh air moving, stop the oil from spreading so cleanup stays manageable.
Work quickly: block edges with rags or rolled towels, create a perimeter using absorbent socks or temporary barriers, and prevent runoff to drains by plugging or damming them.
Keep traffic away, mark the area, and avoid tracking oil to clean zones.
Tools and materials checklist (absorbents, detergents, scrapers, brushes, binders)
Tools and materials matter—gather them before you touch the spill: You’ll need absorbents, detergents, scrapers, brushes, and binders.
Pick PPE too—gloves, goggles, and a mask. Prepare disposal bags.
- Absorbents: kitty litter or commercial pads.
- Tools: plastic scraper, stiff brush.
- Cleaners: degreaser, water, and rags.
Step-by-Step Cleanup Remove Oil Without Spreading It
Start by containing the spill with barriers and an absorbent perimeter so it can’t spread.
Then blot up excess oil with the right absorbents, gently scrape or lift semi-solid grease, and choose a cleaner suited to your floor.
Agitate with controlled brushing and pressure to lift residue without smearing.
Step 1 Contain the spill immediately (barriers, absorbent perimeter)
Stop the spread immediately by creating a quick barrier around the spill and laying an absorbent perimeter to catch runoff.
You’ll work fast, prevent tracking, and protect drains. Use nearby materials and keep people clear.
- Block edges with rags or boarders.
- Lay absorbent granules or pads around perimeter.
- Funnel runoff toward containment, not drains.
Step 2 Blot and absorb excess oil (best absorbents and techniques)
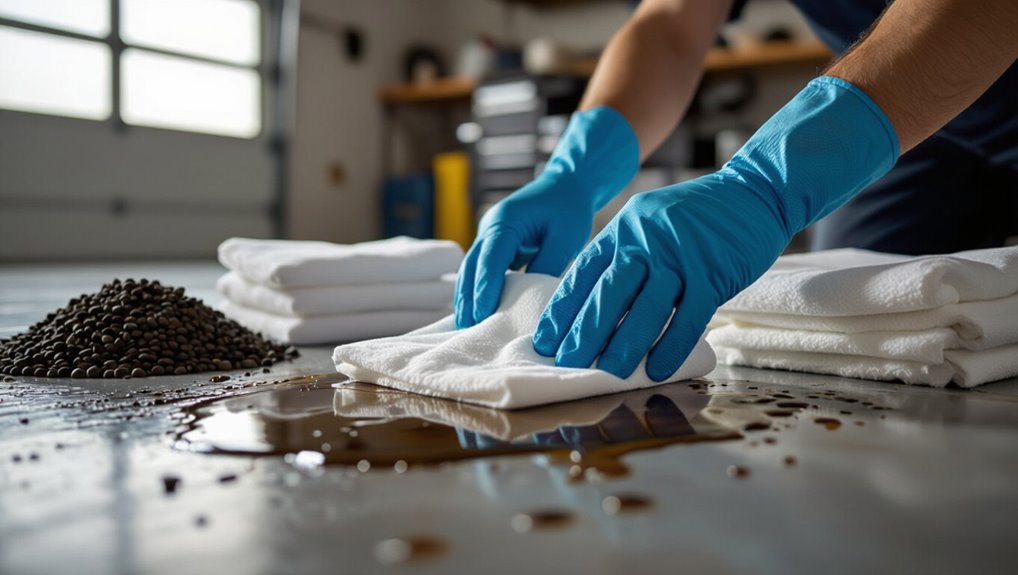
Once you’ve contained the spill, focus on removing as much free oil as possible before it soaks in or spreads.
Blot gently with disposable paper towels or microfiber—don’t wipe. Press repeatedly to lift oil, replacing saturated cloths.
Sprinkle absorbents like kitty litter, sawdust, or commercial granules for remaining sheen; let sit, then scoop or vacuum granules.
Repeat until mostly dry.
Step 3 Scrape or lift semi-solid grease gently (tools and angles)
Gently pry up any semi-solid grease with a flat tool—like a plastic putty knife, old credit card, or a spatula—to avoid gouging the floor or smearing the oil.
Work slowly, keeping the tool nearly flat and lifting at a shallow angle. Collect residue on a disposable scraper or paper towel.
- Angle: 15–30°
- Motion: push then lift
- Dispose: seal and trash
Step 4 Apply the right cleaner for your surface (degreasers, dish soap, solvent options)
Choose a cleaner that matches your floor material and the oil type so you remove grease without damaging the surface. Test a small area, then apply: use citrus or enzymatic degreasers for heavy oil, mild dish soap for fresh spills, and appropriate solvents only on sealed concrete or tile. Rinse and dry thoroughly.
| Surface | Cleaner | Notes |
|---|---|---|
| Sealed concrete | Degreaser | Strong, rinse |
| Tile/vinyl | Dish soap | Gentle, effective |
| Stone/porous | Enzyme | Avoid harsh solvents |
Step 5 Agitate and lift residue without smearing (brushing patterns and pressure guidance)
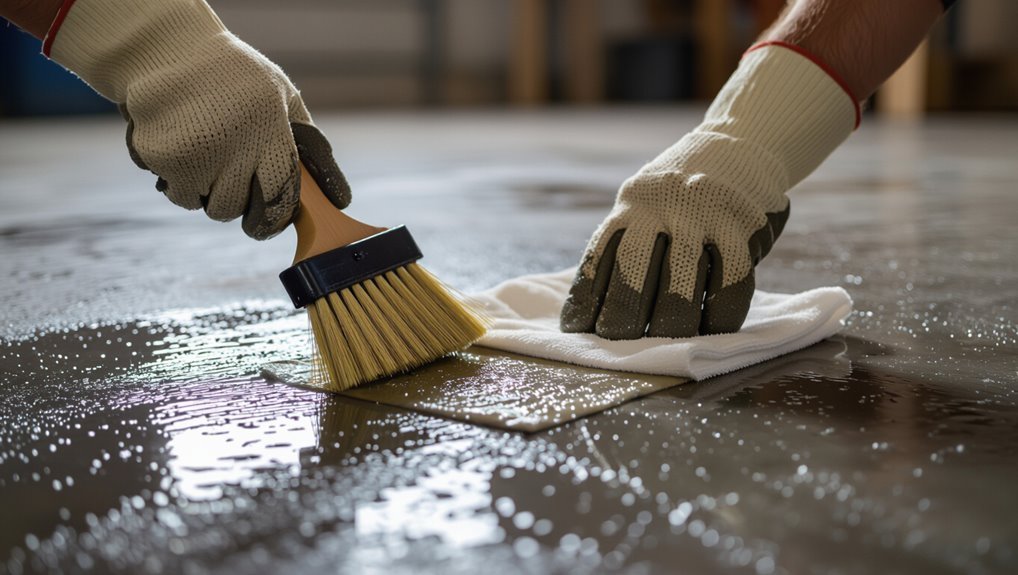
Start scrubbing in short, controlled strokes so you lift oil without spreading it across the floor.
Use a stiff brush for textured surfaces and a soft-bristled brush for delicate floors. Work from the outside of the stain toward the center, apply moderate pressure, and rinse the brush frequently.
Check progress often to avoid smearing and repeat only as needed until residue breaks up.
Step 6 Rinse and extract contaminants (hose, mop, wet vacuum methods)
Once the residue is loosened, rinse it away promptly to keep oil from re-soiling the area.
Use controlled water and extraction to avoid spreading. Follow these steps:
- Hose: direct low-pressure flow toward a drain, not across clean zones.
- Mop: blot outward, change water frequently.
- Wet vacuum: extract pooled slurry, repeat until runoff clears.
Step 7 Drying and final inspection to ensure no spread or residue
After rinsing and extracting the contaminants, dry the area thoroughly and inspect every inch to confirm no oil or residue remains and that you haven’t spread it to adjacent surfaces.
Use absorbent towels, fans, or a wet/dry vac until surfaces are damp-free.
Check seams, grout, nearby walls, and tool soles.
Repeat spot-cleaning if you find streaks, then dispose of soiled materials safely.
Surface-Specific Procedures and Tips
Different floors need different approaches, so you’ll match methods to the surface before you start.
For concrete or garage floors use powder absorbents, pressure washing, or poultices; for tile and grout choose grout-safe cleaners and brightening techniques.
On sealed wood use gentle cleaners with minimal water, on laminate and vinyl stick to solvent-free cleaners and blotting, and on painted or epoxy floors use paint-safe degreasers after spot-testing.
Concrete and garage floors powder absorbents, pressure washing, poultices
Concrete and garage floors are porous and often need more than simple soap and water to remove oil; you’ll get better results by combining powder absorbents, pressure washing, and targeted poultices depending on the stain’s age and size.
First, blot fresh spills with cat litter or sawdust.
For set stains, apply a poultice of degreaser and baking soda, then rinse with a fan spray pressure washer.
Tile and grout grout-safe cleaners and grout brightening techniques
While tile holds up well, grout soaks up oil and grime, so you’ll need grout-safe cleaners and brightening methods that lift stains without damaging joints; choose pH-neutral or manufacturer-recommended products for sealed tile and an alkaline degreaser for unsealed surfaces.
Scrub with a stiff nylon brush, rinse thoroughly, repeat stubborn spots, then apply a grout brightener or oxygen bleach per instructions and reseal grout when dry.
Sealed or finished wood floors gentle cleaners and minimal water methods
Tile grout soaks up oil, but wood reacts differently, so switch to cleaners and methods made for sealed or finished wood floors.
Blot excess oil with paper towels, don’t rub.
Use a pH-neutral wood cleaner diluted per label and a barely damp microfiber mop or cloth.
Dry immediately to avoid swelling.
Test any product in an inconspicuous spot before full use.
Laminate and vinyl solvent-free cleaners and blotting methods
Laminate and vinyl resist oil differently than wood, so start by blotting up as much grease as you can with paper towels—don’t wipe or you’ll spread it—then follow with a solvent-free cleaner made for these surfaces.
Apply cleaner sparingly, work with a soft microfiber, blot stains repeatedly, rinse with a damp cloth, and dry thoroughly.
Repeat if residue remains; avoid harsh solvents.
Painted or epoxy floors paint-safe degreasers and spot-testing
If your floor is painted or coated with epoxy, treat it differently than vinyl or laminate: blot first, then switch to a paint-safe degreaser designed to avoid softening or discoloring finishes.
Test the product in an inconspicuous spot, wait recommended dwell time, then inspect. If safe, apply sparingly, agitate gently with a soft brush, rinse thoroughly, and dry to prevent streaks or damage.
Homemade Remedies vs. Commercial Products
You can often lift fresh oil with simple home remedies like baking soda, cat litter, cornstarch, and a bit of dish soap.
For older or heavy-duty spills, reach for recommended commercial degreasers and absorbents designed for tougher jobs.
If you care about the planet, look for eco-friendly, biodegradable products that balance strength with lower environmental impact.
Effective home solutions (baking soda, cat litter, cornstarch, dish soap)
Compare common DIY absorbents and degreasers—baking soda, cat litter, cornstarch, and dish soap—against commercial cleaners to decide what’s best for your spill.
You’ll pick a quick, cheap option or something stronger based on surface and stain size.
- Baking soda/cornstarch: absorb fresh oil.
- Cat litter: good for large spills.
- Dish soap: breaks grease for scrubbing and rinsing.
Recommended commercial degreasers and absorbents (when to use)
When a DIY fix won’t cut it, commercial degreasers and specialty absorbents deliver faster, stronger results for tough or large oil stains—especially on porous concrete, garage floors, or when the spill’s been sitting. You’ll choose industrial degreasers for heavy, baked-on oil; use polymer absorbents for liquid pooling and clay-based for fresh spills.
| Product Type | Best Use |
|---|---|
| Industrial degreaser | Baked-on, large stains |
| Polymer absorbent | Liquid pooling |
| Clay absorbent | Fresh spills |
Eco-friendly and biodegradable options
Although commercial products often promise faster results, eco-friendly and biodegradable options can be just as effective for many household oil stains if you choose the right method and act promptly.
You can use baking soda, cornstarch, or cat litter to absorb fresh oil, then scrub with a vinegar and water solution or biodegradable dish soap.
Rinse and repeat until stain lifts.
Mistakes That Spread Oil What to Avoid
Don’t rub an oil stain — you’ll just spread it; blot gently, pick cleaners suited to your floor, and avoid pouring on excess water.
If you notice spreading, stop, blot up loosened oil with fresh absorbent material, and switch to a targeted cleaner or absorbent like cat litter.
Acting quickly and using the right technique will help you undo most accidental spreading.
Common errors (rubbing instead of blotting, wrong cleaners, overwatering)
If you start scrubbing or pour on too much water, you’ll usually make the stain worse instead of better.
Don’t rub—blot gently to lift oil. Choose cleaners made for degreasing; solvents can spread or damage finishes. Limit liquids to avoid seepage.
- Blot, don’t rub.
- Use proper degreasers.
- Avoid overwatering; dab instead.
How to recognize and undo spreading if it happens
When an oil stain starts to spread, you’ll notice a larger, darker halo or wet-looking rings radiating from the original spot and a slippery texture underfoot; act fast to stop further migration by blotting the new edges with absorbent cloths and switching to smaller, targeted dabs rather than broad scrubbing.
Sprinkle baking soda or kitty litter, let absorb, then lift gently and repeat until dry.
Prevention and Maintenance to Avoid Future Spills
To avoid future oil spills, you should use protective measures like drip pans, mats, and trays under vehicles and equipment.
Keep a regular cleaning schedule and consider sealants for porous floors to stop stains and make spills easier to remove.
Store and handle oils properly—tight lids, labeled containers, and secure shelving—to cut the risk of accidents.
Protective measures (drip pans, mats, drip trays)
One simple step you can take to prevent oil stains is to place drip pans, absorbent mats, or drip trays under vehicles and machinery; they catch leaks before oil reaches the floor and make cleanup much easier.
- Choose oil-rated, puncture-resistant pans.
- Position mats where drips concentrate.
- Empty and replace trays regularly to avoid overflow and contamination.
Regular cleaning routines and sealants for porous floors
Because porous concrete and unfinished floors soak up spills fast, you should set up a regular cleaning routine and apply an appropriate sealant to keep oil from penetrating and staining.
Sweep and mop frequently, treat fresh spots immediately, and use degreasers on stubborn residues.
Reseal floors every few years or after heavy use; test sealants on a small area first for compatibility and adhesion.
Proper storage and handling of oils to minimize risk
Keeping your floors sealed and cleaned reduces stains, but preventing spills in the first place is even better.
Store oils in labeled, sealed containers on stable, raised shelves or in spill trays. Use funnels and pumps to transfer fluids, wear gloves, and keep absorbents nearby.
Dispose of oily rags safely in metal cans with lids. Inspect storage regularly for leaks and replace damaged containers.
When to Seek Professional Cleanup
If the spill is large, involves hazardous fluids, or triggers local environmental rules, you should call a professional instead of trying to handle it yourself.
Professionals bring specialized equipment, trained crews, and proper disposal methods that you likely don’t have.
They’ll also manage remediation and paperwork to keep you compliant and safe.
Large spills, hazardous fluids, or environmental regulations
When a spill covers a large area, involves hazardous fluids, or falls under environmental rules, you should call a professional cleanup team right away.
They’ll assess risks, contain contamination, and handle disposal to keep you and the environment safe.
Don’t delay—report to authorities if required, cordon the area, evacuate if instructed, and follow official guidance until experts arrive and secure the site.
What professionals do differently (equipment, disposal, remediation)
Call in professionals because they bring tools, training, and legal know-how that homeowners and routine cleaners don’t.
You’ll get specialized absorbents, pumps, containment booms, and PPE; technicians follow protocols to prevent spread and contamination.
They handle hazardous-waste transport, proper disposal, and soil or concrete remediation.
Hiring pros protects health, limits liability, and guarantees regulatory compliance when simple cleanup won’t suffice.
FAQ
You’ll want to act fast after a spill to reduce staining and make cleanup easier.
Ask whether porous surfaces like concrete or wood can be permanently marked, if bleach is safe to use, how to dispose of oil-soaked absorbents, and what to do for carpet or upholstery.
Below are clear answers and practical steps for each question.
How quickly do I need to act after an oil spill?
How fast you act matters a lot: treat an oil spill as immediate—clean up within minutes to prevent spreading, staining, or slipping hazards.
Start by containing edges, blotting excess with absorbent material, then apply the right cleaner.
The longer you wait, the harder removal becomes and the greater risk of tracking oil elsewhere.
Prompt action limits damage and cleanup time.
Will oil permanently stain porous floors like concrete or wood?
Act fast, and you also reduce the chance of a permanent stain on porous surfaces like concrete or wood.
Porous materials absorb oil quickly; untreated spills can darken and leave long-lasting marks. You can often lift fresh oil with absorbents, degreasers, and scrubbing.
Older, soaked-in stains may be stubborn and need repeated treatments or professional restoration to improve appearance.
Can I use bleach to clean oil off a floor?
Curious whether bleach will remove oil stains? No—bleach won’t break down oil; it’s a disinfectant and whitener, not a degreaser.
Using bleach can damage finishes, discolor materials, and create fumes.
Instead, use absorbents and a proper degreaser or detergent designed for oils.
If you do use chemicals, ventilate, test a hidden spot, and follow product safety instructions.
How do I dispose of oil-soaked absorbents safely?
Wondering what to do with rags, kitty litter, or pads soaked in oil?
Double-bag them in heavy-duty plastic, seal tightly, and label as oily waste.
Don’t toss them in regular trash or compost.
Check local hazardous waste rules — many communities accept used absorbents at collection sites.
For large amounts, contact a licensed hazardous-waste hauler to guarantee safe, legal disposal.
What if the spill is on carpet or upholstery?
If the spill soaks into carpet or upholstery, you’ll need a different approach than you’d for hard floors.
Blot excess oil with paper towels without rubbing. Sprinkle baking soda or cornstarch, let sit 15–30 minutes, then vacuum.
Apply a mild dish soap solution, blot, rinse with a damp cloth, and repeat until faded.
Consider professional cleaning for persistent stains or delicate fabrics.