How to Install a Floor: The Complete Step-by-Step Guide
You’ll start by choosing the right flooring—hardwood, laminate, vinyl, tile, or carpet—then plan layout, direction, and connections. Clear and inspect the subfloor, fix moisture or level issues, and pick underlayment and tools. Follow manufacturer steps for glue, nail, click-lock, or mortar installation, trim edges, install thresholds, and maintain humidity. Troubleshoot gaps, buckling, and loose boards as needed. Keep your timeline and materials checklist handy, and if you keep going you’ll get detailed, step-by-step procedures and tips.
How to Install a Floor and What This Guide Covers
You’ll get a clear overview of the installation steps, who the guide is for, and which rooms and floor types each approach suits.
You’ll also find estimated time, cost ranges, and difficulty levels so you can decide DIY or call a pro.
Use this to match your budget, schedule, and skill level before you start.
Direct Quick Answer: Overview of the Installation Process
Start by deciding the type of flooring you want—hardwood, laminate, vinyl, tile, or carpet—then follow a straightforward sequence: prepare the subfloor, acclimate and layout materials, install underlayment or moisture barrier as needed, lay the flooring according to the manufacturer’s method, trim and finish edges, and complete final cleanup and inspection.
This quick overview shows how to install floor step-by-step so you can plan efficiently.
Who This Guide Is For and Project Scope (rooms, floor types, DIY vs pro)
Although some projects are best left to specialists, this guide is written so you can confidently tackle most common flooring jobs—whether you’re updating a single room, refinishing hardwood throughout a house, or installing new tile in bathrooms and kitchens.
You’ll find clear steps for laminate, vinyl, hardwood, engineered wood, and tile. Use it if you’re a confident DIYer; know when to call a pro.
Estimated Time, Cost Range, and Difficulty Levels
Now that you know which rooms and floor types this guide covers, let’s look at how long projects typically take, what they cost, and how hard they are.
You’ll see quick DIY rooms (hours), full installs (days), budget to premium ranges, and skill levels from easy to expert so you can plan time, money, and help needed.
| Time | Emotion |
|---|---|
| Cost | Confidence |
| Difficulty | Caution |
| Help | Relief |
Basics Types of Flooring and How They Differ
You’ll want to compare common floor types so you can pick the right material for each room.
Consider solid and engineered hardwood for warmth and refinishing options, laminate for budget-friendly looks, vinyl/LVP/LVT for moisture resistance, tile for high-traffic or wet areas, and carpet where comfort and insulation matter.
I’ll outline pros, cons, construction differences, and typical use cases for each.
Hardwoods (Solid vs Engineered): Pros, Cons, and Use Cases
Many homeowners prefer hardwood for its warmth and lasting value, but you’ll want to choose between solid and engineered boards based on where and how you’ll use them. You’ll pick solid for refinishing and longevity; choose engineered for moisture-prone areas and stability.
| Feature | Which to Choose |
|---|---|
| Moisture resistance | Engineered |
| Refinishability | Solid |
| Installation areas | Both |
| Cost | Engineered often lower |
Laminate Flooring: Construction, Advantages, Limitations
Laminate flooring mimics wood or stone using a layered construction—an inner fiberboard core, a high-resolution photographic layer, and a durable wear layer—so you get the look of natural materials at a lower cost and with easier maintenance.
You’ll install it as click-lock planks over an underlayment, enjoy scratch resistance and simple cleaning, but accept limited refinishing and sensitivity to standing moisture.
Vinyl and Luxury Vinyl Plank (LVP/LVT): Variants and Water Resistance
If you liked laminate’s affordability and ease of installation but worry about moisture, vinyl and luxury vinyl plank (LVP/LVT) offer a practical alternative.
You’ll choose between sheet vinyl, vinyl tile, and plank formats; LVP/LVT mimic wood or stone with thicker wear layers.
Many vinyl options are waterproof, making them suitable for kitchens, bathrooms, and basements while remaining easy to clean and install.
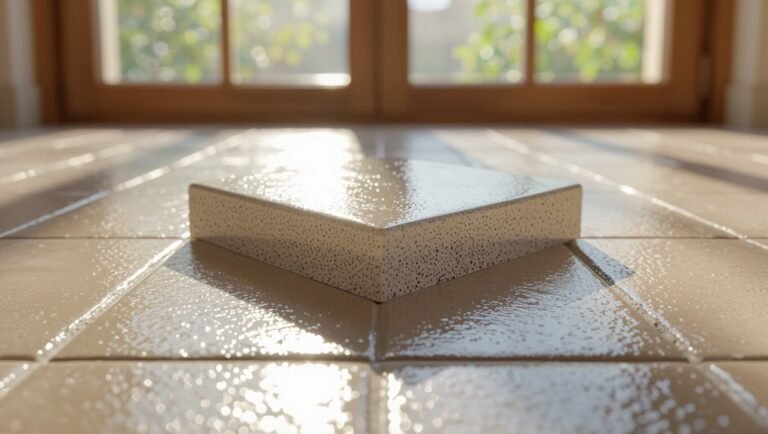
Tile (Ceramic/Porcelain): When to Choose Tile
When you need a surface that stands up to heavy moisture, heat, and frequent cleaning, ceramic and porcelain tile are smart choices; they’re extremely durable, come in a wide range of sizes and finishes, and suit high-traffic areas like kitchens, bathrooms, mudrooms, and entryways.
Choose tile when you want low maintenance, stain resistance, and long lifespan; expect harder underfoot, precise subfloor prep, and professional or careful DIY installation.
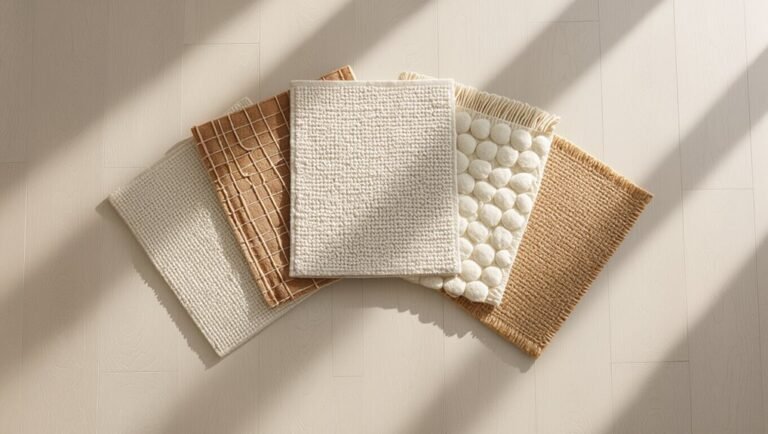
Carpet: Types, Padding, and Suitability
Because carpet adds warmth, sound absorption, and comfort underfoot, it’s a popular choice for bedrooms, family rooms, and other cozy spaces; you’ll pick from loop, cut pile, or frieze based on look and durability.
Match density and thickness to traffic, and always install proper padding for support, insulation, and longevity.
Consider stain-resistant fibers for active households.
Cork, Bamboo, and Specialty Floors: When to Consider Alternatives
Some homeowners want something different from hardwood or carpet, and cork, bamboo, and other specialty floors offer distinct benefits you might prefer.
Consider cork for softness, insulation, and eco-friendliness; bamboo for durability and a hardwood look; reclaimed or resin floors for unique style.
Match choice to moisture levels, traffic, maintenance willingness, and budget.
Test samples in your space before committing.
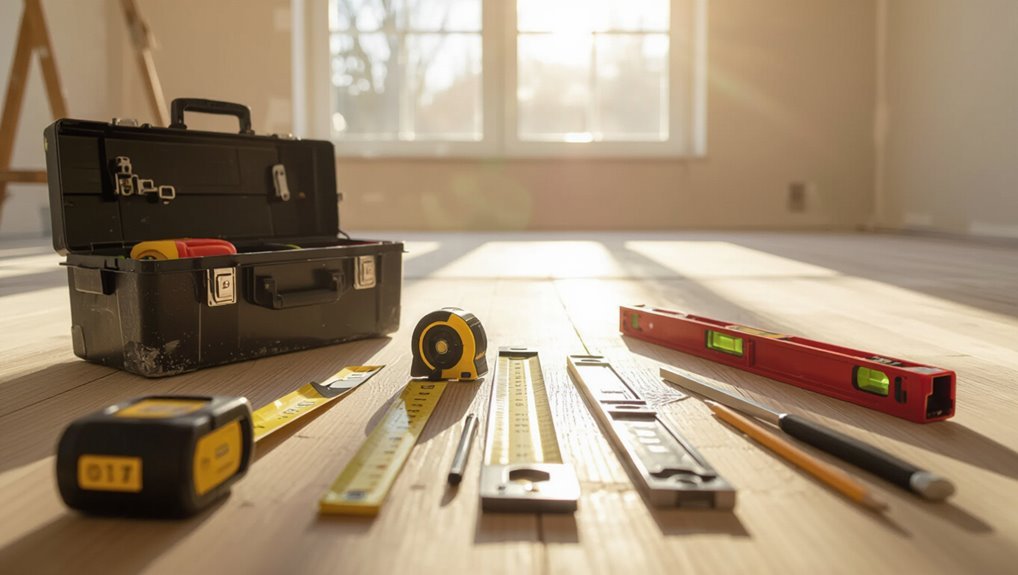
Tools, Materials, and Preparation Checklist
Before you start, gather the essential tools—saws, spacers, tapping block, and a good measuring tape—so you won’t stop mid-job.
Match materials and consumables to your floor type (underlayment, adhesive, trim) and check the room measurements, subfloor condition, and moisture levels.
Don’t forget safety gear and a cleared, well-lit workspace to keep the install smooth and safe.
Essential Tools for Most Flooring Installs
1. You’ll need a concise toolset to work efficiently and safely. Gather basics before starting:
- Tape measure, chalk line, carpenter’s square, utility knife.
- Circular saw or miter saw, jigsaw, pry bar.
- Flooring nailer/stapler, rubber mallet, tapping block.
- Level, floor roller, knee pads, safety glasses, dust mask.
Prepare workspace, charge batteries, and double-check measurements.
Materials and Consumables by Floor Type
While each flooring type has its own needs, you’ll want a clear checklist of materials and consumables so installations go smoothly. Gather adhesive, underlayment, trims, nails, spacers, cleaners, and safety gear. Use this quick visual guide:
| Floor Type | Common Materials | Consumables |
|---|---|---|
| Hardwood | Planks, finish | Nails, filler |
| Vinyl | Rolls/planks, glue | Seam tape, trim |
| Tile | Tiles, thinset | Grout, spacers |
Site Preparation: Room Measurements, Subfloor Inspection, Moisture Testing
Start by measuring the room and inspecting the subfloor so you know exactly what materials and tools you’ll need; take length and width (and any alcoves or cutouts) to calculate square footage.
Then check the subfloor for level, damage, and moisture.
Gather a tape measure, straightedge, level, moisture meter, pry bar, patching compound, underlayment, and appropriate fasteners to address issues before installation.
Safety Gear and Workspace Setup
Before you begin installing flooring, gather the right safety gear and set up a clear workspace so you can work efficiently and avoid injuries.
Wear safety glasses, hearing protection, gloves, knee pads, and a dust mask. Guarantee good lighting, ventilation, and a flat, debris-free area.
Organize tools—saw, tape measure, spacers, hammer, pull bar—and keep materials staged for easy access.
Step-by-Step Installation General Workflow (High-Level Steps)
Before you start, plan the layout, mark changes, and set the order of work so the job flows smoothly.
Then remove old flooring, prep and repair the subfloor, address moisture and level any low spots.
Finally, acclimate your new materials and install the appropriate underlayment or vapor barrier before laying the floor.
Step 0 Planning: Layout, Transition Areas, and Order of Work
Planning sets the tone for a smooth installation, so you’ll want to map out the layout, mark changeover areas, and decide your work sequence before you cut boards or mix adhesives.
Determine start points, plank direction, and staging zones for tools and materials. Identify thresholds, shifts, and door swings.
Sequence rooms to minimize traffic and drying interruptions, and note any access or expansion needs.
Step 1 Remove Old Flooring and Prep Subfloor
Strip out the old flooring and get the subfloor clean, level, and dry—this is the foundation of a successful install.
Remove baseboards, adhesives, nails, and debris; vacuum and sweep thoroughly.
Inspect for rot or loose boards and secure fasteners.
Confirm the surface is smooth and free of contaminants so your new flooring adheres and fits properly.
Proceed when the area’s ready.
Step 2 Leveling, Repairing, and Moisture Mitigation
Now that your subfloor is clean and secure, you’ll check for flatness, repair any damage, and address moisture so the new flooring performs well.
Use a straightedge and filler for low spots, sand high areas, tighten loose boards, and replace rotten sections.
Test moisture with a meter, install a vapor barrier or vapor-retardant primer where needed, and let repairs cure before proceeding.
Step 3 Acclimating Flooring Materials
Because flooring expands and contracts with temperature and humidity, you should acclimate your materials to the room they’ll be installed in before you start laying them.
Unbox bundles, fan out planks or tiles, and stack them off the floor on pallets or supports.
Leave them 48–72 hours (or manufacturer-recommended time), control room temperature and humidity, and check moisture content before starting installation.
Step 4 Underlayment and Vapor Barriers
Step 4 covers laying the underlayment and any required vapor barrier to protect your subfloor and secure a stable, long-lasting finish.
You’ll choose underlayment suited to your flooring and moisture conditions, roll or lay it flat, seal seams with tape, and trim edges.
For vapor barriers, overlap seams and seal penetrations.
Confirm smooth, clean substrate before proceeding to installation.
Step 5 Installation Methods Overview (Nail, Glue, Click-Lock, Mortar)
With your underlayment and vapor barrier in place, you’re ready to choose an installation method and follow a consistent workflow. Decide based on subfloor, material, and traffic. Nail for solid wood, glue for engineered or vinyl, click-lock for DIY, mortar for tile. Plan layout, acclimate, measure, cut, install rows, and check alignment.
| Method | Best For | Notes |
|---|---|---|
| Nail | Solid wood | Requires nailer |
| Glue | Engineered/vinyl | Strong bond |
| Click-lock | Laminate | Floating system |
Step 6 Finishing: Trims, Transitions, Thresholds, and Baseboards
Finish strong by installing trims, connectors, thresholds, and baseboards to protect edges, cover gaps, and give the room a polished look.
Measure and cut pieces precisely, maintain expansion gaps, and fasten trims securely.
Use junctions where floor types meet, scribe baseboards to uneven walls, and seal sensitive seams.
Inspect joints and tighten or replace any loose components for a clean, durable finish.
Step 7 Post-installation Curing, Cleaning, and Care Instructions
1 crucial phase follows installation: curing, cleaning, and care, and you should treat it deliberately to protect your new floor and guarantee long-term performance.
Let adhesives and finishes cure per manufacturer times, avoid traffic and moisture, then clean with recommended products.
Use pads under furniture, maintain humidity, spot-clean spills promptly, and schedule regular gentle maintenance to preserve appearance and durability.
Step-by-Step Guides by Floor Type (Detailed Procedures)
Now you’ll get specific, step-by-step procedures for each floor type so you can follow the right tools and techniques for your project.
You’ll see how to handle engineered and solid hardwood (layout, fastening or nailing patterns, and finishing), laminate and vinyl plank systems (click-lock, loose-lay, or glue-down plus underlayment and expansion gaps), and ceramic/porcelain tile (layout, thinset, grouting, and sealing).
Use these focused instructions to match your materials and avoid common mistakes.
Installing Engineered Hardwood Tools, Layout, Fastening, and Finishing
Before you begin installing engineered hardwood, gather the right tools, plan a precise layout, choose a fastening method, and understand the finishing steps so you can work efficiently and avoid costly mistakes.
Measure and acclimate boards, set expansion gaps, and mark a chalk line. Use glue, floating click, or staples per manufacturer.
Trim, sand edges lightly if needed, then apply recommended finish and allow proper cure time.
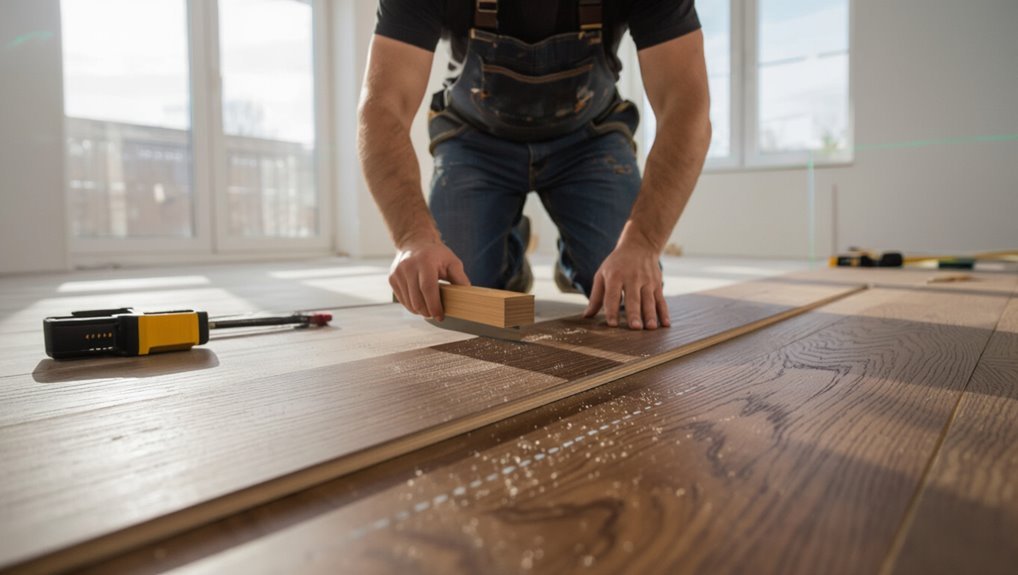
Installing Solid Hardwood Nailing/Stagger Patterns and Sand/Finish Notes
When you’re ready to install solid hardwood, start by choosing the correct nail type and a stagger pattern that prevents end joints from aligning closer than the manufacturer’s minimum (typically 6–8 inches).
Using pneumatic cleats or flooring nails and a properly calibrated flooring nailer will keep boards seated and reduce gaps.
After installation, sand progressively from coarse to fine grits, clean thoroughly, and apply stain and finish per product instructions for even protection and sheen.
Installing Laminate Flooring Click-Lock Process, Expansion Gaps, and Underlayment
Although laminate installs faster than solid hardwood, you still need a clear plan for the click-lock assembly, underlayment selection, and setting correct expansion gaps; doing these steps right prevents buckling, noise, and premature wear.
Lay foam or cork underlayment, stagger seams, angle-lock boards together, tap joints with a block, maintain manufacturer-specified gaps at walls and thresholds, and install threshold moldings to preserve movement.
Installing Vinyl Plank (LVP/LVT) Loose Lay vs Glue Down vs Click Systems
Pick the vinyl plank system that suits your room and skill level—loose lay, glue down, or click—and follow the methodical steps for that type to get a durable, flat result.
For loose lay, acclimate and snap panels in place with perimeter gaps.
For glue down, spread adhesive and press planks, rolling to remove bubbles.
For click systems, use underlayment, stagger seams, and lock boards together.
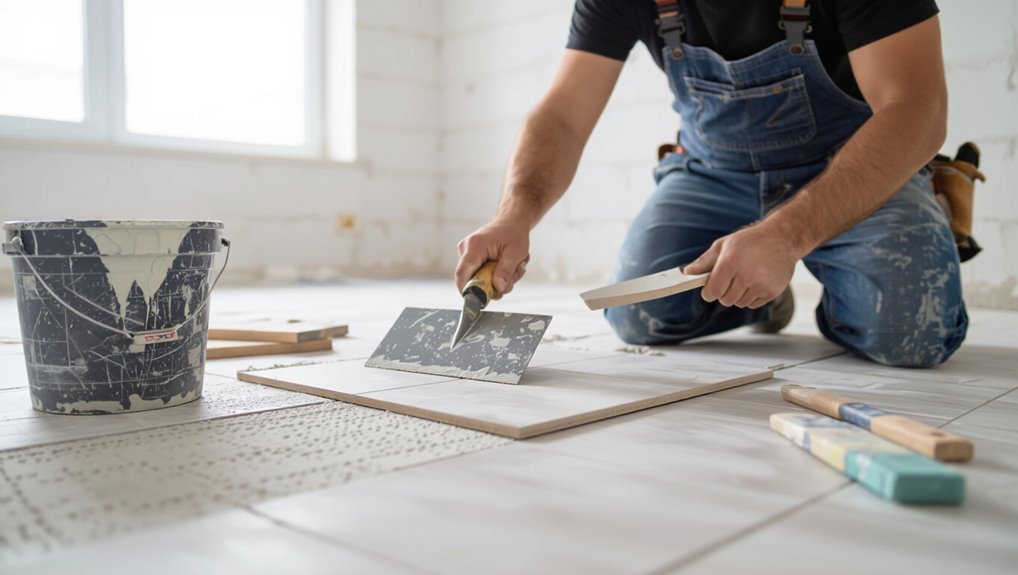
Installing Ceramic/Porcelain Tile Layout, Thinset, Grouting, and Sealing
After you’ve chosen a vinyl system that fits the room and your skill set, hard-surface tiling offers a different set of techniques and tools you’ll want to master for a lasting result.
Plan layout and dry-fit tiles, snap guides, mix thinset to manufacturer specs, trowel and back-butter tiles, maintain spacers, grout after curing, wipe haze, and seal grout and porous tiles to protect and clean easily.
Installing Carpet Tackless Strip, Stretching, Seaming, and Trimming
Start by measuring and preparing the subfloor, then lay out carpet direction and seam locations so you can install tackless strips, stretch the carpet, join seams, and trim edges in a logical sequence; this organized approach prevents puckers, loose spots, and visible seams and saves time during each step.
Secure tackless strips, trim backing, use a power stretcher, heat-seam or hot-melt joiner, and trim edges flush.
Installing Floating Floors Over Imperfect Subfloors Best Practices
Once your carpet edges are trimmed and seams secured, you’ll often face subfloors with dips, bumps, or residue that would cause a floating floor to flex, click, or fail prematurely.
Inspect, clean, and level: sweep, vacuum, remove adhesives.
Sand high spots, fill low areas with self-leveler, and use underlayment with vapor barrier if needed.
Test plank fit and expansion gaps before locking rows.
Common Problems and How to Fix Them
You’ll run into common issues like uneven subfloors that bounce, gaps, buckling or cupping, and moisture-driven failures that all need different fixes.
Learn how to spot visible seams or color variation, diagnose adhesive failures and tile lippage, and decide when repair won’t cut it and replacement’s required.
I’ll walk you through quick detection steps and practical remedies so you can fix problems before they get worse.
Uneven Subfloor and Bouncing Areas Diagnosis and Repair
When your new floor feels springy or you can see gaps and high spots, it’s usually a sign the subfloor isn’t flat or securely fastened.
Walk the area to locate bounce, mark joist spans, and probe for loose spots. Fasten with screws into joists, sister or reinforce weakened joists, and level low areas with plywood or a self-leveling compound before installing finish flooring.
Gapping, Buckling, and Cupping Causes and Remedies
If your floorboards start separating, buckling, or cupping, it’s usually because moisture changes, wrong acclimation, or installation errors created mismatches between the wood and its environment.
Fix gaps by tightening loose boards, adding proper expansion gaps, or refastening with nails/adhesive.
For buckling, relieve pressure, reinstall affected planks with correct spacing.
For cupping, sand high edges and correct humidity and fastening to stabilize.
Moisture-Related Failures Detection and Remediation
Because moisture’s the main culprit behind many floor failures, you need to spot signs early and act decisively to prevent long-term damage.
Look for staining, swelling, soft spots, musty odors, or warping. Test concrete with a moisture meter or tape test.
Fix leaks, improve ventilation, install proper vapor barriers, and allow subfloors to dry fully before installing new flooring to avoid recurrence.
Visible Seams or Color Variation Prevention and Correction
Though seams and color mismatches often seem minor at first, they can quickly draw attention and undermine the whole room’s look, so you’ll want to address them before and during installation.
Inspect planks for shade batches, mix boards from multiple boxes, stagger seams, maintain consistent acclimation, use proper spacers and tight joints, and touch up slight color gaps with manufacturer-approved stains or fillers.
Adhesive Failures and Tile Lippage Fixes and When to Replace
After you’ve handled seams and color consistency, check the floor’s bonding and surface level next—adhesive failures and tile lippage are among the most visible defects and can cause safety or warranty issues.
Probe loose tiles, lift and clean old adhesive, apply manufacturer-recommended adhesive, and press tiles flat.
Shim or sand high edges, regrout if needed.
Replace tiles when cracks, hollow sounds, or persistent movement remain.
Mistakes to Avoid and Best Practices
Before you start, know the top 10 DIY mistakes that commonly ruin installs so you can avoid them.
I’ll share pro tips for getting straight lines, consistent joints, and cleaner cuts that save time and look professional.
Finally, follow simple maintenance best practices to keep your floor lasting years.
Top 10 DIY Mistakes That Ruin Flooring Installs
Everyone makes mistakes the first time they tackle a flooring project, but some errors will cost you time and money—or even ruin the installation.
You’ll avoid trouble by planning, preparing, and following basics. Common pitfalls include:
- Skipping subfloor prep
- Ignoring acclimation
- Using wrong adhesives/fasteners
- Rushing layout and cuts
Pro Tips for Straight Lines, Consistent Joints, and Cleaner Cuts
Mistakes with layout and cuts are common, but getting straight lines, even joints, and clean cuts comes down to technique and the right tools.
Use a chalk line, square, and spacers for alignment. Score before snapping brittle boards. Clamp guides and cut slowly with a sharp blade.
Stagger end joints, check moisture and acclimate materials, and dry-fit rows to confirm consistent gaps before fastening.
Maintenance Best Practices to Prolong Floor Life
A few straightforward habits will keep your new floor looking and performing its best: sweep or vacuum regularly to remove grit, use felt pads under furniture, and place mats at entries to trap moisture.
Wipe spills immediately, avoid harsh cleaners or steam, and refinish or reseal according to manufacturer guidance.
Inspect for damage periodically and address issues before they worsen.
Cost Comparison, Time Estimates, and When to Hire a Pro
You’ll want a clear cost breakdown by material and labor so you can compare options and budget accurately.
Decide whether to DIY or hire based on risk, complexity, and the time you have.
If you choose a pro, I’ll outline how to vet contractors—what to ask, what certifications to check, and red flags to watch for.
Cost Breakdown by Material and Labor
Picking the right material and knowing what you’ll pay for labor can shave hundreds or even thousands off your flooring project. You should compare materials, factor installation hours, and estimate total cost per room. Consider time: DIY saves labor but costs effort. Hire pros for complex layouts or moisture issues.
| Material | Cost/ft² | Install hrs/100ft² |
|---|---|---|
| Vinyl | $1–$4 | 4–8 |
| Laminate | $1–$5 | 6–10 |
| Hardwood | $3–$12 | 10–18 |
When to DIY vs When to Hire: Risk and Complexity Checklist
Now that you’ve compared material costs and installation time, decide whether to DIY or hire by weighing risk, skill, and schedule.
Consider scope, tools, and tolerance for mistakes before committing.
- Small room, basic plank — DIY saves money.
- Complex layout or levels — hire for accuracy.
- Tight schedule — pro finishes faster.
- Limited tools/experience — hire to avoid costly errors.
How to Vet and Hire a Flooring Contractor (questions to ask, certifications)
Wondering how to find a flooring contractor who’s reliable and fairly priced?
Ask for licenses, insurance, and trade certifications; request references and recent photos of similar jobs.
Get detailed written estimates with labor, materials, and timeline.
Compare at least three bids, check online reviews, and confirm warranty terms.
Hire someone who communicates clearly, meets your schedule, and provides a written contract.
Tools and Materials Buying Guide
Before you start, you’ll want to pick the right underlayment and adhesive for your floor type to guarantee durability and proper performance.
I’ll point out reliable brands and key product features to watch for so you can compare options quickly.
Finally, we’ll weigh whether to rent or buy tools based on cost and how often you’ll use them.
How to Choose the Right Underlayment and Adhesives for Your Floor Type
Because underlayment and adhesive choices affect durability, comfort, and installation ease, you should match materials to both your floor type and subfloor conditions before you buy.
For hardwood, use a vapor-retardant underlayment and recommended adhesive; for laminate, choose foam or cork underlay with moisture barrier; for tile, pick cement backerboard or mortar bed and thinset; for vinyl, use smooth, compatible adhesive.
Recommended Brands and Product Features to Look For
When you’re buying tools and materials, pick reputable brands known for consistent quality and good warranties so you don’t end up replacing products mid-project.
Look for corrosion-resistant finishes, ergonomic designs, and clear specs. Compare warranties and customer support. Consider certification marks for adhesives and underlayments.
- Durable finish
- Ergonomic tools
- Clear technical specs
- Strong warranty and support
Renting vs Buying Tools: Cost and Frequency Considerations
If you only need specialty tools for a day or two, rent them instead of buying — it saves money, storage space, and maintenance headaches.
For basic, frequently used items (saws, drills, levels), buy quality pieces you’ll reuse.
Compare rental rates, delivery fees, and depreciation. Track project frequency; when rental costs exceed purchase price, owning becomes smarter and more convenient.
Troubleshooting Quick Reference (Cheat Sheet)
If something goes wrong, you’ll want a quick list of common symptoms, likely causes, and immediate fixes to get the job back on track.
Keep emergency repairs and temporary solutions handy so you can protect the subfloor and prevent further damage until a permanent fix is possible.
Use this cheat sheet to diagnose problems fast and decide whether you can fix them yourself or call a pro.
Symptoms, Likely Causes, and Immediate Fixes
Use this quick-reference cheat sheet to match common flooring symptoms to likely causes and immediate fixes so you can act fast and avoid bigger problems. You’ll see symptom, cause, and quick fix so you can diagnose and stop damage immediately.
| Symptom | Likely Cause | Immediate Fix |
|---|---|---|
| Gaps | Shrinkage | Add spacers, control humidity |
| Cupping | Moisture | Dry area, improve ventilation |
| Squeak | Loose subfloor | Tighten screws, add shims |
| Stain | Spill | Blot, clean per manufacturer |
Emergency Repairs and Temporary Solutions
When a flooring problem threatens safety or causes rapid damage, act fast with simple, temporary fixes you can do right away to stabilize the situation until a permanent repair is possible.
Plug leaks with waterproof tape or a tarp, brace loose boards with screws and clamps, mark hazardous areas, use plywood over weak spots, and remove rugs from damp floors.
Call a pro promptly.
Frequently Asked Questions (FAQ)
You’ll find answers here to common questions like how long installation takes per room and whether you can lay new flooring over existing material.
We’ll cover how to tell if your subfloor needs replacing and the proper expansion gap for floating floors.
You’ll also learn when it’s safe to move furniture back after installation.
How long does a typical floor installation take per room?
How long will a typical floor installation take per room?
It depends on material, room size, prep, and skill.
Small rooms with engineered hardwood or laminate can take a day; larger rooms or tile may need two to three days plus drying or grout time.
Expect extra time for removing old flooring, leveling subfloor, and trim work.
Plan for contingencies.
Can I install new flooring over existing flooring?
Can you install new flooring over existing floors? Yes—often. You can lay vinyl, laminate, or engineered hardwood over stable, level surfaces like tile or plywood.
Remove loose flooring, repair damage, and make sure height won’t interfere with doors or changes.
Follow manufacturer guidelines for underlayment and moisture barriers. Avoid layering over soft, uneven, or water-damaged materials to prevent failures.
How do I know if my subfloor needs replacement?
Wondering whether your subfloor needs replacing? Check for soft spots, sagging, extensive water staining, mold growth, or a musty odor.
Walk across the room—noticeable bounce or creak often means compromised support.
Inspect from below for rot, damaged joists, or widespread termite damage.
Small localized issues may be repairable; widespread deterioration usually calls for full replacement to guarantee a stable finish.
What is the required expansion gap for floating floors?
If your subfloor shows movement or water damage, you’ll also want to pay attention to the expansion gap for a floating floor.
Leave 1/4 to 3/8 inch at walls for small rooms; increase to 1/2 inch for rooms over 25–30 feet or where humidity swings are large.
Follow manufacturer specs and use spacers to maintain consistent gaps.
How soon can I move furniture back after installation?
After installation, wait at least 24–48 hours before moving lightweight furniture back onto most floors so adhesives can set and the surface can acclimate; heavier pieces and area rugs usually need 72 hours to prevent indentations or shifting.
Use felt pads, lift instead of drag, and distribute weight with plywood or sliders for heavy items.
Check manufacturer guidance for specific timelines and warranties.
Project Checklist and Step Sequence for Printing
Before you start printing your project packet, run through a pre-install checklist to confirm materials, measurements, and site prep.
On installation day, follow a clear timeline so each crew member knows their tasks and the sequence of steps.
After the job, use a post-install care checklist to document cleanup, warranties, and any follow-up actions.
Pre-install Checklist
Since you’re about to start the install, gather your project checklist and a clear step sequence for printing so you won’t stall mid-job; this guarantees you have the materials, tools, measurements, permits, and a timeline laid out and that your layout and print files match the floor plan before the first piece goes down.
Confirm:
- Materials count and backups
- Tools and consumables
- Site measurements and tolerances
- Permit and safety checks
Installation Day Timeline
Now that your pre-install checklist is complete and your layout files match the floor plan, map out a clear installation day timeline so the crew knows what to do and when.
Divide tasks by hour, assign roles, and include contingencies. Prioritize safety, sequencing, and material staging.
- Arrival & setup
- Subfloor prep
- Plank installation
- Cleanup & inspection
Post-install Care Checklist
1 clear checklist will help you protect your new floor and extend its life—follow the steps below to handle immediate care, routine maintenance, and warranty obligations in a logical sequence for printing and distribution.
- Remove protective coverings, inspect seams and finish.
- Wait recommended cure time before heavy traffic.
- Clean with approved products; schedule regular maintenance.
- Document installation, keep receipts, and file warranty within deadlines.