How Much Does Floor Installation Cost? What to Expect by Material
You’ll typically pay $1–$15+ per sq ft to install flooring, depending on material, room complexity, and prep work. Laminate and basic vinyl run cheapest ($1–$5), hardwood and higher-end tile cost more ($5–$15+), and carpet sits in the lower midrange. Expect extra for subfloor repairs, removal, stairs, or moisture barriers. DIY can save labor but risks mistakes. Keep measuring and getting quotes — keep going to see itemized breakdowns and smart budgeting tips.
Typical Floor Installation Costs at a Glance
You’ll get a clear snapshot of what flooring costs across different project sizes, starting with national average ranges so you can set realistic expectations.
I’ll include a quick cost-per-square-foot reference table for easy comparisons.
Then we’ll cover the main reasons you might pay more or less in concise summary bullets.
National average cost ranges by project size
Across the country, typical floor installation costs vary by project size, from small 100–200 sq ft rooms to whole-home installs. Knowing these national averages helps you budget realistically.
For a single room you’ll typically pay less than for multiroom or whole-house projects. When asking how much is floor installation, expect scaled pricing: small jobs lower total, larger jobs higher total but often lower per-square-foot.
Cost-per-square-foot quick reference table
Now that you know how project size affects total cost, let’s look at prices on a per-square-foot basis to make comparisons easier. Use this quick reference to gauge material and installation ranges; local labor and prep still vary.
| Material | Typical $/sq ft |
|---|---|
| Laminate | 1.50–5.00 |
| Hardwood | 5.00–12.00 |
When you’ll pay more or less (summary bullets)
Costs shift quickly based on a handful of clear factors, so you can predict when a job will run higher or lower.
You’ll save or spend based on scope, material, and access. Consider these quick triggers:
- Material choice: luxury planks or basic vinyl.
- Subfloor prep: repairs add time and cost.
- Room complexity: stairs, patterns, tight spaces increase labor.
Understanding Floor Installation Costs What’s Included and Why Prices Vary
When you budget for new flooring, you’ll need to account for materials, labor, subfloor prep, removal and disposal, and any finishing work.
Prices change based on the material you pick, room size and access, where you live, and how complex the job is.
Also consider one-time costs like warranties or installation fees versus recurring maintenance expenses.
Components of total cost (materials, labor, subfloor prep, removal, disposal, finishing)
Think of a floor project as more than just the material you walk on; it’s a bundle of distinct costs that add up—materials, labor, subfloor prep, removal and disposal, and finishing.
You’ll pay for product quality, installer time and skill, repairing or leveling the subfloor, hauling old flooring away, and final touches like trim, seals, or stains.
Budget for each component.
Factors that drive price differences (material, room size, accessibility, location, complexity)
Because several variables affect what you’ll actually pay, two identical-looking flooring jobs can end up with very different price tags.
You’ll pay more for premium materials, larger rooms, tight or multi-level access, remote locations, and intricate patterns or changes.
Expect complexity—stairs, removal, uneven subfloors, and custom cuts—to raise labor time and total cost, so get detailed quotes and site inspections.
One-time vs. recurring costs (warranties, maintenance)
Although the upfront price covers materials and installation, you’ll also face one-time and recurring costs that affect a floor’s true lifetime expense.
Expect one-time expenses like delivery, subfloor repair, and extended warranties; recurring costs include cleaning products, occasional resealing or refinishing, and warranty renewals or service fees.
Factor these into comparisons—lower initial cost can mean higher long-term maintenance and replacement spending.
Cost Breakdown by Flooring Material (Main Comparison)
Next, you’ll compare typical cost components and price ranges for common materials: hardwood (solid and engineered), laminate, vinyl (LVP/LVT), tile (ceramic/porcelain), and carpet.
For each, you’ll see material price, underlayment/prep, installation labor, and any extras like finishes or trim that affect the final total.
This side-by-side view will help you match budget and performance.
Hardwood (solid and engineered) cost components and typical ranges
Hardwood flooring costs break down into material, labor, and finishing components, and you’ll usually pay more for solid oak or maple than for engineered boards. You’ll pay $3–$12+/sq ft for materials, $3–$8 for installation, and $1–$4 for sanding/staining; high-grade or exotic species cost more.
| Component | Typical Range |
|---|---|
| Materials | $3–$12+/sq ft |
| Installation | $3–$8/sq ft |
| Finishing | $1–$4/sq ft |
Laminate cost components and typical ranges
Laminate flooring usually costs less than hardwood and breaks down into three main parts: materials, installation, and underlayment/finishing. You’ll pay for plank quality, labor per square foot, and accessories like trim and moisture barriers. Expect mid-range costs overall, with DIY lowering labor but adding time.
| Component | Typical Range |
|---|---|
| Materials | $0.80–$3.00/sq ft |
| Installation | $1.50–$4.00/sq ft |
| Underlayment | $0.25–$1.00/sq ft |
| Extras | $0.50–$2.00/sq ft |
Vinyl (LVP/LVT) cost components and typical ranges
Vinyl plank and tile (LVP/LVT) costs split into three main parts: materials, installation, and underlayment/trim, with durability and finish affecting price more than overall style. You’ll pay $1–$5/ft² for materials, $1–$3 for installation, plus $0.50–$1.50 for underlay/trim. Choose thicker wear layers for heavy traffic; click systems cut install time.
| Component | Low | High |
|---|---|---|
| Materials | $1/ft² | $5/ft² |
| Installation | $1/ft² | $3/ft² |
| Underlay/Trim | $0.50/ft² | $1.50/ft² |
Tile (ceramic/porcelain) cost components and typical ranges
Tile (ceramic or porcelain) usually costs more up front than many other options, but its durability and water resistance make it a long-term value. You’ll pay for tile, thinset/mortar, grout, and labor; prices vary by tile quality and layout complexity. Expect moderate to high material costs and skilled installation for best results.
| Component | Typical Range |
|---|---|
| Tile | $1–$15+/sq ft |
| Mortar/Grout | $0.50–$3/sq ft |
| Labor | $4–$12+/sq ft |
Carpet cost components and typical ranges
Carpet costs vary widely based on fiber, pile, and padding, and you’ll typically pay less up front than for hard-surface floors. You’ll weigh material, pad quality, labor, and removal; stain resistance and warranty affect price. Expect $2–$8/sq ft for basics, $8–$15 for premium. Installation speed and room prep change totals.
| Component | Typical Range | Notes |
|---|---|---|
| Material | $1–$10/ft² | Fiber matters |
| Padding | $0.50–$3/ft² | Comfort, longevity |
| Labor | $0.50–$2/ft² | Depends on room |
| Removal | $0–$1/ft² | Old carpet out |
| Extras | $0–$2/ft² | Stairs, connections |
Natural stone cost components and typical ranges
If you liked carpet for comfort, natural stone will appeal for durability and upscale look—but it costs a lot more up front. You’ll pay for material (marble, slate, granite), professional labor, and substrate prep. Expect wide ranges: $8–$30+/sq ft material, $5–$15+/sq ft installation, plus sealing and transport.
| Component | Typical range | Notes |
|---|---|---|
| Material | $8–$30+/sq ft | Type affects price |
| Labor | $5–$15+/sq ft | Skilled installers needed |
| Extras | $1–$6+/sq ft | Sealing, waste, transport |
Concrete and polished concrete cost components and typical ranges
When you want a durable, low-maintenance floor with an industrial or modern look, concrete and polished concrete are cost-effective options that vary mainly by finish and prep work. You’ll pay for slab repair, moisture mitigation, polishing level, stains/sealers, and labor; ranges run roughly $2–$15+ per sq ft.
| Component | Typical Range |
|---|---|
| Slab prep | $0.50–$5/sq ft |
| Moisture mitigation | $1–$4/sq ft |
| Polishing | $1–$6/sq ft |
| Stain/seal | $0.50–$3/sq ft |
| Labor | $1–$5/sq ft |
Cork and bamboo cost components and typical ranges
Cork and bamboo offer eco-friendly, comfortable alternatives to traditional hardwoods, and you’ll see costs vary based on material grade, plank size, surface finish, underlayment, and installation complexity. You’ll pay $3–8/ft² for cork, $2.50–7/ft² for bamboo; refinishing and moisture barriers add labor and materials.
| Component | Typical Range |
|---|---|
| Material | $2.50–8/ft² |
| Underlayment | $0.50–1.50/ft² |
| Installation | $1–4/ft² |
| Finishing | $0.50–2/ft² |
Room- and Project-Specific Cost Considerations
When budgeting, you’ll need to account for room-specific issues like moisture and tight layouts in kitchens and baths, higher traffic and cushioning needs in living areas and bedrooms, and waterproofing or insulation for basements.
Don’t forget that stairs and multi-level jobs add riser and runner costs, and small jobs can trigger minimum charges while whole-house installs often offer economies of scale.
Planning for these variables up front helps you avoid surprises and choose the right materials and scope.
Kitchens and bathrooms (moisture, layout, fixtures)
Because kitchens and bathrooms face more moisture, heavy foot traffic, and complex layouts, you’ll pay more attention to material choice, waterproofing, and precise installation, all of which drive costs.
Expect premium waterproof materials, moisture barriers, grout sealing, and careful changes around cabinets, islands, and fixtures.
Complex cuts and plumbing access raise labor time, increasing total installation expense.
Living areas and bedrooms (traffic, cushioning)
If you’re installing flooring in living areas or bedrooms, expect costs to reflect foot traffic patterns and comfort needs—high-traffic zones call for more durable surfaces, while bedrooms often prioritize cushioning and sound absorption.
You’ll choose resilient options like hardwood, luxury vinyl, or durable carpet in busy rooms, and softer underfoot choices or added padding in bedrooms, which raises material and labor costs slightly.
Basements and below-grade installations (moisture barriers, insulation)
Although basements stay cooler and damper than main floors, you’ll pay more for below-grade installations because they require moisture barriers, proper insulation, and sometimes a subfloor system to prevent mold and cold spots.
You’ll need vapor barriers, sealants, and foam or rigid insulation under or around the flooring, plus labor for prep and drying time. Expect higher material and installation costs.
Stairs and multi-level jobs (riser/runner costs)
Moving from below-grade prep to stairs and multi-level work, you’ll face different challenges and costs: stair treads, risers, and landings demand more precise cutting, fitting, and finishing than flat rooms.
Expect higher labor rates per step, additional trim, nosing, and extra adhesive or fasteners.
If matching upstairs and downstairs, plan for waste from angled cuts and tight tolerances that add time and cost.
Small jobs vs. whole-house installations (minimum charges, economies of scale)
When you compare small jobs to whole-house installations, you’ll see costs don’t scale linearly: contractors often have minimum charges to cover travel, setup, and mobilization, while larger projects benefit from economies of scale that lower the per-square-foot price.
For small rooms expect higher unit costs and potential minimum fees; for whole-house work you’ll save on material waste, labor efficiency, and scheduling, reducing overall cost.
Step-by-Step: How to Estimate Your Own Floor Installation Cost
Start by measuring each room accurately to calculate square footage. Then pick your material and grade so you know base costs.
Add labor, expected waste, and any extra materials. Include prep work like removal, leveling, or moisture mitigation.
Finally, get multiple quotes and ask contractors about timelines, warranties, and hidden fees so you can compare apples to apples.
Step 1 Measure accurately and calculate square footage
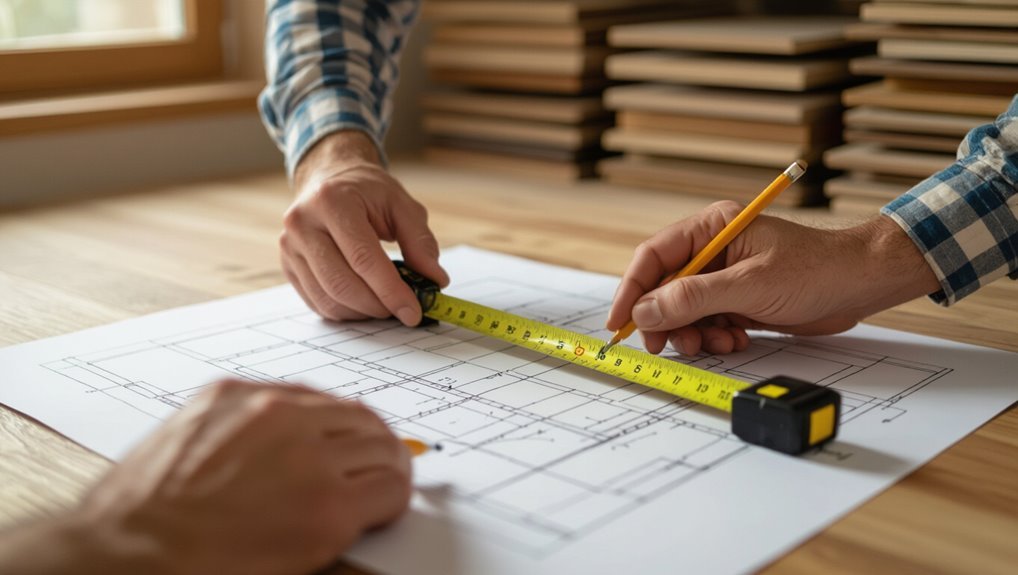
Accurately measuring your space is the foundation for a reliable floor installation estimate, so grab a tape measure, notepad, and calculator before you begin.
Measure length and width of each room, note alcoves and closets, and subtract permanent fixtures.
Multiply area measurements to get square footage, add 5–10% waste for cuts and pattern matching, and record totals for contractor quotes.
Step 2 Choose materials and grade/quality options
With your measured square footage in hand, pick the flooring material and quality level that’ll fit your budget and lifestyle.
Compare durability, maintenance, and appearance across options—hardwood, engineered, laminate, vinyl, tile, and carpet.
Note grade differences: entry-level, mid, and premium affect price and lifespan.
Choose a finish and plank or tile size, balancing upfront cost with long-term value.
Step 3 Account for labor, waste, and extra materials
Now you’ll factor in labor, waste, and extra materials so your estimate reflects real-world costs.
Calculate installer hours by room complexity and local hourly rates.
Add 5–15% for cutting, pattern matching, and breakage depending on material.
Include trim, underlayment, adhesives, and fasteners.
Add a small contingency for unexpected small supplies so your budget won’t get blindsided.
Step 4 Factor in prep work: removal, leveling, moisture mitigation
Before you lay a single plank, evaluate and price the prep work—removal, subfloor leveling, and moisture mitigation—as these steps can change your whole estimate.
Remove old flooring, haul debris, and inspect the subfloor for damage.
Factor in patching, self-leveling compound, and vapor barriers or sealers for basements.
Unexpected repairs and moisture control can add significant time and cost, so budget accordingly.
Step 5 Get and compare multiple quotes (what to ask contractors)
Once you’ve accounted for removal, leveling, and moisture control, it’s time to get multiple quotes so you can compare real-world prices and timelines.
Ask contractors about experience, warranty, and schedule. Request written estimates that break out labor, materials, and contingencies.
Verify insurance and references before committing.
- Experience and portfolio
- Detailed written estimate
- Insurance, warranty, timeline
DIY vs. Professional Installation Cost, Time, and Risk Comparison
You can save a lot by doing floors yourself if the material is forgiving and you have the right skills and tools, but complex materials or large rooms often make pros more economical.
Consider how your skill level, tool needs, and material choice affect time and error risk.
Don’t forget hidden DIY costs like wasted materials, rework from mistakes, and the extra time you’ll spend away from other responsibilities.
When DIY saves money and when it doesn’t
A handful of projects are great DIY candidates, but others eat time, money, and patience fast — and knowing which is which saves you from costly mistakes.
You’ll save when tasks are simple, require little specialized equipment, and you have time.
Don’t DIY when mistakes ruin materials, warranties, or resale value, or when professional speed and guarantees outweigh labor savings.
Skill level and tool requirements by material
Knowing when to tackle a flooring job yourself comes down to the material’s skill and tool demands—some options are forgiving for DIYers, while others repay hiring a pro. You’ll weigh effort, tools, and precision: hardwood and tile need specialized tools and experience; vinyl plank and laminate are more DIY-friendly.
| Material | Skill/Tools |
|---|---|
| Hardwood | High / saws, nailer |
| Vinyl/Laminate | Low / utility knife, spacers |
Common hidden costs of DIY projects (mistakes, rework, time)
While DIY can cut upfront labor bills, mistakes, rework, and extra time can quickly erase those savings and even push costs above hiring a pro.
You’ll face hidden expenses: replacement materials, specialty tools, waste disposal, and lost weekends.
Misaligned flooring or poor underlayment causes repairs and resale hit.
Factor your hourly value, learning curve, and potential warranty loss before committing to DIY.
Common Problems and Extra Costs to Watch For
Before you start, know that hidden issues can quickly push your floor job over budget.
You might face rotten subflooring or structural fixes, moisture or mold remediation, and extra demolition or permit costs.
Older homes can add lead, asbestos, or other hazards that require specialist removal and fees.
Subfloor damage and structural issues
If you find soft spots, sagging, or widespread rot when the old flooring comes up, don’t assume the job will be simple — damaged subflooring and hidden structural issues can quickly add time and cost to your installation.
You’ll likely need joist repairs, sistering, or full subfloor replacement. Expect higher labor, materials, and possible permit costs; get a professional inspection and written estimate.
Moisture and mold remediation
When moisture shows up under your flooring, it can quickly turn a straightforward install into a remediation project with significant extra costs. Mold, mildew, and persistent dampness demand fast, professional attention to protect your new floor and your home’s structure.
You’ll need assessment, drying, mold remediation, and possible subfloor replacement. Expect lab testing, containment, air filtration, and cleanup fees before reinstalling finish flooring.
Unexpected demolition or permit requirements
Although you might budget just for new flooring and installation, unexpected demolition or permit requirements can add substantial time and cost to the job.
You may find subfloor damage, hidden wiring, or load-bearing changes that force extra demo or structural work.
Local codes might require permits, inspections, or licensed contractors—each adding fees and scheduling delays—so get inspections and quotes upfront to avoid surprises.
Lead/asbestos and older-home hazards
Since older homes often contain lead paint, asbestos, or other hidden hazards, you’ll need tests and specialized abatement before installers can safely work.
Plan for inspection fees, hazardous-material removal, and stricter disposal rules that raise costs and timelines.
You’ll also want licensed contractors and documentation for permits or resale disclosures.
Factor these into your budget to avoid delays, fines, or health risks.
Money-Saving Strategies and Best Practices
To keep floor installation costs down, you’ll want to pick a material that fits both your budget and lifestyle so you don’t pay more over time.
Look for timing or bulk-buying discounts and ask contractors for bundled quotes so you get better rates.
Finally, negotiate terms and choose maintenance-friendly options that lower lifetime costs.
Choosing the right material for budget and lifestyle
When you’re choosing flooring, focus on how each material fits your budget and daily life rather than just price per square foot; durable, low-maintenance options like luxury vinyl or laminate can save you money over time in busy homes, while hardwood or tile might make sense where longevity or resale value matters.
Consider traffic, pets, moisture, and cleaning needs, then prioritize longevity, repairability, and warranty.
Timing and bulk-buying discounts
If you can be flexible about start dates, you’ll often score the best prices by buying during slow seasons and waiting for supplier sales or contractor downtime. Retailers and installers drop rates in late winter or early fall, and buying in bulk during those windows can reveal substantial per-square-foot discounts.
Plan purchases to match promotions, consolidate orders to reduce handling fees, and compare unit prices across suppliers to maximize savings.
Negotiating with contractors and getting bundled quotes
Though contractors expect negotiation, you’ll get the best deal by coming prepared: gather multiple bids, know the materials and labor rates, and ask for bundled quotes that combine flooring, underlayment, trim, and installation to lower per-item markup.
Compare warranties, timelines, and payment terms. Negotiate phased payments tied to milestones, request itemized invoices, and leverage competing offers to secure discounts or free upgrades.
Maintenance choices that lower lifetime cost
Because you’ll live with the floor far longer than the installer, making smart maintenance choices upfront saves real money over its lifetime: seal porous surfaces, use proper cleaners, place entry mats, attach felt pads to furniture, and maintain humidity for wood.
Follow manufacturer care schedules, refinish or reseal when recommended, and address damage immediately to avoid costly replacements or larger repairs down the road.
Sample Budget Scenarios and Case Studies
You’ll see three clear budget scenarios to help plan your project: a tight-budget remodel with specific cost breakdowns, a mid-range upgrade showing realistic pricing, and a high-end renovation with premium material and labor figures.
Each case study will list example numbers for materials, labor, and contingencies so you can compare outcomes.
Use these scenarios to pick the approach that matches your goals and adjust the figures for your location.
Tight-budget remodel (example with numbers)
If you’re working with a tight budget, a realistic example helps you see where every dollar goes and what trade-offs you’ll face.
This case study walks through a 300 sq ft living room refresh that keeps costs under $1,200 by prioritizing materials, labor choices, and prep work.
You choose vinyl plank ($450), DIY removal and basic leveling ($150), adhesive and trim ($100), and hire installer for 4 hours ($400), leaving $100 contingency.
Mid-range upgrade (example with numbers)
For a mid-range upgrade, picture a 300 sq ft living room where you want better durability and style without jumping to high-end hardwood.
You pick a quality engineered hardwood at $1,200, professional removal and minor subfloor repair at $400, underlayment and fasteners at $150, professional installation for two days (about $800), and trim plus finishing nails and caulk at $150 — totaling roughly $2,700 with a $200 contingency built in.
You’ll get durable flooring, faster install, and a solid resale appeal; expect two contractors for prep and install, a few days of disruption, and straightforward maintenance.
High-end renovation (example with numbers)
Imagine a 300 sq ft living room outfitted with premium wide-plank hardwood at $6,000, professional removal and extensive subfloor repair at $1,200, sound-reducing cork underlayment and specialty fasteners at $600, high-end two-day installation and finishing at $1,800, and custom trim, staining, and sealants at $700 — a total around $10,300 with a $500 contingency for unexpected issues.
You’ll get superior durability, refined finish, and quieter floors, but expect higher labor and material lead times; it’s an investment in comfort and resale value.
Checklist Before You Hire or Start Work
Before you hire anyone or start work, make sure you’ve got a clear checklist so you don’t face surprises.
Ask contractors the right questions, secure the necessary documents and warranties, and finish basic site prep to keep the project on track:
- Questions to ask contractors
- Documents and warranties to obtain
- Site prep you should complete
These steps’ll save time and money once installation begins.
Questions to ask contractors
What should you ask a contractor before they step into your home?
Ask about experience with your material, timeline, crew size, daily work hours, and site protection.
Confirm permits, how they handle unexpected issues, cleanup, and who oversees the job.
Request a detailed estimate with payment schedule and change-order process.
Ask for references and recent project photos to verify quality.
Documents and warranties to obtain
When you’re lining up a contractor, get all essential documents and warranties in writing so you’re protected if something goes wrong.
Ask for a detailed contract, proof of insurance, licenses, manufacturer warranties for materials, and a workmanship warranty with duration and coverage.
Confirm start/end dates, payment schedule, change-order procedures, and dispute resolution.
Keep originals and scan copies for your records.
Site prep you should complete
If you want the job to go smoothly, clear and prep the room yourself so installers can start on schedule: remove furniture and wall hangings, take up throw rugs and thresholds, empty closets and cabinets near the work area, and relocate pets and fragile items to a safe space.
Sweep and vacuum thoroughly, check for loose baseboards, secure cords, cover vents, and guarantee clear access for materials and trash removal.
Frequently Asked Questions (FAQ)
You’ll find answers here to common concerns like how much new flooring can boost your home’s value and whether it’s cheaper to replace or refinish hardwood.
You’ll also get clear timelines for typical installations and whether quotes usually cover cleanup and disposal.
Finally, we’ll explain what material and labor warranties you should expect.
How much does installing new flooring typically add to home value?
Curious how much new flooring boosts your home’s value? You can typically expect a return of 50–150% of your investment depending on material, quality, and market.
Midrange upgrades like quality vinyl or engineered hardwood often offer strong ROI; luxury materials may add appeal but lower percentage returns.
Focus on durable, neutral choices that match neighborhood standards to maximize resale value.
Is it cheaper to replace or refinish hardwood?
After updating flooring to boost value, you’ll often face the choice of replacing hardwood or refinishing what you have — and the cheaper option depends on the wood’s condition, the finish you want, and labor costs in your area.
If boards are structurally sound with minor wear, refinishing usually costs less.
Full replacement becomes economical only for severe damage, major style changes, or when warranty/new installation is needed.
How long does a typical installation take?
Timing varies by project, but most typical room installations take 1–3 days from start to finish.
You’ll see floors removed, subfloor prep, and new material laid and finished within that window for hardwood, laminate, vinyl, or tile.
Larger spaces, complex patterns, or needed subfloor repairs can add days.
Allow drying time for adhesives and finishes before heavy use to guarantee durability.
Do contractors include cleanup and disposal in quotes?
Do contractors usually handle cleanup and disposal? It depends.
Many include basic cleanup and hauling of old flooring in their quote, but some charge extra for heavy debris, disposal fees, or site-specific needs.
Ask for a written line-item: what’s removed, who hauls it, landfill or recycling costs, and any post-installation cleanup level.
Clarify responsibilities before work begins.
What warranties should I expect for materials and labor?
Cleanup and disposal details lead naturally into warranty questions, since you’ll want to know who’s responsible if something goes wrong after the crew leaves.
Expect separate warranties: manufacturer covers material defects (often 10–25 years for hardwood/laminate; lifetime for some tiles), while installers offer labor or workmanship guarantees (usually 1–5 years).
Get both in writing, note exclusions, and confirm transferability and claim procedures.