How to Attach a Toilet Flange to a Concrete Floor the Right Way
You’ll center the flange over the waste, mark anchor holes, and drill into the concrete with a hammer drill using masonry bits. Clean the surface, insert sleeve anchors or epoxy bolts, then set the flange slightly above the finished floor and secure it with stainless fasteners. Install the wax ring, position closet bolts, dry-fit the toilet, and seal the base with silicone. Follow the rest of the guide for tips on avoiding common mistakes and ensuring long-term stability.
How to Attach a Toilet Flange to a Concrete Floor Quick Answer
You’ll set the flange onto the wax ring or rubber gasket, align it over the drain, and anchor it to the concrete with masonry anchors or epoxy bolts.
Expect about 1–2 hours for the job if you have basic DIY skills; difficulty is moderate because of drilling into concrete.
Have a hammer drill with masonry bit, anchors or epoxy, wrench, level, and safety gear.
Direct summary of the correct method
Start by centering the flange over the drain opening, mark the anchor locations, then drill into the concrete, insert anchors or epoxy, and secure the flange with stainless bolts or screws so it sits flush and level with the finished floor.
You’ll then seal around the flange, align the toilet, torque bolts evenly, and test for a stable, leak-free connection when learning how to attach toilet flange to concrete floor.
Estimated time, difficulty, and tools overview
After you’ve centered and secured the flange, plan on the whole job taking about 1.5–3 hours for most DIYers, depending on concrete hardness and any prep needed.
You’ll need moderate skill—drilling into concrete and sealing properly—but it’s doable with patience. Gather quality tools and follow safety steps.
- SDS hammer drill, masonry bits, anchors
- Wax ring, flange bolts, sealant
- Safety gear, measuring tools, torque wrench
Understanding Toilet Flanges and Why Proper Attachment Matters
A toilet flange is the ring that connects your toilet to the drain and anchors it to the floor, and it also seals the pipe to prevent leaks and sewer gas.
For concrete floors you’ll commonly use cast iron, PVC, brass, or a repair ring, each chosen for durability and how they fasten to masonry.
If the flange’s wrong type or isn’t secured and sealed properly, you’ll get wobbling, leaks, broken bolts, or sewage odors that lead to costly repairs.
What a toilet flange is and its functions
Think of the toilet flange as the essential link between your toilet and the drain: it centers and secures the fixture, creates a sealed connection with the waste pipe using a wax ring or gasket, and provides mounting points to fasten the toilet to the floor—so if the flange’s misaligned, cracked, or loose, you’ll get leaks, odors, wobbling, or sewer-gas entry.
You’ll also rely on it to maintain proper alignment, support weight, and enable a tight, lasting seal.
Types of flanges suitable for concrete floors (cast iron, PVC, brass, repair rings)
One clear choice when working with concrete floors is cast-iron flanges because they match older drain lines and stand up to heavy use, but you’ll also find PVC, brass, and repair-ring options that suit different pipe materials and repair needs. Pick cast iron for durability, PVC for ease, brass for corrosion resistance, and repair rings to salvage damaged seats.
| Type | Best use |
|---|---|
| Cast iron | Older drains, heavy use |
| PVC/Brass | Retrofit, corrosion resistance |
Common failures from improper installation
When a toilet flange isn’t seated or fastened correctly, you’ll quickly run into leaks, wobbling, and sewer gas odors that can damage floor material and pose health risks.
Improper height, loose bolts, cracked flange, or poor seal cause wax ring failure, water damage, warped subfloor, and mold.
You’ll face costly repairs, recurring leaks, and potential structural compromise if you don’t install it square and secure.
Preparation Assessing the Existing Conditions
Start by inspecting the flange, waste pipe, and surrounding concrete for cracks, corrosion, or gaps that could affect a seal.
Measure the flange height, offset, and bolt hole locations so you can match a replacement or adapter precisely.
Based on those findings, decide whether you can repair the existing flange, need a full replacement, or should use an adapter to bridge mismatched dimensions.
Inspecting the flange, waste pipe, and concrete floor
Before you drill or cut, closely inspect the flange, waste pipe, and surrounding concrete so you know exactly what you’re dealing with.
Check flange cracks, corrosion, warped or missing bolts, and gasket condition.
Probe the waste opening for obstructions or offset fittings.
Tap the concrete for hollow spots, note chips or spalling, and mark any sections needing repair before mounting the new flange.
Measuring flange height, offset, and bolt locations
Measure three critical dimensions to guarantee the new flange will sit correctly: the flange height relative to the finished floor, any lateral offset from the waste pipe centerline, and the bolt hole spacing.
You’ll record precise numbers, check for level, and note obstruction points so installation is smooth.
- Measure flange top to finished floor
- Verify centerline offset from pipe
- Record bolt slot spacing and diameter
Determining whether to repair, replace, or use an adapter
When you inspect the existing flange and pipe, decide whether repair, full replacement, or an adapter will give you a reliable seal and proper alignment.
If flange cracks, warped bolt slots, or corrosion compromise fit, replace.
If pipe depth or material mismatches flange, use a flange adapter or extender.
Minor damage or loose bolts can be repaired with epoxy, new hardware, and proper sealing.
Required Tools, Materials, and Safety Precautions
Before you start, gather the right tools and materials: a hammer drill with a diamond or masonry bit, concrete anchors or screws, a saw if cutting is needed, a new flange, wax ring or rubber seal, bolts, epoxy, and any repair ring.
Put on safety gear—safety glasses, gloves, ear protection, and a dust mask—and plan for proper ventilation and dust control when drilling concrete.
Follow concrete-drilling precautions like using the correct bit, starting slowly, keeping the bit cool, and securing the work area to prevent slips or debris hazards.
Complete tools list (drill, concrete anchors, diamond bit, saw, etc.)
You’ll need a compact set of tools and safety gear to attach a toilet flange to concrete: a hammer drill with a 1/4″ or 3/8″ masonry bit, concrete anchors or sleeve/hammer anchors sized to your flange bolts, a diamond hole saw or grinder for cutting the floor or pipe, a reciprocating saw or oscillating multi-tool for stubborn material, a socket set or wrench, a torque screwdriver or driver bit, a utility knife, putty knife, caulk gun, and personal protective equipment — safety glasses, hearing protection, dust mask or respirator, and work gloves.
- Choose anchor type and length for slab thickness.
- Match diamond bit to pipe diameter and concrete hardness.
- Keep spare bits, anchors, and driver bits on hand.
Materials checklist (new flange, wax ring or rubber seal, bolts, epoxy, repair ring)
A clear materials checklist lets you finish the job without backtracking: Gather a new flange sized to your waste line, a wax ring or rubber seal (choose wax for flat surfaces, rubber for slight irregularities), stainless steel closet bolts and nuts, concrete epoxy or anchoring adhesive, a flange repair ring or spacer, and replacement anchor sleeves.
Keep a clean cloth and plumber’s putty handy.
Safety gear and concrete-drilling precautions
When you drill into concrete, wear safety glasses, a dust mask or respirator rated for silica, ear protection, sturdy gloves, and steel-toed boots to protect against flying chips, harmful dust, and heavy tools; secure long hair and avoid loose clothing.
Clamp templates, mark anchor locations, and use a hammer drill with carbide masonry bits.
Ventilate, take breaks, clear dust, and keep bystanders away.
Step-by-Step Installation Attaching a New or Replacement Flange to Concrete
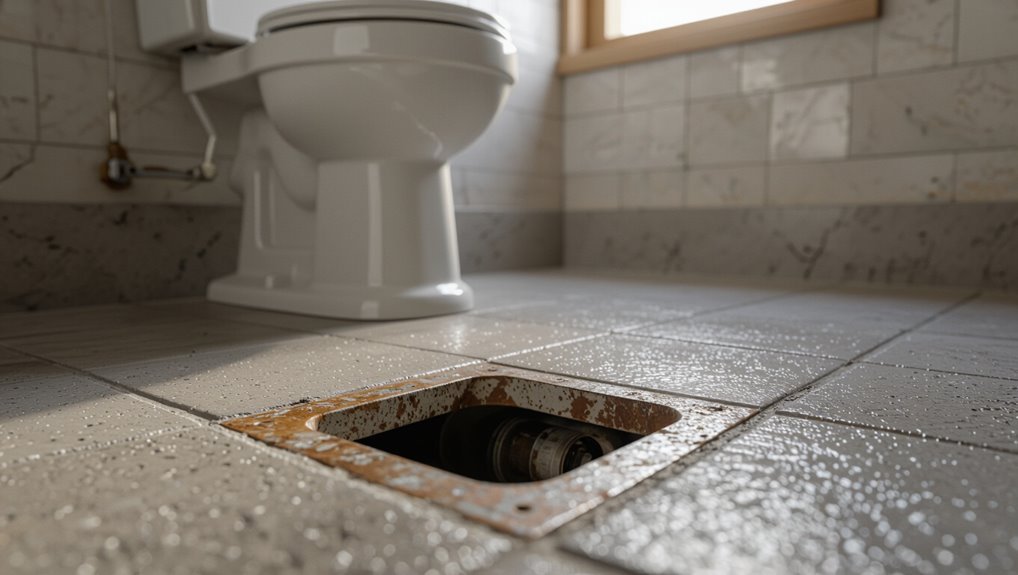
Now you’ll remove the toilet and inspect the existing flange and waste opening for damage or obstructions.
Clean and prep the concrete, then position the new flange and mark the anchor holes.
Finally, drill into the concrete, install anchors or sleeve inserts, and secure the flange with bolts, epoxy, or concrete screws.
Step 1 Remove old toilet and inspect flange/waste opening
Start by turning off the water supply and flushing the toilet to drain the bowl and tank. Then disconnect the supply line and remove the mounting bolts so you can lift the old fixture free.
Inspect the flange and waste opening for cracks, corrosion, or misalignment before proceeding.
- Check flange height relative to finished floor.
- Look for broken bolt slots or missing hardware.
- Confirm waste opening isn’t obstructed.
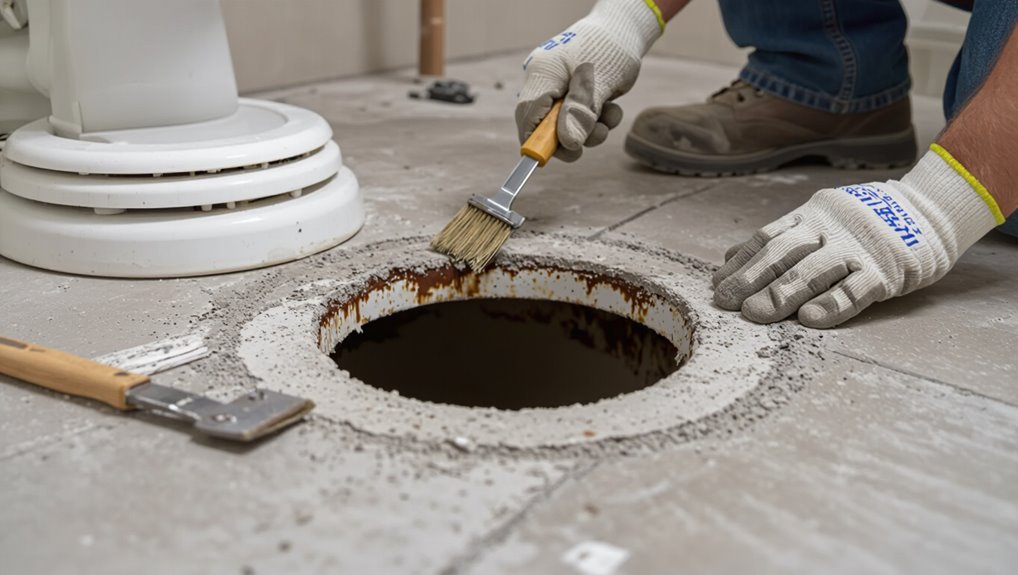
Step 2 Clean and prepare the concrete surface and waste opening
Before you set the new flange, clear and prep the concrete and the waste opening so the flange will sit flat and seal properly.
Remove debris, old wax, and loose mortar with a scraper and vacuum.
Chip away uneven concrete edges, then smooth with a masonry grinder or sandpaper.
Dry the area, inspect for cracks, and repair with hydraulic cement before proceeding.
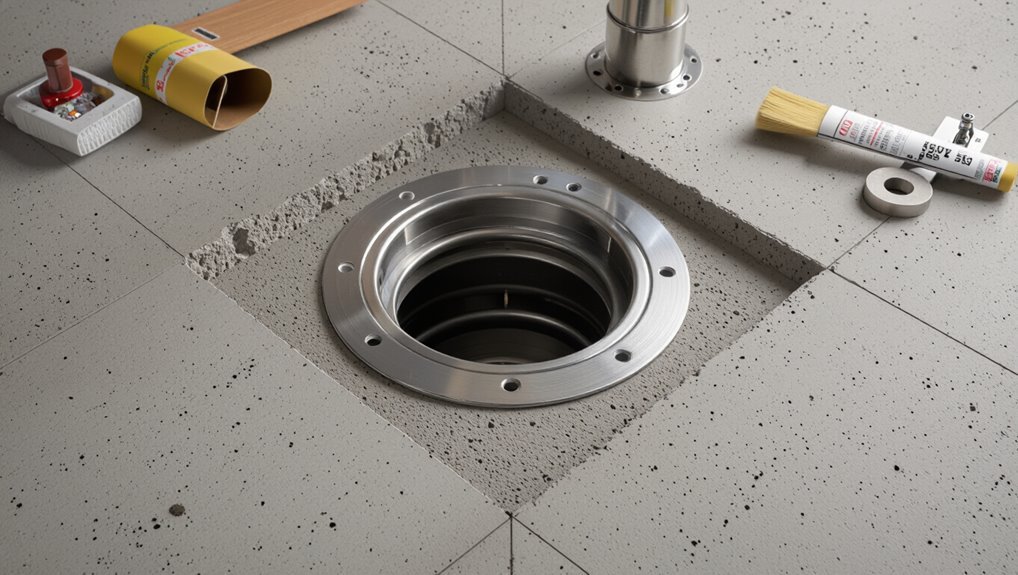
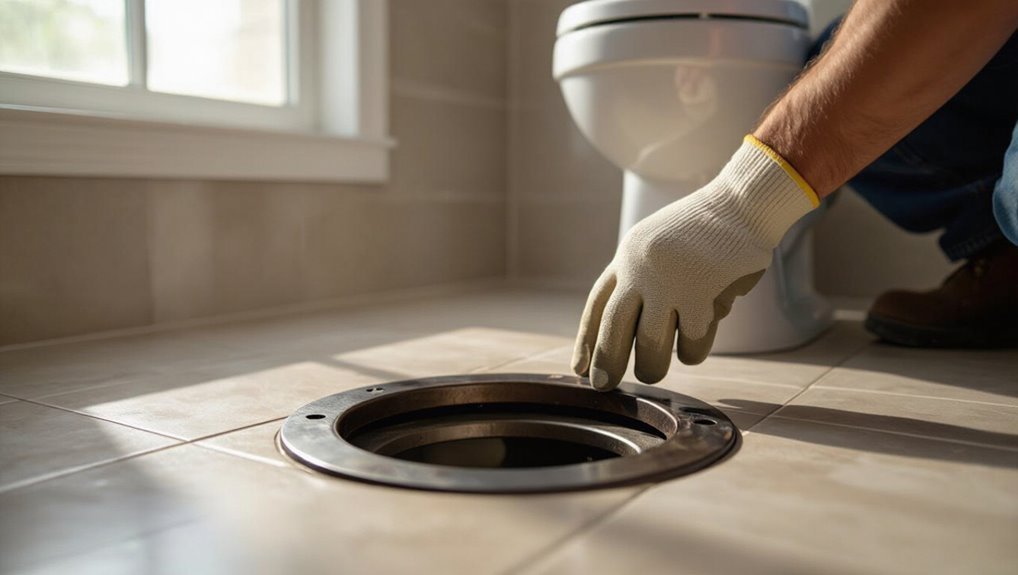
Step 3 Positioning the new flange and marking anchor locations
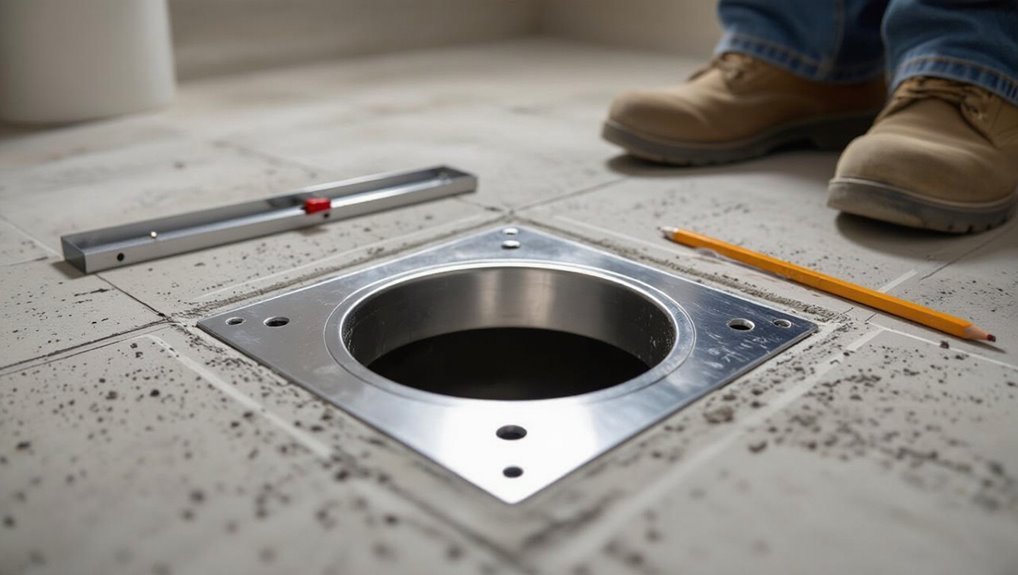
With the concrete cleaned and any cracks repaired, set the new flange over the waste opening to check fit and orientation.
Center it so bolt slots align with the toilet horn and wall clearances. Use a pencil to mark anchor hole locations through the flange, note wax ring position, and verify flange sits flush.
Double-check marks before removing the flange.
Step 4 Drilling into concrete and installing anchors or sleeve inserts
Drill the anchor holes you’ve marked using a hammer drill and a masonry bit sized for your chosen anchors or sleeve inserts; keep the drill perpendicular to the slab and clear dust from each hole before inserting anchors.
Tap sleeve inserts or anchors flush with the flange surface, confirm alignment with your marks, and guarantee holes are deep enough for full anchor engagement without cracking the concrete.
Step 5 Securing flange with bolts, epoxy, or concrete screws
Set the flange in place and choose your fastener method—anchoring bolts, epoxy, or concrete screws—based on the flange type, hole prep, and load requirements.
If using bolts or screws, align holes, insert anchors or screws, and tighten evenly without over-torqueing.
For epoxy, clean holes, apply epoxy, seat flange, and allow full cure before loading.
Check stability.
Step 6 Ensuring correct flange height relative to finished floor
Because the flange height determines the toilet’s seal and stability, you’ll want to measure and adjust it before finalizing the install.
Verify flange top sits 1/4″ to 1/2″ above finished floor (or flush if using a wax-free seal).
Shim, raise, or recess flange as needed, then recheck level and distance to confirm a tight wax ring seal and proper toilet seating.
Step 7 Installing closet bolts and test-fitting the base
Now install the closet bolts and dry-fit the toilet base to confirm alignment and clearance before you commit to the final seal.
Insert two or three bolts into the flange slots, tighten anchors so bolts stand vertical, and slide bolt caps on.
Lower the toilet onto bolts, check even seating, adjust bolt positions or flange shims if needed, then lift the bowl for final sealing preparations.
Step 8 Setting the wax ring or modern wax-free seal
Place the proper seal carefully so you’ll get a watertight connection between the toilet and the flange: choose a standard wax ring (with or without a horn) or a modern wax-free gasket, center it over the flange, and make sure the flange sits flush with the finished floor before lowering the bowl.
Press the seal gently to seat it, align the bolts, and avoid shifting the flange seal.
Step 9 Mounting the toilet, tightening bolts, and leveling
Set the toilet onto the flange carefully, guiding the closet bolts through the bowl’s mounting holes and lowering the bowl straight down to seat the seal.
Press evenly, then hand-thread washers and nuts. Alternate tightening both sides incrementally to avoid cracking. Use a wrench for snug, not overtightened, fit.
Check level front-to-back and side-to-side, shim under base if needed before final tightening.
Step 10 Final sealing, caulking, and testing for leaks
With the bowl level and bolts snug, finish the job by sealing the base and testing for leaks to guarantee a watertight, long-lasting installation.
Apply a continuous bead of silicone caulk around the toilet base where it meets the floor; smooth it for a neat seal.
Reconnect water, flush repeatedly, and inspect for drips.
Tighten or re-caulk if you detect any moisture.
Alternative Methods and Special Cases
If the concrete or original flange is damaged, you can use a flange repair ring or adapter to bridge gaps and convert between PVC and cast iron or to offset the flange.
You’ll need to weigh epoxy or chemical anchors against mechanical anchors for strength, cure time, and ease of future removal.
And when you’re working over tile or with a recessed flange, plan for shims, flange extenders, or cutting tile so the flange sits at the correct height.
Using a flange repair ring for cracked concrete or damaged flange
When a toilet flange or the surrounding concrete is cracked, a flange repair ring gives you a reliable way to restore a secure toilet connection without tearing up the slab.
You’ll bolt the ring over the damaged area to distribute load and create new anchor points for the flange.
Clean debris, drill concrete anchors through the ring, tighten evenly, and seal edges with thinset or epoxy before reinstalling the flange and toilet.
Flange-to-pipe adapters (PVC to cast iron, offset flanges)
Because old cast-iron lines and modern PVC don’t always align, you’ll often use a flange-to-pipe adapter to bridge the materials or shift the flange position; these adapters let you splice PVC to cast iron or install an offset flange without cutting into the slab. You’ll choose adapters by size, material compatibility, and offset needed.
| Type | Use | Limit |
|---|---|---|
| No-hub | Cast iron splice | Clamp space |
| PVC bell | PVC join | Solvent only |
| Offset | Move flange | Height limits |
Using epoxy or chemical anchors vs. mechanical anchors pros and cons
After you’ve picked the right adapter or offset to line up the flange, you’ll face a choice about anchoring to the concrete: chemical (epoxy) anchors or mechanical anchors.
Epoxy offers strong, vibration-resistant bonds and fills irregular holes but needs proper mixing and cure time.
Mechanical anchors install faster, work in colder conditions, and are removable, though they can loosen over time and crack weak concrete.
Installing on tile over concrete or recessed flange situations
Tile over concrete and recessed-flange situations demand a different approach than a straightforward flange-on-concrete install, so you’ll need to assess tile thickness, flange depth, and drain alignment before you start.
If tile raises the floor, use a spacer or flange extender; for recessed flanges set below tile, consider a flange spacer ring or build up with thin-set and backer, ensuring a solid, level seal.
Common Mistakes and How to Avoid Them
Don’t overtighten or undertorque the closet bolts—either can crack the toilet base or leave it loose.
Make sure the flange sits at the correct height, use the proper anchors at the right depth, and replace a damaged wax ring before testing for leaks.
Checking each of these points as you go will keep the toilet stable and watertight.
Under- or over-torquing bolts and cracking the toilet base
If you tighten the closet bolts too little, the toilet will rock and break the wax seal; if you crank them down too hard, the porcelain can crack under strain.
Tighten nuts evenly, alternating sides, and stop when the bowl sits snug and won’t wobble.
Use a torque-limited driver or hand tools with care, and check alignment before final tightening to avoid stress.
Incorrect flange height leading to leaks or wobble
When the flange sits too high or too low relative to the finished floor, you’ll get a poor seal, wobbling, or slow leaks that can rot the subfloor.
Check flange height before installing the wax ring; use a thinner or thicker seal, adjust with flange spacers or a riser, and test stability.
Verify the flange sits flush and level for a reliable, leak-free connection.
Using wrong anchors or insufficient anchor depth
Because the flange holds the toilet in place, using the wrong anchors or not drilling deep enough can cause the bolts to pull out or the toilet to rock.
Use concrete screws or sleeve anchors rated for load, match anchor diameter to bolt size, and drill to the manufacturer’s depth.
Tighten evenly, avoid over-torquing, and recheck stability after installation to prevent movement.
Failing to replace a damaged wax ring or not testing for leaks
Although a worn or improperly seated wax ring may seem minor, skipping its replacement or neglecting a leak test can lead to water damage, odors, and a wobbly toilet.
Always replace the wax ring when reinstalling the toilet, inspect the flange and bolts, and run a water test after seating the bowl.
Catch leaks early to prevent costly repairs.
Best Practices, Maintenance, and Longevity Tips
To keep your flange secure and rust-free, use stainless or galvanized fasteners and concrete anchors rated for plumbing loads.
Check the flange, wax ring, and bolts each season for leaks, wobble, or corrosion and replace parts as soon as you spot wear.
Call a plumber if you find cracks in the concrete, persistent leaks, or if flange alignment or pipe damage is beyond a simple parts swap.
Recommended materials and fasteners for durability
Choose corrosion-resistant materials and robust fasteners so your flange stays secure for years; stainless steel or brass bolts, concrete anchors rated for wet environments, and a quality PVC or cast-iron flange suited to your drain type will cut maintenance and failure risk.
Use stainless or hot-dipped galvanized washers, epoxy-set anchors for cracked concrete, and marine-grade sealant. Match fastener length to slab thickness and avoid dissimilar metals.
Seasonal and periodic inspection checklist
After selecting corrosion-resistant materials and proper anchors, you’ll want a straightforward seasonal and periodic inspection checklist to catch wear before it becomes a problem.
Inspect flange bolts, seals, and floor anchors for corrosion or looseness. Check for hairline cracks or moisture staining around the flange and test toilet wobble monthly.
- Tighten loose bolts; replace corroded hardware
- Verify wax ring integrity; watch leaks
- Seal small concrete cracks promptly
When to call a plumber vs. DIY
While many flange repairs are straightforward, know when a pro is worth the cost so you don’t turn a fixable issue into a flood.
You can handle simple flange replacement, minor crack sealing, and bolt swaps with basic tools.
Call a plumber if you see sewer odors, persistent leaks, large concrete damage, compromised drain alignment, or if you lack confidence—timely expertise prevents costly water damage.
Cost, Time, and Complexity Comparison
You’ll want to weigh typical costs—materials are usually modest but labor can be the biggest expense.
Expect a DIY job to take a few hours to a day while a pro can finish faster but will charge for time and expertise.
Be aware that cast-iron stacks, access or structural problems will raise complexity, time, and cost.
Typical cost breakdown (materials vs. labor)
A clear cost breakdown helps you decide whether to DIY or hire a pro: materials for attaching a toilet flange to concrete — flange kit, concrete anchors or epoxy, wax or rubber gasket, and sealant — typically run $15–$60, while labor for a plumber varies widely, usually $150–$400 for a straightforward replacement and $300–$800+ if concrete repair or floor leveling is needed.
| Item | Typical cost |
|---|---|
| Materials | $15–$60 |
| Labor | $150–$800+ |
Time estimates for DIY vs. professional installation
Expect a DIY flange install to take about 1–3 hours if you’re comfortable with basic plumbing and have the right tools, while a pro will usually finish the same job in 30–90 minutes.
You’ll spend extra time measuring, drilling into concrete, and waiting for adhesive or sealant to cure.
Call a pro if you want speed, guaranteed fit, and minimal cleanup.
Factors that increase complexity (cast-iron stacks, structural issues)
When cast-iron stacks, uneven slabs, or hidden structural problems show up, they can turn a straightforward flange job into a lengthy, costly project.
You’ll face specialized tools, extra materials, and often a need for structural repairs or pipe alterations that add both time and expense.
You’ll likely need cutting tools, rusted-hardware replacement, concrete patching, and permits, so budget more and consider hiring pros for safety and code compliance.
FAQ
You’ll want clear answers to common concerns like attaching a flange to cracked concrete, the correct flange height above the finished floor, and which concrete anchors work best.
Also ask whether you can reuse an old flange or bolts and how to stop a toilet from wobbling after replacement.
I’ll walk you through concise solutions for each question.
Can I attach a flange directly to old cracked concrete?
Although old cracked concrete can complicate the job, you can attach a toilet flange to it if you take the right steps to guarantee a solid, leak-proof connection.
Clean and chisel loose concrete, fill cracks with hydraulic cement or epoxy, and use a flange with a backing ring or concrete anchors rated for cracked substrate.
Test stability before final sealing and install.
How high should the flange sit above the finished floor?
Fixing cracked concrete and setting a solid flange are only part of the job; you also need the flange to sit at the right height above the finished floor to guarantee a reliable seal and proper toilet fit.
Aim for the flange face to be 1/4″ to 1/2″ above finished floor. That range compresses the wax ring properly and prevents leaks or rocking.
What type of anchor is best for concrete?
Which anchor should you pick for fastening a toilet flange to concrete?
Use stainless steel sleeve anchors or wedge anchors sized 1/4″–3/8″ by 1½”–2½” for solid hold and corrosion resistance.
For thin concrete or chipboard overlays, use stainless concrete screws (Tapcon) with matching pilot holes.
Avoid anchors that corrode or rely solely on adhesive; mechanical anchors give reliable long-term stability.
Can I reuse the old flange or bolts when replacing a toilet?
If your old flange and bolts look solid and fit the new toilet, you can often reuse them—but you should inspect them closely first.
Check for cracks, corrosion, warped or broken bolt slots, and stripped threads. If the wax ring seats properly and the flange sits flush with the floor, reuse is fine.
Replace any compromised bolts or a cracked flange for a reliable seal.
How do I stop a wobbling toilet after flange replacement?
Why is your toilet wobbling after a flange replacement?
You likely have uneven mounting, a misaligned flange height, or loose bolts.
Tighten bolts evenly, shim gaps with plastic shims or wax-free shims, and make certain the flange sits flush with the finished floor.
If flange height is wrong, raise it with a flange extender.
Retest and torque bolts to secure the bowl without cracking.