How to Clean a Garage Floor: Remove Stains, Oil, and Grime Effectively
You can restore a grimy garage floor by starting with scraping and blotting, then applying a concrete-safe degreaser to oil spots and letting it sit. Scrub with stiff nylon or wire brushes, or rent a floor buffer for big areas, and rinse with a pressure washer set to 1500–3000 PSI. For deep stains use an absorbent-solvent paste, citric acid for rust, and always wear PPE. Keep going to learn detailed steps, tool choices, and prevention tips.
How to Clean a Garage Floor: and What to Expect
You’ll get a quick plan for tackling stains, oil, and grime—when to use simple cleaners, degreasers, or a pressure washer versus calling a pro.
I’ll also cover how long each approach typically takes, what it usually costs, and basic safety precautions to follow.
That way you’ll know whether to DIY or hire help and what results to expect.
Instant summary: Best approach for stains, oil, and grime
Start by tackling the worst spots first: scrape off dried debris, blot fresh spills, then apply a degreaser to oil stains and let it sit per the product directions before scrubbing with a stiff brush.
For how to clean a garage floor, follow with a borax or concrete cleaner, rinse thoroughly, repeat stubborn areas, and finish with concrete sealer if you want longer protection.
When to DIY vs. hire a professional
Wondering whether to tackle your garage floor yourself or call a pro?
You should DIY for light stains, routine scrubbing, and simple degreasing—when you have time, basic tools, and patience.
Hire a professional for extensive oil saturation, structural damage, stubborn embedded stains, or if you want coatings like epoxy applied evenly.
Pros save time and guarantee durable, safe results.
Required time, cost range, and safety overview
Because the time, cost, and safety needs vary by task, plan on anywhere from an hour for a quick degrease to a full weekend for deep cleaning and repairs.
Costs range from under $20 for DIY supplies to several hundred dollars for specialty cleaners or rented equipment—and $500–$3,000+ if you hire a pro for coatings or major remediation.
You’ll need PPE, ventilation, proper disposal, and realistic time and budget buffers.
Understanding Garage Floor Materials and Why Cleaning Differs
Before you start cleaning, know what your floor’s made of—concrete, epoxy, sealed concrete, or tiles—because each one soaks up stains and reacts to cleaners differently.
Porous concrete will absorb oil and grease much faster than sealed surfaces, while epoxy and tiles resist spills but can be damaged by harsh solvents.
That matters because common contaminants like motor oil, brake dust, and road salt require different treatments depending on the floor material.
Common garage floor types (concrete, epoxy, sealed concrete, tiles)
Garage floors come in several common finishes—bare concrete, epoxy coatings, sealed concrete, and interlocking or ceramic tiles—and each one soaks up dirt, stains, and cleaning solutions differently, so you’ll need to tailor your approach.
- Concrete: porous, durable, needs degreasers and scrubbing.
- Epoxy: smooth, resists chemicals, wipes and mild cleaners work.
- Tiles/sealed: grout and seams need attention; avoid harsh strippers.
How material affects stain absorption and cleaning methods
You’ve just reviewed the common finishes and how they behave, so now let’s look at why those differences matter for stains and cleaning.
Porous concrete soaks oils and requires degreasers and poultices; sealed or epoxy surfaces repel liquids, letting you wipe or use milder cleaners.
Tiles resist chemicals but grout traps grime, needing brushes.
Match cleaner strength and agitation to the material to avoid damage.
Common contaminants and how they interact with floor types
Different floor materials attract and hold contaminants in distinct ways, so you’ll clean concrete, epoxy, tile, and sealed surfaces differently.
You should match cleaners and methods to contaminants: porous concrete soaks oil; epoxy resists spills but traps grit; sealed tile sheds liquids but shows residue. Choose degreasers, pH-balanced cleaners, or abrasive scrubs accordingly.
- Oil — concrete absorbs deeply
- Grease — epoxy holds surface film
- Dirt/salts — sealed tile traps residue
Tools, Supplies, and Safety Gear You’ll Need
You’ll want a few must-have tools—like a pressure washer, stiff scrub brush, squeegee, and shop vacuum—to get loose dirt and grime out of the way.
Pair those with the right cleaners and stain removers, from degreasers and detergents to poultices or acid cleaners for stubborn spots.
Wear gloves, eye protection, and a mask, and make sure the area is well-ventilated when using strong chemicals.
Essential tools (pressure washer, scrub brush, squeegee, shop vacuum)
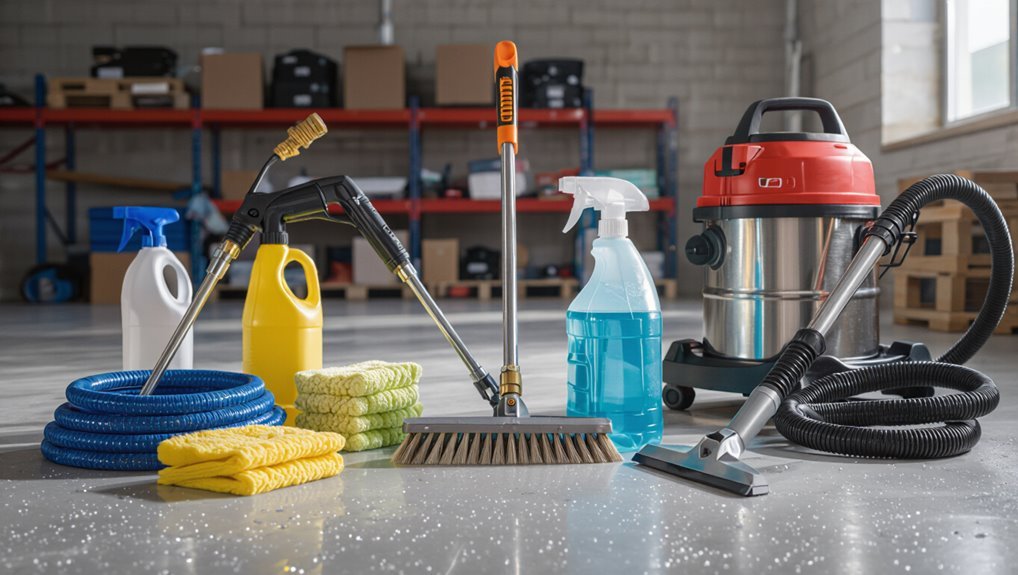
Start with a few reliable tools: a pressure washer to blast away stubborn grime, a stiff scrub brush for corners and stains, a squeegee to push water toward the drain, and a shop vacuum to pick up wet debris and remaining grit.
Use them efficiently: prioritize safety, test pressure settings, and dry thoroughly.
- Prep
- Target
- Finish
Cleaning agents and stain removers (degreasers, detergents, poultices, acid cleaners)
1 essential rule: match the cleaner to the stain and material—use water-based detergents for routine dirt, solvent or enzyme degreasers for oil and gasoline spots, poultices to draw deep-set stains from porous concrete, and acid cleaners only for heavy mineral or rust stains on acid-safe surfaces.
Choose concentrated cleaners, follow dilution, and test a small area first.
- Degreasers
- Poultices
- Acid cleaners
Personal protective equipment and ventilation tips
Because many cleaners and stain removers are corrosive, toxic, or volatile, you should equip yourself with proper personal protective equipment and guarantee good ventilation before you begin work.
Wear chemical-resistant gloves, eye protection, and a respirator if fumes are present. Open doors/windows and run fans.
Follow label instructions and never mix chemicals.
- Gloves
- Eye protection
- Respirator/fans
Quick Preparation Steps Before You Start
First, clear the space by moving vehicles and stored items so you can reach the whole floor.
Then dry-sweep or vacuum to remove loose dirt, dust, and cobwebs before wet cleaning.
Finally, spot-test any cleaners and cover nearby surfaces or belongings to protect them from splashes.
Clearing the space and removing vehicles/items
Before you start scrubbing, clear the workspace by moving cars, bikes, tools, and storage bins out of the garage so you have unobstructed room to work.
Unplug and stack small appliances, cap chemicals, close paint cans, and remove potted plants.
Group loose items nearby for easy return, label fragile boxes, and keep heavy equipment off the floor to prevent accidental staining or damage during cleaning.
Dry sweeping and vacuuming loose debris
Start by sweeping the entire floor with a stiff-bristled broom to loosen dirt, dust, and cobwebs.
Then follow up with a shop vacuum to pick up finer grit and debris from corners, cracks, and along baseboards.
Work methodically in overlapping passes, empty the vacuum frequently, and use crevice and brush attachments to extract sand, seed husks, and flaky paint before any wet cleaning or stain treatments.
Spot-testing cleaners and protecting nearby surfaces
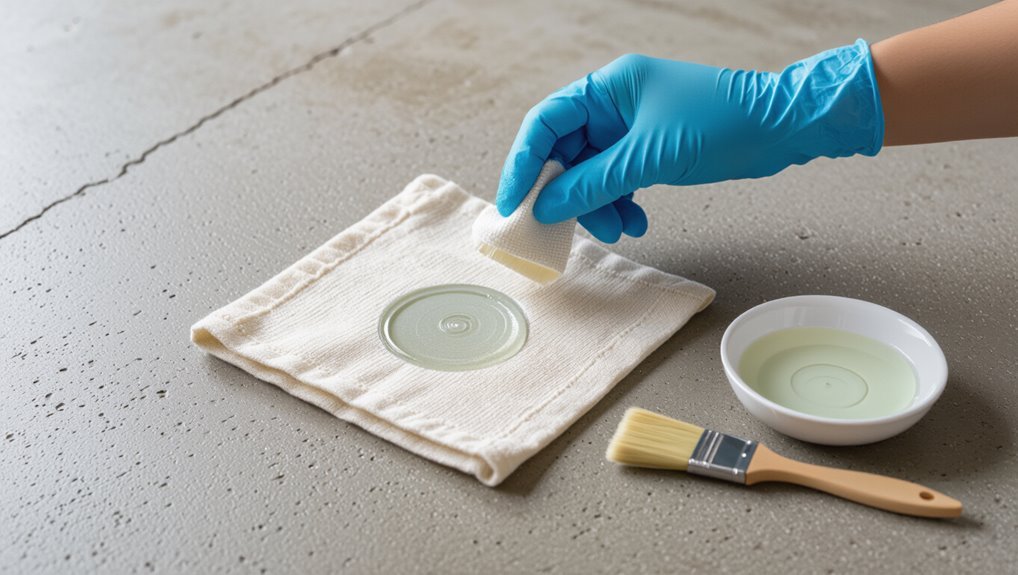
Once the loose debris is gone, test any cleaner on a discreet patch of floor to make sure it won’t discolor or damage the surface.
Wear gloves and eye protection, dilute cleaners per instructions, and wait the recommended time.
Cover nearby items, plants, and walls with plastic or drop cloths to prevent splashes.
Rinse test area and inspect before full application.
Step-by-Step: Deep Clean a Garage Floor
Now you’ll follow a clear, step-by-step deep-clean process to get the floor truly clean.
Start by pre-soaking with a degreaser, then agitate with the right brushes or a scrubber before pressure-washing and rinsing.
Finish by targeting stubborn oil, hydraulic, rust, paint, and chemical stains with poultices, solvents, or specific removers and the proper safety precautions.
Step 1 Pre-soak and degrease: applying degreaser and dwell time
Spray a concrete-safe degreaser over stains and greasy areas so it can break down oil and grime before you scrub.
Let the solution sit for the manufacturer’s recommended dwell time—usually 5–15 minutes—to penetrate and loosen deposits.
Keep the surface wet; reapply on dry spots.
Wear gloves and eye protection, and ventilate the area.
Rinse thoroughly before moving to agitation.
Step 2 Agitation: best brushes, scrub patterns, and mechanical options
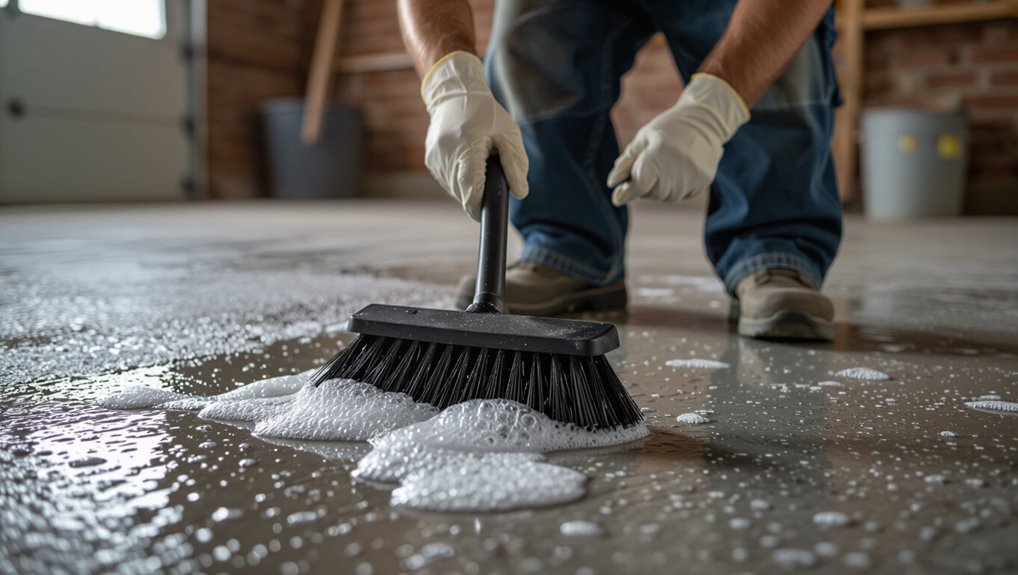
Choose the right agitation method to loosen stubborn grime efficiently: stiff nylon push brooms and deck brushes work best for general scrubbing, while wire brushes suit heavily soiled, oil-stained concrete but can roughen softer floors.
Scrub in overlapping, crosshatched passes, keep consistent pressure, and work small sections.
For large areas, rent a floor buffer with a nylon scrubbing pad to save effort and time.
Step 3 Pressure washing and rinsing techniques (pressure, nozzle types)
1 key tool for finishing a deep garage-floor clean is the pressure washer—use it to strip loosened dirt and rinse detergents quickly and thoroughly.
Set PSI around 1500–3000 depending on concrete age; keep wand moving to avoid etching. Use a 25° or 40° nozzle for general rinsing, 15° for stubborn grime.
Finish with a low-pressure fan to flush residues away.
Step 4 Treating stubborn oil and hydraulic fluid stains (poultices, solvents)
When simple scrubbing and pressure washing won’t budge dark spots, it’s time to target oil and hydraulic fluid with stronger methods—poultices and appropriate solvents remove deep-set residues without damaging concrete when used correctly.
Mix an absorbent (cat litter, diatomaceous earth) with solvent or detergent to form a paste, apply, cover, let sit, then scrape and vacuum.
Repeat spot-treating until stains lift.
Step 5 Removing rust, paint, and chemical stains (specific agents and cautions)
Sometimes you’ll run into rust, paint, or chemical stains that won’t respond to soap and a scrub brush, so you’ll need targeted cleaners and careful technique to remove them without harming the concrete.
For rust use a citric acid or commercial rust remover; for paint try a plastic scraper and a concrete-safe stripper; for chemical burns test a neutralizer.
Wear gloves, eye protection, and ventilate.
Step 6 Final rinse, drying, and checking for residue
Start by rinsing the entire floor with a steady stream of clean water, working from the highest point toward the drain or garage door so soap, loosened grime, and residue flow out efficiently.
Use a squeegee or push broom to guide water, then let the surface air-dry or speed it with fans.
Inspect for streaks or trapped grime and repeat spot-cleaning as needed.
Targeted Methods and Quick Fixes (List of Common Problems)
You’ll use different tactics depending on the problem—fresh oil wipes up much easier than old, set-in stains, and household fixes like cat litter or baking soda can lift grease and motor oil.
For tire marks, rubber scuffs, mold, mildew, and organic stains you’ll apply specific cleaners and scrubbing methods, and small surface chips or cracks should be repaired before any sealing or coating.
Below are quick, targeted solutions for each common issue so you can get the job done efficiently.
Removing fresh oil vs. old set-in oil
When an oil spill happens, act fast for the best results: fresh oil soaks up and lifts more easily, while old, set-in stains need stronger treatment and more elbow grease.
Tackle fresh spots by blotting, applying solvent, then rinsing; for old stains, scrub with a degreaser and repeat. Choose a mechanical scrubber for stubborn areas.
- Fresh: blot, solvent, rinse
- Old: degrease, scrub, repeat
- Stubborn: mechanical agitation
Tackling grease and motor oil with household items (cat litter, baking soda)
If fresh spots respond to blotting and solvents and set-in stains need heavy scrubbing, you can often handle small grease and motor oil spills with common household items before reaching for commercial degreasers.
Cover spill with clay cat litter to absorb, sweep up, then sprinkle baking soda; let sit 15–30 minutes, scrub with a stiff brush and warm soapy water, rinse and repeat if needed.
Eliminating tire marks and rubber scuffs
Many garages end up with black tire marks and rubber scuffs that look worse than they are, and you can usually remove them with a few targeted tricks.
Start with a stiff broom or eraser wheel, then apply a citrus degreaser or rubbing alcohol for stubborn marks.
Scrub with a nylon brush, rinse, and repeat.
Finish by sealing the area to prevent recurrence.
Dealing with mold, mildew, and organic stains
Something as small as a damp corner can let mold, mildew, and organic stains take hold on your garage floor, but you don’t have to live with them.
Wear gloves and a mask, scrub affected spots with a bleach solution or enzyme cleaner, rinse thoroughly, and dry completely.
For persistent growth, repeat treatment and improve ventilation to prevent recurrence.
Repairing minor surface damage before finishing
Tackle small cracks, chips, and surface pits before you seal or paint the floor so the finish looks smooth and lasts longer.
Clean debris, then use a concrete patch or epoxy filler for hairline cracks and shallow chips.
For larger gouges, apply a repair mortar, level with a trowel, and sand when cured.
Prime patched areas before coating for consistent adhesion and appearance.
Comparison of Cleaning Products and Tools
Decide whether a commercial degreaser or a DIY mix will give you the grease-cutting power you need without undue cost or fumes.
Think about scale and frequency—small stains might respond to homemade cleaners, while heavy buildup often warrants a concentrated product.
If your floor’s large or stubborn, consider renting a pressure washer or walk-behind scrubber for a faster, more effective clean.
Commercial degreasers vs. DIY solutions
When you’re weighing commercial degreasers against DIY solutions, think about strength, cost, and convenience: store-bought formulas typically work faster and require less elbow grease, while homemade mixes—like baking soda, vinegar, or simple solvent blends—can be cheaper and gentler on surfaces but usually need more scrubbing and time.
| Power | Comfort |
|---|---|
| Fast wins | Peace of mind |
| Harsh sting | Proud satisfaction |
Smart buy: when to rent a pressure washer or floor scrubber
Wondering whether to rent a pressure washer or a floor scrubber for your garage? You’ll choose based on soil type, area, and budget: pressure washers blast away oil and grime on concrete, scrubbers polish large flat areas with detergent, and rentals save money for one-off deep cleans.
Compare rental cost, water use, and drying time before deciding.
- Pressure washer
- Floor scrubber
- Rental factors
Preventing Future Stains and Maintaining a Clean Floor
To keep stains from returning, you should sweep regularly, spot-clean spills immediately, and place mats under vehicles and work areas.
Consider protective options—sealers, epoxy coatings, or floor paints—and weigh each one’s durability and cost before choosing.
Follow a simple seasonal checklist (spring and fall) to reapply protection, inspect for cracks, and refresh mats.
Best practices: regular sweeping, spot-cleaning, and mat placement
Keep up with a simple routine—sweep frequently, spot-clean spills right away, and place mats where messes start—to prevent stains and make deep cleans rare. You’ll save time and protect surfaces by acting fast and using targeted barriers.
- Sweep weekly to remove grit that scratches and embeds.
- Blot and treat spills immediately with absorbent pads and degreaser.
- Position mats under vehicles, workbenches, and tool zones.
Protective options: sealers, epoxy coatings, and floor paints (pros/cons)
If you’re already sweeping, blotting spills, and using mats, the next step is choosing a protective finish that makes cleaning easier and shields the concrete from stains and wear. You’ll weigh sealers (easy, breathable), epoxy (durable, prep-heavy), and paint (cheaper, less durable). Choose based on traffic, budget, and prep time.
| Option | Pros | Cons |
|---|---|---|
| Sealer | Easy application | Less durable |
| Epoxy | Very durable | Intensive prep |
| Paint | Low cost | Wears faster |
Seasonal maintenance checklist
When seasons change, treat garage-floor maintenance as a quick checklist you run every few months: sweep and vacuum debris, spot-clean oil or fluid drips, inspect seals and coatings for damage, reapply sealer or touch up paint as needed, reposition mats and drip pans, and check drainage and gutters.
Do small fixes promptly to prevent stains and costly repairs later.
Common Mistakes and How to Avoid Them
Don’t use a cleaner that’s incompatible with your floor—check the label before you pour.
Avoid overpressurizing or scrubbing too hard, which can etch or chip the surface.
Dispose of runoff properly, wear protective gear, and keep the area ventilated to protect yourself and the environment.
Using the wrong cleaner for your floor type
Because garage floors vary—concrete, epoxy, painted, or sealed, you’ll ruin finishes and waste effort using the wrong cleaner.
Check your floor type, read labels, and test cleaners in an inconspicuous spot.
Use pH-neutral solutions for sealed or painted surfaces, degreasers for concrete, and manufacturer-approved products for epoxy.
Don’t mix chemicals; follow dilution and dwell-time instructions.
Overpressurizing and causing surface damage
If you crank a pressure washer too high or hold the nozzle too close, you can etch concrete, chip paint, or strip sealers in minutes.
Use a wider spray tip, keep the wand at least 12–18 inches away, and start on low pressure.
Test a small area first, move steadily, and avoid concentrated blasts on repairs, seams, or painted surfaces.
Improper disposal of contaminated runoff and environmental considerations
When you rinse oil, antifreeze, paint chips, or heavy grime from your garage floor into the street or storm drain, those contaminants can harm waterways and violate local rules.
So handle runoff deliberately: contain it with absorbent pads or berms, collect and dispose of wash water through proper municipal systems or hazardous-waste facilities, and never send it down a storm drain.
Also, check local disposal rules, label wastes, and use certified disposal services to avoid fines and environmental damage.
Skipping safety precautions and ventilation
Keeping runoff and wastes out of storm drains protects the environment, but protecting yourself while you clean matters just as much.
Don’t skip gloves, eye protection, or a respirator when using strong cleaners. Open doors and windows, run a fan, and avoid enclosed garages.
Read product labels, work in shifts if fumes build, and wash exposed skin promptly to prevent irritation or injury.
Cost, Time, and Decision Guide: DIY vs. Professional Service
You can save money by doing basic cleaning and minor repairs yourself, with supplies and sealer typically costing under a few hundred dollars and a weekend of work.
Hire a pro when stains are severe, the slab needs resurfacing, or you want a warranty and faster turnaround.
Ask potential contractors about scope, timeline, materials, guarantees, and before-and-after photos so you know what to expect.
Typical DIY cost breakdown and time estimates
Tallying costs and time up front helps you decide whether to tackle a garage-floor cleanup yourself or hire pros. Typical DIY costs: cleaners, degreasers, brushes, rentals. Expect 3–8 hours for a single-car garage; 6–16 for larger spaces. Use this quick reference:
| Item | Cost (USD) | Time |
|---|---|---|
| Cleaner & degreaser | 15–40 | 1–2 hrs |
| Tools/rental | 10–60 | 1–4 hrs |
| Sealer (optional) | 25–100 | 1–4 hrs |
When professional cleaning or resurfacing is recommended
If your initial cost-and-time estimates make a DIY approach look feasible, take a moment to assess the floor’s condition before committing—some problems call for pro skills and equipment.
Hire professionals when damage is extensive (large cracks, spalling, structural issues), stains won’t lift, you need resurfacing or coatings, or you lack time, tools, or confidence.
Pros save time and prevent costly mistakes.
Questions to ask a pro and what to expect from a service
Wondering what to ask a pro and what to expect from a garage-floor service? Ask about experience, surface prep, products, warranties, timeline, and total cost.
Expect concrete inspection, pressure washing, repairs, and optional sealing or coating. Typical jobs take a few hours to a couple of days.
Compare quotes, check references, and weigh cost versus your time and DIY skill before deciding.
FAQ
You probably have a few specific questions, like how to lift a stubborn oil stain or whether household cleaners are safe on sealed or epoxy floors.
You’ll also want to know if pressure washing will harm the surface, how often to reseal or refinish, and the safest way to dispose of oily rags and contaminated water.
Read on for clear, practical answers to each point.
How do I remove a stubborn oil stain that won’t budge?
Got a stubborn oil stain that’s refused every cleaner you’ve tried?
Scrape dried residue, sprinkle absorbent cat litter or baking soda, let sit several hours, then sweep.
Apply a degreasing powder or enzyme cleaner, scrub with a stiff brush, rinse with hot water and repeat as needed.
For persistent spots, try poultices or commercial concrete degreasers following label directions and safety precautions.
Are household cleaners safe for sealed or epoxy floors?
Can common household cleaners harm sealed or epoxy garage floors? Yes—some cleaners with harsh solvents, bleach, or acidic ingredients can dull or etch finishes.
You should use pH-neutral cleaners or products labeled safe for epoxy/sealed concrete.
Test any new cleaner in an inconspicuous spot first, rinse thoroughly, and avoid prolonged contact to preserve shine and protective coatings.
Can I pressure wash my garage floor without damaging it?
Wondering whether pressure washing will harm your garage floor?
You can safely pressure wash concrete and many sealed or epoxy floors if you use moderate pressure (around 1500–3000 psi), a wide fan nozzle, and keep the wand at least a foot away.
Test a small area first, avoid high pressure on damaged spots, and let the floor dry thoroughly afterward.
How often should I reseal or refinish my garage floor?
How often should you reseal or refinish your garage floor?
You should reseal epoxy or concrete sealer every 2–5 years, depending on traffic, chemical exposure, and wear.
High-use garages may need attention closer to two years; lightly used floors can go longer.
Refinish damaged or peeling surfaces immediately to restore protection and prevent stains or deeper deterioration.
What is the safest way to dispose of oily rags and contaminated water?
Any oily rags or water used to clean up solvents and motor fluids need to be handled as hazardous waste, not tossed in the trash or down a drain.
Store rags in a metal container with a tight lid, let them air-dry outdoors, then take them and contaminated water to a household hazardous waste (HHW) facility or scheduled collection.
Check local rules and never pour residues into sewer or storm drains.