How to Deep Clean Floor Tiles So They Look Brand New
You can restore tiles by clearing the area, sweeping, then mopping with warm water and a mild pH-neutral or appropriate cleaner for your tile type. Scrub grout with a baking-soda paste or grout cleaner using a stiff brush, rinse thoroughly, and dry to prevent streaks. For stone, use pH-neutral products and reseal if needed; avoid acids on natural stone. Follow proper tools and spot treatments, and keep going to learn specific tips, timings, and fixes.
How to Deep Clean Floor Tiles So They Look Brand New
You’ll get a quick action plan to restore tiles to like-new condition, plus guidance on when deep cleaning is worth the effort.
I’ll explain the right methods and cleaners for different materials—ceramic, porcelain, natural stone, vinyl, and terracotta—so you don’t damage surfaces.
Follow a few simple steps and you’ll know exactly how often to clean and which techniques will give the best results.
Quick Answer One Paragraph Action Plan
If you want tiles that look brand new fast, start by clearing the area and sweeping or vacuuming thoroughly to remove loose dirt and grit.
Then follow a simple action plan for how to deep clean floor tiles:
- Mop with warm water and mild detergent.
- Scrub grout with a brush and baking soda paste.
- Rinse, dry, and buff for shine.
When and Why You Should Deep Clean Tiles
After you’ve followed the quick action plan to lift surface dirt, know when a deeper clean is worth the extra effort: schedule it whenever grout darkens, tiles feel gritty underfoot, lingering odors persist, or regular mopping no longer restores shine.
Deep cleaning prevents stains from setting, restores slip resistance, extends tile life, and improves indoor air quality—so act promptly rather than waiting for visible damage.
Types of Floor Tiles and How That Affects Cleaning (Ceramic, Porcelain, Stone, Vinyl, Terracotta)
Different tile families demand different care, so matching your deep-clean method to the material prevents damage and delivers a like-new finish. You’ll use pH-neutral cleaners for stone, stronger degreasers for porcelain and ceramic, gentle mops for vinyl, and seal terracotta first. Choose tools and solutions per tile to avoid etching or residue.
| Tile Type | Cleaning Tip |
|---|---|
| Ceramic/Porcelain | Alkaline cleaner |
| Stone/Terracotta | pH-neutral + sealant |
Tools, Materials, and Safety Preparations
Before you start, gather the essential tools—bucket, mop, scrub brush, grout brush, microfiber cloths, and a wet vacuum or steam cleaner if you have one.
Decide whether you’ll use a homemade mix (like vinegar and water for sealed tiles) or a commercial cleaner, and avoid harsh acids, bleach on colored grout, or ammonia-based products that can damage finishes.
Put on gloves and eye protection, ventilate the area, and always test your chosen solution on a small spot and sweep/mop to remove loose debris before full cleaning.
Essential Tools and Equipment
You’ll need a compact set of tools and safety gear to get tile floors truly clean without risking damage or injury.
Gather sturdy items and prepare the area.
- Rubber gloves, knee pads, eye protection
- Stiff-bristle brush, microfiber mop, grout brush
- Bucket, squeegee, sturdy trash bag
Check labels on tools, ventilate the room, and test a small area first.
Cleaning Solutions Homemade vs. Commercial (What to Use and What to Avoid)
While homemade cleaners can be cheaper and gentler, commercial products often offer stronger stain- and mildew-fighting power—so choose based on your tile type, grout condition, and ventilation. Use mild vinegar or baking soda for sealed tiles; avoid acid on natural stone. For tough grime, pick pH-neutral commercial formulas labeled for your tile.
| Use | Avoid |
|---|---|
| Vinegar (sealed) | Acid on stone |
| Baking soda paste | Abrasive powders |
| pH-neutral cleaner | Bleach on grout |
| Commercial grout cleaner | Oil-based soaps |
| Hot water rinse | Mixing chemicals |
Safety Precautions and Protective Gear
Because cleaning solutions and tools can irritate skin, eyes, or lungs, put on proper protective gear and prepare the space before you begin: wear chemical-resistant gloves, safety goggles, and a mask or respirator for strong cleaners.
Use knee pads for prolonged work, non-slip shoes, and ventilation—open windows and run fans.
Keep pets and children away, and store chemicals upright and labeled.
Test Spot and Surface Preparation Steps
Before you wet the floor, identify an inconspicuous test spot and gather the right tools and materials: a soft white cloth, pH-neutral cleaner, a small nylon-bristle brush, a spray bottle, distilled water, and tape to mark the area.
Test cleaner on the spot, wait five minutes, blot to check for discoloration.
Ventilate, wear gloves and knee pads, and remove loose debris before starting.
Step by Step Deep Cleaning Process (Primary How To)
Start by clearing the area and giving the floor a thorough dry sweep and vacuum to remove loose debris.
Pre-treat any stains—grease, oil, rust, or pet spots—then mop with the right cleaner at the recommended mix and technique.
Finish by agitating grout and tile where needed, then rinse well to remove all residue.
Step 1 Clear, Dry Sweep, and Vacuum
Clear the area and give the floor a thorough dry sweep, then vacuum to remove dust, grit, and loose debris that can scratch tiles during deeper cleaning.
Move furniture, rugs, and décor so you can reach edges. Use a soft-bristled broom and a vacuum with a hard-floor setting.
Empty the vacuum canister or bag before continuing to the next cleaning stage.
Step 2 Pre treating Stains and Spills (Grease, Oil, Rust, Pet Stains)
Now that loose dirt’s gone, tackle stubborn stains and spills so they don’t set into the tile or grout.
Pre-treat by matching stain type to cleaner, test a hidden spot, then agitate gently and wait a few minutes before rinsing.
- Grease/oil: degreaser or dish soap, blot first
- Rust: commercial rust remover, follow label
- Pet stains: enzyme cleaner, blot and air dry
Step 3 Mopping with Appropriate Cleaner (Mixture Ratios and Techniques)
1. Mix a mild pH-neutral floor cleaner with warm water per label instructions—usually one tablespoon per gallon for routine cleaning, up to a quarter cup for heavy soil.
Dip and wring a microfiber mop, mop in overlapping strokes, rinse the mop frequently, and change solution when cloudy.
Finish with a clean water rinse to prevent residue and streaks.
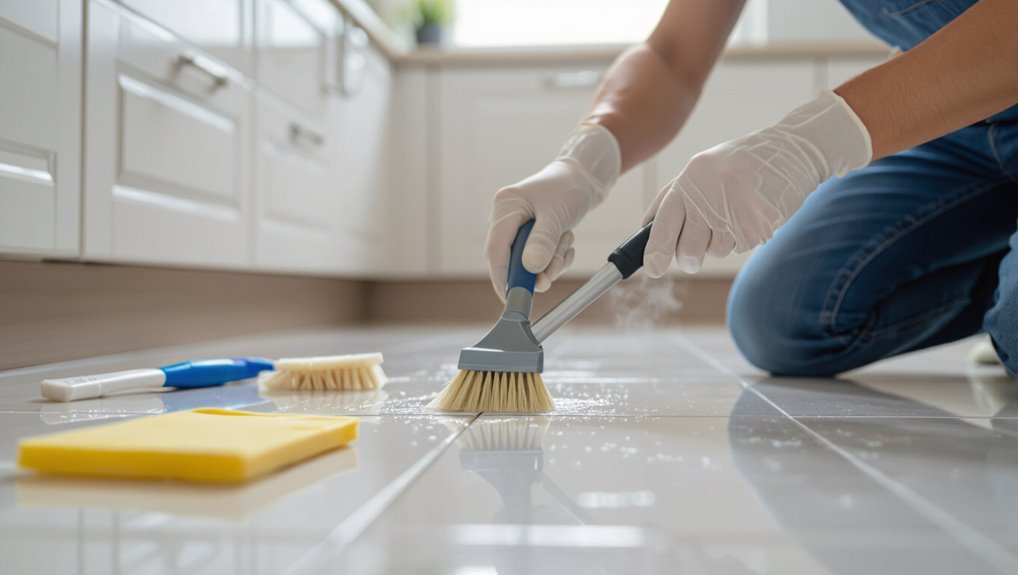
Step 4 Agitating Grout and Tile Surface (Tools and Methods)
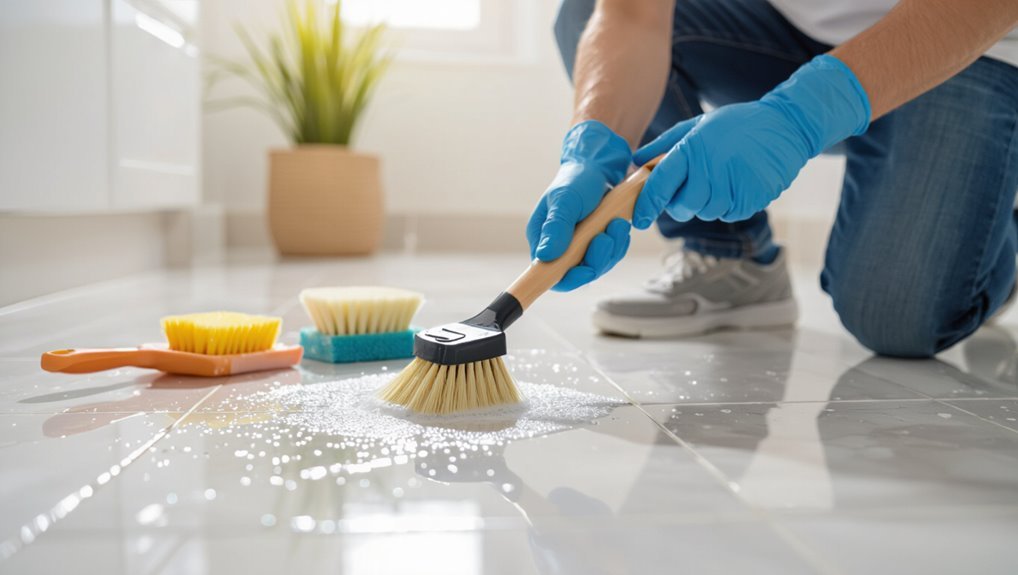
Before you start scrubbing, gather the right tools—stiff nylon brush or grout brush, a soft-bristle scrub pad for tiles, a spray bottle with cleaner, and protective gloves—so you can work systematically and avoid damage.
Work small sections, spray cleaner, scrub grout lines with angled motions, then use the pad on tile surfaces with light pressure.
Rinse brushes periodically and inspect for missed spots.
Step 5 Rinsing and Removing Residue
You’ll want to rinse each cleaned section thoroughly to lift loosened dirt and neutralize any remaining cleaner so residue doesn’t dull the tiles or attract grime.
Use fresh water and a clean mop or sponge, changing water often. Focus on grout lines and corners, wiping until suds and film are gone.
Finish by inspecting for streaks or sticky spots.
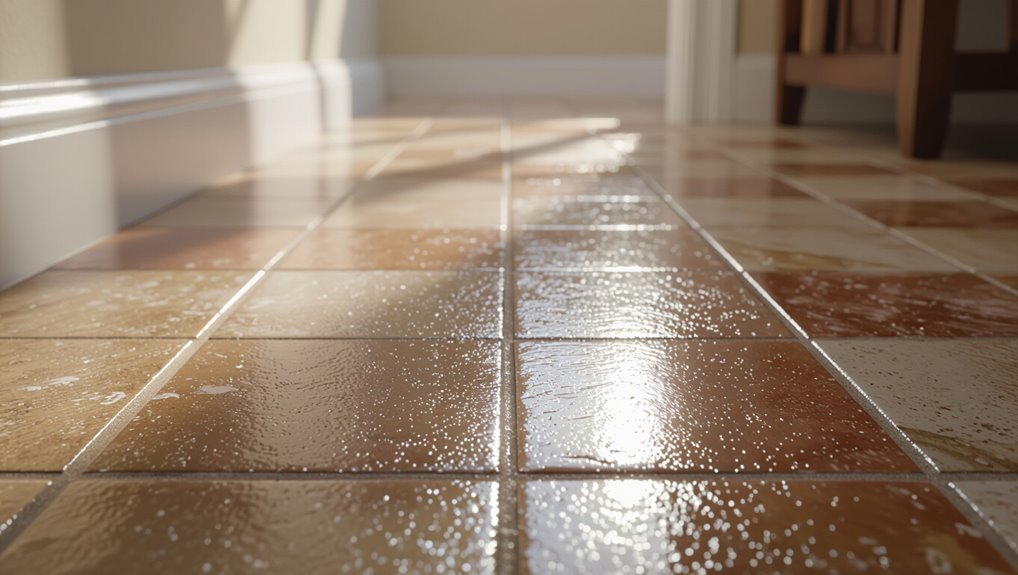
Step 6 Drying and Buffing for a New Look Finish
Now that the floor’s been rinsed and you’ve removed all residue, dry and buffing will lock in that clean look and prevent water spots or streaks.
Use microfiber towels or a mop to absorb moisture, working with the grain of the tile.
Once dry, buff with a dry microfiber pad or low-speed polisher for a glossy, streak-free finish and faster drying.
Step 7 Deep Grout Cleaning and Whitening (Chemical, Steam, and DIY Options)
When grout’s still dingy after surface cleaning, tackle it with targeted methods so your tiles really pop. You can choose chemical cleaners, steam, or DIY mixes depending on stain severity and surface type.
Test cleaners, apply with a stiff brush, rinse thoroughly, and neutralize acids.
For stubborn stains, steam or oxygen bleach lifts grime.
Seal grout after it’s fully dry to protect results.
Specialized Processes for Common Problems
You’ll need targeted techniques for specific tile issues like hard water stains, soap scum, and wax or finish buildup.
Follow safe, effective treatments for mold and mildew so you don’t damage grout or harm yourself.
For dull or etched tiles, learn how to restore shine without abrasive mistakes.
Removing Hard Water Stains and Soap Scum
If hard water stains and soap scum have dulled your tiles, you can restore their shine with targeted cleaners and a little elbow grease.
Mix equal parts white vinegar and water for durable tiles, or use a commercial lime remover for stubborn buildup.
Apply, let sit a few minutes, scrub with a nonabrasive brush, rinse thoroughly, and dry to prevent recurrence.
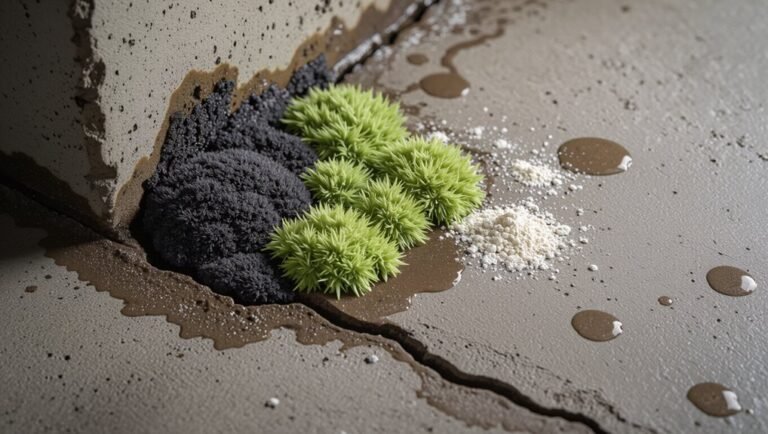
Treating Mold and Mildew Safely
Hard water and soap scum can leave tiles looking dull, but mold and mildew are a different problem that demand safer, more targeted handling to protect both your surfaces and your health.
Wear gloves and a mask, ventilate the area, and scrub affected grout with a vinegar-water mix or diluted bleach for stubborn spots.
Rinse thoroughly and dry to prevent return.
Dealing with Wax Build Up or Floor Finish Residue
When old wax or leftover floor finish dulls your tiles and leaves a sticky haze, you’ll need a different approach than routine mopping.
Strip residue using a commercial floor stripper or a DIY mix (warm water, mild detergent, a splash of ammonia for vinyl).
Work small sections, agitate with a scrub brush, rinse thoroughly, then neutralize per product instructions before drying and resealing if desired.
Restoring Shine to Dull or Etched Tile Surfaces
Although it’s tempting to assume dull or etched tiles are beyond repair, you can often restore significant shine with targeted cleaning, polishing, or grinding techniques depending on the material and severity of the damage.
Assess tile type, start with a mild abrasive cleaner, then progress to polishing pads or honing for natural stone.
Seal or apply finishing polish to protect results and maintain gloss.
Comparison: Cleaners and Tools That Work Best
You’ll want the right cleaner for each tile type—commercial products often suit porcelain and ceramic, while DIY solutions can work for sealed natural stone if used carefully.
For grout you’ll rely on stiff brushes and targeted cleaners, whereas tile surfaces respond better to microfiber mops, steam cleaners, or floor machines.
I’ll compare brand options and tool choices so you can pick the safest, most effective combo for your floors.
Best Cleaners by Tile Type (Commercial Brands vs. DIY)
Because different tiles react to cleaners in distinct ways, choosing the right product and tool matters more than using the strongest option you can find. You’ll match cleaners to porcelain, ceramic, natural stone, vinyl, and terracotta—commercial for power, DIY for gentle control. Test first, avoid acids on stone, and rinse thoroughly.
| Tile | Recommended Cleaner |
|---|---|
| Porcelain | Neutral pH commercial |
| Ceramic | Mild DIY solution |
| Stone | Stone-specific cleaner |
| Vinyl | Gentle commercial |
| Terracotta | pH-balanced DIY |
Best Tools for Grout vs. Tile (Brushes, Steam Cleaners, Floor Machines)
Pick tools that match the job: grout needs concentrated agitation and precision, while tile surfaces respond best to broader, gentler cleaning. Use stiff nylon grout brushes, handheld steamers for grout lift, microfiber mops for tile, and floor machines for heavy-duty polish. Choose based on tile finish and grout depth.
| Grout | Tool |
|---|---|
| Tile | Tool |
| Precision | Steam/brush |
| Broad | Microfiber/floor machine |
Preventive Maintenance and Best Practices
Keep a simple weekly and monthly routine to stop dirt buildup before it needs heavy scrubbing, and use a seasonal deep-clean checklist to catch grime and wear early.
You’ll want to plan long-term care like sealing or resealing grout and applying protective coatings to extend the life of your tile.
Also adopt habits like entry mats and furniture pads to prevent damage and make maintenance easier.
Weekly and Monthly Maintenance Routine
When you follow a simple weekly and monthly routine, you’ll prevent grime buildup and extend the life of your floor tiles; these small, regular tasks save time and effort compared with occasional deep scrubbing.
You’ll spot issues early and keep finishes consistent. Try this rhythm:
- Weekly: sweep/vacuum and damp-mop with mild cleaner.
- Biweekly: spot-clean grout lines.
- Monthly: inspect seals and address stains promptly.
Seasonal Deep Cleaning Checklist
Because seasonal deep cleaning tackles buildup you can’t remove with routine care, you should schedule a focused checklist each change of season to protect tiles and grout from long-term damage.
Tackle heavy soils, address grout discoloration, and refresh finishes with these steps:
- Scrub grout lines with brush and targeted cleaner
- Deep-clean with steam or heavy-duty tile cleaner
- Rinse thoroughly and dry to prevent residue
Long Term Care: Sealants, Re sealing Grout, and Protective Coatings
After you’ve removed deep soils and refreshed finishes during seasonal cleaning, protect that work by using sealants, re-sealing grout, and applying protective coatings that slow staining and wear.
Choose products suited to your tile type, follow manufacturer cure times, and test in a discreet spot.
Re-seal grout every 1–3 years, refresh coatings as needed, and clean gently to preserve protection.
Flooring Habits to Prevent Dirt and Damage (Entry Mats, Furniture Pads)
A few simple habits—using entry mats, shoe removal or rotation, and furniture pads—cut tracked-in dirt, grit, and scuffs before they damage tiles and grout.
Place durable mats outside and inside doors, shake or vacuum them regularly, and swap shoes at the entrance.
Add felt pads to chair and table legs, check and replace pads periodically, and lift heavy items instead of dragging.
Common Mistakes and How to Avoid Them
Watch out for cleaners, excess water, and abrasive tools that can etch tiles or erode grout.
If you’ve already used the wrong product or scrubbed too hard, there are targeted fixes—neutralizing agents, rinsing, grout repair, and gentle polishing—that can often reverse damage.
I’ll walk you through how to spot each mistake and the best steps to correct it.
Mistakes That Damage Tile or Grout (Wrong Cleaners, Excess Water, Abrasives)
Tiles and grout can look ruined fast if you use the wrong cleaners, pour on too much water, or scrub with abrasive tools—so know what to avoid and why.
You’ll prevent staining, etching, and loosened grout by choosing mild cleaners, limiting water, and using soft tools.
- Acidic or bleach-heavy solutions
- Flooding grout with water
- Steel wool or harsh scrubbing pads
How to Fix or Reverse Common Cleaning Mistakes
If you’ve already used a harsh cleaner, flooded grout, or scrubbed with steel wool, you can often undo the damage with the right steps and a bit of patience.
Rinse thoroughly, neutralize chemicals with a vinegar or baking soda solution, let grout dry fully, then re-seal.
For surface scratches, use a fine-grade abrasive pad gently or apply a tile-specific polish. Test first.
Cost, Time Estimate, and When to Call a Professional
Expect a small bathroom to take an hour or two while a large kitchen or open-plan area can take half a day or more, depending on how neglected the grout and sealant are.
DIY deep-cleaning supplies usually cost under $50–$150, while professional jobs range from about $100–$600 or higher for restoration and repairs.
If you see cracked tiles, persistent stains, loose grout, or moisture damage, call a pro for restoration rather than trying to fix it yourself.
Typical Time Required by Room Size and Condition
Because room size and floor condition directly affect how long deep cleaning takes, you’ll want realistic time estimates before you start.
Small, lightly soiled bathrooms: 30–60 minutes.
Medium kitchens and living areas with average grime: 1.5–3 hours.
Large or heavily stained spaces and grout restoration: 3–6+ hours.
Call a pro if stains persist or the timeline exceeds your availability.
Estimated Cost Ranges for DIY vs. Professional Deep Cleaning
Budgeting for deep tile cleaning helps you choose between DIY and pros. You can save money doing it yourself—expect $20–$150 for supplies and 1–4 hours per room. Pros cost $0.50–$5/sq ft and finish faster. Call a pro if stains persist or grout needs sealing.
| Option | Cost | Time |
|---|---|---|
| DIY | $20–$150 | 1–4 hrs |
| Pro | $0.50–$5/sq ft | 1–2 hrs |
Signs You Need Professional Restoration or Repair
If your tiles show deep discoloration, crumbling grout, widespread cracks, or persistent stains that won’t lift with strong cleaners, it’s time to call a professional—these issues often indicate structural damage, moisture intrusion, or aged grout that DIY methods can’t fully fix.
Expect restoration costs from a few hundred to several thousand dollars, jobs taking hours to days, and immediate service if water damage or active mold exists.
Before and After Care Visual Guide
Before you start, take wide and close-up photos of stained areas, grout lines, and room edges so you can compare results.
Keep a simple visual checklist for “brand new” results—uniform color, grout restoration, and absence of watermarks or residue.
After cleaning, compare your photos to the checklist to confirm you’ve achieved the desired outcome.
What to Photograph Before You Start
Why photograph your tiles before you start cleaning? Capture current dirt, grout stains, cracks, and worn sealant so you can compare progress and document problem areas.
Shoot from multiple angles, include close-ups of grout lines, corners, and any damage. Note lighting and camera distance for consistent after photos.
Store images with date and brief notes for reference.
Visual Checklist for “Brand New†Results
Anyone can get tiles looking brand new again by following a focused visual checklist that guides you from inspection through final touch-ups.
You’ll confirm baseline photos, note stains and grout gaps, and compare after shots. Use this quick guide to verify results and target missed spots:
- Take wide and close before photos
- Spot-check grout, edges, and corners
- Capture identical after shots for comparison
Frequently Asked Questions
You probably have a few quick questions about timing, cleaners, and damage risks — like how often to deep clean different tile types, whether bleach or vinegar are safe, or if steam will harm grout.
You’ll also want clear steps for tackling stubborn stains and discoloration. Below are concise answers to those common concerns.
How often should I deep clean ceramic/porcelain/stone tiles?
How often should ceramic, porcelain, or stone tiles get a deep clean? Aim for a deep clean every 3–12 months depending on traffic:
- High-traffic kitchens and entryways every 3 months,
- Moderate areas every 6 months,
- Low-traffic rooms yearly.
If you notice dullness, stains, or persistent grout discoloration, clean sooner.
Regular sweeping and mopping will extend deep-clean intervals.
Can I use bleach on grout and tiles?
After a deep clean, grout often looks like the place you’d reach for bleach first, but proceed with care: bleach can whiten grout lines and remove organic stains, yet it can also damage some tile finishes, discolor colored grout, and irritate skin or lungs.
Test a small area, dilute properly, ventilate, wear gloves and eye protection, and rinse thoroughly after treatment.
Will steam cleaning damage my tiles or grout?
Wondering if steam cleaning will harm your tiles or grout? You can use steam on most glazed ceramic and porcelain tiles without damage, but avoid unsealed natural stone and older grout—moisture and heat can weaken or discolor them.
Test a small, hidden area first, use moderate pressure, and follow manufacturer guidelines to protect seals and grout integrity.
How do I remove permanent stains or discoloration?
If steam cleaning’s off the table for your floor—or it didn’t lift that stubborn mark—you’ll need targeted methods for permanent stains and discoloration.
Test a poultice (baking soda or commercial stain remover) on an inconspicuous spot, apply, cover, and let sit per instructions.
For deep-set dye or rust, use specialized rust remover or grout-safe alkali cleaners, then rinse and neutralize thoroughly.
Is it safe to use vinegar on tile floors?
Can you use vinegar on tile floors safely? Yes for ceramic or porcelain glazed tiles—dilute white vinegar with water (one part vinegar to four parts water), mop, rinse, and avoid prolonged contact.
Don’t use vinegar on natural stone (marble, travertine, limestone) or waxed surfaces; acid damages stone and strip finishes.
Test a small area first and always follow manufacturer care instructions.