How to Install Vinyl Flooring on Stairs Without Slipping or Gaps
You can install vinyl on stairs without slipping or gaps by thoroughly prepping and measuring each tread and riser, fixing squeaks, and cleaning surfaces so adhesive bonds well. Choose slip-resistant LVT or sheet vinyl, high-grip stair nosing, and waterproof adhesive, then dry-fit pieces, trim to a snug fit, and apply adhesive evenly before rolling and clamping while it cures. Follow manufacturer open times and inspect seams; keep going to learn detailed steps and troubleshooting.
Quick Answer Can You Install Vinyl Flooring on Stairs Without Slipping or Gaps?
Yes — you can install vinyl on stairs without slipping or gaps by prepping treads, using adhesive or stair nosing, and fitting each plank snugly.
You’ll need vinyl planks or sheets, construction adhesive, stair nosing, a utility knife, straightedge, measuring tape, and a heat gun or roller for seams.
Follow precise measuring, proper adhesive coverage, and secure nosing to keep the surface safe and gap-free.
Short summary of recommended approach
You can install vinyl on stairs without slipping or gaps by choosing the right materials and following a precise prep-and-install routine: use high-grip stair nosing, waterproof adhesive, fully acclimate and accurately trim the vinyl, and secure each tread and riser with adhesive plus mechanical fasteners where recommended.
For how to install vinyl floor on stairs, prep, measure, cut tight, glue, press, fasten, and seal edges.
Key materials and tools at a glance
One clear kit of materials and tools will keep the job safe and gap-free: stair nosing, high-grip adhesive, a quality vinyl plank or sheet, a utility knife with fresh blades, a straightedge, measuring tape, a floor roller, and a trim set (nailer/screws and a caulking gun).
You’ll also need:
- Safety gloves and knee pads
- Clean solvent and rags
- Pencil and masking tape
- Small pry bar and hammer
Understanding Vinyl Flooring for Stairs
You’ll want to choose the right vinyl—luxury vinyl tile (LVT), rigid vinyl plank, or continuous sheet—all of which behave differently on steps.
Stairs require tougher installation methods than flat floors because of edge wear, vibration, and the need for secure nosing.
Also check safety features and local building codes for tread slip resistance and proper nosing dimensions before you start.
Types of vinyl suitable for stairs (LVT, vinyl plank, sheet vinyl)
Three main vinyl types—luxury vinyl tile (LVT), vinyl plank, and sheet vinyl—work well on stairs, and each brings different strengths depending on durability, slip resistance, and installation method. You’ll pick based on traffic, aesthetics, and grip. LVT offers pattern detail, planks mimic wood, sheet vinyl minimizes seams.
| Type | Best use |
|---|---|
| LVT | Detail/grip |
| Sheet | Seamless coverage |
Why stairs need different treatment than flat floors
Because stairs combine vertical and horizontal surfaces and get concentrated wear, they demand different treatment than flat floors.
You’ll face edge changes, tighter seams, and higher impact at nosing and risers. Adhesion, cutting precision, and stair-specific trim matter more.
You must plan for directional grain, slip resistance, and finishing details so the installation stays durable and gap-free.
Safety and building-code considerations
While vinyl makes stair updates straightforward, you still must meet safety and code requirements before you start—local building codes, stair geometry, and slip-resistance regulations all affect material choice and installation methods.
Check tread width, riser height, nosing rules, and handrail clearance. Use certified slip-resistant vinyl or add non-slip treatments.
Get permits if required, follow manufacturer guidelines, and schedule inspections to guarantee compliance.
Preparation: Assessing and Preparing Your Stairs
Before you start, inspect each stair for solid structure and take precise measurements so your layout minimizes seams and waste.
Fix squeaks, tighten loose treads, and level uneven risers so the vinyl will sit flat.
Finally, clean thoroughly and apply primer where recommended to guarantee proper adhesion.
Inspecting stair structure and dimensions
When you inspect stair structure and dimensions, take precise measurements and look for defects that could affect the vinyl’s fit or adhesion.
Measure tread depth, riser height, and nosing profiles. Check for wobble, rot, or moisture that would compromise bonding.
Note differences between flights and record measurements.
- Tread depth
- Riser height
- Nosing profile
- Moisture/rot signs
Repairing and leveling steps (squeaks, loose treads, uneven risers)
Now that you’ve measured and noted problem areas, address squeaks, loose treads, and uneven risers to create a stable, flat surface for the vinyl.
Tighten loose treads with screws or blocking, glue and clamp delaminated areas, shim or plane high risers and sand low spots.
Make certain each step is rigid, level, and safely fastened before proceeding with underlayment and installation.
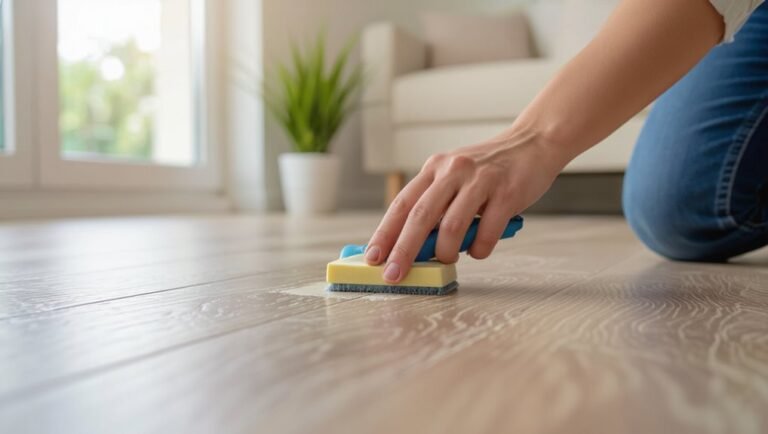
Cleaning and priming surfaces for adhesion
Clear surfaces stick better, so start by removing dust, grease, old adhesive, and loose paint from each tread and riser.
Scrub with a degreaser, rinse, and let dry. Sand glossy or uneven spots for tooth, then vacuum and wipe with tack cloth.
Apply a primer recommended by your vinyl and adhesive manufacturers, following dry times carefully to guarantee strong, lasting adhesion.
Measuring and planning layout to minimize seams and waste
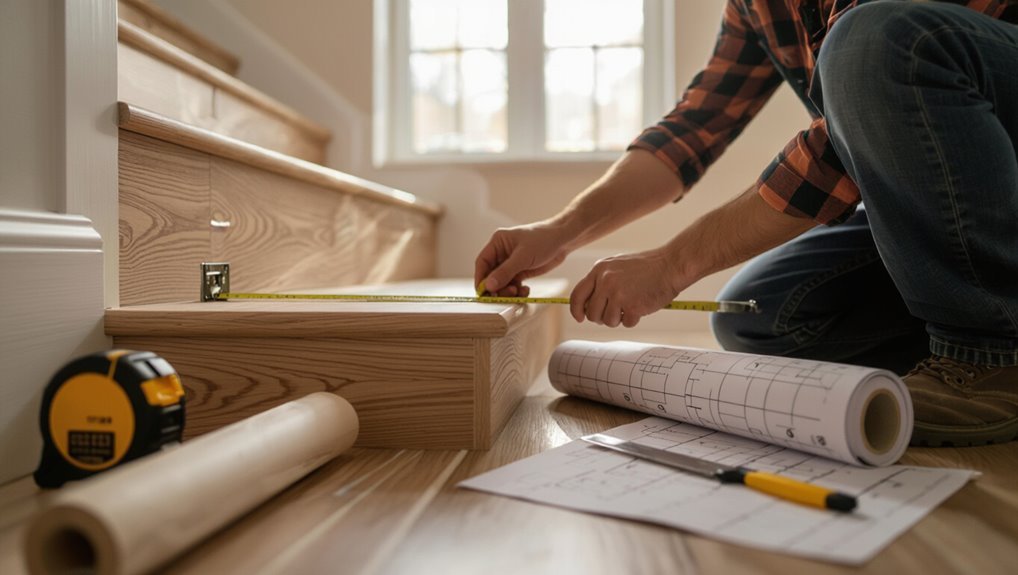
Measure each tread and riser carefully and sketch a simple template before you cut any vinyl. Record widths, depths, and nosing shapes, noting variations.
Plan layout to run grain or pattern consistently down the stairs. Place seams on risers or outer edges, not high-traffic centers.
Nest pieces to maximize yield and reduce waste; allow for a small trimming margin.
Materials, Adhesives, and Tools Selecting for Grip and Gap-Free Results
Choose a durable, slip-resistant vinyl and a thin, dense underlayment designed for stairs to guarantee a stable, gap-free surface.
Pick adhesives based on substrate and traffic — pressure-sensitive for ease of repositioning, polyurethane for moisture and strong bonds, or contact cement for instant grip on nosing areas.
Finish with the right stair nosing profile and trims to lock edges, protect corners, and maintain a continuous, safe tread.
Best vinyl products and underlayment options for stairs
Because stairs get heavy wear and need tight seams, pick vinyl products and underlayment designed for traction, flexibility, and thin profiles; you’ll want rigid or luxury vinyl planks with beveled or micro-beveled edges, a textured slip-resistant surface, and a dense, low-compression underlayment or adhesive-backed underpad that prevents movement without raising nosing heights.
- 4.5–6mm rigid vinyl planks
- embossed, slip-resistant surface
- thin closed-cell underlayment
- adhesive-backed underpad for stair use
Adhesive types (pressure-sensitive, polyurethane, contact cement) and when to use each
When you’re installing vinyl on stairs, the right adhesive makes the difference between a secure, gap-free finish and boards that shift or peel; different adhesives suit different materials and conditions. You’ll choose pressure-sensitive for peel-and-stick planks, polyurethane for strong moisture-resistant bonds, and contact cement for immediate grab on tricky edges.
| Adhesive | Best for | Notes |
|---|---|---|
| Pressure-sensitive | Vinyl planks | Repositionable initially |
| Polyurethane | High-moisture areas | Very strong, flexible |
| Contact cement | Edges/nosing | Instant bond, no repositioning |
Stair nosing, nosing profiles, and trim options
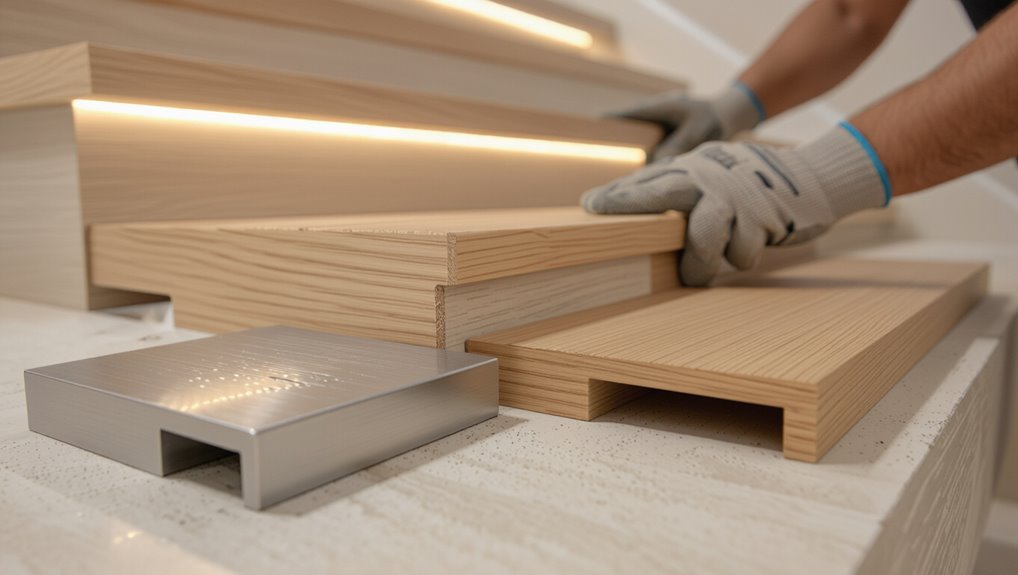
Although often overlooked, stair nosing is the component that protects edges, provides grip, and gives your vinyl installation a finished look.
So you’ll want to pick the right profile and materials for safety and a gap-free fit. Choose aluminum, PVC, or rubber nosing to match tread thickness; use bullnose, L-profile, or flush nosing for changes.
Secure with construction adhesive and mechanical fasteners.
Step-by-Step Installation Process
Start by dry-fitting and trimming each vinyl piece to the exact stair dimensions so nothing binds during installation.
You’ll attach risers first using techniques that prevent gaps, then fit treads to align precisely with the nosing before securing nosing and junction strips.
Follow the adhesive manufacturer’s protocol and curing times to guarantee a gap-free, long-lasting bond.
Step 1 Dry fit and cut vinyl pieces to stair dimensions
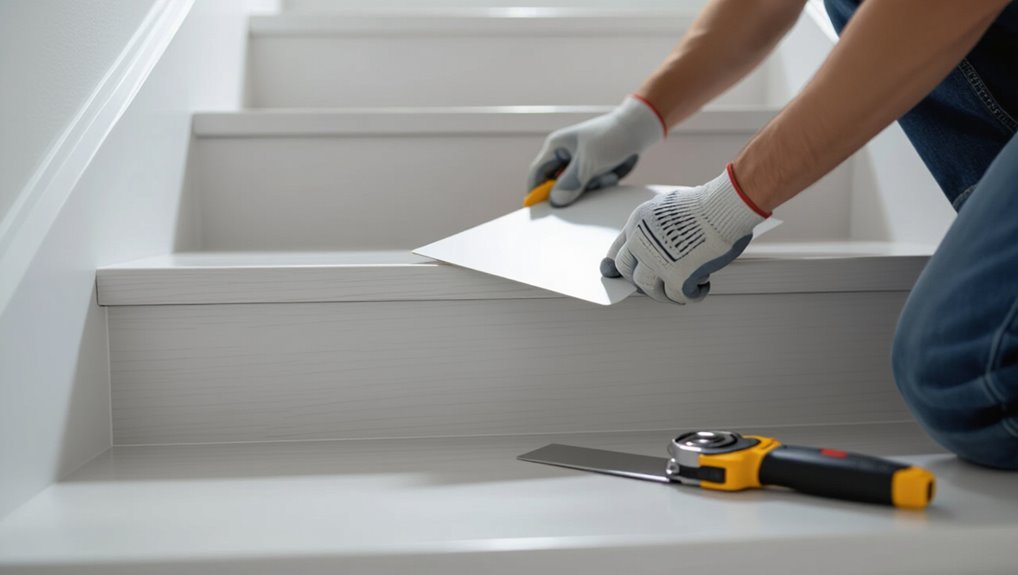
Measure each stair carefully and dry fit the vinyl pieces before you cut, so you can confirm exact fit and mark any adjustments.
You’ll trim treads and nosing pieces to match depth and width, noting irregularities. Use a sharp utility knife and straightedge, test fit, then label each piece for location.
- Check depth and width
- Trace templates
- Cut outside-in
- Label pieces
Step 2 Install riser pieces (technique to avoid gaps)
Once you’ve dry-fit and labeled the riser pieces, position each piece so its top edge tucks tightly under the tread above and its bottom edge butts snug against the stringer or next riser; this alignment prevents visible gaps when you press the vinyl into place.
Apply adhesive evenly, smooth from center outward, press firmly with a roller, and secure seams with low-profile trim or contact cement.
Step 3 Install tread pieces and align to nosing
With the risers secured, move on to fitting the tread pieces so they align perfectly with the nosing.
Measure each tread, trim precisely for a snug fit, and dry-fit before bonding.
Center the plank on the step, keep edges tight against riser and side walls, and maintain consistent overhang at the nosing.
Press firmly, removing air pockets for an even, gap-free surface.
Step 4 Secure nosing and transition pieces
Secure the nosing and connections next to lock the tread in place and create a safe, finished edge.
Fit the nosing snugly against tread fronts, check alignment, then fasten with recommended screws or adhesive clips into the stringer.
Install junction pieces at landings and top/bottom stairs, ensuring tight seams and consistent height.
Trim excess and verify snug, gap-free joints before finishing.
Step 5 Adhesion protocol and curing times for gap-free bond
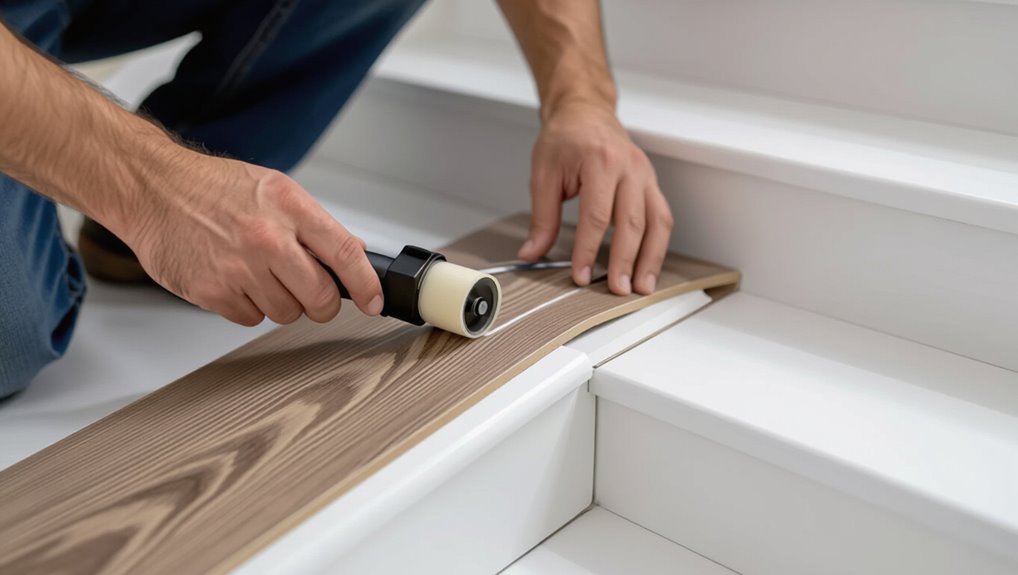
Begin by preparing the surfaces and layout so every plank sits tight: clean dust and debris from treads and risers, dry-fit the vinyl to confirm alignment and gaps, and plan adhesive bead locations according to the manufacturer’s diagram.
Apply recommended adhesive evenly, press planks firmly with a roller, clamp or weight as needed, and follow specified open and cure times before trimming or foot traffic.
Step 6 Finishing edges, seams, and caulking for waterproofing
Step 6 focuses on clean, watertight finishes: trim exposed edges, seal seams, and caulk joints so moisture can’t migrate beneath the vinyl.
After adhesive cures, rout tight seams, press seam tape or weld vinyl where possible, and install nosing and stair trim.
Use a high-quality silicone or polyurethane caulk, smooth beads with a wet finger, and wipe excess for a neat, durable waterproof finish.
Anti-Slip Solutions and Enhancements
You’ll want to prioritize slip resistance when finishing vinyl on stairs by choosing built-in textured vinyl with appropriate grip ratings or adding non-slip tapes, adhesive strips, or coatings.
Pick stair nosing that has anti-slip features to extend safety where tread meets edge.
Finally, set a maintenance routine—cleaning, reapplying coatings or replacing strips—to keep traction reliable over time.
Built-in textured vinyl options and grip ratings
Treads with molded textures give vinyl stair coverings a safer, more confident footing. Manufacturers rate these surfaces so you can pick the right level of grip for your home or commercial space.
You’ll compare R-scale or PTV values, texture depth, and wear layer compatibility. Choose higher ratings for wet or high-traffic areas, balancing grip with ease of cleaning and aesthetic needs.
Adding non-slip tapes, adhesive strips, or coatings
If built-in textured vinyl doesn’t give you the grip you need, you can boost traction quickly with non-slip tapes, adhesive strips, or liquid coatings designed for stairs.
You’ll clean, measure, and apply products that match tread width and traffic. Consider durability, slip rating, and appearance.
- Grip tape: coarse, easy install
- Adhesive strips: low profile
- Liquid coatings: seamless
- Removable options: temporary
Choosing nosing with anti-slip features
When selecting stair nosing, pick profiles that combine a secure grip with the right fit for your vinyl—raised ribs, abrasive inserts, or rubberized edges all add traction without compromising appearance.
Measure tread depth and vinyl thickness, choose matching nose material (aluminum, PVC, or rubber), guarantee profile covers edges snugly, and fasten per manufacturer specs so the nosing stays flush, secure, and visually consistent.
Maintaining slip resistance over time
Although proper nosing and installation give you a good start, maintaining slip resistance over time takes regular inspection and targeted updates; check wear points, clean residues that reduce traction, and replace or refresh anti-slip elements like abrasive strips, inserts, or coatings as they degrade.
You should test grip after cleaning, reapply coatings yearly or as needed, and promptly repair damaged nosing to keep stairs safe.
Common Problems and How to Fix Them
You’ll run into a few common issues when installing vinyl on stairs, but you can fix most of them without redoing the whole job.
Check and repair gaps between treads and risers, address peeling or lifting by troubleshooting adhesives, and smooth or cut out bulges, bubbles, or wrinkles.
For visible seams or mismatched patterns, use corrective trimming, seam sealer, or selective replacement to blend the finish.
Gaps between tread and riser causes and repairs
If your vinyl treads are pulling away from the risers, you’re dealing with a common issue that usually stems from movement, poor adhesion, or installation errors.
Inspect for loose nails, gaps in subflooring, or uneven surfaces.
Tighten or replace fasteners, fill voids with wood filler or shims, sand and clean surfaces, then reapply contact adhesive or use mechanical fasteners to secure the tread.
Peeling or lifting vinyl troubleshooting adhesive failures
When vinyl starts peeling or lifting, it’s usually because the adhesive failed—either from improper application, incompatible products, or moisture and temperature changes.
You’ll want to diagnose the cause before patching. Remove loose vinyl, clean old adhesive with recommended solvent, and dry thoroughly.
Choose the correct adhesive for your vinyl and substrate, apply evenly, press and weight the repair, and allow full cure time.
Bulging, bubbling, or wrinkles prevention and remediation
Because air, moisture, or improper tension can get trapped under vinyl, bulges, bubbles, and wrinkles often show up quickly on stairs and worsen with use.
To prevent them, dry substrates thoroughly, roll or squeegee vinyl from center outward, and maintain correct tension.
To fix small bubbles, pierce and press out air; for large or persistent wrinkles, remove and reapply with proper adhesive and heat as needed.
Visible seams or mismatched patterns corrective techniques
After handling bubbles and wrinkles, you’ll want to tackle visible seams and pattern mismatches, since they can draw the eye and ruin the stair run’s flow.
Align planks before cutting, use a chalk line for straight seams, and stagger joints. If a mismatch appears, trim and reposition or replace the affected piece.
Fill tiny gaps with color-matched filler and press seams with a roller.
Best Practices and Pro Tips
To get a professional look, you’ll want to match patterns and align visuals across each tread and riser before you cut.
Work safely to minimize dust and noise, account for humidity and temperature when storing and acclimating the vinyl, and plan the job to reduce disruption.
If the layout, stair shape, or environmental conditions are tricky, consider hiring a pro rather than risking mistakes.
Pattern matching and visual alignment for aesthetics
When you’re laying vinyl on stairs, aligning patterns so they flow naturally from tread to riser makes the installation look intentional and polished; plan each run, mark reference lines, and visualize how motifs will intersect at nosing and corners before you cut.
Start at a focal point, match grain or tile lines across steps, trim for continuous flow, and adjust pieces so seams sit where they’re least visible.
Working safely and minimizing disruption during installation
Good pattern alignment looks great, but you also need to protect yourself and the household while you work.
Wear gloves, eye protection, and a dust mask. Block off the stairway, use signage, and cover nearby floors and furniture.
Keep tools organized, secure loose boards, and use LED work lights.
Schedule noisy steps for low-traffic times to minimize disruption and risk.
Seasonal and environmental considerations (humidity, temperature)
Because vinyl expands and contracts with temperature and humidity shifts, you should plan installation for a stable climate window and acclimate the planks on the stairs for at least 48 hours in the space.
Monitor humidity (35–65%) and indoor temperature (60–80°F). Avoid installing during extreme seasonal swings or when HVAC is off.
Use moisture barriers where subfloor shows elevated moisture to prevent buckling or gaps.
When to hire a professional vs. DIY
If you’ve got solid DIY skills, the right tools, and a straightforward staircase, you can likely handle vinyl installation yourself; however, hire a professional if the stairs are complex, the subfloor needs major repairs, or you’re unsure about moisture issues, code requirements, or proper stair-nosing installation.
You should also call a pro for steep inclines, custom treads, tight timelines, or if warranties require certified installation.
Materials Cost, Time Estimate, and Project Planning
You’ll want a clear budget that breaks down materials, tools, and any labor so you’re not surprised mid-job.
Plan the time for each step—prep, cutting, fitting, adhesive/fastening, and finishing—and add buffer for drying or unexpected issues.
Use a checklist to decide if you can finish in one day or need a staged, multi-day schedule.
Typical cost breakdown (materials, tools, labor)
Planning a vinyl stair installation starts with a clear cost breakdown—materials, tools, and labor—so you can set a realistic budget and timeline. Estimate materials ($2–6/ft²), tools ($50–150 one‑time), and labor ($40–80/hr or contractor flat). Prioritize quality adhesive and non‑slip nosing. Use the table below to compare costs quickly.
| Item | Typical Cost | Notes |
|---|---|---|
| Materials | $2–6/ft² | Vinyl + nosing |
| Tools | $50–150 | Cutters, roller |
| Labor | $40–80/hr | Or flat rate |
Time per step and total project timeline
Start by breaking the job into clear steps—measuring and prepping stairs, cutting and laying vinyl on treads and risers, installing nosing, and finishing—so you can assign realistic time and material needs for each.
Estimate 20–40 minutes per tread for an average DIYer; risers take 10–20 minutes.
Add drying and adhesive cure time.
Total for a 12-step staircase: roughly 6–10 hours.
Checklist for one-day vs. multi-day installations
Decide whether you’ll finish the job in one day or spread it over several by matching your staircase size and skill level to realistic time and material needs.
Estimate hours, factor drying times, and budget adhesive plus extras. Plan helpers, tools, and cleanup.
- Materials: vinyl, adhesive, nosing, underlayment
- Time: per-step vs. total
- Cost buffer: 10–20%
- Crew: solo or assistant
Frequently Asked Questions
You’ve probably got a few practical questions before you start—like whether you can install vinyl over existing stair flooring and if the same adhesive works for treads and risers.
You’ll also want to know how long vinyl lasts, how to maintain it, whether it gets slippery for kids or seniors, and how to replace a single damaged piece.
Below are concise answers to those common concerns.
Can I install vinyl over existing flooring on stairs?
Can you install vinyl over existing stair flooring? Yes, in many cases you can if the current surface is secure, level, and free of cushioning.
Remove loose edges, fill gaps, and sand glossy finishes. Thin-set or adhesive-backed vinyl can work, but avoid layering over thick carpet or uneven tiles.
Always check manufacturer guidelines and local building codes before proceeding.
How long does vinyl on stairs last and how do I maintain it?
If your existing stairs were suitable for vinyl and the installation was done properly, you can expect vinyl stair coverings to last anywhere from 10 to 25 years depending on material quality and foot traffic.
To maximize lifespan, sweep and vacuum regularly, mop with a manufacturer-recommended cleaner, avoid abrasive tools, place mats at entries, repair edges or seams promptly, and use felt pads on furniture.
Will vinyl on stairs be slippery for children or elderly family members?
Because vinyl can be smooth and wear down over time, it may feel slippery—especially for children and older adults—but you can manage the risk with the right choices and treatments.
Choose textured or slip-resistant vinyl, add non-slip tape or adhesive treads, keep stairs clean and dry, guarantee proper edge changes, and consider handrails and good lighting to reduce falls and improve stability.
Can I use the same adhesive for treads and risers?
Which adhesive to use depends on the materials and the stair conditions—you can sometimes use the same adhesive for both treads and risers, but only if the product is rated for vertical and high-traffic surfaces and matches the vinyl type.
Check manufacturer recommendations, cure time, and slip resistance. Use adhesives labeled for vinyl on stairs; otherwise choose separate products to guarantee proper bonding and durability.
How do I replace a single damaged stair vinyl piece?
When a single stair vinyl piece gets damaged, you can often replace just that piece without redoing the whole staircase—especially if you used the same adhesive and materials on treads and risers.
Remove damaged vinyl carefully, clean substrate, and trim any loose edges.
Cut a matching replacement from leftover material, dry-fit, apply adhesive, press firmly, and roll to remove bubbles.
Seal seams and trim excess.