How to Level an Uneven Concrete Floor Before Installation
You can make an uneven concrete floor flat by measuring and mapping highs and lows, grinding down peaks, and filling low spots with patch mortar or a self-leveling compound. Clean, dry, and prime the slab first, repair cracks, and control dust. Small dips under 1/4″ are DIY-friendly; larger hollows or structural issues may need pro help. Mix and pour per instructions, work fast, and respect cure times—keep going and you’ll find step-by-step techniques, tools, and costs ahead.
How to Level an Uneven Concrete Floor Before Installation Quick Answer
For most jobs, the best overall approach is to grind low spots and use a self-leveling compound to smooth the slab.
However, call a pro if you find major cracks, structural settlement, or drainage issues.
Expect a few hours to a couple of days depending on prep and drying time, with costs ranging from low for DIY materials to several hundred or more if you hire help.
You’ll need a grinder or scarifier, patching compound, primer, self-leveler, trowels, and basic safety gear.
Direct answer: best overall approach and when to call a pro
If your slab has only minor dips or high spots (under 1/4 inch across a few feet), you can usually fix it yourself with a self-leveling compound or a thin skim coat after proper cleaning and priming.
Tackle larger hollows or slopes up to 1/2–3/4 inch by feathering in multiple passes or using a cement-based patch that’s trowelable.
For most DIYs, learn how to level an uneven concrete floor yourself, but call a pro if there’s structural cracking, drainage issues, or unevenness over large areas.
Time, cost, and tool overview
You’ll typically spend a few hours to a couple of days leveling a concrete floor, depending on the size of the area and how severe the unevenness is.
Expect materials and rental tools to drive cost; small jobs run $50–$300, larger repairs $300–$1,200+.
Bring:
- Grinding machine for high spots
- Self-leveling compound for low areas
- Trowel, primer, and mixing tools
Basics: Understanding Concrete Floor Unevenness
Before you start leveling, you’ll want to know why the slab is uneven — common causes include settlement, a poor pour, moisture issues, or inadequate subbase.
Look for types of irregularities like low spots, high spots, slopes, and cracks so you can choose the right repair method.
Don’t forget that unresolved unevenness can ruin new flooring and void manufacturer warranties, so accurate assessment matters.
Common causes of uneven concrete (settlement, poor pour, moisture, etc.)
Cracks, dips, and sloping in a concrete floor usually trace back to a few predictable causes: soil settlement, a poor pour or finish, and moisture problems.
You’ll recognize them by patterns:
- Sunken areas where soil washed away.
- Wavy, uneven trowel marks from rushed finishing.
- Moisture blistering or efflorescence from poor drainage or vapor intrusion.
You can address each cause differently.
Types of floor irregularities (low spots, high spots, slopes, cracks)
When you inspect a concrete floor, you’ll find four basic irregularities—low spots (dips), high spots (humps), slopes, and cracks—each with distinct causes and repair methods.
You’ll spot low spots where water pools and use patching or self-leveler. High spots need grinding.
Slopes indicate grading or settlement and may require reprofiling.
Cracks range from hairline to structural, needing sealants or repairs.
How unevenness affects flooring installation and warranty
If your concrete isn’t flat, it’ll change how flooring goes down and whether the manufacturer will honor the warranty.
You’ll likely face installation problems like uneven seams, hollow spots, adhesive failure, and premature wear. Many warranties require that the substrate meet specific flatness and moisture standards before installation.
You should measure tolerances, document conditions, fix issues with leveling compound or grinding, and keep receipts for warranty claims.
Assessing Your Floor: Measure, Map, and Decide
Before you start any repairs, gather a level, straightedge (or laser level), and moisture meter so you can accurately assess the slab.
Use the straightedge and level to measure flatness, mark highs and lows on a floor map, and test for moisture and structural problems as you go.
If you find large deviations, persistent moisture, or cracks that suggest settling, get a professional evaluation before proceeding.
Tools and materials needed for assessment (level, straightedge, laser level, moisture meter)
A few basic tools make evaluating an uneven concrete floor quick and accurate: a 4- to 6-foot level or straightedge, a laser level for larger areas, a tape measure, and a moisture meter to check slab dampness.
You’ll also want safety gear and marking tools.
Visualize tasks:
- Straightedge bridging low spots
- Laser projecting reference plane
- Moisture meter probing damp zones
Step 1 Measure flatness: how to use a straightedge and level
Now that you’ve gathered your straightedge, level, tape and moisture meter, start by measuring flatness systematically: lay the 4- to 6-foot straightedge across the slab in a grid pattern, check for gaps, and note high or low spots with a pencil or chalk.
Use a carpenter’s level on the straightedge to read slope and bubble placement, record deviations, and repeat across the room.
Step 2 Create a floor map of highs and lows
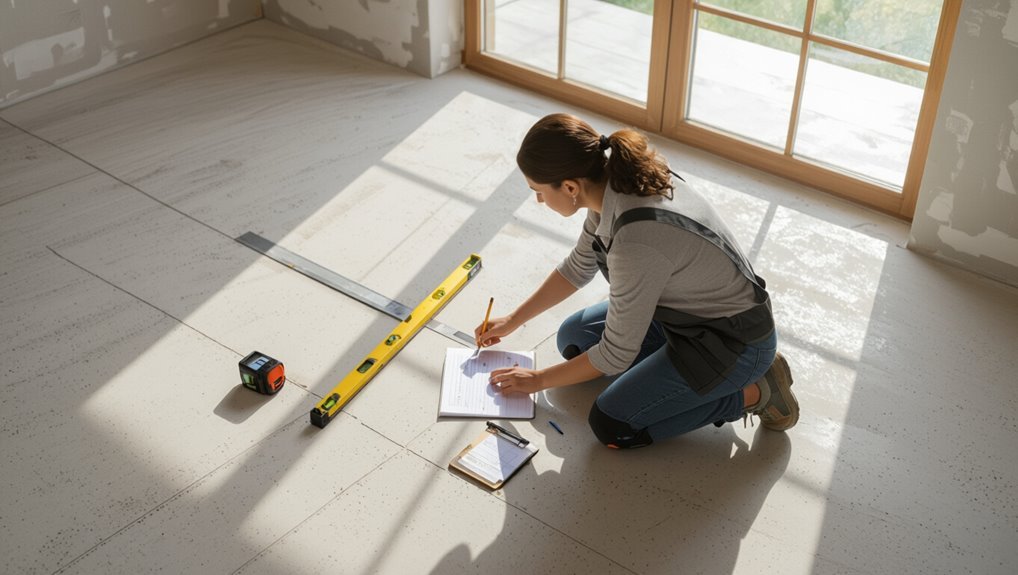
Step 2 is where you turn your spot checks into a clear floor map so you can see every high and low.
Walk the room with your notes and mark each deviation on a scaled sketch, indicating distance from fixed points (walls, doorways) and the size of gaps under the straightedge or the degree of slope from your level.
Label contours, note extreme points, and prioritize areas to correct.
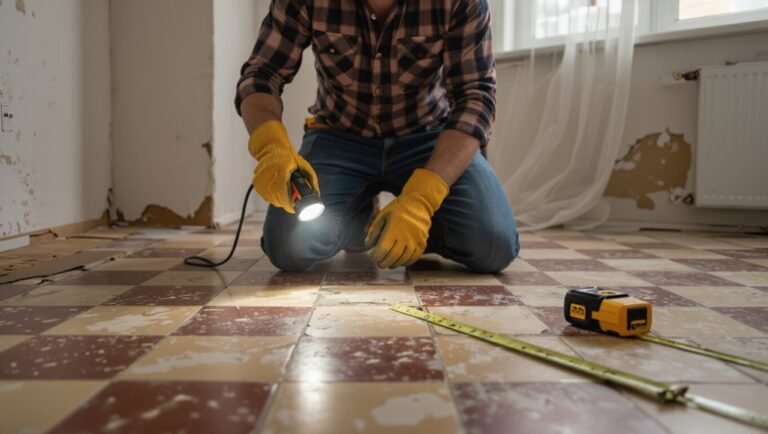
Step 3 Test moisture and identify structural issues
With your floor map in hand, check for moisture and structural problems before you pick a leveling method.
Use a moisture meter and tape test to spot damp areas. Inspect for cracks, settlement, and deflection; tap slabs to detect hollow spots.
Note locations and severity on your map. These findings guide choosing patching compounds, self-levelers, or targeted repairs.
When the assessment indicates professional evaluation is required
If your assessment reveals widespread cracks, ongoing moisture, significant settlement, or structural movement, call a professional for a formal evaluation before you proceed.
You’ll avoid costly mistakes by getting a structural or waterproofing specialist to diagnose causes, recommend repairs, and specify remediation methods.
Follow their written scope so leveling work complies with safety, warranty, and local code requirements before you order materials or start.
How-To: Level an Uneven Concrete Floor Step-by-Step
Now you’ll choose the right approach—grinding, patching, screeding, or a self-leveling compound—based on the severity of highs and lows.
First prep the slab by cleaning, etching, and applying a bonding primer, then grind down high spots and scarify where needed while controlling dust.
Repair deep cracks and depressions with patch mortar or epoxy, and finish by mixing and pouring a self-leveling compound within its work time.
Overview: choosing between grinding, self-leveling compound, patching, or screeding
Before you start, decide which method fits the condition of your slab, the amount of height change, and how you’ll use the space — grinding for minor high spots, self-leveling compound for broad low areas, patching for isolated depressions, and screeding when you need to build or replace a full surface plane.
Choose grinding for small corrections, self-leveling for shallow widespread dips, patching for localized holes, and screeding to reestablish a consistent plane.
Step 1 Prepare the surface (cleaning, etching, bonding primer)
Start by giving the slab a thorough cleaning so dirt, oil, and loose material won’t prevent adhesion.
Sweep and vacuum debris, degrease stains, then etch or acid-wash per product instructions.
Apply bonding primer once dry.
Visualize three key steps:
- Scrub and rinse until water beads evenly.
- Neutralize and dry after etching.
- Roll primer uniformly; allow full cure before leveling.
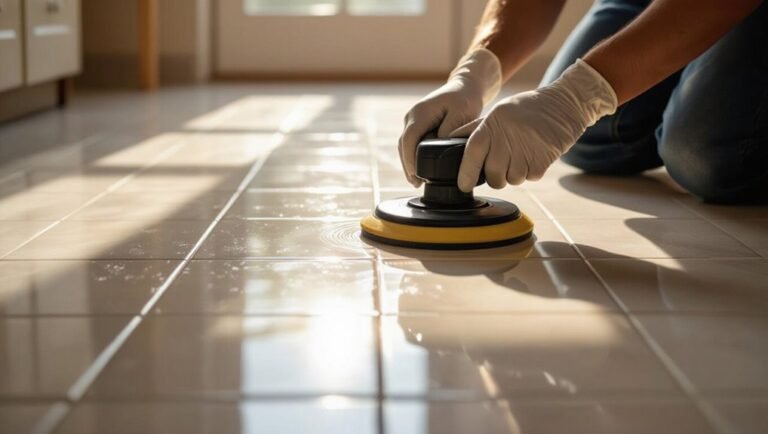
Step 2 Address high spots: grinding and scarifying (tools, technique, dust control)
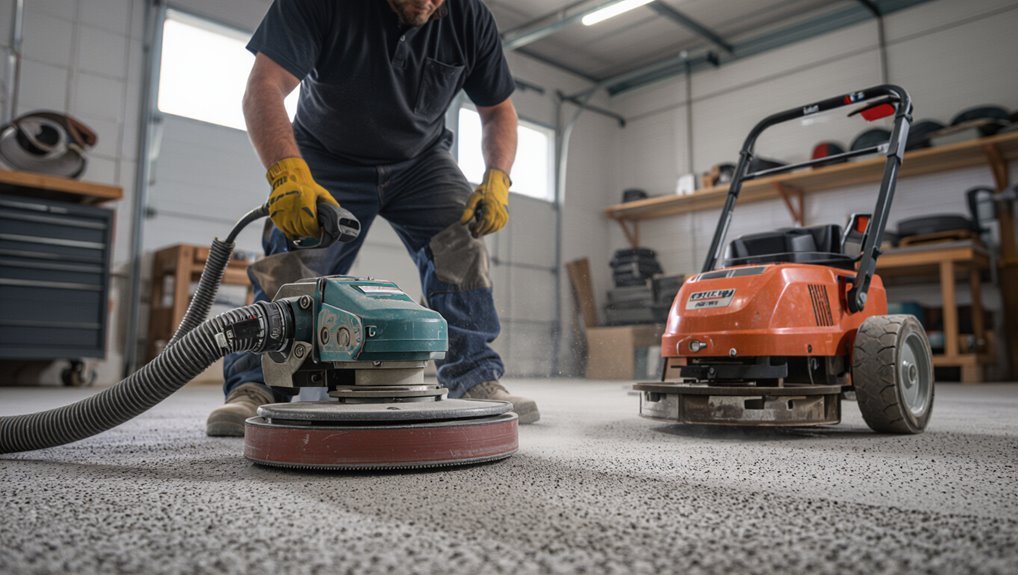
Tackle high spots by grinding or scarifying them down to create a uniform plane that the leveling product can bond to; choose the method based on how much material you need to remove and the tools you have.
Use an angle grinder with diamond cup wheels for small areas or a floor grinder/scarifier for large spots.
Work in passes, clamp knee pads, and run vacuum dust extraction.
Step 3 Repair deep depressions and cracks (patch mortars, epoxy injections)
Patch deep depressions and repair cracks so your leveling compound has a solid, stable base to bond to.
Clean debris and dust, then widen hairline cracks slightly for proper adhesion. Use a suitable patch mortar for voids and epoxy injections for structural cracks.
Follow manufacturer mixing and curing times, apply in layers if needed, and grind or feather edges for a smooth, bonded surface.
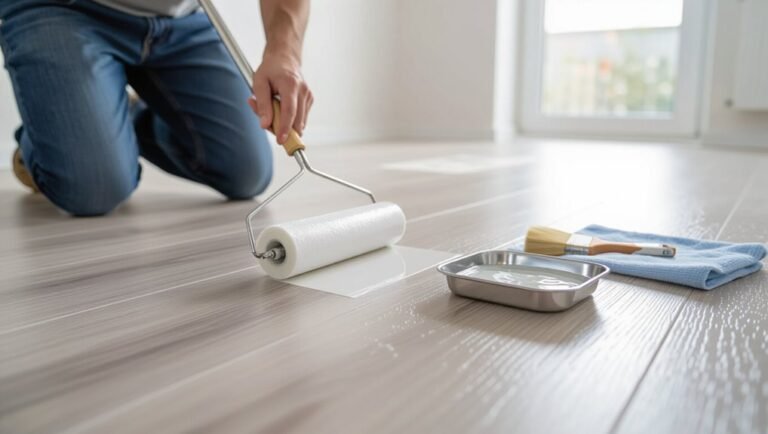
Step 4 Apply a self-leveling compound (mixing, pour technique, working time)
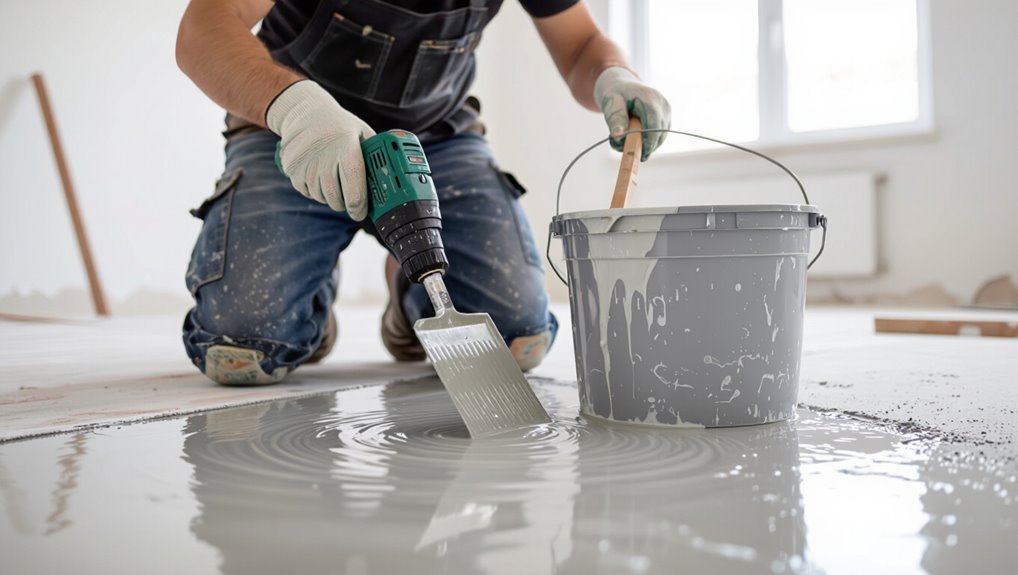
With repairs finished and surfaces cleaned, you’re ready to mix and pour the self-leveling compound to create a flat, load-bearing surface.
Follow manufacturer water ratios, mix to a lump-free, pourable consistency, and work quickly—most mixes set in 15–30 minutes.
Pour from one corner, let it flow, and use a gauge rake or push with a squeegee to guide coverage before the working time expires.
Step 5 Screeding and feathering for gradual slopes (when to use, method)
When you need a gradual slope—to direct water toward a drain or to shift between floor heights—you’ll use screeding to establish the main plane and feathering to blend the edge down smoothly; both techniques keep the surface even without creating abrupt steps.
Set screed rails at desired grade, drag a straightedge to remove excess, then float and feather the perimeter with a trowel to taper connections.
Step 6 Curing time, post-level checks, and surface preparation for final flooring
After the leveling mix sets, let it cure fully before you walk on it or install finish flooring—doing so prevents cracks and guarantees flatness.
Check level with a straightedge and laser; mark and sand high spots, fill low pinholes, and vacuum thoroughly.
Test moisture with a meter or tape method.
Prime or apply recommended bond coat per flooring manufacturer before laying finish.
Choosing the Right Method and Materials
You’ll pick the right approach by comparing grinding, leveling compounds, patching, and overlays against how much material you need, depth of repair, and moisture conditions.
I’ll point out the best products for thin skims, deep fills, and damp areas, plus the tools each job requires.
Then we’ll weigh whether renting or buying gear makes the most sense for your project.
Comparison of methods: grinding vs. leveling compound vs. patching vs. overlay
Although each repair method can make your floor flat, they work best in different situations and have distinct costs, time frames, and skill requirements. You’ll choose grinding for shallow highs, compounds for moderate dips, patching for localized holes, and overlays for large-scale restorations. Compare quickly:
| Method | Best for | Skill/time |
|---|---|---|
| Grinding | Minor high spots | Low/fast |
| Leveling compound | Moderate unevenness | Medium/moderate |
| Patching | Local damages | Low/short |
| Overlay | Widespread defects | High/long |
Best products by scenario (thin skim, deep fills, moisture-prone areas)
Whatever size or cause of your uneven concrete, picking the right product makes the job faster and lasts longer.
You’ll choose based on depth and moisture: thin skim coats use polymer-modified self-levelers; deep fills need flowable cement repair or aggregate mixes; moisture-prone areas require moisture-tolerant, vapor-mitigating primers and epoxy toppings.
- thin skim
- deep fills
- moisture-prone
Recommended tools and rental vs. buy decisions
1 smart tool choice can speed the job and save money, but decide whether to rent or buy based on frequency, project size, and budget.
You’ll need mixers, screeds, grinders—buy if you’ll reuse, rent for one-offs.
Picture your workflow:
- Paddle mixer whipping smooth compound.
- Long screed leveling across joists.
- Floor grinder shaving high spots precisely.
Common Mistakes and How to Avoid Them
Don’t skip moisture testing—excess dampness can wreck adhesives and topping materials.
Watch compound thickness and avoid overbuilding beyond manufacturer limits, and make certain you prep the surface thoroughly to guarantee proper bonding.
Mix accurately and respect working times so the material performs as planned.
Mistake: Skipping moisture testing and its consequences
If you skip moisture testing before leveling, you can set yourself up for major problems down the line—adhesives can fail, leveling compounds can delaminate, and new flooring can buckle or grow mold.
You need to test for moisture and alkalinity, interpret results per product specs, and address high readings with a vapor barrier or remediation.
Skipping tests wastes time, money, and materials.
Mistake: Overbuilding with self-leveling compound (thickness limits)
When you pour too much self-leveling compound, you’re not making the floor stronger—you’re risking cracks, long cure times, and failed bonds because most products have strict thickness limits.
Don’t exceed manufacturer depth specs; use a primer and pour in multiple controlled lifts if needed.
For deep low spots, fill with appropriate patch mortar or use a fiber-reinforced mix designed for thicker builds.
Mistake: Poor surface prep and bonding failures
Since a self-leveling product can only bond to a clean, sound surface, poor prep is the single biggest cause of failures like peeling, cracking, or delamination.
You must remove grease, paint, dust, and weak laitance; repair spalled areas and fill deep voids.
Always use the manufacturer-recommended primer and guarantee the substrate is dry and structurally sound before pouring to secure adhesion and longevity.
Mistake: Incorrect mixing or working time errors
Although the bag may look simple, improper mixing and missing the product’s working time are the quickest ways to ruin a pour.
You must follow manufacturer ratios, mix to a uniform consistency, and avoid overmixing air. Work in manageable batches, monitor pot life, and have tools and helpers ready.
If it starts to set, discard and mix fresh—don’t try to revive it.
Best Practices and Prevention
To keep your floor flat for the long term, make sure you prep the substrate correctly and install control joints where needed.
Address moisture with proper mitigation and a vapor barrier before you pour or install any topping.
Then follow basic maintenance—clean spills, monitor for cracks, and fix small issues quickly—to prevent future unevenness.
How to ensure long-term flatness (proper substrate prep, control joints)
When you want a floor that stays flat for years, start with meticulous substrate preparation and a clear plan for control joints; these steps prevent cracks, bonding failures, and future unevenness.
Clean, level, and mechanically profile the slab, repair delamination, and guarantee proper priming.
Layout control joints per slab geometry and load paths, and time saw cuts to relieve stress before finishes.
Moisture mitigation and vapor barriers before installation
If your slab holds or transmits moisture, it’s going to ruin many floor systems, so you must address vapor issues before installing leveling compounds or floor coverings.
Test for moisture (RH, calcium chloride). Repair cracks and install a vapor retarder or impermeable membrane per manufacturer specs.
Use moisture-tolerant primers and leveling products if needed. Confirm dryness before proceeding to avoid failures.
Maintenance tips to prevent future unevenness
Because small issues compound over time, regular maintenance keeps your concrete slab stable and prevents the unevenness that forces costly repairs later.
Inspect for cracks, settlement, and drainage issues every season. Fix small cracks, reseal surfaces, clear gutters, and maintain proper grading.
Control moisture with dehumidifiers and vapor barriers, avoid heavy point loads, and schedule prompt repairs to stop minor problems becoming major ones.
When to Hire a Professional
If your floor shows structural cracks, big elevation changes, or persistent moisture, you’ll want a pro rather than a weekend fix.
Ask contractors about their experience with concrete leveling, request written, itemized quotes, and compare timelines and warranty terms.
Professionals typically use mudjacking, polyurethane foam, or full slab replacement—expect a few hours to several days depending on the method and site conditions.
Signs the project is beyond DIY (structural issues, large elevations, moisture)
When you notice widespread cracking, severe slopes, or persistent moisture under the slab, it’s time to call a professional rather than tackling the job yourself; these signs often point to structural problems, major elevation differences, or chronic water intrusion that require specialized equipment and expertise to fix safely and effectively.
You should hire pros if floors shift, drains fail, elevations exceed a few inches, or moisture tests read high.
What to ask contractors and how to get accurate quotes
Wondering what to ask contractors so you don’t get surprised by costs or scope creep?
Ask for a written, itemized quote, proof of insurance and references, and a clear warranty.
Get timeline and payment milestones in writing, and insist on scope limits.
Visualize answers with:
- Itemized sheet
- Project photos
- Signed agreement detailing exclusions and fees
Typical professional methods and expected timelines
Now that you know what to ask contractors and how to get accurate bids, you’ll want to understand the common professional methods for leveling concrete and how long each typically takes so you can evaluate quotes and schedule work.
Pros use grinding (hours), self-leveling compound (1–2 days including cure), mudjacking (1 day), or full pour overlays (2–4 days).
Ask about cure times and disruption.
Tools, Materials, and Cost Guide
You’ll get a clear checklist of tools and materials with typical costs so you can budget the job.
I’ll also give realistic time estimates for common project sizes—single room, garage, and basement—so you can plan your schedule.
With that info you’ll know what to buy, how long it should take, and when to call a pro.
Detailed checklist of tools and materials with typical costs
Before you begin, gather the right tools and materials so you can work efficiently and avoid costly delays; this checklist breaks down what you’ll need, why it matters, and typical price ranges so you can budget the job. You’ll need safety gear, measuring tools, leveling compounds, and mixing equipment—buy quality to save time and rework.
| Item | Purpose | Typical Cost |
|---|---|---|
| Trowel | Finishing | $10–$30 |
| Level | Measure | $15–$60 |
| Mix | Compound | $20–$50 |
Time estimates for common project sizes (single room, garage, basement)
With your tools and materials laid out and costs estimated, you can start planning how long each job will take so you can schedule help, rent time, or arrange workspace access.
Single room: 1–2 days for prep, grinding, patching, and curing.
Two-car garage: 2–4 days.
Basement (finished area): 3–5 days, allowing extra drying and multiple skim coats.
Frequently Asked Questions
You probably have specific questions about how flat your floor needs for vinyl, tile, hardwood, or carpet, and whether you can pour self-leveling compound over old adhesive or tile.
You’ll also want to know how long to wait before installing flooring, whether leveling will hide cracks or stop structural movement, and if moisture control is always required first.
I’ll answer each of these clearly so you can pick the right prep and timing for your project.
How flat does a floor need to be for vinyl, tile, hardwood, and carpet?
Because different floor coverings tolerate different amounts of variation, you’ll want to know the flatness requirements for vinyl, tile, hardwood, and carpet before you start leveling.
Vinyl and resilient flooring usually need variations under 3/16″ over 10′.
Tile demands very flat surfaces—1/8″ in 10′ or better.
Hardwood prefers 3/16″ in 6′.
Carpet is most forgiving, often 1/2″ over 6′.
Can I use self-leveling compound over old adhesive or tile?
Knowing how flat a subfloor must be for each finish helps decide whether you can cover existing adhesive or tile with a self-leveling compound.
You can in some cases, but surfaces must be clean, sound, and well-bonded. Remove loose adhesive, grind high spots, and prime per manufacturer instructions.
Thin-set on ceramic tile often needs scraping or a bonding primer before applying the compound.
How long before I can install flooring over a self-leveling product?
How soon can you install flooring over a self-leveling product? It depends on the product and thickness.
Most cement-based mixes set to walk-on in 2–4 hours and accept tile or resilient flooring in 24 hours; some require 48–72 hours for full strength.
Always check the manufacturer’s cure times, ambient temperature and humidity, and recommended moisture tests before installing your finished floor.
Will leveling compound hide cracks or fix structural movement?
Will a leveling compound hide cracks or fix structural movement? You can cover hairline cracks cosmetically with self-levelers, but you shouldn’t rely on them to repair structural issues or active movement.
Fillers and patching compounds suit non-moving cracks; for shifting slabs, diagnose causes and use proper structural repairs—saw-cut joints, epoxy/injection, or underpinning—before applying leveling product for a lasting floor.
Is moisture control always necessary before leveling?
Because excess moisture can ruin a new topping, you should always check and control dampness before pouring most leveling compounds—especially if the slab sits over dirt, contains a vapor drive, or has known leaks.
Test with a moisture meter or perform a calcium chloride test. If levels exceed product limits, install a vapor barrier, repair leaks, or use a moisture-tolerant primer before leveling.