What Is the Best Laminate Wood Flooring? Top Picks Compared
You want durable, attractive laminate that stands up to daily wear, so pick planks with an AC3+ wear rating, a thick HDF core, and a proven click-lock waterproof system for kitchens or high-traffic rooms. Choose surface texture and edge profile to match your style, and confirm manufacturer-approved underlayment and installation methods. With proper prep and maintenance you’ll get 10–25 years of service. Keep going to see top-rated models, comparisons, and buying tips.
Quick Answer Best Laminate Wood Flooring Right Now
For a quick pick, your top overall choice balances style and performance while the best-for-durability option stands up to heavy traffic.
If you’re on a budget, there’s a solid low-cost plank, and you can choose a waterproof line for kitchens or basements or a high-end look for living areas.
In short: pick durable or waterproof for active rooms, budget for low-traffic spaces, and premium styles where appearance matters most.
Top overall pick, best for durability, best budget option, best waterproof, best for high-end look
Choosing the right laminate comes down to balancing looks, toughness, and price, so we’ve picked the top overall, most durable, best budget, best waterproof, and best high-end-look options to match different needs and rooms.
You’ll find answers to what’s best laminate wood flooring for wear, water resistance, style, and value so you can choose confidently.
- Feel proud of your choice
- Enjoy peace of mind
- Love the look every day
One-sentence buying guidance for different rooms and needs
You’ve got solid options for overall performance, durability, budget, waterproofing, and high-end looks—now pick the laminate that fits the room.
For high-traffic areas choose 12mm AC4/AC5 styles.
For kitchens and basements prioritize waterproof cores.
For bedrooms pick quieter, thinner planks with good underlayment.
For rentals favor budget-friendly wear layers.
And for showrooms opt for premium visuals and longer warranties.
Why Choose Laminate Wood Flooring? Basics and Benefits
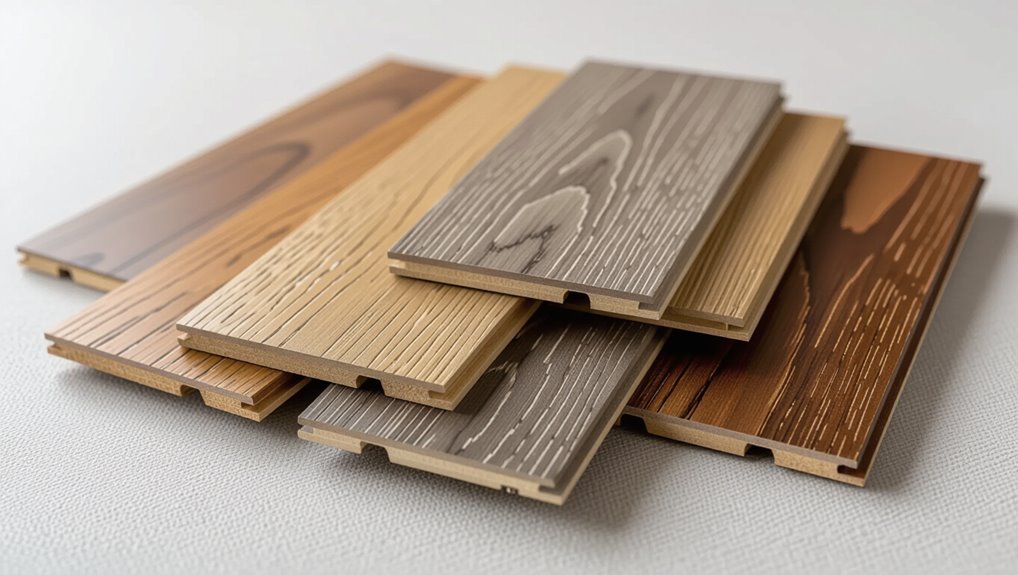
You’ll learn how laminate’s layered construction—wear layer, photographic decor, HDF core, and backing—gives it strength and stability.
You’ll see how it stacks up against hardwood, vinyl, and engineered wood in cost, durability, and maintenance.
We’ll also cover typical lifespans and what affects performance so you can pick the right product for your space.
What is laminate flooring construction and key components
Laminate flooring is a multi-layered product designed to mimic real wood while offering greater durability and easier upkeep.
You’ll find four main layers: a wear-resistant top coat that resists scratches, a printed decorative layer for the wood look, a dense fiberboard core providing stability, and a backing layer for moisture resistance and balance.
Installation uses click-lock or glue-down systems.
Advantages vs hardwood, vinyl, and engineered wood
Now that you know how laminate is built, compare it to other flooring options to see when it makes the most sense for your space. Laminate is cost-effective, scratch-resistant, and DIY-friendly versus hardwood, often more durable than vinyl, and usually less expensive than engineered wood while mimicking real grain.
| Feature | Laminate | Alternative |
|---|---|---|
| Cost | Low | Hardwood high |
| Durability | High | Vinyl variable |
| Installation | Easy | Engineered moderate |
| Appearance | Realistic | Varies |
| Maintenance | Simple | Varies |
Typical lifespan and performance factors
Because quality, traffic, and care all affect how long it lasts, you should expect laminate floors to perform differently from home to home.
Expect 10–25 years with normal use; premium AC4–AC5 ratings and thicker wear layers push longevity.
Regular cleaning, moisture control, and felt pads extend life.
High humidity, heavy pets, or poor installation shorten performance and void warranties.
How to Choose the Best Laminate Flooring Key Criteria
When choosing laminate, you’ll want to compare key specs like wear layer (AC rating) and overall thickness to match your traffic and durability needs.
Also consider surface texture and finish (embossed, hand-scraped, matte or gloss), water resistance or waterproof systems, edge profile and plank size, and the installation method—click-lock, glue, or floating.
I’ll walk you through what each of these factors means and how to pick the right combination for your space.
Wear layer (AC rating) and thickness explained
While choosing laminate, you’ll want to focus first on the wear layer and overall thickness, since they control durability and feel underfoot.
The AC rating (AC1–AC5) signals abrasion resistance for residential to heavy commercial use. Thicker boards (8–12mm+) add stability, sound dampening, and a more realistic feel.
Match rating and thickness to room traffic and longevity goals.
Surface texture and finish options (embossed, hand-scraped, matte, gloss)
After you’ve matched wear layer and thickness to traffic and longevity, look at surface texture and finish—the things you see and feel every day.
Choose embossed for realistic grain alignment, hand-scraped for rustic character, matte for subtle, low-glare elegance, or gloss for brighter, showroom sheen.
Pick a finish that hides scratches, matches decor, and fits maintenance preferences.
Water resistance and waterproof systems
Because spills and humidity are everyday realities, pick laminate that stands up to moisture so your floors stay looking new—water-resistant options slow damage from occasional wetness, while waterproof systems let you install laminate in bathrooms, kitchens, or basements with confidence.
Check core type, wear layer, and manufacturer moisture ratings, and confirm seam and locking-system integrity to prevent swelling and leaks.
Edge profile and plank size considerations
One key decision you’ll make is the edge profile—square, beveled, or micro-beveled—and the plank size, since both affect the room’s visual flow, how seams show over time, and installation ease.
Choose wider planks for fewer seams and a modern look; narrower planks suit traditional spaces.
Square edges read seamless; bevels add definition and hide minor height differences between planks.
Installation method: click-lock, glue, float
When choosing laminate flooring, think about the installation method—click-lock, glue-down, or floated—as it shapes cost, time, and long-term performance.
Click-lock snaps together for fast, DIY-friendly installs and easy repairs.
Glue-down creates a more permanent, solid feel and suits high-traffic areas.
Floating floors rest over underlayment, offering moisture tolerance and simple removal for future updates.
Environmental and health factors (VOC, certifications)
Besides installation and performance, you should also weigh environmental and health factors—these affect indoor air quality and long-term safety as much as wear and cost.
Check VOC emissions: low or CARB/TSCA-compliant products cut off-gassing.
Look for certifications like FloorScore, GREENGUARD, or FSC for responsible sourcing.
Prioritize low-formaldehyde adhesives and recycled-content cores to reduce exposure and environmental impact.
Warranty types and what to look for
Why does the warranty matter? You want protection for wear, moisture, and structural defects.
Check coverage length, who’s covered (residential vs. commercial), transferability, and pro-rated terms.
Watch exclusions: water damage, improper installation, and maintenance lapses.
Confirm claim process, required proof, and whether the manufacturer or retailer handles repairs or replacements.
A clear, thorough warranty saves you headaches.
Top Picks Compared Detailed Evaluations
Now you’ll compare our top picks side-by-side so you can pick the laminate that fits your needs.
We’ll cover the best overall, the best budget option, top waterproof choices, the toughest for high-traffic areas, and the most realistic wood looks.
Read on to see which one matches your priorities.
Best Overall Laminate
You’ll see why this pick stands out for its balance of durability, realistic appearance, and easy installation.
I’ll explain the best rooms and traffic levels for it, plus any maintenance or moisture limitations to watch for.
That way you can weigh the benefits against drawbacks and pick the right fit for your space.
Why it stands out
What makes this laminate our top overall pick is how it balances durability, appearance, and value without compromise. You’ll get scratch resistance, realistic grain, easy installation, consistent color, and long warranty support that together simplify choices and reduce surprises.
| Feature | Benefit | Quick Note |
|---|---|---|
| Durability | Lasts years | Low maintenance |
| Appearance | Realistic wood | Authentic look |
| Value | Affordable | High ROI |
| Warranty | Peace of mind | Strong coverage |
Ideal use-cases and drawbacks
Having covered why this laminate topped our list, let’s look at where it shines and where it doesn’t.
You’ll love it in high-traffic living areas, bedrooms, and home offices thanks to durability and realistic visuals.
It isn’t ideal for bathrooms or basements prone to moisture, and you’ll need underlayment on uneven subfloors.
Expect limited refinishing options compared with real hardwood.
Best Budget Laminate
When you’re shopping for budget laminate, know what performance you can expect and where it falls short so you don’t overreach.
Focus budget options in low-traffic rooms like bedrooms or home offices, and prep subfloors carefully to avoid installation issues.
With the right underlayment and a few simple installation tips, you can get good looks without blowing your budget.
Performance expectations and limitations
Although budget laminate sacrifices some premium features, you’ll still get dependable wear resistance and easy upkeep if you set realistic expectations. Expect limited water resistance, thinner wear layers, and fewer texture options. You’ll save upfront but may replace sooner in high-traffic areas.
| Strengths | Limitations |
|---|---|
| Affordable | Less durable |
| Low maintenance | Limited waterproofing |
| Variety of looks | Thinner plank |
| Easy install | Fewer textures |
| Quick replacement | Shorter warranty |
Best rooms and installation tips
If you’re picking budget laminate for specific rooms, match the product’s water resistance, wear rating, and thickness to the room’s traffic and moisture levels so you get the best performance for your money.
Use higher AC ratings in hallways and kitchens; choose water-resistant planks for bathrooms and basements.
Install over a flat, dry subfloor with recommended underlayment, stagger seams, and leave expansion gaps.
Best Waterproof Laminate
You’ll want to understand the waterproofing technology behind each laminate and how it stands up to real spills, humidity, and foot traffic.
I’ll compare the trade-offs—durability, installation, and cost—against waterproof vinyl so you can see where laminate shines or falls short.
That way you can pick the top waterproof laminate that fits your room and lifestyle.
Technology used and real-world resistance
Modern waterproof laminate relies on a few key technologies that determine how well it stands up to spills, scratches, and daily wear. You’ll look for enhanced wear layers, sealed cores, and tight locking systems that resist moisture and abrasion. Test results show varying performance, so inspect AC ratings and manufacturer warranties before buying.
| Feature | Benefit |
|---|---|
| Wear layer | Scratch resistance |
| Sealed core | Moisture protection |
| Locking system | Gap prevention |
| AC rating | Durability guide |
| Warranty | Real-world assurance |
Pros/cons vs waterproof vinyl
While both waterproof laminate and waterproof vinyl aim to keep your floors safe from spills, they use different constructions and deliver distinct trade-offs in feel, durability, and installation.
So you’ll want to weigh which benefits matter most for your space.
Laminate feels more like real wood, resists scratches well, and often installs as floating planks.
Vinyl excels in moisture resistance, is softer underfoot, and offers easier maintenance.
Best for High-Traffic Areas
When you’re choosing laminate for busy rooms, focus on wear ratings, thickness, and core type to guarantee long-lasting performance.
You’ll also want products that handle frequent foot traffic with minimal maintenance needs.
In the following picks I’ll compare durability, construction, and upkeep so you can pick the best fit for your home.
Wear ratings, thickness, and core type
Because your floors take the brunt of daily traffic, you want laminate with the right wear rating, sufficient thickness, and a durable core—these three factors determine how long the surface stays attractive and how well it resists dents, scratches, and moisture.
| Wear Rating | Thickness (mm) | Core Type |
|---|---|---|
| AC3 | 7 | HDF |
| AC4 | 8 | HDF |
| AC5 | 12 | HDF |
| AC6 | 12+ | WPC |
Maintenance needs
For high-traffic areas you’ll want laminate that’s easy to clean, resistant to surface wear, and simple to repair when damage happens.
Choose AC-rated surfaces, scratch-resistant finishes, and water-resistant cores so routine sweeping and damp mopping keep floors looking new.
Keep felt pads on furniture, replace damaged planks with click-lock systems, and follow manufacturer cleaners to extend life and performance.
Best Looks for Realistic Wood Appearance
When you’re after a truly realistic wood look, pay close attention to texture, grain detail, and color fidelity—those elements make the difference between a fake and a convincing plank.
Also think about matching trim and connections so the floor reads as a cohesive whole.
Below we compare top picks that excel in both visual authenticity and finishing compatibility.
Texture, grain detail, and color fidelity
Although you might focus first on plank durability and ease of installation, texture, grain detail, and color fidelity are what sell the illusion of real wood. You’ll want tight grain replication, matched embossing, and true-to-sample hues under varied light. Compare options quickly:
| Feature | Why it matters | What to test |
|---|---|---|
| Grain accuracy | Realism | Close-up pattern repeat |
| Embossing | Tactile feel | Run your hand |
| Color fidelity | Consistency | Samples in room |
Matching trim and transitions
Anyone can make a wince-inducing mismatch by picking trim and changes as an afterthought, so you’ll want to plan them alongside your planks to preserve a cohesive, realistic look.
Match tone and grain where possible, or choose complementary hues. Coordinate baseboards, thresholds, and reducers with plank width and room connections.
Test samples in lighting, and prioritize durable finishes that resist scuffs and moisture.
Best for DIY Installation
When choosing laminate for a DIY install, you’ll want boards with click-lock edges, pre-attached underlayment, and clear manufacturer guides to speed the job.
Watch out for common pitfalls like uneven subfloors, failing to acclimate planks, and skipping proper expansion gaps.
Below we’ll compare top picks that balance easy-install features with reliability for first-time installers.
Ease-of-installation features and tools
If you’re tackling a laminate install yourself, look for click-lock edges, pre-attached underlayment, and forgiving tolerance specs that cut down on measuring and trimming. You’ll want planks that align easily, a simple tapping block, and clear instructions. Quick-fit systems save time; integrated vapor barriers reduce prep.
| Feature | Benefit |
|---|---|
| Click-lock | Faster assembly |
| Pre-attached underlayment | Less prep |
| Tolerance specs | Easier fit |
Common pitfalls for DIYers
Those ease-of-installation features speed things up, but DIYers still run into predictable problems that can undo a smooth install.
You might skip proper subfloor prep, ignore acclimation times, or underestimate expansion gaps. Cutting errors, uneven joins, and improper underlayment choices also cause squeaks or buckling.
Take measurements, follow manufacturer steps, and double-check tools and materials before you start.
Side-by-Side Comparison Table
Now we’ll set up a side-by-side comparison table so you can quickly scan each floor’s AC rating, thickness, waterproofing, price range, warranty, and best use.
You’ll see how performance and cost trade off at a glance, making it easier to pick the right option for your space.
Use the table to match features to your priorities before you decide.
Comparison metrics to include: AC rating, thickness, waterproof, price range, warranty, best use
When you’re comparing laminate flooring options side-by-side, focus on a handful of clear metrics—AC rating, thickness, waterproofing, price range, warranty, and best use—so you can match performance to the room’s demands and your budget. Use a simple table to compare quickly and feel confident choosing.
| Metric | Why it matters | What to look for |
|---|---|---|
| AC rating | Durability | AC3+ for homes |
| Thickness | Stability | 8–12 mm recommended |
| Waterproof | Peace of mind | Fully waterproof options |
| Price/warranty | Value | Balance cost with warranty |
Step-by-Step Buying and Selection Guide
Start by measuring your room and calculating how much laminate you’ll need. Then set a budget and decide which features matter most.
Shortlist brands, request samples, and test them in your room’s lighting while simulating foot traffic.
Finally, pick the right underlayment and accessories to guarantee performance and a clean install.
Step 1: Measure space and calculate required material
Before you shop, measure the room carefully and calculate how much laminate you’ll need so you avoid shortfalls or waste.
Measure length and width, multiply for square footage, then add 10%–15% for cuts, waste, and pattern matching.
Include closets, alcoves, and thresholds. Round up to whole boxes based on plank coverage.
Record measurements before buying.
Step 2: Set budget and prioritize features
Decide how much you’ll spend and what matters most before you buy—set a clear budget range, then rank features like wear layer durability, water resistance, edge style, and realistic appearance so you can compare options quickly and avoid overspending on traits you don’t need.
Prioritize must-haves (e.g., waterproof for kitchens) versus nice-to-haves, then allocate funds accordingly to balance longevity and look.
Step 3: Shortlist brands and request samples
Now that you’ve set your budget and priorities, narrow your options to a handful of reputable brands that match those criteria and request physical samples so you can judge color, texture, and edge profile in your actual light and with your furniture.
Inspect cores, wear layers, and click systems. Ask about warranties and return policies.
- Imagine the finished room.
- Feel the plank underfoot.
- Trust your instincts.
Step 4: Test samples in room lighting and traffic simulation
When you bring samples home, test them in the room’s actual lighting and under simulated foot traffic so you know how they’ll look and wear over time; place planks near windows, under lamps, and along walls.
Then walk over them, roll a chair, and set heavy items on a few to check resilience and color shift.
Note seams, glare, and any pattern repeat that may bother you.
Step 5: Choose underlayment and accessories
Although the flooring itself sets the look, your underlayment and accessories determine how it performs, feels, and lasts—so choose them thoughtfully.
Pick underlayment for moisture barrier, sound reduction, and cushioning based on subfloor and room. Match connection strips, reducers, and trim to thickness and finish.
Keep vapor barriers for basements, use acoustic underlay in multiunit buildings, and buy extras for cuts and mistakes.
Step 6: Decide DIY vs professional installation
With underlayment and trim picked, you’ll next decide who installs the floor—your choice affects cost, timeline, and final quality.
If you’re handy and have time, DIY saves labor and gives control; allow extra time for learning and mistakes.
Hire pros for complex layouts, moisture issues, or speed; they’ll guarantee warranty compliance and a polished finish, costing more but reducing risk.
Installation Overview and Best Practices
Before you install, make sure the planks acclimate and the subfloor is clean, level, and dry.
You’ll choose between click-lock, glue-down, or floating installations—each has clear pros and cons depending on traffic, moisture, and skill level.
Finish with the right trims, thresholds, and connections to protect edges and get a professional look.
Pre-installation checklist (acclimation, subfloor prep)
To get a flawless laminate install, start by properly acclimating the planks and preparing the subfloor so nothing moves or shows once you’re done.
You’ll check moisture, level surfaces, and clear debris. Take time now to prevent gaps, squeaks, and warping later.
- Inspect moisture and humidity—don’t guess.
- Level and repair imperfections—be exact.
- Clean and dry thoroughly—no surprises.
Common installation methods with pros/cons
Now that your subfloor and planks are acclimated and ready, you’ll choose an installation method that fits your skill level, budget, and room use.
Click-lock floating is fastest and DIY-friendly but can telegraph subfloor imperfections.
Glue-down gives stability and better sound but’s messier and permanent.
Staple/nail methods suit thicker laminates over plywood yet need tools and experience.
Choose based on room, tolerance, and future changes.
Finishing touches: trims, thresholds, transitions
1 key step remains after laying your laminate: install the trims, thresholds, and junctions that protect edges, hide gaps, and create a seamless look between rooms.
Choose matching reducer strips for doorways, T-moldings for equal-height joins, and quarter-round or base shoe for perimeter gaps.
Measure precisely, pre-drill if needed, and secure pieces without restricting the floor’s expansion.
Common Mistakes and How to Avoid Them
Don’t pick laminate just because it looks good—you’ll regret it if it can’t handle your room’s traffic or moisture.
Make sure you prep the subfloor and use the right underlayment, and never skip waterproofing in damp areas.
Also leave proper expansion gaps during installation so your floor can move without buckling.
Mistake: Choosing solely on appearance
Although a beautiful finish can catch your eye, choosing laminate flooring based only on looks can lead to regret when durability, maintenance, or compatibility with your home’s layout don’t match your expectations.
You should weigh wear rating, water resistance, edge profile, and installation type.
Test samples in your lighting, ask about warranties, and prioritize performance for high-traffic areas over purely aesthetic choices.
Mistake: Skipping proper underlayment or subfloor prep
Picking a beautiful laminate is only part of the job; how you prepare the floor underneath matters just as much.
Don’t skip underlayment or ignore subfloor issues — uneven, dirty, or damp surfaces shorten flooring life, cause squeaks, and void warranties.
Use the recommended underlayment, level and clean the subfloor, and address minor imperfections before installing so your laminate performs and looks great for years.
Mistake: Installing in high-moisture areas without proper waterproofing
If you install laminate in bathrooms, laundry rooms, or basements without proper waterproofing, moisture will warp boards, swell seams, and ruin the locking system.
Don’t assume standard laminate is waterproof; choose products rated for wet areas or use water-resistant options.
Seal junctions, use moisture barriers on subfloors, and address leaks promptly so spills and humidity don’t cause costly damage or premature replacement.
Mistake: Not accounting for expansion gaps
Because laminate expands and contracts with temperature and humidity, you’ve got to leave proper expansion gaps around the perimeter and at fixed obstacles; skipping them leads to buckling, popping seams, and damaged locks.
Measure and follow manufacturer gap recommendations, use spacers during installation, and maintain gaps at thresholds and vents.
If you’re unsure, consult guidelines or a pro to prevent costly repairs.
Care, Cleaning, and Maintenance Tips
You’ll keep your laminate looking great with simple daily and weekly cleaning routines that prevent dirt buildup and water damage.
For stains and minor scratches, you’ll learn quick fixes and when to use touch-up kits.
Finally, we’ll cover how to tell whether your floors need refinishing or full replacement.
Daily and weekly cleaning routines
While laminate’s tough surface makes it low-maintenance, a simple daily and weekly routine keeps it looking like new:
Wipe crumbs and spills daily with a soft, dry or slightly damp microfiber cloth;
Sweep or vacuum weekly using a hard-floor setting;
And mop sparingly with a manufacturer-approved cleaner, drying quickly to avoid moisture damage.
- Feel proud of your gleaming floors.
- Enjoy stress-free upkeep.
- Protect your home’s warmth and charm.
Stain removal and minor scratch repair
Along with daily upkeep, you’ll sometimes face spills, stains, or light scratches that need quick attention to keep laminate looking its best.
Blot spills immediately, clean stains with a damp cloth and mild detergent, then dry. For minor scratches, use a color-matched laminate repair kit or wax stick, buff gently, and avoid abrasive scrubbing.
Test products in an inconspicuous spot first.
When to refinish or replace
If your laminate shows widespread wear, deep gouges, or lifted seams that cleaning and spot repairs won’t fix, it’s time to contemplate refinishing or replacing it.
You’ll assess damage extent, budget, and lifespan: floating planks often require replacement, while higher-quality engineered options might be refinished less often.
Choose replacement if repairs are impractical or costs approach new installation.
Cost Breakdown and Long-Term Value
You’ll want to know typical price ranges for materials and installation so you can budget accurately.
Compare upfront cost versus durability and expected ROI for each room—high-traffic areas may justify premium boards.
Also learn how to interpret warranties and the claims process so you’re protected if issues arise.
Typical price ranges (materials + installation)
Expect to pay between about $1 and $5 per square foot for basic laminate planks and $3 to $8 or more for higher-end, textured or waterproof options; once you add underlayment, trim, and professional installation, total costs usually range from $2.50 to $12 per square foot depending on quality and labor rates.
| Item | Typical cost |
|---|---|
| Basic planks | $1–$5/sq ft |
| Premium planks | $3–$8+/sq ft |
| Installation + materials | $1.50–$6/sq ft |
| Total typical | $2.50–$12/sq ft |
Cost vs durability and ROI by room type
Anyone weighing laminate choices will want to balance upfront cost against how long the floor will hold up in each room.
Choose high-AC ratings and thicker wear layers for traffic areas and kitchens; save with thinner, lower-rated planks in bedrooms or guest rooms.
Factor installation, expected replacement timing, and resale appeal—durable, attractive laminate often yields better long-term value despite higher initial expense.
Warranty interpretation and claims process
After weighing cost, durability, and room-by-room ROI, you should also understand how warranties protect that investment and what the claims process looks like.
Read terms carefully: coverage length, finish vs. structural limits, and transferability.
Keep purchase records, photos, and installation receipts.
For defects, contact the retailer or manufacturer promptly, follow their inspection steps, and note timelines for remedies like repair, replacement, or pro-rata refunds.
Environmental and Health Considerations
When choosing laminate, you’ll want to contemplate eco-friendly options and products with recycled content to reduce environmental impact.
Check for certifications like FloorScore and GREENGUARD to make sure indoor air quality and emissions meet strict standards.
Also think about end-of-life disposal and recyclability so your flooring doesn’t just become landfill later.
Eco-friendly options and recycled content
Because more homeowners care about both the planet and indoor air, choosing eco-friendly laminate means looking beyond appearance to materials and emissions; check for recycled-content cores, low-VOC adhesives and finishes, and certifications like FloorScore or GREENGUARD to verify claims.
You’ll prefer boards with post-consumer recycled fiber, formaldehyde-free resins, and water-based coatings—reducing landfill waste and indoor pollutants while keeping durability and style intact.
Certifications to look for (FloorScore, GREENGUARD)
If you want to minimize indoor pollutants and verify eco-claims, look for independent certifications like FloorScore and GREENGUARD that test products for low volatile organic compound (VOC) emissions and safer chemical profiles.
You’ll also see certifications referenced in product specs and labels; prefer certified laminates to reduce off-gassing risks, protect sensitive occupants, and meet green-building standards or project requirements.
Disposal and recyclability
Although laminate flooring lasts for years, you’ll eventually need to deal with disposal and recyclability in ways that minimize environmental and health harms.
Check local recycling programs; many facilities won’t accept laminate due to mixed materials and coatings. Consider donation, resale, or specialized recycling centers.
Remove and dispose of underlayment, adhesives, and trim separately. Avoid burning; sealed off-gassing can release toxins.
Frequently Asked Questions
You probably have practical questions about laminate after reading about environmental and health factors.
We’ll cover whether laminate is waterproof, if it works in bathrooms or basements, how its lifespan compares to hardwood, whether it can be refinished, and what underlayment to use.
Keep reading for clear, short answers to each.
Is laminate flooring waterproof?
Curious whether laminate flooring can handle spills and moisture? Most traditional laminate resists everyday splashes thanks to a sealed wear layer, but it isn’t fully waterproof.
Prolonged standing water or leaks can swell cores and damage joints. If you need higher moisture protection, look for products labeled “water-resistant” or “waterproof” with sealed edges and waterproof cores; follow manufacturer care guidelines.
Can laminate flooring be installed in bathrooms and basements?
Wondering if laminate works in bathrooms and basements? You can install water-resistant or waterproof laminate in bathrooms if you control humidity, seal edges, and clean spills quickly.
In basements, use a moisture barrier and choose products rated for below-grade use; elevated subfloor systems help. Avoid standard laminate in damp areas.
Always follow manufacturer guidelines and warranty requirements for wet or low-level installations.
How long does laminate flooring last compared to hardwood?
How long will laminate hold up compared to hardwood?
Laminate typically lasts 10–25 years depending on wear, quality, and maintenance, while hardwood can last 30–100+ years with refinishing and care.
You’ll get shorter lifespan from lower-grade laminate and heavy traffic.
Laminate resists scratches and moisture better initially, but it doesn’t age or develop patina like solid hardwood.
Can I refinish laminate flooring?
Can you refinish laminate flooring?
You can’t sand and refinish laminate like real hardwood because it lacks a solid wood top layer.
For surface scratches or wear, you’ll use repair kits, touch-up markers, or replacement planks.
If damage is extensive, remove and replace affected boards or consider installing new flooring.
Regular cleaning and protective pads extend laminate life.
What underlayment should I use with laminate?
Which underlayment should you use with laminate depends on your subfloor type and priorities like moisture protection, sound reduction, and comfort.
For concrete, use a vapor-barrier foam or cork with moisture resistance.
For plywood, thin foam or felt works.
Choose thicker or rubberized underlay for better sound and cushioning.
Always check manufacturer requirements and local humidity; improper underlayment voids warranties.