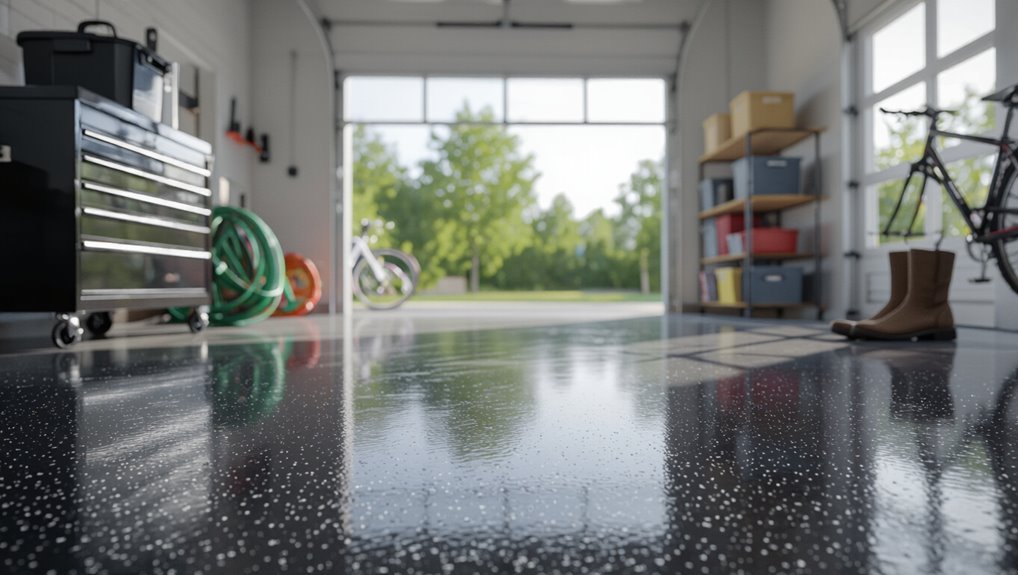
How to Clean Garage Floor Epoxy and Keep It Gleaming
Keep your epoxy garage floor gleaming by sweeping daily to remove grit, spot-treating spills right away with a gentle degreaser, and mopping weekly using a microfiber mop and a pH‑neutral cleaner. Rinse well, remove excess water with a squeegee or wet/dry vacuum, and use a soft brush for scuffs. Address oil stains with a citrus or alkaline degreaser and consider a UV‑stable topcoat every few years. Follow these steps and you’ll find simple ways to maintain and restore shine.
Quick Answer How to Clean Garage Floor Epoxy and Keep It Gleaming
For a quick, effective clean, sweep and mop with a gentle degreasing cleaner and rinse with clean water to keep epoxy gleaming.
If stains are stubborn, an ammonia-based solution or light scrubbing with a soft brush usually does the trick.
Call a professional if you have deep scratches, large areas of peeling, or chemical damage that needs repair rather than routine cleaning.
One-sentence summary of the fastest effective method
Start by sweeping and spot-treating stains, then mop with a mild pH-neutral cleaner and warm water, rinse, and dry—this quick routine removes dirt and grease while preserving the epoxy’s shine.
For the fastest, most effective result, you’ll sweep daily, tackle spills immediately with a gentle degreaser, and mop weekly using soft tools so you’ll keep your garage floor epoxy gleaming.
When to call a professional vs. DIY
If the damage is limited to dirt, oil spots, or light scuffs, you can handle cleaning and maintenance yourself; call a professional when you see deep gouges, widespread peeling, chemical etching, or if the floor needs re-coating across large areas.
You should also hire pros for extensive stains that resist cleaners, uneven surfaces, or if you lack tools/time.
Professionals guarantee proper prep and lasting repairs.
Basic Understanding What Epoxy Garage Floors Are and Why Cleaning Matters
Epoxy coating is a tough resin layer you apply to concrete that bonds tightly and resists stains and chemicals.
Different finishes—high-gloss, matte, or flake—change how dirt shows and how easy the surface is to mop or scrub.
You’ll keep the floor looking great and extend its life by cleaning regularly to remove grit, spills, and abrasive particles.
What is epoxy coating?
Think of epoxy coating as a tough, glossy skin you apply to your garage floor: it’s a resin-and-hardener system that chemically bonds into a durable, seamless surface.
You get impact, chemical and abrasion resistance, and easier cleaning because spills sit on top instead of soaking in.
Proper prep and curing make it long-lasting; without that, performance and cleanliness suffer.
Common epoxy finishes and how they affect cleaning (gloss, matte, flake)
Because finish type changes how dirt, spills, and wear show up, you’ll clean each epoxy floor a bit differently:
Gloss hides minor stains and resists spills but shows scratches and streaks, so you’ll need gentle mopping and occasional buffing.
Matte conceals scratches yet traps grime, requiring more scrubbing.
Flake finishes mask imperfections but need vacuuming and degreasing between flakes to prevent buildup.
Why regular cleaning preserves appearance and longevity
You’ve seen how finish type changes how dirt and wear show up, and that affects how often and how you clean—but regular care matters beyond appearance.
You’ll prevent grit from abrading the coating, stop chemicals from etching or discoloring, and catch spills before stains set.
Consistent sweeping, mopping with pH-neutral cleaner, and prompt spot-cleaning extend both shine and the floor’s service life.
Tools and Materials You’ll Need
You’ll need a few basic tools—broom, mop, scrub brush, microfiber towels, and a wet/dry vacuum—plus supplies like pH-neutral cleaners, degreasers, and stain removers for tougher spots.
Pick cleaners rated safe for epoxy and avoid harsh acids or high-alkaline products that can damage the finish.
Wear gloves, eye protection, and guarantee good ventilation or use a respirator when using stronger chemicals.
Essential cleaning tools and supplies
Before you start scrubbing, gather a handful of basic tools and supplies that’ll make cleaning epoxy fast and effective:
- Microfiber mop and bucket for dust and light washing.
- Soft-bristle push broom for sweeping grit.
- Non-abrasive scrub brush or pad for scuffs.
- Wet/dry vacuum or squeegee for water pickup and quick drying.
Recommended cleaners and chemicals (pH-neutral, degreasers, stain removers)
When picking cleaners for epoxy, focus on products that’ll clean without etching or dulling the finish: a pH‑neutral floor cleaner for routine washes, a water‑based degreaser for oil and grease, and a targeted stain remover for rust or tire marks. Choose low‑odor, nonabrasive formulas and follow dilution guidelines.
| Cleaner type | Best use |
|---|---|
| pH‑neutral | Routine cleaning |
| Degreaser | Oil/grease |
Safety gear and ventilation tips
Cleaning products work well only if you protect yourself and keep air moving—epoxy cleaners and degreasers can release fumes or irritants, and scrubbing can fling particles.
You should wear nitrile gloves, safety goggles, and a respirator rated for organic vapors when needed.
Open doors and run fans or a box fan to exhaust air. Dispose of rags safely and wash hands afterward.
Step-by-Step Cleaning Process
Start by clearing the floor and removing loose debris so you can see what needs attention.
Then sweep or dry-wipe to collect dust, spot-treat stains (oil, grease, rust, paint) with the appropriate method, and mix the cleaning solution at the recommended concentration and contact time.
Finish by choosing a scrubbing method—stiff broom, microfiber mop, or floor scrubber—based on the level of soil and your tool availability.
Step 1 Prep: clear the floor and remove loose debris
1. You’ll start by clearing the area so cleaning’s effective and safe.
Remove cars, tools, and crates; bag small debris; lift mats.
- Remove vehicles and large items.
- Pick up tools and loose gear.
- Scoop or vacuum dirt and grit.
- Bag trash and tiny fragments.
You’ll leave the epoxy unobstructed and ready for the next step.
Step 2 Sweep and dry dust removal techniques
Before you move on to wet cleaning, sweep the epoxy thoroughly to remove loose dust and grit; doing this prevents scratches and helps detergents work better.
Use a soft-bristled push broom or microfiber dust mop, sweeping toward a single collection point. Pick up debris with a dustpan or vacuum with a hard-floor attachment.
Repeat until surface looks uniformly clean and smooth.
Step 3 Spot-treat stains (oil, grease, rust, paint) with method per stain type
With loose dust removed, you can tackle stubborn spots that sweeping won’t fix. Treat oil with absorbent, scrape residue, then degreaser; use vinegar or rust remover for rust; soften paint with a gentle solvent and scrape. Rinse and dry each area.
| Stain | Action | Tool |
|---|---|---|
| Oil | Absorb, degrease | Rag, brush |
| Rust | Acid cleaner | Gloves, brush |
| Paint | Solvent, scrape | Scraper, cloth |
Step 4 Mix and apply cleaning solution (concentrations and contact time)
Mix the cleaning solution precisely and apply it evenly so it can break down dirt without damaging the epoxy.
Use a mild detergent or pH-neutral cleaner diluted per label—typically 1–2 ounces per gallon for daily cleaning, stronger (follow directions) for heavy grime.
Allow 5–10 minutes’ contact time, keeping solution wet but not puddled, then rinse thoroughly with clean water.
Step 5 Scrubbing methods: broom, microfiber mop, floor scrubber (pros/cons)
Step 5 focuses on how you’ll actually scrub the floor: choosing between a stiff broom, a microfiber mop, or a mechanical floor scrubber depends on the soil level, floor size, and how much elbow grease you want to expend.
Use a stiff broom for heavy grit and spots, a microfiber mop for light dirt and control, and a floor scrubber for large areas and faster, deeper agitation.
Step 6 Rinse thoroughly and squeegee or wet-vac removal
1. Rinse the epoxy with clean water, working from one side toward an exit to avoid recontamination.
Use a hose or bucket, loosening residue left from scrubbing.
Then squeegee excess water into a drain or collection area, or run a wet-vac for faster removal.
Repeat until rinse water stays clear.
Don’t leave pooled water that traps dirt or streaks.
Step 7 Drying and final inspection for missed spots
Let the floor air-dry or speed drying with fans and/or a dehumidifier, then walk the area to spot any missed stains, streaks, or residue.
Move slowly, checking under different light angles and at knee level for subtle spots.
Mark trouble areas, blot or re-clean small spots with a damp microfiber, then dry those patches so the surface is uniformly clean and streak-free.
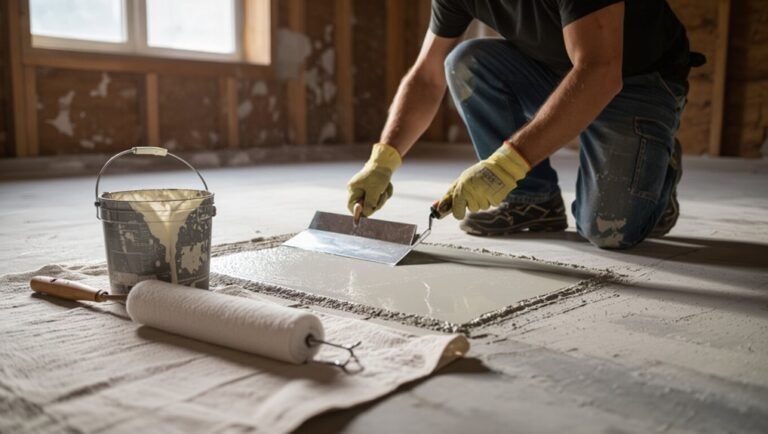
Step 8 Reapplying seal or topcoat (when and how)
After the floor’s dry and you’ve fixed any missed spots, decide whether to reapply a seal or topcoat based on wear, gloss loss, or manufacturer recommendations—typically every 2–5 years for high-traffic garage floors.
Clean thoroughly, scuff lightly, and remove dust.
Apply thin, even coats of recommended product with a roller, allow proper cure between coats, and ventilate until fully hardened.
Routine Maintenance Plan
Keep a simple routine so your epoxy stays looking great: have a daily/weekly quick-clean checklist for sweeping and spot-mopping, a monthly deeper-clean checklist for scrubbing and degreasing, and annual tasks for inspection and touch-ups.
Follow each checklist on schedule to prevent buildup and catch wear early. That way you’ll extend the floor’s life and avoid costly repairs.
Daily/weekly quick-clean checklist
1–2 times a week, do a quick sweep and spot-clean to keep epoxy looking its best: follow this short checklist so dirt and spills don’t set in.
- Sweep loose debris with a soft broom.
- Wipe spills immediately with a microfiber towel.
- Mop high-traffic areas with mild detergent.
- Inspect for stains or chips; address small issues fast.
Monthly deeper-clean checklist
Once a month, set aside a bit more time to give your epoxy floor a deeper clean that prevents buildup and catches small problems early.
Move vehicles and items, sweep and vacuum grit, mop with a pH-neutral cleaner, and scrub stains with a soft-bristle brush.
Rinse thoroughly, dry with microfiber mops, and spot-treat oil or chemical marks to preserve gloss and adhesion.
Annual maintenance tasks and inspection points
Each year, set aside time for a thorough inspection and a few preventative tasks that extend the life of your epoxy floor and catch problems before they worsen.
Check for chips, cracks, delamination, stains, and soft spots.
Reseal or spot-repair damaged areas, refresh silicone seals at edges, inspect drainage, and address oil or chemical stains promptly.
Keep a maintenance log.
Common Problems and How to Fix Them
You’ll run into a few common issues with garage floor epoxy, like yellowing, dullness or loss of gloss, peeling or bubbling, persistent stains, and damage from harsh chemicals or tires.
For each problem you’ll want to diagnose the cause—UV exposure, poor surface prep, or chemical attack—and choose the right fix, from buffing and recoat to spot repair or full resurfacing.
If stains or damage won’t respond to normal cleaning, escalate to stronger cleaners, sanding and re-priming, or professional restoration.
Yellowing, dullness, and loss of gloss causes and fixes
While epoxy’s high-gloss finish looks great at first, exposure to UV light, abrasion, chemical spills, and improper maintenance can make it yellow, dull, or lose its shine. Knowing which factor is at work helps you choose the right fix.
Use UV-stable topcoats for sun damage, scrub and recoat worn areas, neutralize chemical stains, and follow gentle maintenance to restore gloss and prevent recurrence.
Peeling, bubbling, or flaking epoxy diagnosis and repair options
Peeling, bubbling, or flaking epoxy usually signals a bonding or surface-prep problem, and spotting the cause quickly helps you choose the right repair.
Check for moisture, oil contamination, or poor adhesion. Remove failed sections, clean and etch the concrete, allow full drying, then reapply a compatible primer and epoxy.
For widespread failure, consider professional resurfacing.
Persistent stains that won’t lift escalation steps
If a stain won’t budge after normal cleaning, don’t assume it’s permanent—escalate methodically: identify the stain type, try stronger but appropriate cleaners, and test deeper treatments in a small area before committing to full-surface work.
For oil, grease, or rust, use targeted degreasers, citrus solvents, or oxalic acid sparingly.
Rinse thoroughly, repeat as needed, and consider professional help if stains persist.
Damage from harsh chemicals or tire marks mitigation strategies
Tire scuffs and chemical etching can mar even well-done epoxy, but you can often reduce their appearance or stop further damage with the right steps.
Clean residues with a mild degreaser, rinse, then sand lightly with fine grit to blend scuffs.
Apply a compatible epoxy touch-up or thin clear coat.
For future protection, use mats and avoid harsh solvents.
Best Practices and Prevention Tips to Keep Epoxy Gleaming
To keep your epoxy gleaming, start with simple preventative measures like mats at entry points, drip pans under vehicles, and wheel stops to limit abrasion.
Use only epoxy-safe cleaners and avoid harsh solvents or acidic detergents that can cause long-term damage.
Also monitor temperature and humidity during maintenance and add protective coatings or runners in high-traffic zones to extend the finish.
Preventative measures (mats, drip pans, wheel stops)
Anyone can keep epoxy floors looking new by stopping damage before it starts with simple preventative measures: place heavy-duty mats under parked cars and workstations, use drip pans under vehicles and equipment that might leak fluids, and install wheel stops or parking guides to prevent scuffs from misaligned tires.
- Mats protect from grit and abrasion.
- Drip pans catch corrosive fluids.
- Wheel stops prevent impact marks.
- Routine checks catch issues early.
Safe chemicals to avoid long-term damage
Chemicals matter: choose cleaners that’re pH-neutral and non-abrasive so you don’t dull or etch your epoxy finish over time.
Use mild dish soap, gentle floor detergents, or specially formulated epoxy cleaners.
Avoid harsh acids, ammonia, bleach, and solvent-based degreasers that soften, discolor, or craze the coating.
Rinse thoroughly and test any new product in a small, hidden area first.
Temperature and humidity considerations for maintenance
Beyond choosing the right cleaners, you’ll also need to watch temperature and humidity when maintaining epoxy floors, since environmental conditions affect both cleaning effectiveness and the coating’s long-term appearance.
Clean when temperatures are between 50–85°F (10–29°C) and humidity is moderate; avoid washing during high humidity or extremes.
Drying times lengthen in cold or damp conditions, increasing streaks and trapping moisture under the finish.
How to protect high-traffic zones
When you want your epoxy floor to stay showroom-ready, focus protection where wear happens most: entryways, workstations, and vehicle paths.
Use heavy-duty mats or rubber runners, polyurethane bumpers for tool stands, and adhesive floor tape for wheel tracks.
Rotate mat positions periodically, clean debris frequently, and place drip pans under vehicles.
Recoat high-use strips yearly to maintain gloss and resilience.
Product Comparison and Recommendations
Now you’ll compare the best pH-neutral cleaners for epoxy floors and when to reach for stronger degreasers or stain removers.
I’ll point out which products work best for oil, grease, and tire marks and the specific use cases for each.
You’ll also get quick recommendations on mop types, scrubbers, and squeegees to make cleaning easier and protect your finish.
Best pH-neutral cleaners for epoxy floors
Because epoxy is sensitive to harsh chemicals, you’ll want a pH-neutral cleaner that lifts dirt and grime without dulling the finish. Choose concentrated formulas for dilution control, fragrance-free options if you’re sensitive, and non-abrasive blends for regular maintenance.
| Brand | Type | Best For |
|---|---|---|
| Simple Green | Concentrate | Regular cleaning |
| Rejuvenate | Spray | Quick touch-ups |
| Zep | Ready-to-use | High-traffic areas |
| ECO | Biodegradable | Eco-friendly needs |
Top degreasers and stain removers (use cases)
1 key choice for keeping epoxy garage floors pristine is picking the right degreaser or stain remover for the specific mess you’ll face.
Use citrus or bio-based solvents for oil and grease, alkaline cleaners for automotive fluids, and enzymatic formulas for organic stains.
Pick low-odor, non-abrasive products labeled safe for epoxy, test a small area, and follow manufacturer dwell times and rinsing instructions.
Recommended tools: mop types, scrubbers, squeegees
Choosing the right tools makes cleaning epoxy garage floors faster and protects the finish, so pick a mop, scrubber, and squeegee that match the size of your space and the types of messes you handle.
Use a microfiber flat mop for routine dusting, a heavy‑duty string mop for greasy spills, a stiff-bristle deck brush or long‑handle scrubber for stains, and a rubber squeegee to push water toward drains.
DIY vs Professional Cleaning and Repair
You can handle routine maintenance yourself—sweeping, mopping with a pH-neutral cleaner, and spot-repairing small chips.
Call a pro if you see large cracks, widespread peeling, heavy staining, or if the floor needs a full recoat. A professional will assess the damage, prep and repair the surface, and quote a cost based on scope and materials so you know what to expect.
When DIY is sufficient
If stains are superficial, chips are small, and the coating sticks well, you can handle most cleaning and minor repairs yourself with basic supplies and a bit of patience.
Use pH-neutral cleaners, a soft scrub brush, and microfiber mops.
For small chips, sand edges, apply epoxy touch-up, and blend gently.
Work methodically, let cures set, and avoid harsh chemicals or heavy tools.
Signs you need a professional cleaning or recoating
When visible cracks, widespread peeling, deep stains, or persistent oil spots resist standard cleaning, it’s time to call a pro—these issues usually signal underlying adhesion failure, substrate damage, or contaminants that DIY methods won’t fix reliably.
You should also hire professionals if the floor feels spongy, has large delaminated areas, or requires surface profiling, hazardous chemical removal, or guaranteed long-term adhesion.
What to expect from professional service and estimated costs
Expect a clear, staged process from professionals: they’ll inspect the slab, document damage, perform necessary surface prep (shot-blasting or diamond grinding for adhesion), remove contaminants, apply primers and repairs, and finish with the chosen epoxy or topcoat—each step is typically itemized in a written estimate so you can compare scope and price.
You’ll pay $2–8/ft² for repairs and recoats; full replacements run $5–15/ft².
Frequently Asked Questions (FAQ)
You’ve probably got questions about pressure washing, steam cleaning, or whether vinegar or bleach will hurt your epoxy — let’s answer them.
You’ll learn how often to deep-clean, the safest way to lift oil stains, and whether pressure or steam is appropriate.
Read on for clear, practical guidance.
Can I pressure wash my epoxy garage floor?
Can you pressure wash your epoxy garage floor? Yes—with caution.
Use a fan nozzle, keep pressure under 1,200–2,000 psi, and stay at least 12–18 inches away to avoid etching or lifting edges.
Test a small area first, avoid prolonged spray on seams, and let floor dry fully.
Don’t use hot water or abrasive tips that can damage the coating.
How often should I deep-clean my epoxy floor?
If you pressure wash carefully, you’ll remove surface grime, but deep cleaning should be scheduled less often.
Aim for a thorough deep clean every 6–12 months, depending on traffic, spills, and soil buildup. High-use garages may need the shorter interval; lightly used spaces can wait longer.
Spot-treat stains promptly to avoid accelerated deterioration between deep cleans.
Will vinegar or bleach harm epoxy?
Wondering whether common household cleaners like vinegar or bleach will damage your epoxy floor?
You should avoid undiluted bleach and strong acids—these can dull or etch epoxy over time.
Mild vinegar solutions (diluted) are usually safe for routine cleaning, but test a small area first.
For tough messes, use a pH-neutral cleaner designed for epoxy to protect the finish.
How do I remove oil stains without damaging the finish?
You can remove oil stains from epoxy without harming the finish by acting quickly and using gentle, non-abrasive methods.
Blot excess oil, then sprinkle an absorbent like baking soda or cat litter; let sit, sweep up.
Apply a mild degreaser or dish soap diluted in warm water, scrub lightly with a soft-bristle brush, rinse, and dry.
Repeat for stubborn spots.
Can I use steam cleaners on epoxy floors?
Curious whether a steam cleaner’s high heat and moisture will harm your epoxy floor? You shouldn’t use steam cleaners regularly.
Excessive heat and sustained moisture can soften or delaminate epoxy, especially at seams or damaged areas.
For tough grime, opt for a pH-neutral cleaner, soft brush, or low-pressure power wash.
Spot-test first and avoid prolonged steaming to protect the finish.