What to Put Under Vinyl Flooring for Best Results
You should install a moisture barrier plus a manufacturer‑approved underlayment matched to your vinyl type and room conditions. For floating LVP/LVT, use a dense foam, cork, or rubber underlay; for glue‑down or sheet vinyl, a thin felt, plywood or cement board may be best. Check moisture levels and warranty rules, smooth and level the subfloor, and avoid overly compressible pads. Keep going to see room‑specific picks, installation tips, and common mistakes to avoid.
Quick Answer Best Underlayment Options for Vinyl Flooring
If you want a quick recommendation, choose a dense foam or cork underlayment for click-lock vinyl and a thin, moisture-resistant pad for glue-down sheets.
You’ll get better sound control and comfort with foam or cork, and better bonding and moisture protection with a dedicated sheet underlayment.
Pick the type that matches your vinyl installation method and subfloor conditions.
Direct recommendation summary
Pick the underlayment based on your vinyl type, subfloor condition, and sound or moisture concerns: you’ll choose differently depending on what do you put under vinyl flooring and the room.
Consider these options:
- Thin foam for click-lock luxury vinyl plank
- Cork for sound dampening
- Rubber for moisture-prone areas
- Plywood or cement board to level uneven subfloors
Follow manufacturer specs for best results.
Understanding Vinyl Flooring and Why Underlayment Matters
Vinyl comes in several types—sheet vinyl, luxury vinyl planks (LVP), and luxury vinyl tile (LVT)—and each installs and performs a bit differently, so you’ll want to pick the right product for your space.
Underlayment can control sound, block moisture, add comfort, smooth minor subfloor imperfections, and improve insulation.
Some vinyl products (especially rigid-core click-lock LVP/LVT) can be installed directly over a flat, dry subfloor without extra underlayment, but always check the manufacturer’s guidelines.
What is vinyl flooring (LVP vs LVT vs sheet vinyl)
Flooring choices today include several types of vinyl—luxury vinyl plank (LVP), luxury vinyl tile (LVT), and sheet vinyl—each built for different looks and performance; you’ll want to know which one you have before picking underlayment.
LVP mimics hardwood with long planks. LVT imitates ceramic or stone tiles, and sheet vinyl is a continuous flexible roll for seamless coverage and quick installation.
Functions of underlayment (sound, moisture, comfort, leveling, insulation)
Once you know which type of vinyl you’re installing, the next question is what goes beneath it — underlayment does much more than provide a flat base.
It reduces impact and airborne noise, blocks minor moisture, cushions for comfort, evens out small subfloor imperfections, and adds thermal insulation.
Choosing the right underlayment optimizes performance, longevity, and comfort for your vinyl floor.
When vinyl can be installed without underlayment
Although underlayment offers real benefits, you can sometimes lay vinyl without it—especially with rigid core or glue-down sheets that bond well to a smooth, level subfloor.
You should skip underlayment only when the subfloor is clean, dry, flat, and structurally sound. Avoid gaps, moisture issues, and unevenness; otherwise add underlayment for comfort, sound control, and protection against minor imperfections.
Primary Underlayment Types for Vinyl Flooring
You’ll choose from several common underlayment options depending on your needs: foam, cork, felt, rubber, or a rigid layer like plywood or cement board used as underlayment.
Each type affects cushioning, sound control, moisture resistance, and installation method differently.
We’ll compare their pros and cons so you can pick the best fit for your vinyl floor.
Foam underlayment
Many homeowners pick foam underlayment for vinyl because it’s lightweight, affordable, and easy to install.
You’ll get basic cushioning, minor sound reduction, and a smoother surface over subfloor imperfections.
Choose closed-cell foam for moisture resistance and density that matches your vinyl type.
Install underlayment seams taped per manufacturer instructions, and avoid overly thick foam that can affect locking vinyl planks.
Cork underlayment
Cork underlayment gives your vinyl a firmer, more natural cushion while delivering excellent sound absorption and thermal insulation.
You’ll benefit from cork’s moisture resistance and mold inhibition when installed over a dry subfloor. It’s durable, compresses minimally under furniture, and enhances underfoot warmth.
Cutting and fitting are straightforward, but choose the right thickness for vinyl specifications to maintain warranty compliance.
Felt underlayment
Although it’s less common than foam, felt underlayment gives vinyl a dense, stable base that reduces minor subfloor imperfections and improves sound absorption.
You’ll find felt resists compression, supports heavier furniture, and evens thermal performance.
It’s easy to cut and lay, though it can be thicker than needed for some vinyl types.
Choose compatible adhesive or floating installation to prevent movement.
Rubber underlayment
Rubber underlayment gives vinyl flooring excellent durability and noise reduction, making it a strong choice when you want long-lasting cushioning and impact absorption.
You’ll get superior resilience against indentation, improved thermal comfort, and effective sound dampening.
It’s moisture-resistant and works well over concrete and wood subfloors.
Expect easy installation with adhesive or interlocking sheets, though cost is higher than foam alternatives.
Plywood or cement board subfloor (when used as underlayment)
If you need a stable, level base for vinyl, plywood or cement board subflooring will give you the rigidity and support required for long-lasting performance.
You’ll choose plywood for ease, smoothness, and fastening; use cement board where extra impact resistance or flatness matters.
Secure panels to joists, fill seams, and sand high spots so vinyl lays flat and seams don’t telegraph.
Moisture barrier films and vapor barriers (polyethylene, peel-and-stick)
After you’ve got a flat, secure subfloor in place, protect your vinyl from moisture with a dedicated barrier.
Use polyethylene sheeting or peel-and-stick vapor barriers to block ground moisture and prevent adhesive failure or warping.
Overlap seams, tape edges, and extend up walls slightly.
Choose thickness and adhesive compatibility per manufacturer recommendations, and make certain the barrier stays continuous beneath the entire floor surface.
How to Choose the Right Underlayment Step-by-Step
First, identify your vinyl type and follow the manufacturer’s underlayment specs.
Next, inspect the subfloor, check moisture with a meter against recommended thresholds, and note whether you need soundproofing, insulation, comfort, or leveling.
Finally, match underlayment thickness, compressibility, and R-value to those findings before you buy.
Step 1: Identify vinyl type and manufacturer requirements
Before you pick an underlayment, determine exactly what type of vinyl you have and check the manufacturer’s installation requirements.
Different vinyl products—sheet, luxury vinyl plank (LVP), luxury vinyl tile (LVT), or rigid core—have specific needs for moisture barriers, cushioning, and subfloor flatness.
Follow their specs for warranty compliance, allowable underlayment materials, required vapor protection, and any adhesive or floating-floor restrictions before buying.
Step 2: Assess subfloor material and condition
When you’re ready to choose an underlayment, inspect the subfloor type and condition thoroughly—identify whether it’s plywood, OSB, concrete, or existing vinyl.
Check for levelness, loose boards, moisture issues, and any damage that could telegraph through the new flooring, because these factors determine which underlayment will work and whether repairs are needed first.
- Identify material
- Note uneven areas
- Locate damage
- Confirm stability
Step 3: Test and evaluate moisture levels (tools and thresholds)
You’ve already checked what the subfloor is made of and noted any uneven or damaged spots; now check moisture so you don’t install underlayment over a damp surface.
Use a reliable moisture meter (pin or pinless) and tape test for concrete. Compare readings to manufacturer thresholds—typically below 3% for wood, 2–4 lbs/1000 ft²/24hr or 75% RH for concrete—then remediate if needed.
Step 4: Determine needs: soundproofing, insulation, comfort, leveling
Once you’ve ruled out moisture issues, decide what you actually need your underlayment to do: reduce noise, add thermal insulation, improve walking comfort, or help level small subfloor irregularities.
Prioritize one or two goals—overdoing features can cause conflicts.
For apartments choose acoustic rated material; for basements favor insulating pads; for uneven floors use thin self-leveling or dense underlayments to mask minor dips and squeaks.
Step 5: Match underlayment thickness, compressibility, and R-value
With your performance priorities set, it’s time to match the underlayment’s physical properties to those goals: thickness, compressibility, and R-value each affect noise control, comfort, and thermal performance differently.
Choose thicker, less compressible underlayment for subfloor smoothing and impact sound reduction; choose higher R-value for colder floors.
Balance thickness with floor changes and mobility needs to avoid excessive cushioning.
Step 6: Check warranty and installation compatibility
Step 6 helps you avoid costly mistakes by checking that the underlayment meets your vinyl’s warranty and installation requirements; manufacturers often void coverage if you use incompatible materials or install over unsuitable substrates.
You should read warranty fine print, confirm approved underlayment types, and verify moisture, adhesive, and substrate limits.
When in doubt, contact the manufacturer or installer to document compatibility before proceeding.
Installation Process Overview
Start by getting the subfloor clean, level, and repaired so your underlayment sits flat and stable.
You’ll want to know when to lay a moisture barrier and how to overlap and seal it before placing underlayment.
Then choose the right method—floating or glue-down—follow manufacturer seaming and edge treatments, and work systematically across the room.
Preparing the subfloor (cleaning, leveling, repairs)
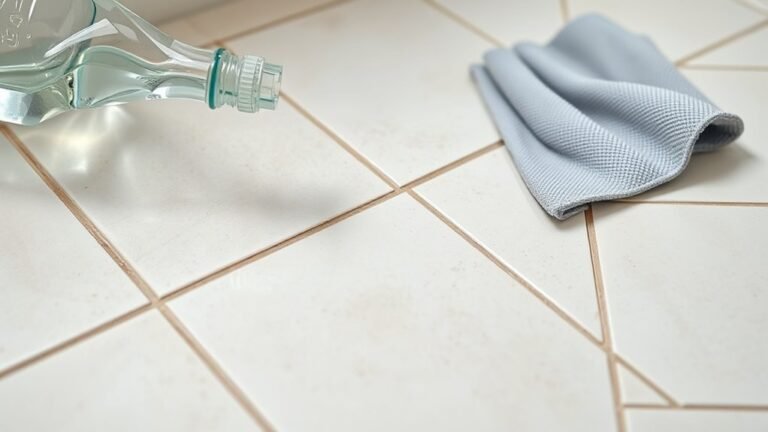
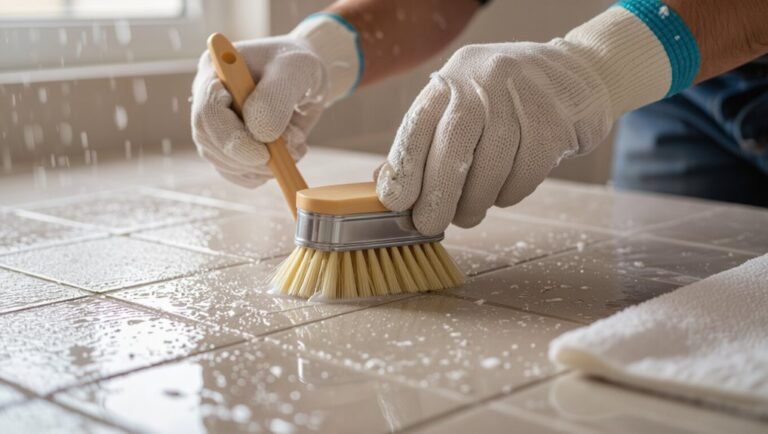
Before you lay any vinyl, make sure the subfloor is spotless, flat, and sound—this prevents gaps, squeaks, and premature wear.
Sweep and vacuum debris, scrape old adhesive, and patch holes or gouges with appropriate filler.
Sand high spots and use a self-leveling compound for low areas.
Secure loose boards, replace damaged sections, and recheck for firmness before proceeding.
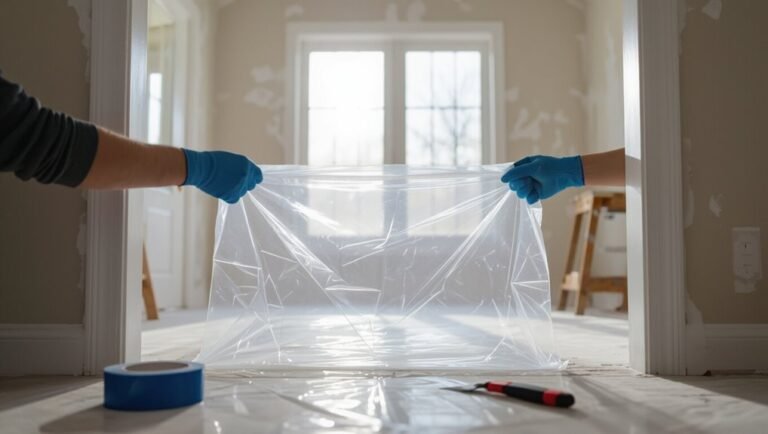
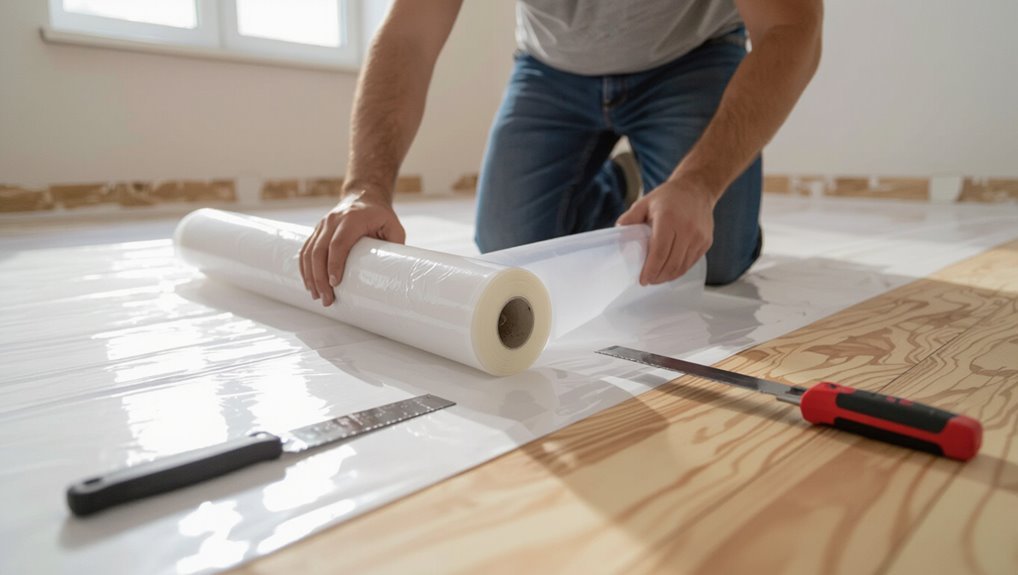
Laying a moisture barrier (when and how)
Because moisture can warp vinyl and promote mold, you’ll want to install a moisture barrier whenever the subfloor is concrete, the space sits over a crawlspace, or humidity is a concern.
Roll out a 6–10 mil polyethylene sheet, overlap seams by 6–12 inches, and tape them.
Extend up walls slightly, trim after flooring, and seal edges at doorways and vents to prevent vapor intrusion.
Installing common underlayment types with vinyl (floating vs glue-down)
When you’re ready to install vinyl, choose the underlayment method that matches the product and subfloor—floating systems need a cushioning underlayment that also provides acoustic and minor leveling benefits, while glue-down vinyl requires a thin, firm underlayment or none at all to guarantee proper adhesive contact; this determines the tools, prep, and sequencing you’ll follow.
For floating floors, roll out foam or cork, tape seams, trim.
For glue-down, verify flatness, dust-free surface, apply adhesive per manufacturer, set planks, and roll.
Seaming and edge treatment tips
After you’ve laid underlayment and aligned the first rows, pay close attention to seams and edges to guarantee a waterproof, professional finish.
Seal seams with manufacturer-recommended seam tape or adhesive, trim edges precisely, and leave proper expansion gaps.
Install threshold strips at doorways, use quarter-round or baseboard to hide gaps, and compress edges firmly to prevent moisture infiltration and movement.
Comparison Table of Popular Underlayments for Vinyl
To help you choose the right underlayment for vinyl, the table below compares common options by thickness, moisture resistance, sound insulation, comfort, and suitability for different subfloors.
| Underlayment | Key traits |
|---|---|
| Foam | Thin, moderate comfort, limited moisture resistance, good for level subfloors |
| Cork | Thicker, excellent sound insulation, fair moisture resistance, works on plywood/concrete |
Common Mistakes and Problems to Avoid
Don’t install vinyl without checking moisture levels first, or you can invite mold and failure.
Avoid overly thick or compressible underlayments on click-lock planks, follow the manufacturer’s underlayment requirements, and seal vapor barrier seams carefully.
Also don’t lay over uneven or damaged subfloors — fix them before you install.
Installing without checking moisture
If you skip checking subfloor moisture, you risk trapping dampness beneath your vinyl and inviting warping, mold, or adhesive failure.
Don’t assume levels are safe—measure with a moisture meter or perform a calcium chloride or RH test.
Address leaks, cure new concrete, or install a proper vapor barrier when needed.
Taking these steps prevents costly repairs and preserves your flooring’s warranty.
Using too thick or compressible underlayment for click-lock vinyl
When you pick an underlayment that’s too thick or too soft for click-lock vinyl, the planks won’t lock tightly and can feel spongy underfoot, leading to gaps, squeaks, and premature wear.
Choose a firm, manufacturer-recommended pad with minimal compression.
Test a plank in place before installing a full room, and replace any compressible foam that allows movement or undermines the locking mechanism.
Skipping manufacturer-specified underlayment
Although saving time or money might tempt you to skip the underlayment your vinyl’s maker specifies, that shortcut can void warranties, cause fit-and-finish problems, and let moisture or sound issues creep in.
You’ll risk uneven support, premature wear, and manufacturer refusal to cover damage. Follow their specs: use the recommended type and thickness to guarantee proper performance, longevity, and warranty protection.
Poor seam sealing of vapor barriers
Skipping the right underlayment won’t be your only worry—poorly sealed vapor barrier seams can cause big problems too.
If seams aren’t taped or overlapped correctly, moisture will migrate under the vinyl, promoting mold, cupping, and adhesive failure. You should align seams, use recommended tape, and seal penetrations.
Inspect and repair seams before installing to protect flooring longevity and indoor air quality.
Installing over uneven or damaged subfloors
If you lay vinyl over an uneven or damaged subfloor, you’ll end up with visible ripples, premature wear, and fastener or adhesive failures that shorten the life of your floor.
Inspect and repair gaps, loose boards, and high spots. Level with patching compound or underlayment, replace rotten sections, and sand humps.
Proper prep prevents squeaks, tears, and wasted materials.
Best Practices and Pro Tips
When choosing underlayment, you’ll want to balance sound reduction with the stability required for your vinyl.
Match the underlayment to any radiant heat system, plan for clean changes and thresholds, and use compatible adhesives or strips.
Finally, think about long-term maintenance so your floor stays stable and quiet for years.
Balancing sound reduction and stability
Although cutting down noise is important, you also need a substrate that keeps vinyl flat and supported.
This is because soft or compressible underlay can cause seams to telegraph and wear prematurely.
Choose dense, thin underlayment or dual-purpose products that balance damping with rigidity.
Test samples under typical foot traffic, prioritize stability over maximum sound deadening, and follow manufacturer specs for warranty.
Pairing underlayment with radiant heat systems
Because radiant heat changes how quickly and evenly your floor warms, pick underlayment that conducts heat well and won’t trap moisture or compress under load.
Choose thin, dense materials rated for hydronic or electric systems, like cementitious boards or specialized conductive foams.
Verify manufacturer compatibility with your vinyl, guarantee proper vapor control, and follow installation temps and fastening guidelines for safe, efficient heat transfer.
Handling transitions and thresholds
Radiant-heated floors and underlayment choices influence how different flooring areas meet, so you’ll want to plan how to join vinyl to other surfaces before you finish the job.
Use connection strips that match height and movement tolerance, allow expansion gaps at doorways, and secure thresholds to subfloor—not vinyl.
For tile or wood edges, install reducer or T-molding for a seamless, durable junction.
Long-term maintenance considerations
When you want your vinyl floor to look and perform like new for years, establish a simple maintenance routine and follow a few pro-tested practices.
Sweep or vacuum regularly, mop with a manufacturer-approved cleaner, and avoid abrasive tools.
Use felt pads on furniture, rugs in high-traffic zones, and control humidity.
Address spills promptly and refinish or replace damaged planks as needed.
Cost Considerations and Value Decisions
You’ll want to weigh price ranges for common underlayments—foam, cork, rubber, and specialty options—because costs and performance vary.
Know when it’s worth paying more for sound reduction, moisture barriers, or better durability versus sticking with a budget option.
Also compare DIY savings against professional installation costs and the risk of warranty or performance issues if the job isn’t done right.
Price ranges by underlayment type
Underlayment prices vary widely, so it helps to know what drives those differences before you shop.
Foam runs lowest, often $0.20–$0.80 per sq ft. Cork and felt sit midrange, about $0.80–$2.00 per sq ft.
Rubber and specialized moisture-barriers cost more, $1.50–$4.00+ per sq ft. Factor coverage, thickness, and any attached vapor barriers when comparing costs.
When to invest in higher-quality underlayment
If you’re planning to keep vinyl flooring for years or install it in high-traffic or moisture-prone areas, invest in higher-quality underlayment to protect your floor and save on future repairs.
Choose upgraded options when subfloor irregularities, sound reduction, or added thermal comfort matter.
You’ll pay more up front, but better underlayment extends lifespan, reduces maintenance, and improves daily comfort and resale appeal.
DIY vs professional installation cost trade-offs
When weighing DIY vs. hiring a pro, consider both upfront costs and hidden expenses like tools, wasted materials, and your time.
Doing it yourself can save on labor but may cost more if mistakes lead to repairs or reduced floor longevity.
You should assess skill level, project size, warranty implications, and time value.
For complex subfloors or large areas, hire a pro; for small, simple rooms, DIY often makes sense.
Room-by-Room Recommendations
Think about each room’s needs when choosing underlayment for vinyl flooring.
In bathrooms and laundry rooms you’ll want moisture-focused options, while kitchens need something durable and comfortable underfoot.
For basements pick a vapor barrier with insulation, and in living rooms or bedrooms prioritize sound reduction and cushioning.
Bathrooms and laundry rooms (moisture-focused)
Because bathrooms and laundry rooms see frequent water and humidity, you’ll want an underlayment that prioritizes moisture resistance and fast drying.
Choose closed-cell foam, cork with a vapor barrier, or waterproof rubber underlayments. Make sure seams are sealed and subfloor is level.
Look for mold- and mildew-resistant products, and use a moisture meter before installation to confirm safe conditions.
Kitchens (durability and comfort)
While kitchens get heavy foot traffic and the occasional spill, you’ll want an underlayment that balances durability, cushioning, and moisture protection.
Choose dense cork or high-density foam with an integrated moisture barrier to absorb impact, reduce fatigue, and resist spills.
Make certain it’s compatible with your vinyl’s warranty, provides sound dampening, and lays flat for stable, long-lasting performance under cabinets and appliances.
Basements (vapor barrier and insulation)
Basements demand a vapor barrier and insulation under vinyl to keep moisture out and warmth in; you’ll want an underlayment that combines a reliable vapor retarder with insulating properties to prevent condensation, mold, and cold floors.
Choose closed-cell foam or cork with a built-in vapor layer, seam-tape joints, and guarantee the subfloor is level and dry before installation to maintain performance.
Living rooms and bedrooms (sound and comfort)
When you want vinyl floors that feel warm underfoot and cut down on echo, choose an underlayment designed for comfort and sound control; look for foam or cork options with good density and an attached or compatible acoustic pad.
You’ll improve foot comfort, reduce impact and airborne noise, and add minor thermal insulation.
Install per manufacturer instructions and guarantee moisture compatibility with your vinyl.
Frequently Asked Questions
You probably have a few specific questions before you start—like whether vinyl can go straight over plywood or concrete, if you always need a moisture barrier, and which underlayment suits click-lock (floating) vinyl.
You’ll also want to know whether underlayment affects your warranty and if the same product works for both laminate and vinyl.
Below are clear answers to each of these common concerns.
Can I install vinyl flooring directly over plywood or cement?
Yes — you can install vinyl flooring directly over plywood or cement, but the subfloor must be clean, dry, flat, and structurally sound before you lay anything down.
Check for loose boards, squeaks, cracks, or high spots and repair them. Use a level to confirm flatness and sand or skimcoat minor imperfections.
Follow manufacturer tolerances for flatness and adhesive recommendations.
Do I always need a moisture barrier under vinyl?
How often do you need a moisture barrier under vinyl? You don’t always need one, but you should if subfloors are concrete, prone to dampness, or in basements and ground-level rooms.
For plywood or elevated floors in dry areas, many vinyl types include built-in backing and may not require extra barriers.
Always check manufacturer guidelines and local humidity conditions.
What underlayment is best for click-lock (floating) vinyl?
If your subfloor doesn’t need a separate moisture barrier, you’ll still want the right underlayment for click-lock (floating) vinyl to get comfort, sound control, and stability.
Choose thin foam or cork designed for floating vinyl, or combination underlayments with integrated vapor control if needed.
Make certain it’s compressible enough for joints, rated for vinyl, and keeps the floor level for proper locking and longevity.
Will underlayment affect the warranty on my vinyl flooring?
Wondering whether your choice of underlayment will void the warranty on your vinyl flooring?
Check your manufacturer’s warranty terms—many require specific underlayment types or approved brands.
Using unapproved products or improper installation can void coverage for issues like wear or moisture.
Keep receipts, follow installation guidelines, and when in doubt, ask the manufacturer or retailer for written approval before installing an alternative underlayment.
Can I use the same underlayment for laminate and vinyl?
You’ll often find manufacturers list approved underlayments for each product, so check those before deciding whether to use the same underlayment for laminate and vinyl.
You can sometimes use the same type if it meets both products’ needs—moisture barrier, cushioning, and thickness limits.
If specs differ, choose the underlayment that preserves warranty, performance, and sound control for each room.
Resources and Next Steps
Use the checklist to confirm factors like moisture barrier, thickness, and soundproofing before you buy or install underlayment.
If the subfloor is uneven, you’re unsure about moisture levels, or the project feels beyond your skill set, call a professional to avoid costly mistakes.
Below are links and next steps to help you choose materials and find qualified installers.
Checklist for choosing and installing underlayment
1 clear checklist will help you pick and install the right underlayment without costly mistakes: gather product specs (thickness, R-value, moisture barrier), confirm subfloor condition and flattening needs, check manufacturer compatibility with your vinyl, and line up tools and safety gear for the job.
- Measure room and buy extra material
- Verify moisture readings
- Choose compatible adhesive/method
- Prep and clean subfloor before laying
When to call a professional
If your subfloor has major damage, persistent moisture, or unevenness beyond what basic leveling can fix, call a pro—these issues can invalidate warranties and lead to costly failures if handled incorrectly.
You should hire a professional when:
- structural repairs are needed
- mold or active water intrusion exists
- complex moisture mitigation is required
- manufacturer warranty demands certified installers