How to Clean a Pebble Shower Floor and Prevent Soap Scum Buildup
You can keep a pebble shower floor clean by rinsing and squeegeeing after each use, scrubbing weekly with a pH-neutral cleaner and a soft brush, and spot-treating soap scum or mineral deposits with a stone-safe cleaner or a tested vinegar/baking soda mix. Dry and reseal the stones every 12–18 months, fix cracked grout promptly, and avoid acidic or abrasive tools. Follow these simple steps and you’ll cut buildup and extend the floor’s life—more tips and fixes are ahead.
How to Clean a Pebble Shower Floor and Prevent Soap Scum Buildup
You can get a clean pebble shower floor with a quick, simple routine that prevents soap scum from building up.
Start with a gentle scrub and rinse after each use, then use a weekly mild cleaner to remove residue.
Stick to this effective schedule and you’ll cut down on deep cleanings.
Quick Answer Simple, Effective Routine
Although pebble shower floors look natural, they trap soap and grime quickly, so a short, consistent routine keeps them clean and slip-free.
You’ll learn how to clean a pebble shower floor fast:
- Rinse and squeegee after each use to remove soap residue.
- Weekly scrub with mild cleaner and soft brush.
- Monthly seal to repel grime and simplify maintenance.
Understanding Pebble Shower Floors
A pebble shower floor is made of small, irregular stones set into grout or a mesh backing, and you’ll want to know that construction because it affects cleaning.
Those gaps and textured stone surfaces trap soap scum and grime more easily than smooth tile.
Different stones (like river rock, travertine, or marble), grout types, and sealants change how porous the floor is and what cleaners and maintenance will work best.
What a pebble shower floor is and how it’s constructed
Pebble shower floors combine natural river stones or manufactured pebbles set into grout or mortar to create a textured, slip-resistant surface that also adds visual interest.
You’ll typically find pebbles mounted on mesh sheets or individually laid, then embedded in thinset and grouted.
Floors are sealed to protect grout and stones.
Proper slope and drainage are essential for durability and performance.
Why pebble floors trap soap scum and grime
Texture explains a lot: the uneven surface, many grout joints, and tiny crevices between stones give soap scum, body oils, and mineral deposits plenty of places to cling and build up.
You’ll find residue lodges where water flow slows, making rinsing incomplete. That trapped grime darkens grout, dulls stones, and promotes slippery films, so regular agitation and thorough rinsing are essential to keep the floor clean.
Common materials (stone types, grout, sealants) and how they affect cleaning
Different stones, grout mixes, and sealants change how you should clean and what products will work. You’ll choose pH-neutral cleaners for soft stones, stronger cleaners for dense granites, and mild scrubs for grout. Reseal porous stone regularly and test products on a hidden pebble.
| Material | Cleaning | Sealant |
|---|---|---|
| Limestone | Neutral | Frequent |
| Granite | Stronger | Less frequent |
Safety and Preparation Before Cleaning
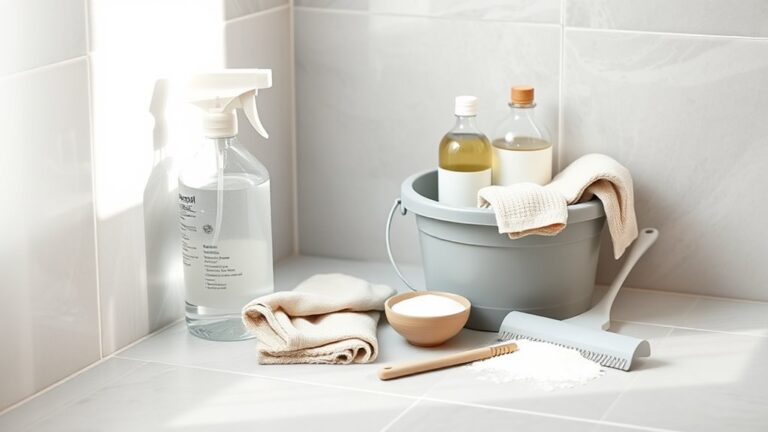
Before you start cleaning, gather the right tools and supplies—mild cleaner, soft brush, bucket, and a tester for any new product.
Make sure the bathroom is well ventilated, wear gloves, and spot-test cleaners on an inconspicuous area.
Inspect the floor closely for loose stones, cracked grout, or failing sealant so you can repair them before wet-cleaning.
Tools and supplies you’ll need
You’ll need a handful of specific tools and supplies to clean a pebble shower floor safely and effectively:
- Soft-bristled brush, grout brush, or nylon scrub pad for scrubbing without scratching.
- pH-neutral cleaner or mild vinegar solution and a bucket for mixing.
- Microfiber towels, sponge, and a small squeegee to rinse and remove excess water and residue.
Protective measures (ventilation, gloves, testing cleaners)
Because cleaning products and wet surfaces can create hazards, take a few simple protective measures: run the bathroom fan or open a window for ventilation, wear rubber or nitrile gloves to protect your skin, and spot-test any cleaner on an inconspicuous area to make sure it won’t damage the pebbles or grout.
Also wear non-slip shoes, keep children and pets out, and rinse thoroughly after testing.
How to inspect the floor for damage, loose stones, and sealant condition
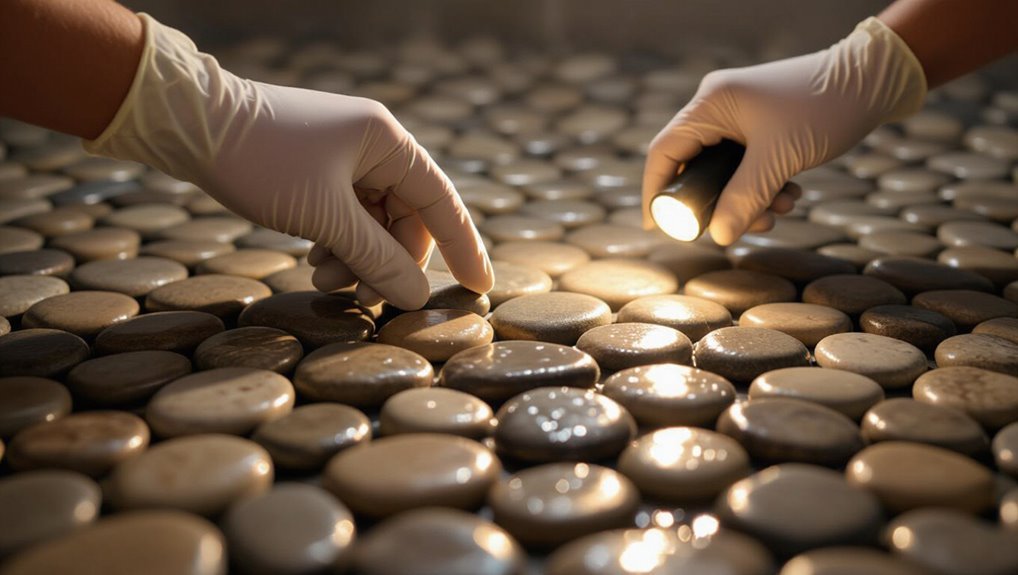
With ventilation running and gloves on, move on to a careful inspection of the pebble floor to spot damage, loose stones, and the condition of the sealant.
Run your hand gently over pebbles, press grout seams, and look for cracks or gaps.
Note loose or hollow-sounding stones and areas where sealant is worn, peeling, or discolored so you can repair or reseal before cleaning.
Step-by-Step Cleaning Process (Deep Clean)
Start by removing loose debris and drying any loose dirt so you can see what needs the most attention.
Pick a cleaner that’s safe for both stone and grout—pH-neutral for natural stone, acidic only for grout if the manufacturer allows it—and apply it following the label, letting it sit the recommended time.
Scrub grout and stones with appropriate brushes using controlled pressure, then rinse thoroughly and inspect for any remaining residue.
Step 1 Remove surface debris and dry loose dirt
Sweep or vacuum the pebble floor to lift hair, soap scum flakes, and grit before any wet cleaning.
Remove loose debris so scrubbing won’t grind dirt into grout. Check corners and drain for trapped bits.
- Use a soft-bristle broom or handheld vacuum attachment.
- Work toward the drain for easy collection.
- Empty the trap or vacuum canister promptly.
Step 2 Choose the right cleaner for stone and grout (pH-neutral vs. acidic)
After you’ve removed loose debris, pick a cleaner that’s safe for both natural stone and grout—pH-neutral formulas are the safest everyday choice because they won’t etch or dull pebble surfaces, while acidic cleaners (like those with vinegar or stronger acids) can remove mineral buildup but may damage certain stones or weaken grout.
| Cleaner | Use case |
|---|---|
| pH-neutral | Regular cleaning, safe |
| Acidic | Stubborn mineral stains, use cautiously |
Step 3 Apply cleaning solution safely and let sit (technique and dwell time)
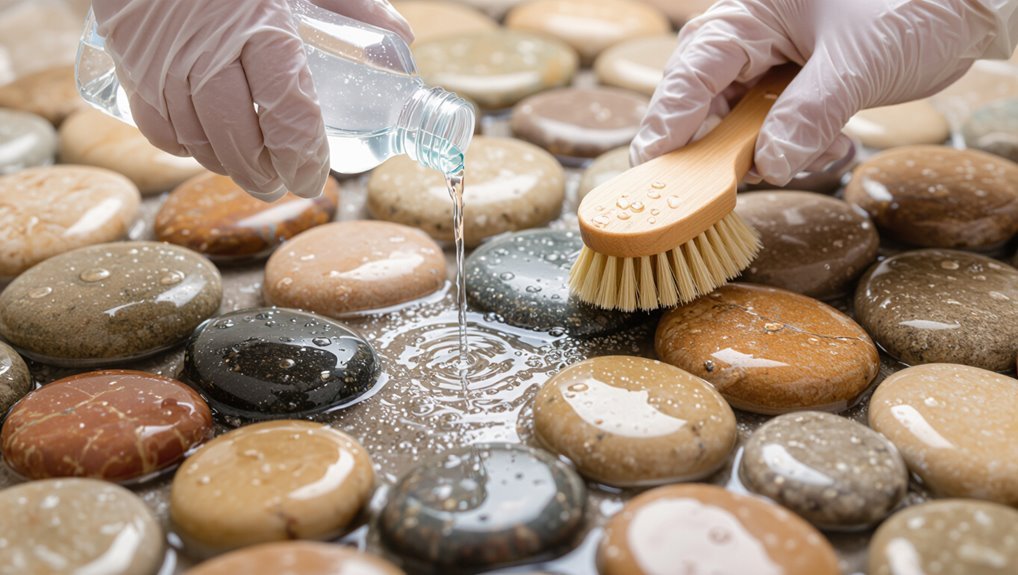
Once you’ve chosen a cleaner, apply it evenly across the pebble floor using a soft-bristle brush or a spray bottle so every crevice gets covered.
Then let it dwell according to the product instructions—typically 5–15 minutes for pH-neutral cleaners and up to 30 minutes for stronger, acid-based solutions.
While it sits, ventilate the bathroom, keep pets and children away, and avoid mixing cleaners.
Step 4 Scrub effectively: brushes, strokes, and pressure (grout lines vs. stones)
Grab a soft- to medium-bristle brush and start scrubbing in short, controlled strokes, adjusting pressure so you scrub grout lines more firmly while treating the pebbles gently to avoid scratching or loosening them.
Focus on grout channels with a bit more force and use circular motions over stones. Work in small sections, reapply cleaner as needed, and pause to inspect grout for stubborn deposits.
Step 5 Rinse thoroughly and check for remaining residue
5. Rinse the floor with warm water, directing flow to drains so loosened soap and grit flush away.
Move a handheld showerhead or cup in sweeping motions, checking crevices and grout for film or suds.
If you spot residue, repeat targeted rinsing and gentle brushing until water runs clear.
Finish by inspecting under different angles and light.
Step 6 Drying techniques to prevent mineral spots and mold
Because moisture left on pebbles invites mineral spots and mold, dry the floor thoroughly and methodically after rinsing; use a squeegee to push water toward the drain, then blot remaining dampness with microfiber towels.
Open ventilation—fan or window—while you towel-dry grout lines and between stones.
Finish with a quick air-dry period to guarantee no hidden moisture remains.
Removing Stubborn Soap Scum and Stains
Before you start scrubbing, learn to tell soap scum, hard water scale, and mold apart so you can choose the right treatment.
For soap scum you can use targeted homemade mixes or commercial cleaners, while hard water deposits and rust need gentler, stone-safe approaches.
Protect the pebbles and grout by using appropriate products and techniques for grout stains and mold so you don’t damage the stone.
Identifying soap scum versus hard water scale and mold
Wondering whether those cloudy patches are soap scum, hard water scale, or mold?
You’ll spot soap scum as filmy, greasy residue that wipes away with elbow grease and mild detergent.
Hard water scale feels chalky, white, and resists soap—often around fixtures.
Mold appears fuzzy or discolored (black/green) and smells musty.
Test by scrubbing small areas to distinguish them.
Targeted treatments for soap scum (homemade and commercial options)
1 simple routine can make soap scum manageable: use the right cleaner, apply it directly, let it sit, then scrub with a soft brush or sponge.
You can choose gentle homemade mixes or stone-safe commercial products, test a patch, then treat spots.
Suggestions:
- Vinegar (diluted) or baking soda paste for mild scum
- Commercial stone-safe soap scum remover
- Repeat spot treatment and rinse thoroughly
Removing hard water deposits and rust without damaging stone
If soap scum responds to regular spot treatments, you’ll still sometimes face tougher mineral build-up and rust that won’t yield to mild cleaners.
Use a poultice of baking soda and hydrogen peroxide for rust, or dilute white vinegar for mineral spots—test in an inconspicuous area first.
Gently scrub with a soft brush, rinse thoroughly, and reseal stone afterward to prevent recurrence.
Treating grout stains and mold safely
When grout darkens from soap scum, mildew, or mold, act quickly to prevent staining and deterioration; you’ll get the best results by combining gentle cleaners, targeted agitation, and proper drying.
Use a pH-neutral stone cleaner or diluted hydrogen peroxide for stains, scrub grout lines with a soft brush, rinse thoroughly, and dry.
Re-seal grout after it’s fully cured to inhibit recurrence.
Repair and Maintenance Steps After Cleaning
After cleaning, check for loose pebbles and gaps in the grout so you know when to re-grout or press pebbles back into place.
Inspect the sealant and any waterproof membrane for cracks or peeling and patch or reseal small areas promptly.
If the damage is extensive or you’re unsure about the waterproofing, call a professional to prevent leaks.
When and how to re-grout or fix loose pebbles
A loose pebble or a hairline gap in grout signals it’s time to repair your shower floor, and you shouldn’t delay—small fixes prevent bigger water damage.
Remove loose pebbles and old grout, clean and dry the area, then apply matching grout or epoxy adhesive.
Smooth joints, let cure per instructions, and wipe excess.
Check repairs regularly and regrout any spreading gaps.
Inspecting and repairing sealant or waterproof membranes
Loose grout and popped pebbles can let water reach the substrate.
So next you’ll need to inspect the sealant and any waterproof membrane under or around the pebble floor.
Check for cracks, gaps, or soft spots.
Dry the area, remove failing sealant, and apply compatible waterproofing compound or sealant per manufacturer instructions.
Allow full cure before resealing grout or using the shower.
When to call a professional
If you find recurring leaks, widespread grout loss, significant substrate damage, or mold that won’t respond to cleaning, call a professional to assess and repair the problem; these issues usually need specialized tools and expertise to prevent further deterioration.
You should also hire a pro if repairs exceed your skill level, waterproofing is compromised, or persistent odors and staining return despite proper cleaning and resealing.
Preventing Soap Scum Buildup Daily and Weekly Habits
After each shower, rinse the pebbles and use a squeegee or towel to remove water and soap residue.
Once a week, do a light clean with a pH-neutral cleaner and soft brush, and schedule deep cleans and resealing (typically every 12–18 months) to protect grout and stone.
Consider using a water softener, gentle soaps, and a removable shower mat to cut down on buildup.
Daily rinse and squeegee routine
Because pebble floors trap water and soap in their crevices, a quick daily rinse and squeegee routine keeps grime from hardening into stubborn soap scum.
You’ll rinse with warm water, then squeegee toward the drain, and let air finish drying. Repeat daily to minimize buildup.
- Rinse thoroughly after each shower
- Squeegee from center outward
- Open ventilation to dry
Weekly light-clean protocol and recommended products
When you set aside a few minutes once a week for a light clean, you’ll prevent soap scum and mineral deposits from taking hold on your pebble floor;
wet the surface, spray a pH-neutral stone cleaner or diluted white vinegar solution (test first), scrub gently with a soft brush, rinse thoroughly, and squeegee.
Use microfiber cloths and a nonabrasive grout brush; avoid bleach or acidic cleaners that etch stone.
Long-term maintenance schedule (seal every X months, deep clean frequency)
To keep your pebble shower looking its best over time, stick to a simple schedule: seal the grout and stones every 12–18 months (or sooner in high-use showers), give the floor a deep clean every 3–6 months, and maintain daily and weekly habits to prevent soap scum from building up.
Track dates, inspect seals annually, reapply sealer at first signs of darkening, and adjust frequency based on wear.
Design and usage tips to reduce buildup (water softeners, soap choices, shower mats)
If you want to minimize soap scum on a pebble shower floor, combine smart design choices with simple daily and weekly habits.
Install a water softener or showerhead filter to cut mineral buildup. Use liquid, pH-balanced or sulfate-free cleansers instead of bar soap.
Squeegee or towel-dry the floor after each use, place a quick-rinse mat, and deep-clean weekly to prevent residue accumulation.
Best Cleaners, Tools, and Sealants for Pebble Floors
You’ll want the right brushes, vacuums, and rinse tools to scrub grit from between pebbles without damaging grout.
Choose cleaners that’re pH-neutral, non-abrasive, and labeled safe for natural stone or pebble surfaces, and look for brands with clear ingredient lists and good reviews.
Finally, pick a penetrating sealer or solvent-based topcoat based on moisture exposure—each has pros and cons and specific application tips you’ll need to follow.
Recommended brushes, vacuums, and rinsing tools
One essential set of tools for keeping a pebble shower floor clean includes a soft-bristled scrub brush, a grout-friendly brush, a wet/dry vacuum, and a gentle rinse hose or detachable showerhead—each chosen to remove dirt without damaging stones or grout.
- Use the soft-bristled brush for pebble surfaces.
- Use the grout brush for stubborn grout lines.
- Use the wet/dry vacuum and rinse hose to remove residue and speed drying.
Best cleaner types and brand attributes to look for
Now that you’ve got the right brushes and rinse tools, pick cleaners that protect both stones and grout while removing soap scum and mildew. Choose pH-neutral, non-abrasive, biodegradable formulas; avoid bleach or acidic mixes. Look for quick-rinse labels, mildew inhibitors, and pleasant but subtle scents to keep showers inviting.
| Cleaner trait | Why it matters |
|---|---|
| pH-neutral | Gentle on stone |
| Non-abrasive | Prevents scratching |
| Biodegradable | Eco-friendly |
| Mildew inhibitor | Longer-lasting clean |
| Quick-rinse | Saves effort |
Sealant types, pros/cons, and application tips

Because pebble shower floors combine porous stone and grout, choosing the right sealant matters for both appearance and longevity; you’ll want a product that balances water resistance, breathability, and ease of reapplication.
Use penetrating sealers for natural look and vapour escape, acrylic topical for glossy protection, and epoxy for heavy-duty sealing.
Apply to clean, dry pebbles, follow cure times, and reseal every 1–3 years.
Common Mistakes to Avoid
Don’t use acidic or abrasive cleaners or metal tools, since they can etch stones and scratch pebbles.
Don’t over-scrub or skip regular sealant upkeep and ventilation, because that lets grime and moisture damage grout and stone.
And don’t try DIY hacks that promise quick fixes but can harm grout or loosen stones.
Using acidic or abrasive cleaners that damage stone
If you reach for a strong acid or abrasive scrub, you can strip the pebble floor’s natural seal, etch the stones, and loosen grout in just a few cleanings.
Don’t use vinegar, bleach, or scouring powders on natural stone.
Choose pH-neutral cleaners formulated for stone, dilute per instructions, test a small area, and rinse thoroughly to protect finish and extend sealant life.
Over-scrubbing or using metal tools
After choosing the right cleaner, resist the urge to scrub harder or grab metal tools when tackling stubborn grime. You’ll wear away sealant, chip pebbles, and create rough spots that trap soap scum.
Use soft brushes or nonabrasive pads, apply cleaner, let it dwell, then rinse. Gentle, repeated care protects finish and prevents faster buildup without damaging the floor.
Skipping sealant maintenance and poor ventilation
When you skip regular sealant upkeep and ignore ventilation, your pebble floor becomes vulnerable to moisture, stains, and lingering mildew.
You’ll notice grout darkening and slippery areas faster.
Maintain sealant on schedule and run exhaust fans or open windows after showers to dry surfaces.
That prevents trapped humidity, reduces mold risk, and keeps pebbles looking fresh without costly repairs.
Applying DIY hacks that harm grout or stones
Neglecting sealant and ventilation sets the stage for bigger problems, but trying quick DIY fixes can make things worse by damaging grout and stones.
Don’t use acidic cleaners, undiluted bleach, or vinegar scrubs on natural stone—those etch surfaces and weaken grout. Avoid abrasive pads and sealant-stripping methods.
Test cleaners on a hidden spot, follow manufacturer guidance, and call a pro for stubborn stains.
Cost, Time, and Frequency Estimates
You’ll usually spend 10–20 minutes weekly on light maintenance, while a deep clean takes an hour or more.
DIY supplies typically cost $10–50, whereas a pro cleaning or restoration can run $150–500 or higher depending on damage.
If grout is crumbling, pebbles are loose, or stains won’t lift, it’s time to call a professional.
Typical time required for maintenance vs. deep clean
If you keep up with quick weekly wipe-downs and a monthly gentle scrub, maintenance takes only 10–20 minutes each session; a true deep clean—scrubbing grout, resealing, and tackling soap scum—usually runs 1–2 hours and is best done every 6–12 months.
Stick to brief upkeep to prevent buildup, schedule deeper work seasonally, and adjust frequency for heavy use or persistent residue.
Estimated costs for DIY supplies vs. professional cleaning
A basic DIY refresh of a pebble shower floor usually runs $15–$60 for supplies—mild cleaner, a scrub brush, grout cleaner, and a sealant—while a more thorough deep-clean kit (specialized grout cleaners, stone-safe detergents, and resealer) can push the total to $75–$150. Compare options visually:
| DIY kit | $15–$150 |
|---|---|
| Tools | Scrub brush, pad |
| Consumables | Cleaner, grout, sealer |
| Pro estimate | $150–$500+ |
Signs your floor needs professional restoration
When persistent staining, loose or missing pebbles, or grout that crumbles under a fingernail show up despite regular DIY care, it’s time to call in a pro—restoration specialists can assess hidden damage, estimate repair costs, and recommend whether deep cleaning, regrouting, or full resealing (or even pebble replacement) is needed.
Expect inspections to take 1–2 hours; repairs range $200–$2,000 and may recur every 3–10 years.
FAQ Pebble Shower Floor Cleaning (35 common questions)
You probably have a bunch of practical questions—like how often to reseal, whether vinegar or bleach are safe, or how to scrub mold from between pebbles.
You’ll also want to know if a shower mat can harm the stones and what renters can do to prevent soap scum.
Let’s walk through clear, usable answers to those common concerns.
How often should I seal my pebble shower floor?
Wondering how often to reseal your pebble shower floor? You should reseal every 1–2 years for high-traffic showers and every 2–3 years for infrequent use.
Check the seal by sprinkling water—if it soaks in, reseal. Use a penetrating stone sealer, follow manufacturer instructions, and allow proper curing.
Regular inspections extend seal life and protect grout and stones.
Can I use vinegar or bleach on a pebble shower floor?
Can vinegar or bleach safely clean a pebble shower floor?
You shouldn’t use undiluted vinegar or harsh bleach regularly—acid can etch some stones and bleach can weaken grout or harm sealers.
For light cleaning, use a pH-neutral cleaner recommended for natural stone.
If you must disinfect, dilute bleach heavily, rinse thoroughly, and test a small hidden area first to protect stones and sealant.
How do I remove stubborn mold between pebbles?
How do you tackle stubborn mold lodged between pebbles without damaging the stone or grout?
Scrub gently with a soft brush and a pH-neutral cleaner or diluted hydrogen peroxide (3%), rinse thoroughly, and dry.
For persistent spots, apply a paste of baking soda and water, let sit 10–15 minutes, scrub, then rinse.
Re-seal grout and pebbles regularly to prevent recurrence.
Will a shower mat damage my pebble floor?
Will a shower mat harm your pebble floor? Not usually. A non-slip mat can protect pebbles from concentrated wear, but plastic mats that trap water or have suction cups can hold moisture, promote mold, and scrape finishes.
Choose a breathable, quick-drying mat with soft backing, lift it regularly to air the floor, and clean both mat and pebbles often to prevent damage.
How can I make soap scum prevention easier for renters?
Want to make soap scum less of a hassle for renters? Teach quick routines: squeegee after each use, wipe grout lines weekly with a microfiber cloth, and keep pH-neutral cleaner and a soft brush under the sink.
Use liquid soap or low-residue body wash, avoid bar soap buildup, and post simple, visible instructions.
Offer mild, approved products to protect the pebble sealant.