Does Home Depot Install Flooring? Everything You Need to Know
Yes — you can have Home Depot install most flooring types, including laminate, vinyl (LVP/LVT), tile, hardwood, and engineered wood, with professional measurement, old-floor removal, subfloor prep, and installation. You’ll get scheduling in-store or online, an itemized estimate, optional add-ons like underlayment or moisture barriers, and a one-year workmanship warranty; some specialty materials or major structural issues may be excluded. Keep going to learn how the process, costs, and warranties actually work.
Quick Answer Does Home Depot Install Flooring?
Yes — Home Depot does install flooring.
You can arrange installation for many products when you buy in-store, and some online orders also offer installer scheduling depending on product and location.
Check your local store or the product page to see if installation is available for your purchase.
Short, direct answer
Home Depot does install flooring—you can have them handle measurement, removal, and installation for many types of floors including laminate, vinyl, tile, hardwood, and engineered wood.
If you want a straightforward solution, Home Depot offers professional installation through its network; you’ll get scheduling, warranty options, and contractor coordination.
Ask your local store for a free estimate to confirm services and pricing.
When Home Depot installation is available (store vs. online)
If you’re ready to move from asking whether installation’s offered to when and where it’s available, here’s what to expect:
You can schedule installation in-store after consulting with a Project Specialist or request online through Home Depot’s website.
Availability depends on product type, your location, and installer schedules.
Online quotes, in-home measurements, and bookings are common; some specialty installs require in-store coordination.
How Home Depot Flooring Installation Works Overview
You’ll learn which flooring types Home Depot installs — like hardwood, laminate, vinyl, and tile — and how options vary by store.
You’ll see the difference between buying installation through Home Depot versus using third-party contractor programs.
Finally, you’ll need to check service areas and availability, since not every option is offered everywhere.
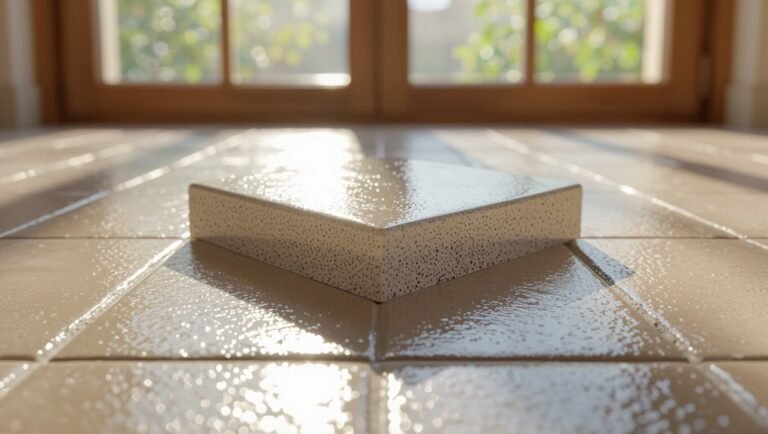
Types of flooring Home Depot installs
Flooring choices make a big difference in comfort, style, and budget, and Home Depot installs a wide range of options to fit different needs.
You can choose materials suited to rooms, traffic, and maintenance. Consider:
- Hardwood — timeless, refinishable, higher cost.
- Laminate — durable, budget-friendly.
- Vinyl (LVP/LVT) — waterproof, versatile.
- Tile — durable, ideal for wet areas.
In-store purchase vs. third-party contractor programs
Now that you’ve weighed material options like hardwood, vinyl, and tile, you’ll want to evaluate how you’ll buy and install them—through an in-store purchase with Home Depot’s installation services or via a third-party contractor program.
If you buy in-store, Home Depot coordinates installers, warranties, and payment.
With third-party programs, you’ll compare independent bids, schedules, and direct contractor warranties before deciding which fits your budget and timeline.
Service areas and availability constraints
Because Home Depot works through a mix of company-trained teams and local partners, availability varies by location and project type.
You should check local store listings and online scheduling to confirm service zones and estimated start dates.
Certain remote areas, specialty materials, or complex jobs may be declined or routed to third-party providers.
Expect variable lead times, seasonal delays, and regional pricing differences.
What Installation Services Include
When you schedule Home Depot flooring installation, the crew will handle standard tasks like measuring, removing old floors, prepping the subfloor, and fitting the new material.
You can also add underlayment, trim, threshold strips, or moisture barriers if your project needs them.
After the job they’ll clean up, inspect the work, and follow up on any concerns.
Standard installation components (measurement, removal, prep, installation)
Start by getting a clear picture of the four core steps you’ll see in a standard Home Depot flooring installation: precise measurement, removal of existing flooring, subfloor prep, and the actual installation of your new floor.
Technicians measure twice, remove old materials, clean and level the subfloor, address minor repairs, and then lay, glue, or float the new planks or tiles to factory specs.
Optional add-ons (underlayment, trim, transition strips, moisture barriers)
Although optional, add-ons like underlayment, trim, connector strips, and moisture barriers can make a big difference in your floor’s performance and finish. Installers will typically offer and install these to meet product requirements and site conditions.
You’ll choose underlayment for sound and comfort, moisture barriers for basements, trim and junction strips for neat edges and safe passages, and flashing or reducers where heights differ.
Post-installation services (cleanup, inspection, follow-up)
After installers fit your underlayment, trim, and moisture protection, they’ll move into post-installation services to finish the job and make sure your floor performs as promised.
They’ll clean debris, vacuum and mop, inspect seams and connections, and address visible defects.
You’ll get a walkthrough explaining care, warranty details, and any necessary touch-ups.
Follow-up calls confirm satisfaction and schedule repairs if issues appear.
Step-by-Step Process for Getting Home Depot to Install Your Flooring
First, pick your flooring and confirm it’s eligible for Home Depot installation.
Then request a quote, schedule a measurement, and make any required site preparations before the crew arrives.
On install day expect the team to work through the job, finish with a walkthrough, and handle final payment.
Step 1 Choose product and check installability
Choosing the right flooring for Home Depot to install starts with verifying the product meets their installation requirements and your home’s needs.
You’ll check material, moisture compatibility, changes, and warranty.
Consider these steps:
- Check Home Depot’s installable product list.
- Confirm subfloor and moisture limits.
- Match trim and change options.
- Guarantee manufacturer installation warranty applies.
Step 2 Request a quote and schedule a measurement
Request a quote and schedule a professional measurement to turn your product choice into a firm plan and accurate price.
Use Home Depot’s online scheduler or call your local store, provide room dimensions and photos, and choose add-ons like underlayment or connectors.
A measurer will confirm material quantities, note installation challenges, and give a written estimate and available installation dates so you can approve and book.
Step 3 Site preparation requirements for homeowners
Once you’ve approved the estimate and booked a measurement, you’ll need to prepare the site so installers can work quickly and safely.
Clear furniture, rugs, and decor from rooms and adjacent areas. Secure pets and children away from work zones.
Empty closets and remove wall hangings. Clear pathways to entry points and make certain electricity is accessible.
Protect stairs and exterior walkways.
Step 4 Day-of-installation expectations
Although the installers will handle the technical work, you’ll want to be available at the start of the day to confirm the scope, access keys or codes if needed, and point out any special areas or concerns.
During installation, stay reachable for quick decisions, keep pets and kids away, clear fragile items, and follow any ventilation or drying instructions.
Expect periodic progress updates.
Step 5 Final walkthrough and payment
Before the installers leave, walk the space with them to confirm every area meets your expectations and that any punch-list items are noted for correction.
Check changes, baseboards, and cleanup. Ask questions about warranties, maintenance, and cure times.
Review the final invoice, verify agreed charges match, and pay by your chosen method.
Get contact info for follow-up and a completion receipt.
Costs and Pricing Structure
You’ll see costs broken into per-square-foot labor, materials, and any removal or disposal fees, plus extras for trim or changes.
Typical ranges vary by flooring—vinyl and laminate sit lower, hardwood and tile cost more—so expect different totals depending on material.
Estimates are based on scope, required prep, and subfloor condition, which can raise the price if repairs or leveling are needed.
Typical pricing components (per-square-foot labor, materials, removal)
When you shop Home Depot flooring installation, the final price bundles several clear components: per-square-foot labor, the cost of materials (underlayment, trim, adhesives), and any removal or disposal fees for existing floors.
You’ll also pay for specialty tasks like subfloor repair, stair work, or changes. Taxes and delivery may apply, and quoted estimates should list each line item so you can compare costs.
Example price ranges by flooring type
Now that you know what line items show up on a Home Depot flooring estimate, it helps to look at typical price ranges by flooring type so you can set realistic expectations.
| Flooring Type | Typical Total Cost (per sq ft) |
|---|---|
| Vinyl plank | $3–7 |
| Laminate | $2–6 |
| Engineered hardwood | $5–12 |
| Tile | $6–15 |
Use these ranges to budget; get a tailored estimate for accuracy.
How estimates are calculated (scope, prep, subfloor condition)
Because flooring estimates hinge on more than just material costs, contractors break them into clear line items so you know what you’re paying for.
You’ll see charges for labor, underlayment, removal, repairs, and disposal.
Prep and subfloor condition affect time and materials—rot, leveling, or moisture barriers add costs.
Get a written scope, ask about allowances, and compare itemized bids.
Who Performs the Work In-House vs. Subcontractors
When you hire Home Depot for flooring, the work is often done by independent contractors from their vetted network rather than company employees.
You’ll want to check each installer’s insurance, licensing, and the warranty they offer since coverage and guarantees can vary.
Verify credentials by asking for license numbers, proof of insurance, and written warranty terms before work begins.
Home Depot’s contractor network and vetting process
If you hire Home Depot for flooring installation, you’ll usually be working with a network of vetted contractors rather than Home Depot employees.
You’ll get contractors chosen for experience, background checks, and customer reviews. Home Depot coordinates scheduling, provides materials lists, and monitors performance through ratings and follow-ups.
You’ll communicate through Home Depot’s project portal, which helps track timelines and resolve issues efficiently.
Insurance, licensing, and warranty differences
Although Home Depot coordinates installations, the actual work usually comes from independent contractors rather than in-house crews.
That difference affects insurance, licensing, and warranties you should check before signing. You’ll want proof of liability and workers’ comp, confirm contractor licensing meets local requirements, and understand manufacturer versus installer warranties.
Coverage limits, claim processes, and who’s liable for damage vary, so get details in writing.
How to verify your installer’s credentials
Because Home Depot often contracts out installations, you should confirm exactly who’ll be doing the work before signing—ask whether installers are company employees or subcontractors, get the crew leader’s name and company, and request copies of their insurance and license documents.
Verify references, check online reviews, confirm contractor registration with your state, and guarantee their insurance covers worker injuries and property damage before payment or scheduling.
Product Compatibility and Limitations
You’ll want to know which flooring types Home Depot typically won’t install—things like certain exotic hardwoods, some loose-lay vinyls, and specialty tile that require certified installers.
Check for structural or site conditions—uneven subfloors, moisture issues, or inadequate joist support—that can stop an installation or require pre-work.
Also review manufacturer requirements and warranty rules, since noncompliance can void coverage even if the store or a subcontractor does the job.
Flooring types commonly not installed by Home Depot
When planning a Home Depot installation, know that some flooring types aren’t supported due to manufacturer, warranty, or installer limitations; this helps you avoid wasted time and unexpected costs.
You’ll often find Home Depot won’t install exotic hardwoods requiring special acclimation, certain reclaimed or hand-scraped planks, some luxury vinyl tiles with proprietary locking systems, or specialty commercial/resilient floors outside their certified installer scope.
Structural or site conditions that can prevent installation
If your subfloor is uneven, damp, or damaged, installers may stop the job or require costly repairs before laying new flooring.
You’ll also face delays if joists sag, structural movement exists, or moisture intrusion persists.
Tight clearances, stair complexities, and compromised thresholds can block installation.
Inspecting and correcting site issues beforehand prevents surprises, extra charges, and failed installations.
Manufacturer requirements and warranty considerations
Site and structural issues don’t just affect whether installers can lay flooring—they can also affect whether your warranty stays valid.
You’ll need to follow manufacturer specs for subfloor type, moisture levels, acclimation, adhesives, and installation methods. If you don’t, the manufacturer or Home Depot may deny claims.
Ask for documented requirements, keep receipts, and confirm installers meet those standards to protect coverage.
Common Problems and Mistakes Homeowners Face
You’ll often run into problems like underestimating materials or the time a job takes, which can delay completion and raise costs.
Miscommunications with schedulers or contractors and improper subfloor prep or moisture issues are common causes of rework.
Know how disputes and defect claims are handled so you can document problems and get timely resolutions.
Misestimating needed materials or time
Because it’s easy to underestimate waste, cuts, and unexpected setbacks, many homeowners find themselves short on materials or pressed for time during a Home Depot flooring job.
You should measure rooms carefully, account for pattern matching and waste, and buy slightly extra planks.
Build buffer days into your schedule so delays or repairs don’t derail progress, and keep contingency funds for surprises.
Communication breakdowns with schedulers or contractors
When communication breaks down with Home Depot schedulers or contractors, projects stall and frustration mounts quickly.
You’ll miss updates, face last-minute rescheduling, or get unclear scope details. Insist on written confirmations, detailed timelines, and direct contact numbers.
Ask for change-order documentation and confirm responsibilities for cleanup and warranties.
Clear, proactive communication prevents surprises and keeps your project on track.
Issues from improper subfloor prep or moisture
If installers skip proper subfloor preparation or ignore moisture levels, your new flooring can buckle, gap, or develop mold in months rather than years.
You’ll face cupping, adhesive failure, and squeaks if uneven or contaminated substrates aren’t fixed.
Moisture testing and vapor barriers matter; don’t accept shortcuts.
Document conditions, request remediation, and verify dryness before installation to protect your investment.
How disputes and defect claims are typically handled
Although you’d expect straightforward resolutions, disputes over flooring defects often stall because contractors, retailers, and insurers point fingers instead of fixing the problem.
You should document damage, photos, receipts, and communications immediately. File claims with the installer and retailer, follow warranty steps, and get independent inspections if needed.
If unresolved, escalate to corporate complaints, mediation, or small claims court with your evidence.
Tips and Best Practices to Ensure a Smooth Installation
Before the crew arrives, clear the work area and secure pets and valuables so installers can work efficiently.
Ask clear questions about timelines, materials, and change-order charges during quoting and scheduling, and document everything to protect warranties and track what was done.
If costs, timing, or warranty terms aren’t satisfactory, consider hiring an independent installer instead.
Preparing your home before the crew arrives
When the installation crew arrives, you’ll want the job to run on schedule and without surprises, so clear pathways, secure pets, and remove fragile items from the work area ahead of time.
Follow these practical steps to prepare:
- Clear furniture and rugs from rooms.
- Create unobstructed access to exterior doors.
- Turn off HVAC if advised.
- Protect nearby surfaces and belongings.
Questions to ask during quoting and scheduling
If you want the project to stay on budget and on time, ask clear, specific questions during quoting and scheduling so there are no surprises later.
Confirm scope, materials, exact measurements, removal and disposal fees, and any subfloor prep costs.
Ask about start and end dates, daily work hours, access needs, payment schedule, change-order procedures, and who your point of contact will be.
Protecting warranties and documenting work performed
One simple step you can take to protect warranties and avoid disputes is to document everything from measurements and product lot numbers to pre-installation photos and signed change orders.
Keep digital and printed copies, timestamp images, and log installer names and dates. Save receipts and warranty cards, note any on-site issues, and request written confirmation for adjustments so claims stay clear and supported.
When to consider hiring an independent installer instead
Because job scope, timing, or past experience can change what’s best for your project, you should consider an independent installer whenever Home Depot’s installation services don’t meet your needs.
Hire independently if you need specialized materials, faster start dates, custom trim or alterations, or higher workmanship guarantees.
Get written estimates, check references and licenses, confirm insurance, and set clear timelines to avoid surprises.
Alternatives to Home Depot Installation
If you’re weighing options beyond Home Depot’s pros, compare local flooring contractors, other big-box or specialty retailers, and the DIY route to see which fits your budget and timeline.
Local contractors can offer personalized service and flexibility, while other retailers may have different warranties or pricing.
Doing it yourself can save money but means you’ll need the time and skills to avoid costly mistakes.
Local flooring contractors vs. Home Depot pros
When you’re weighing installation options, local flooring contractors and Home Depot pros each bring different strengths to the table: local contractors often offer personalized service, flexible scheduling, and deep knowledge of regional conditions, while Home Depot provides standardized pricing, national warranty support, and streamlined ordering. You’ll choose local for customization and rapport; pick Home Depot for predictability and broad coverage.
| Factor | Consideration |
|---|---|
| Cost | Variable vs. fixed |
| Scheduling | Flexible vs. standardized |
| Warranty | Local vs. national |
| Expertise | Regional vs. chain-trained |
| Ordering | Direct vs. centralized |
DIY installation pros and cons
Many DIYers save a lot by installing flooring themselves, but you’ll trade money for time, effort, and a steeper learning curve.
You’ll get control and savings, but face risks like mistakes and warranty issues.
Consider:
- Cost savings
- Time investment
- Skill requirement
- Potential for errors
Weigh these against convenience and guarantees from professional installers.
Other big-box and specialty retailer options
Although Home Depot is a major option, you’ve got several other big-box and specialty retailers that offer installation services, each with different pricing, materials, and warranty terms.
You can compare Lowe’s, Menards, and local flooring chains for competitive quotes, specialized materials, and package deals.
Check installer credentials, timelines, and warranty transferability so you pick the best fit for budget and quality.
Cost-Saving Strategies
You can save a lot by timing installs around Home Depot promotions and seasonal discounts to catch lower labor and material prices.
Consider bundling materials with installation to access package discounts and ask about scope adjustments that keep costs down.
Picking cost-effective materials or reducing the project scope lets you meet your budget without sacrificing quality.
Timing installs with promotions and seasonal discounts
When you schedule your Home Depot flooring install around major sales events and off-peak seasons, you can cut costs without sacrificing quality.
Watch for holiday sales, end-of-season clearances, and special financing windows.
Flexibility with start dates often nets lower labor rates and quicker booking.
Ask your local store about upcoming promotions and negotiate timing to align installation with verified discounts.
Bundling materials and installation for discounts
Besides timing installs for sales, bundling materials and labor often yields the next biggest savings.
You can ask Home Depot for package pricing when buying flooring, underlayment, trim, and installation together.
Combining rooms or phases may lower per-square-foot labor rates.
Get written estimates, compare bundle vs. à la carte costs, and negotiate modest discounts or free delivery to maximize your total savings.
Selecting cost-effective materials and scope adjustments
If you want to cut costs without sacrificing durability, focus on material choices and scope tweaks that deliver the most value per dollar.
Choose durable vinyl plank or laminate over hardwood, limit demolition to necessary areas, reuse existing trim when possible, and consolidate rooms to reduce labor.
Ask for trim, underlayment, or adhesive alternatives that meet specs but cost less, and get multiple quotes.
FAQs
Wondering how long an install takes, whether Home Depot will remove and haul away old flooring, or what installation warranty you’ll get?
You’ll also want to know if you can use your own materials and what happens if you’re not satisfied with the work.
Below are clear answers to those common FAQs to help you decide.
How long does a typical Home Depot flooring install take?
How long will your Home Depot flooring install take?
Timelines vary: small rooms (100–200 sq ft) often finish in a day. Medium projects take one to two days. Larger areas or complex layouts can run several days.
Prep, sequencing, and curing times for adhesives or finishes add hours to days.
Ask your project coordinator for a site-specific estimate and timeline.
Does Home Depot remove old flooring and haul it away?
You’ll often want to know whether Home Depot will remove your old flooring before installers arrive—especially since prep affects scheduling and costs.
Yes, Home Depot typically offers removal and disposal as an add-on service for many flooring jobs. You’ll select it when scheduling; installers will demo and haul away debris.
Confirm pricing, any heavy-item fees, and local disposal rules beforehand.
What warranty does Home Depot provide for installation work?
Curious about protection for the crew’s work? Home Depot typically offers a one-year workmanship warranty on installations performed by its contracted installers.
If you spot defects or improper installation within that period, report them to the store for inspection and repair.
Warranties can vary by product type, installer, and state, so always check your written installation agreement for exact coverage and claim procedures.
Can I use my own flooring material with Home Depot installers?
Can you bring your own flooring for Home Depot installers? Yes — Home Depot often allows customer-supplied materials, but you’ll need installer approval.
They’ll inspect the product for suitability, warranty implications, and code compliance. You may also need to sign a waiver accepting responsibility for defects or performance issues tied to your materials.
Confirm specifics, scheduling, and any additional fees before installation.
What if I’m not satisfied with the installation?
Not happy with the install? You should contact Home Depot and the installer immediately—document issues with photos and notes.
Home Depot offers a workmanship guarantee and will schedule corrections or a callback through its Pro Referral or installation service.
If problems persist, escalate to customer service for dispute resolution or request a refund.
Keep receipts and agreements for faster resolution.
Visuals and Tools
You’ll find a clear sample project timeline and checklist to keep your installation on schedule and on budget.
Use a comparison chart that lays out flooring types, costs, and installation complexity so you can pick the right option for your skill level.
These visuals and tools will help you plan, shop, and communicate with installers.
Sample project timeline and checklist

A clear sample timeline and checklist helps you visualize each step of a Home Depot flooring project and guarantees you have the right visuals and tools on hand before work begins.
Draft a day-by-day schedule (prep, removal, subfloor repair, installation, trim, cleanup).
Check materials, tools, safety gear, and permits. Reserve installer dates, confirm measurements, and mark completion checkpoints to avoid delays.
Comparison chart of flooring types and installation complexity
Compare common flooring types side-by-side to quickly see how their installation complexity, required visuals, and essential tools differ so you can pick the right option for your skill level and schedule. Use the table to weigh effort, visuals, and tools before deciding.
| Type | Complexity | Essential tools |
|---|---|---|
| Vinyl | Low | Utility knife, roller |
| Hardwood | High | Saw, nailer, sander |