
Is Vinyl Flooring Good? Pros, Cons, and Honest Verdict
Vinyl flooring is a smart, budget-friendly choice if you want water resistance, easy upkeep, and looks that mimic wood or stone without high cost. You’ll get durable, comfortable floors that handle spills and busy rooms, though they can dent, fade, and don’t add long-term resale value like hardwood or tile. Installation needs a flat, dry subfloor and repairs can be awkward. Keep humidity and sun exposure in check, and you’ll see why many homeowners pick it—more details ahead.
Quick Answer Is Vinyl Flooring Good?
Yes—vinyl is a practical, affordable floor that works best in kitchens, bathrooms, and high-traffic areas but can have durability and environmental trade-offs.
You’ll get water resistance and easy maintenance, though higher-end options last longer and are less likely to fade or dent.
For homeowners it’s a cost-effective choice, renters get quick style with low commitment, and businesses benefit from durable, low-maintenance coverage.
Short verdict summary (best uses and caveats)
Vinyl is a practical, budget-friendly flooring that suits busy households, rental units, and moisture-prone areas like kitchens and bathrooms.
However, you should avoid it where you want high resale value or authentic hardwood appeal.
If you’re asking “is vinyl flooring good,” it’s excellent for durability, low maintenance, and cost control, yet limited in luxury feel and long-term value compared to real wood or tile.
One-line recommendation for homeowners, renters, and businesses
If you’re choosing flooring, here’s a quick take: homeowners who want low-cost, low-maintenance surfaces will find vinyl a smart choice for high-traffic or wet areas.
Renters get an affordable, easy-to-install option they can take or leave.
Businesses benefit from durable, easy-to-clean vinyl in commercial spaces—just don’t expect it to mimic real hardwood’s resale appeal or luxury feel.
You’ll get practicality, not prestige.
What Is Vinyl Flooring? Basics You Need to Know
You’ll find several vinyl types—sheet, luxury vinyl plank (LVP), luxury vinyl tile (LVT), and vinyl composition tile (VCT)—each suited to different rooms and budgets.
Most vinyl has a layered construction (wear layer, printed design/core, and backing) that determines durability and waterproofing.
Price-wise, vinyl ranges from very affordable entry-level options to mid-priced luxury vinyl that competes with hardwood or tile for appearance and performance.
Types of vinyl flooring (sheet, luxury vinyl plank (LVP), luxury vinyl tile (LVT), vinyl composition tile (VCT))
When choosing flooring, you’ll encounter four main vinyl types—sheet, luxury vinyl plank (LVP), luxury vinyl tile (LVT), and vinyl composition tile (VCT)—each made for different looks, budgets, and performance needs.
- Sheet: continuous, water-resistant, budget-friendly.
- LVP: plank look, realistic wood visuals, easy install.
- LVT: tile appearance, stone or ceramic mimic, durable.
- VCT: commercial-grade, resilient, needs regular maintenance.
Typical construction and materials (wear layer, core, backing)
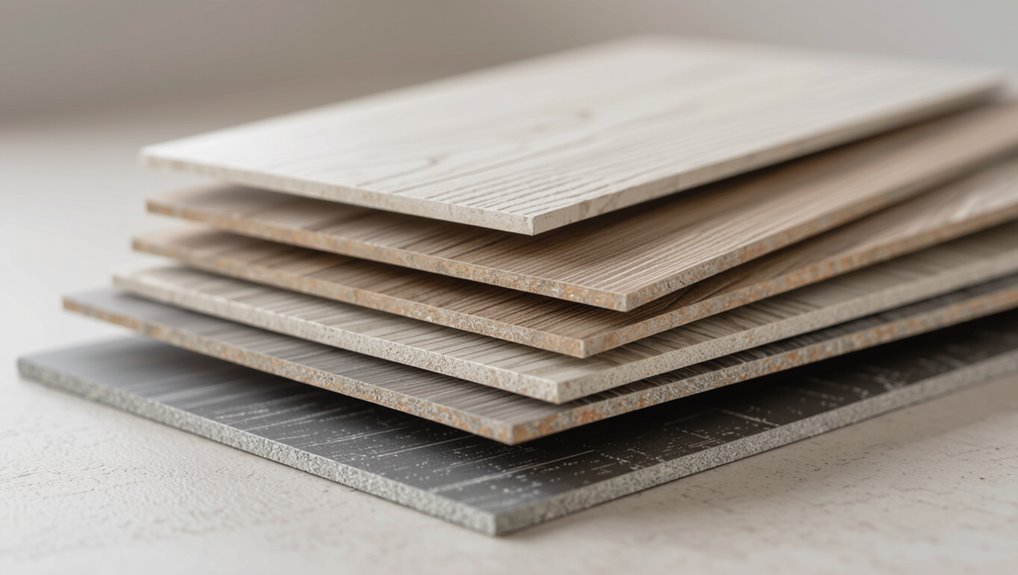
Think of vinyl flooring as a multilayer sandwich: each layer—wear layer, printed vinyl film or core, and backing—plays a specific role in appearance, durability, and comfort.
You’ll find a clear wear layer that resists scratches and stains, a printed decorative layer atop a PVC or stone-plastic core for stability, and a backing that provides moisture resistance and cushioning.
Carefully choose thicknesses for use.
Price range and where it fits among flooring options
Knowing how vinyl’s layers affect performance helps explain why prices vary so much.
You’ll find budget sheet and basic luxury vinyl plank (LVP) from about $0.80 to $3 per sq ft, mid-range LVP $3–$6, and premium rigid-core or waterproof options $6–$12+.
Vinyl sits below hardwood and tile on cost but above cheap carpet, offering a strong value for durability and water resistance.
Pros of Vinyl Flooring
You’ll find plenty to like about vinyl: it stands up to heavy use, handles water in wet rooms, and feels softer underfoot while cutting noise.
You can choose from realistic wood or stone looks to match your style. Many options are simple to install yourself, so you can save on labor.
Durability and wear resistance
Because vinyl’s wear layer is designed to take the brunt of foot traffic and daily use, it resists scratches, scuffs, and stains far better than many other resilient floors.
You’ll find high-traffic areas hold up well, and quality luxury vinyl can last decades with proper care.
Occasional refinishing isn’t needed; regular sweeping and mild cleaning keep it looking new and dependable.
Water resistance and suitability for wet areas
When moisture’s a concern, vinyl stands out for its reliable water resistance, making it a top pick for kitchens, bathrooms, and basements.
You won’t worry about short spills or humidity warping the floor; luxury vinyl and sheet vinyl repel water effectively.
Seams and edges need proper installation and sealing, but with care you’ll get a practical, low-maintenance wet-area flooring solution.
Comfort and sound absorption
Comfort matters, and vinyl gives you a softer, warmer feel underfoot than tile or hardwood, especially with cushioned or thicker luxury vinyl options.
You’ll notice reduced foot fatigue, making standing tasks easier. Vinyl also dampens footsteps and echoes better than hard surfaces, improving acoustic comfort in busy rooms.
Underlayment choices further boost cushioning and sound absorption for quieter, cozier spaces.
Variety of styles and realistic wood/stone looks
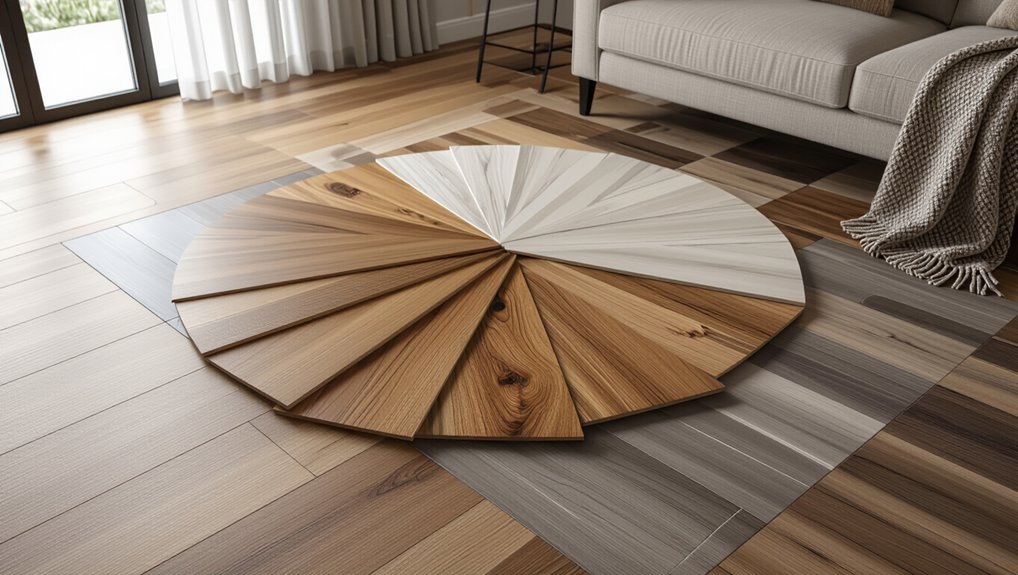
Though it mimics high-end materials, vinyl gives you a huge range of realistic wood, stone, and tile looks at a fraction of the cost, so you can match nearly any decor without sacrificing durability.
You’ll find plank widths, grain patterns, and grout textures that replicate expensive options.
Color palettes span modern to rustic, letting you create cohesive rooms without the upkeep or vulnerability of real hardwood or stone.
Ease of installation and DIY options
Because vinyl comes in click-lock planks, peel-and-stick tiles, and loose-lay sheets, you can pick the format that matches your skill level and time budget.
You’ll find straightforward tutorials and basic tools suffice for many installs. Click-lock often snaps together over underlayment, peel-and-stick trims edges, and loose-lay simply rests in place—so you can tackle rooms without hiring pros.
Low maintenance and cleaning ease
One of vinyl’s biggest advantages is how little effort it takes to keep looking good—you can usually manage maintenance with regular sweeping, an occasional damp mop, and quick spot cleaning for spills.
You won’t need special cleaners; mild detergent and water handle most messes. Durable wear layers resist stains and scuffs, so routine care keeps floors attractive with minimal time and effort.
Cost-effectiveness and lifecycle value
Keeping upkeep simple also helps your budget over time: vinyl’s low maintenance cuts ongoing costs because you won’t be buying special cleaners or paying for frequent professional care. You’ll get durable, affordable materials with easy DIY installs and decent lifespan, making total cost per year competitive versus hardwood or tile.
| Item | Cost impact |
|---|---|
| Purchase | Low |
| Installation | Low–Medium |
| Maintenance | Low |
| Replacement cycle | Medium |
Cons of Vinyl Flooring
While vinyl has many benefits, you should also know its downsides: it can gouge, dent, or fade more easily than harder floors and sometimes shows wear over time.
You’ll want to evaluate environmental and VOC concerns, plus the extra care required for subfloor prep and moisture control.
Repairs are often limited to patching or full replacement, and vinyl typically won’t match the long-term lifespan of hardwood or tile.
Susceptibility to gouges, dents, and fading
Although vinyl’s wear layer protects most daily traffic, it can still get gouged, dented, or faded under certain conditions.
You’ll notice scratches from pet claws, heavy furniture, or dropped tools; point loads can leave permanent depressions.
Prolonged UV exposure may lighten or yellow patterns, especially near windows.
Choose thicker wear layers and use pads, rugs, and UV filters to reduce damage.
Environmental and VOC concerns
If you care about indoor air quality and long-term environmental impact, vinyl flooring raises some red flags: it’s made from PVC and additives that can release volatile organic compounds (VOCs) and other contaminants during installation and over time.
Disposal is problematic because PVC isn’t biodegradable and often ends up in landfills or incinerators. You’ll want low‑VOC certifications, careful ventilation, and recycling options, which are limited.
Challenges with subfloor preparation and moisture issues
Because vinyl needs a flat, dry surface to perform, you’ll spend time and money on subfloor prep that you mightn’t expect.
You’ll have to level imperfections, remove old adhesives, and address moisture barriers or vapor issues before installation. If you skip these steps, the floor can buckle, peel, or trap mold.
Proper testing and remediation add cost and complexity.
Repair limitations (patching vs. replacing)
When a section of vinyl gets dented, burned, or stained, you’ll often find that patching is awkward and obvious rather than seamless—matching color, pattern, and wear is hard, and seams can show.
You’ll usually replace whole planks or sheets for a clean fix, which can be costly and time-consuming. Salvaging matching material isn’t always possible, so repairs often look improvised.
Longevity compared to hardwood or tile
Patching issues often means you’ll end up replacing sections more frequently, which highlights a bigger downside: vinyl simply doesn’t last as long as hardwood or tile.
You’ll notice faster wear in high-traffic areas, edge lifting, and compressed patterns over time.
While affordable initially, vinyl’s shorter lifespan raises replacement costs and environmental waste, so plan for eventual renewal sooner than you’d with wood or ceramic.
Is Vinyl Flooring Right for Your Space? Room-by-Room Guide
Think about how each room will affect vinyl: kitchens and bathrooms need water-resistant choices and careful seams, while living rooms and bedrooms benefit from softer, more comfortable options.
In basements and laundry rooms you’ll want moisture checks, proper adhesives, and installation methods that handle humidity.
For commercial or high-traffic areas pick thicker wear layers and confirm warranty terms for durability.
Kitchens and bathrooms: pros and important precautions
Although kitchens and bathrooms see heavy use and frequent spills, vinyl flooring handles moisture and traffic better than many materials, making it a practical choice for these rooms if you pick the right type and follow a few precautions.
Choose waterproof or fully glued sheets/tiles, seal seams, use proper underlayment, protect against standing water, and avoid sharp objects and prolonged heat to preserve finish and adhesion.
Living rooms and bedrooms: performance and comfort considerations
When you want a warm, low-maintenance floor for living rooms and bedrooms, vinyl delivers a lot of benefits—it’s soft underfoot, quiet, and available in realistic wood and carpet-look styles—while still standing up to daily traffic and occasional spills.
You’ll enjoy easy cleaning, cushioned comfort for kids and pets, and good scratch resistance, though choose thicker wear layers for longevity and softer padding for added comfort.
Basements and laundry rooms: moisture, adhesives, and installation tips
Basements and laundry rooms demand flooring that handles moisture and heavy use, and vinyl often fits the bill if you pick the right type and install it correctly.
Choose waterproof LVT or SPC, use a vapor barrier over concrete, and prefer full-spread adhesive or loose-lay with perimeter glue for laundry areas.
Elevate appliances, guarantee proper slope at drains, and follow manufacturer’s moisture limits.
Commercial/high-traffic spaces: durability and warranty considerations
If your space sees constant foot traffic, rolling carts, or frequent furniture moves, pick vinyl engineered for commercial wear — like heavy-duty LVT or commercial-grade sheet vinyl — and match it to the expected load and maintenance schedule.
You’ll want proven wear layers, commercial warranties, and routine care to protect investment.
- wear layer thickness
- warranty terms
- slip and impact ratings
- maintenance plan
Comparing Vinyl to Other Flooring Options
When you compare vinyl to hardwood, expect similar looks at a lower cost and easier maintenance.
Against laminate, tile, or carpet, vinyl often wins for water resistance and comfort but varies in durability and repairability.
We’ll highlight the trade-offs for appearance, price, upkeep, and room suitability so you can pick what fits your needs.
Vinyl vs. Hardwood (appearance, cost, maintenance)
Choosing between vinyl and hardwood comes down to how you weigh looks, cost, and upkeep: vinyl can convincingly mimic wood grain at a fraction of the price and with far less maintenance, while hardwood offers authentic warmth and long-term value but demands more care and a higher upfront investment.
| Vinyl | Hardwood |
|---|---|
| Low cost | High cost |
| Low maintenance | Higher maintenance |
| Water resistant | Sensitive to moisture |
| Thin feel | Solid depth |
Vinyl vs. Laminate
1 clear difference between vinyl and laminate is how they handle moisture: vinyl’s resilient, water-resistant layers keep spills and humidity from warping the floor, while laminate’s fiberboard core swells and can delaminate if it gets wet.
Vinyl also offers softer underfoot comfort, better sound absorption, and wider style variety; laminate can be cheaper initially but needs more careful moisture management.
Vinyl vs. Ceramic/Porcelain Tile
Although both vinyl and ceramic/porcelain tile can give you a durable, attractive floor, they suit very different needs:
Vinyl is softer, warmer underfoot, easier and cheaper to install, and forgiving over imperfect subfloors.
Tile offers unmatched hardness, longevity, and heat tolerance for wet areas and high-traffic spaces but costs more and requires skilled installation and rigid subfloors.
Choose based on budget, comfort, and location.
Vinyl vs. Carpet
How do you pick between vinyl and carpet when comfort, maintenance, and budget all matter?
Vinyl’s low upkeep, water resistance, and durability suit busy households and allergies, while carpet adds warmth, softness, and noise reduction.
Choose vinyl if you want easy cleaning and longevity; choose carpet for cushioning and cozy aesthetics.
Factor cost, room use, and allergy sensitivity into your decision.
Buying Guide How to Choose the Right Vinyl Flooring
When choosing vinyl, you’ll want to contemplate the type and plank/tile size that fits your room and layout.
Check wear layer thickness and AC ratings, understand the differences between WPC and SPC cores, and compare finishes, textures, and colors.
Finally, evaluate warranties and realistic lifespan so you know what performance to expect.
Selecting type and plank/tile size
Wondering which vinyl type and plank or tile size will work best for your space?
Pick luxury vinyl plank (LVP) for realistic wood look and easy installation, or luxury vinyl tile (LVT) for stone or ceramic aesthetics.
Choose wider planks for larger rooms, narrower for small spaces.
Match plank length and grout style to room scale, furniture layout, and visual flow for a cohesive result.
Understanding wear layer thickness and AC ratings
Once you’ve picked the vinyl type and plank size that suits your room, focus on the wear layer and AC rating to know how long the floor will hold up.
The wear layer (measured in mils) resists scratches and stains—choose 12+ mil for busy homes.
AC ratings indicate durability; aim for AC3–AC5 for residential to light commercial traffic.
Core types (WPC, SPC) and differences
If you want a rigid, stable floor that handles moisture and heavy foot traffic, choose between WPC and SPC cores—each gives you different benefits.
WPC (wood-plastic composite) feels warmer underfoot and offers better sound absorption and slight give.
SPC (stone-plastic composite) is denser, extremely durable, and more dimensionally stable for large or sun-exposed areas.
Choose based on comfort versus rigidity.
Finishes, textures, and color selection
Finishes, textures, and color shape both the look and performance of your vinyl floor, so start by matching them to the room’s use and your style goals.
Choose matte or low-sheen finishes to hide scratches and slip resistance for wet areas.
Select textured grain or embossed surfaces for realism.
Lighter colors open small rooms; darker tones hide stains but show dust.
Evaluating warranties and realistic lifespan
After you’ve picked the right finish, texture, and color for the room, the next step is to check warranties and expected lifespan so you know what protection and longevity you’re actually getting.
You’ll want to verify coverage, transferability, wear layer guarantees, and realistic years of use based on traffic and maintenance.
- Coverage limits and exclusions
- Transferability on resale
- Wear layer warranty length
- Expected real-world lifespan
Installation Options and Step-by-Step Overview
You can install vinyl yourself with a floating click-lock system by following a few basic steps for layout, cutting, and locking planks together.
Alternatively, you can choose glue-down or full-spread adhesive methods for greater permanence, or hire a pro if your subfloor needs major prep or the room has tricky layouts.
Before any method, you’ll want to prepare the subfloor and address common issues like unevenness, moisture, and damaged underlayment.
DIY floating click-lock installation basic steps
A floating click-lock installation is one of the easiest DIY vinyl options and works well over most flat, dry subfloors; you’ll be locking planks together edge-to-edge without gluing them down to the floor.
You’ll measure, acclimate planks, install underlayment, and click rows together.
Tools:
- Tape measure and utility knife
- Underlayment and spacers
- Rubber mallet and tapping block
- Pull bar for edges
Glue-down and full-spread adhesive methods overview
Glue-down and full-spread adhesive installations bond vinyl directly to the subfloor for a very stable, permanent finish that resists shifting and can improve sound and feel underfoot.
You’ll spread adhesive evenly, lay planks or sheet vinyl, and roll or press seams to guarantee full contact. It demands clean, flat subfloors and careful timing, but yields durable, low-profile results that minimize movement.
Professional installation: when to hire a pro
If the glue-down method sounds demanding, you might prefer hiring a pro—especially when subfloors need prep, patterns require precision, or warranties demand certified installation.
You should hire a pro if your layout is complex, you lack tools or time, or you want guaranteed results and cleanup.
Pros handle changes, trim, and moisture issues efficiently, reducing risk and ensuring a lasting finish.
Preparing subfloor and addressing common installation problems
When you’re preparing the subfloor, start by checking for level, cleanliness, and moisture so the vinyl can adhere and perform properly; uneven, dirty, or damp surfaces cause stretching, bubbles, and premature failure.
Then fix issues, choose installation type, and follow manufacturer guidelines.
Common problems and fixes:
- Fill low spots and sand high areas
- Install moisture barrier
- Acclimate planks
- Use proper adhesive/site prep
Common Mistakes to Avoid
When installing vinyl, you’ll want to avoid laying it over uneven or damp subfloors and pick a wear layer and core suited to your traffic and moisture conditions.
Don’t skip acclimation time before fitting the planks or tiles.
And don’t use harsh cleaners or abrasive tools that can void warranties and damage the surface.
Installing over uneven or damp subfloors
Because vinyl needs a flat, dry base to perform, installing over uneven or damp subfloors invites problems like gaps, buckling, and premature wear.
You should inspect, level, and fully dry the substrate before laying planks or sheets.
Ignore this and adhesives won’t bond, seams will lift, and warranties may be voided.
Prep prevents costly repairs and guarantees long-term performance.
Choosing the wrong wear layer or core for traffic and moisture
Pick a wear layer and core that match how you actually use the room—get it wrong and you’ll see scratches, dents, or swelling long before the floor should age.
Choose higher wear-layer thickness and rigid, waterproof cores for kitchens, entryways, or busy homes.
Don’t pick thin wear layers or low-density cores for pets, heavy furniture, or frequent moisture—they won’t hold up.
Skipping acclimation time before installation
If you skip acclimation, your new vinyl can warp, gap, or buckle as it adjusts to the room’s temperature and humidity after installation.
You should let boxes sit unopened in the installation space for 48–72 hours so the planks reach equilibrium.
Skipping this step risks visible seams, popping joints, and costly repairs that could’ve been prevented with simple patience.
Using harsh cleaners or abrasive tools
Once your vinyl’s fully acclimated, it’s tempting to scrub away every mark with heavy-duty cleaners or a scouring pad, but that approach will damage the wear layer and finish.
Use pH-neutral cleaners, microfiber mops, and gentle motion. Avoid bleach, ammonia, abrasive powders, steel wool, or steam cleaners.
Regular gentle care preserves appearance, prevents scratches, and extends the floor’s lifespan.
Maintenance, Repair, and Longevity Tips
Keep a simple cleaning routine—sweep or vacuum daily and mop weekly with a manufacturer‑approved cleaner while avoiding harsh chemicals and abrasive tools.
Use felt pads, mats, and climate control to prevent scratches, dents, and warping, and learn basic patch or plank replacement so small fixes don’t turn into big jobs.
I’ll also cover how to spot when a plank or tile needs full replacement and the best ways to extend your floor’s lifespan.
Daily and weekly cleaning routines (what to use and avoid)
Although vinyl’s tough surface handles traffic well, daily and weekly cleaning routines will prevent dirt buildup and extend the floor’s life.
Sweep or vacuum daily with a soft-brush setting, and mop weekly using a damp microfiber mop and a pH-neutral cleaner.
Avoid abrasive scrubbers, wax, oil-based products, and steam cleaners.
Wipe spills promptly to stop stains and grime from settling.
Preventive measures to minimize scratches and dents
A few simple habits will go a long way in preventing scratches and dents on your vinyl floor.
Use felt pads on furniture legs, lift rather than drag heavy items, and place protective mats in high-traffic zones.
Keep pet nails trimmed and avoid sharp-soled shoes indoors.
Use furniture sliders when moving appliances and maintain consistent indoor humidity to reduce material stress.
Small repair techniques and when to replace planks/tiles
Those simple preventive habits will cut down most damage, but small nicks and gouges still happen — and you can often fix them yourself.
Use a vinyl repair kit, heat-seal minor splits, or apply matching filler and texture.
For loose or badly warped planks/tiles, replace individual pieces.
Replace flooring when recurring damage, extensive lifting, or subfloor issues compromise function or appearance.
Extending lifespan through environmental control
Because vinyl reacts to heat, moisture, and light, controlling your home’s environment is one of the simplest ways to extend the floor’s life.
Keep humidity between 35–65%, use dehumidifiers or humidifiers as needed, and avoid direct sunlight with blinds or UV films.
Maintain indoor temperatures within manufacturer recommendations, fix leaks promptly, and allow new vinyl to acclimate before installation to prevent warping and gaps.
Environmental and Health Considerations
You should check for VOC emissions and look for certifications like FloorScore or GREENGUARD to guarantee lower indoor air pollution.
Consider recyclability and local disposal options when a floor reaches the end of its life.
For healthier choices, pick low-emission products, ask for ingredient transparency, and choose installers who use low-VOC adhesives.
VOCs, certifications (FloorScore, GREENGUARD) and what to look for
When evaluating vinyl flooring, pay close attention to volatile organic compounds (VOCs) and recognized certifications like FloorScore and GREENGUARD, since they directly affect indoor air quality and long-term health.
Choose products with low VOC emissions, verified test results, and clear labeling. Prefer FloorScore or GREENGUARD Gold for stricter limits.
Ask manufacturers for certificate numbers, emission test dates, and installation guidance to minimize off-gassing.
Recyclability and disposal options
Low VOC certifications are a good start, but you should also consider what happens to vinyl at end of life: recyclability and disposal affect both the environment and long-term indoor health.
Many vinyl floors aren’t widely recyclable, often ending in landfills or incineration. You should check local recycling programs, consider take-back schemes, and minimize waste during installation to reduce environmental impact.
Safer choices and low-emission product tips
If you want vinyl that’s healthier indoors, prioritize products certified for low emissions (like FloorScore or GREENGUARD Gold) and those labeled phthalate-free or made with bio-based plasticizers.
Also check for VOC limits, ask suppliers for full ingredient disclosures, choose products with recycled content, and ventilate during and after installation.
Get warranties and third-party test reports to confirm claims before buying.
Cost Breakdown and ROI
You’ll want to know the typical material and installation cost ranges for vinyl so you can compare quotes and budget accurately.
Consider long-term value too—factor in maintenance costs and how often you’ll likely replace the floor.
Finally, spending more on premium LVP/LVT can make sense if you want better durability, warranty coverage, and higher resale appeal.
Typical material and installation cost ranges
A typical vinyl flooring project can range from budget-friendly to mid-range, with material costs commonly between $1 and $7 per square foot.
Total installed prices usually sit between $2 and $10 per square foot depending on vinyl type and labor.
You’ll pay less for glue-down sheet or basic LVP, and more for premium SPC or textured planks.
Expect higher costs for complex rooms and trim.
Long-term value: maintenance costs and replacement cycle
While vinyl needs less routine care than many floor types, you’ll still factor ongoing maintenance and eventual replacement into its long-term value.
You’ll spend little on cleaning—sweeping, damp mopping, occasional manufacturer-recommended products—and minimal repairs for scratches or lifted edges.
Expect a 10–25 year lifecycle for standard vinyl; budgeting for mid-life spot repairs and eventual replacement keeps your total cost of ownership realistic.
When spending more makes sense (premium LVP/LVT)
If you’re weighing upfront cost against long-term benefits, premium LVP/LVT often pays off: you’ll get thicker wear layers, realistic visuals, and better warranties that reduce replacement risk.
Higher-quality planks resist dents, stains, and fading, lowering maintenance and lifecycle costs.
Calculate total cost per year, include installation and resale premium, and choose premium when durability and appearance matter to your home’s value.
Case Examples and Use Scenarios
To help you pick the right product, consider three clear scenarios: a budget-friendly full-home remodel, a moisture-prone basement renovation, and a high-traffic rental property.
For each case, we’ll show which vinyl types, installation methods, and maintenance needs work best.
That way you can weigh the key decision factors and match them to your priorities.
Scenario A: Budget-friendly full-home remodel
Because you’re replacing floors throughout the house on a tight budget, vinyl’s combination of low material cost, easy installation, and wide style range makes it a practical choice—especially where durability and moisture resistance matter most.
You can pick affordable planks that mimic wood, install quickly to save labor, and prioritize higher-wear vinyl in entryways, kitchens, and kids’ rooms for long-term value.
Scenario B: Moisture-prone basement renovation
When a basement tends to hold moisture, vinyl becomes one of the most practical flooring options you can choose.
You’ll benefit from waterproof cores, easy installation over concrete, and simple maintenance.
Pick luxury vinyl plank or tile with a proper underlayment and seam sealing.
Monitor humidity, address leaks promptly, and avoid trapped standing water to keep the floor performing well.
Scenario C: High-traffic rental property
If you’re managing a high-traffic rental property, vinyl flooring can save you time and money while standing up to heavy use.
You’ll appreciate easy cleaning, quick repairs, and resilience against scratches and spills. Choose commercial-grade or thicker planks for durability.
Tenants benefit from comfort and noise reduction. Expect lower replacement costs and minimal downtime between occupancies, improving turnover efficiency.
Key decision factors illustrated per scenario
As you weigh vinyl for specific rooms or properties, focus on the key decision factors—traffic level, moisture exposure, budget, lifespan expectations, and aesthetic priorities—to match product type and installation to real-world use.
You’ll pick rigid core for heavy wear, SPC for moisture, budget LVT for short-term rentals, and premium LVP for long-term style.
- Traffic vs. durability
- Moisture tolerance
- Upfront cost vs. lifespan
- Repairability and replacement
Frequently Asked Questions
You probably have practical questions about vinyl—like how long it lasts and whether you can install it over existing floors.
You’ll want clear answers on waterproofing versus water resistance, sunlight fading, and whether vinyl can be refinished or sanded.
Below are concise FAQs that address each of these points.
How long does vinyl flooring last?
Vinyl flooring typically lasts between 10 and 25 years, depending on the type, installation quality, and how well you maintain it.
Luxury vinyl plank or tile with a thick wear layer can approach 25 years in low-traffic areas, while thinner sheet or budget planks may wear out nearer 10 years.
Regular cleaning and protective measures extend its life.
Can vinyl flooring be installed over existing floors?
Wondering if you can install vinyl over your current floor? Yes—you often can.
Vinyl plank and sheet products can go over clean, level, and dry surfaces like tile, concrete, or well-adhered vinyl. Remove loose flooring, fix high spots, and guarantee subfloor stability.
Check manufacturer guidelines: some require underlayment or prohibit certain substrates. Proper prep guarantees performance and warranty compliance.
Is vinyl flooring waterproof or just water-resistant?
Is it waterproof or just water-resistant? Most luxury vinyl plank/tile (LVP/LVT) and sheet vinyl are waterproof — they resist spills and moisture, so you can use them in kitchens, bathrooms, and basements.
Glue-down and click-lock seams matter: poor installation or damaged seams let water through.
Subfloor issues and prolonged standing water can still cause problems, so dry spills promptly.
Will vinyl flooring fade in sunlight?
Though prolonged direct sunlight can lighten some vinyl floors, most modern luxury vinyl planks and sheets are formulated to resist noticeable fading for many years.
You should still protect high-exposure areas with window films, blinds, or rugs to minimize color shifts.
UV-resistant wear layers and quality brands reduce risk, but lower-end products may show gradual fading over long-term, intense sun exposure.
Can you refinish or sand vinyl flooring?
Can you refinish or sand vinyl flooring? You can’t sand traditional vinyl; abrasion will damage the printed layer and wear surface.
Luxury vinyl planks with a thick, replaceable wear layer also aren’t meant for sanding. Instead, you repair gouges or replace affected planks.
For stubborn surface issues, consider professional recoating or full replacement to restore appearance and durability.
Final Verdict and Practical Recommendations
You’ll find vinyl works best for busy households, rental units, moisture-prone rooms, and budget-conscious buyers who want low-maintenance floors.
Use a quick checklist—budget, moisture exposure, expected lifespan, and design preference—to decide if vinyl fits your needs.
Below are practical recommendations to help you make the final call.
Summary of ideal use-cases and buyer profiles
Because vinyl blends durability, water resistance, and affordability, it fits a wide range of homes and uses: pick it if you need a tough, low-maintenance floor for high-traffic rooms, wet areas like kitchens and bathrooms, or rental units where cost and quick installation matter.
It’s ideal for families with kids or pets, budget-conscious owners, and DIYers wanting fast updates without sacrificing appearance.
Quick checklist to decide if vinyl is right for you
Wondering if vinyl’s the right choice for your space? Use this quick checklist to decide—be realistic about budget, traffic, moisture, and aesthetics.
- Need low maintenance and budget-friendly flooring
- Expect heavy foot traffic or pets
- Need water resistance in kitchens/basements
- Want a specific look without high cost
If most fit, vinyl’s a practical pick; otherwise consider alternatives.