How to Clean a Painted Cement Floor and Keep It Looking Fresh
You can keep a painted cement floor fresh by sweeping daily, spot-cleaning spills promptly, and mopping weekly with a mild, pH-neutral detergent. For grease or stubborn grime use a degreaser or diluted TSP and scrub gently with a soft brush. Rinse well and dry to prevent water marks. Inspect for chips, moisture, or efflorescence and repair or reseal high-traffic areas as needed; follow manufacturer cure times for new paint to avoid damage and learn proper deep-clean steps.
How to Clean a Painted Cement Floor and Keep It Looking Fresh
When spills or dirt show up, start with a quick sweep and a gentle mop using pH-neutral cleaner to remove surface grime.
For stubborn stains, spot-treat with a soft brush and a mild degreaser, then rinse and dry promptly.
If paint is flaking, faded beyond touch-ups, or the surface is rough, it’s time to contemplate repainting rather than more cleaning.
Quick Answer Best Immediate Steps
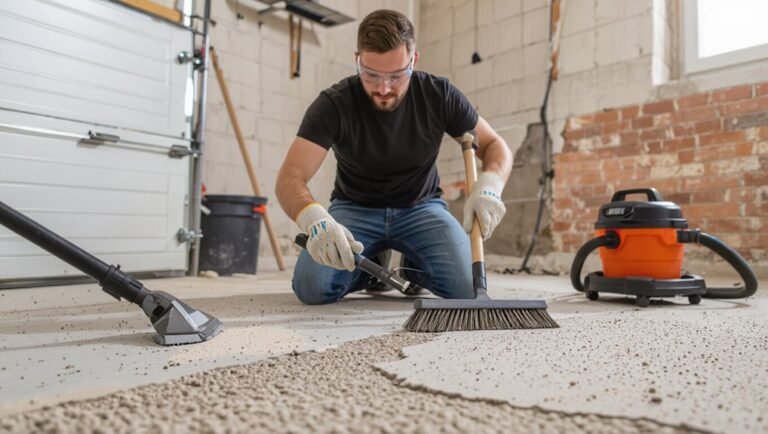
Start by clearing loose dirt and debris with a broom or vacuum so you don’t grind grit into the paint.
Next mop with a mild detergent solution, rinse with clean water, and dry or squeegee to prevent water spots.
For stains, spot-clean with a soft brush and diluted trisodium phosphate or a gentle degreaser.
That’s how do you clean a painted cement floor quickly.
When to Clean vs. When to Repaint
If your painted cement floor mostly shows surface grime, scuffs, or isolated stains, you can usually restore it by cleaning; but if paint is flaking, chalking, or large areas are worn through to bare concrete, a repaint is due.
Clean when damage is superficial: sweep, degrease, scrub, and reseal if needed.
Repaint when adhesion fails, cracks expose concrete, or multiple patches look uneven.
Basic Understanding Painted Cement Floors 101
A painted cement floor is simply concrete with a protective or decorative coating, and you’ll most often see acrylic paints, epoxy coatings, or concrete stains used.
Each type sticks differently—acrylic sits on the surface, epoxy chemically bonds, and stains penetrate the pores.
You should know that poor surface prep, moisture, or incompatible coatings are the main reasons paint fails.
What a Painted Cement Floor Is
Think of a painted cement floor as concrete that’s been sealed and finished with one or more pigmented coatings to improve durability, appearance, and ease of cleaning.
You’ll find smooth or textured surfaces, glossy or matte sheens, and added protection against stains and wear.
Painted floors bridge function and style, letting you customize color while simplifying maintenance and extending slab life.
Common Paint Types for Cement (acrylic, epoxy, concrete stain)
When you pick paint for cement, you’ll usually choose between acrylic, epoxy, or concrete stain—each offers different durability, appearance, and application needs. You’ll pick acrylic for ease and color, epoxy for heavy-duty protection, or stain for a natural look. Compare quickly:
| Type | Durability | Look |
|---|---|---|
| Acrylic | Moderate | Opaque |
| Epoxy | High | Gloss |
| Stain | Low–Moderate | Translucent |
How Paint Bonds to Concrete and Why It Fails
Because concrete is porous and chemically active, paint adheres by seeping into surface pores and forming a mechanical and sometimes chemical bond with the cured matrix; you’ll get the best adhesion when the surface is clean, dry, and properly profiled so the coating can grip instead of just sitting on top.
If moisture, oil, poor prep, or incompatible paint occur, coatings blister, peel, or flake prematurely.
Assess Before You Start
Before you begin cleaning, walk the floor and check for peeling paint, efflorescence, and cracks so you know what repairs or gentle methods are needed.
Determine the paint type and any past treatments to pick compatible cleaners and avoid damage.
Put on appropriate PPE—gloves, eye protection, and a mask—especially if sanding or using stronger chemicals.
Inspecting Surface Condition (peeling, efflorescence, cracks)
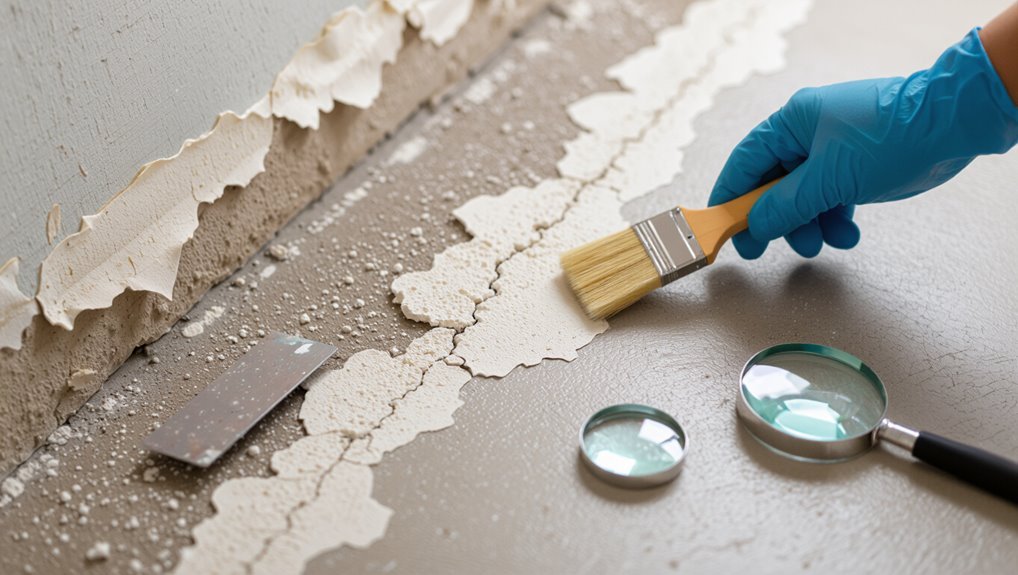
As you get ready to clean, take a close look at the painted cement surface for signs of peeling paint, white powdery efflorescence, and cracks so you can prioritize repairs and select the right cleaning methods.
Note loose or flaking areas, test efflorescence by dry brushing, and map cracks by size and depth.
Tackle repairs first; cleaning won’t fix structural or adhesion issues.
Identifying Paint Type and Previous Treatments
Want to know what’s on your floor so you don’t damage it? Check for gloss, texture, and wear patterns to guess oil- or water-based paint.
Scrape a tiny area—if it flakes chalky, it’s likely old masonry paint; flexible chips suggest latex.
Ask previous owners or test a solvent spot (rinse after).
Note sealers or epoxy coatings before choosing cleaners.
Safety Precautions and Protective Gear
Now that you know what’s on the floor, take a moment to assess hazards and gear up so you don’t create new problems while cleaning.
Wear gloves, eye protection, and a mask rated for dust or fumes. Use knee pads if you’ll kneel.
Confirm ventilation, keep a fire extinguisher nearby when using solvents, and test cleaners on a small area before full use.
Step-by-Step Cleaning Process
Start by clearing and drying the area so you can see the whole surface and avoid tracking dirt.
Next you’ll do dry cleaning—sweeping, dust mopping, and vacuuming—then spot-treat stains like oil, rust, or paint splatters.
Finally, pick a suitable cleaner (pH-neutral or a degreaser alternative), dilute it correctly, and choose the right wet-cleaning tools—mop for light cleaning, scrub brush for stubborn grime.
Step 1 Clear and Dry the Area
1. Clear the area before you clean: remove furniture, rugs, and loose items so you can access the whole painted surface.
Verify the floor is dry to prevent streaks or diluted cleaners.
- Remove furniture
- Take up rugs and mats
- Wipe up spills with absorbent towels
- Allow damp spots to air-dry completely
Step 2 Dry Cleaning: Sweeping, Dust Mopping, and Vacuuming
With the room cleared and dry, you can move on to dry cleaning the painted cement floor: sweeping, dust mopping, and vacuuming will remove loose dirt and grit that can scratch the paint or make wet-cleaning less effective.
Start by sweeping edges toward a central pile, use a microfiber dust mop for whole-floor passes, then vacuum with a soft-brush attachment to lift remaining particles.
Step 3 Spot-Treating Stains (oil, grease, rust, paint splatters)
Tackle stubborn spots next by identifying the stain type—oil and grease, rust, or paint splatters—because each needs a different cleaner and technique to avoid damaging the paint.
Then act promptly: blot fresh oil, scrape dried grease gently, use a rust remover sparingly, and lift paint splatters with a plastic scraper and solvent-safe wipe.
- Oil: blot, apply absorbent
- Grease: scrape, degrease
- Rust: test remover
- Paint: soften, pry carefully
Step 4 Choosing the Right Cleaner (pH-neutral, degreasers, trisodium phosphate alternatives)
Because the wrong cleaner can strip paint or leave residue, choose products that match your floor’s finish and the soils you’re removing. Use pH-neutral for regular cleaning, enzymatic or citrus degreasers for oils, and mild TSP alternatives for heavy grime. Test first in a corner.
| Cleaner type | Best for |
|---|---|
| pH-neutral | Routine |
| Degreaser | Oil/grease |
| TSP-alternative | Stains |
Step 5 Wet Cleaning Technique (dilution, tools, mop vs. scrub brush)
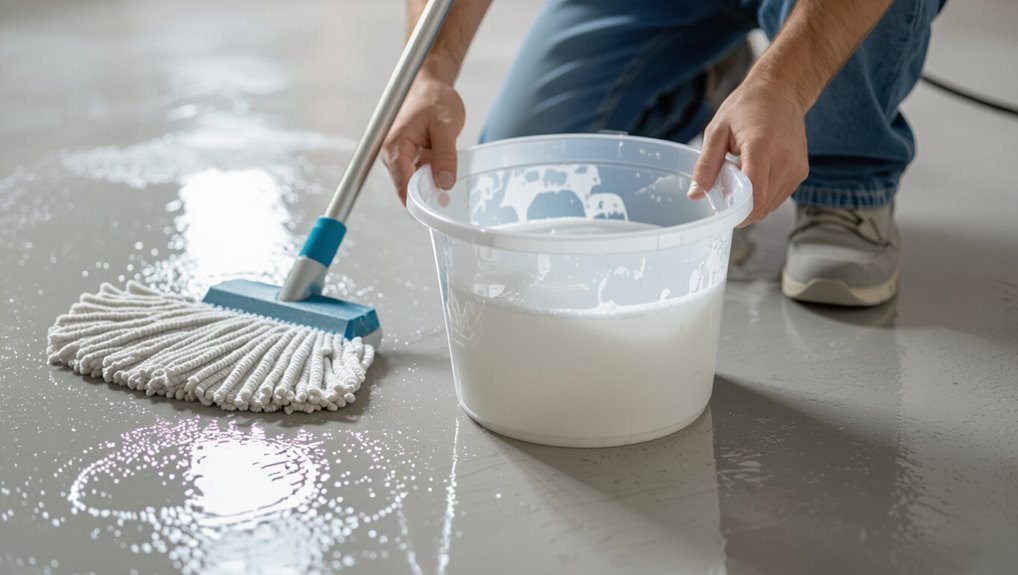
Start by diluting your chosen cleaner to the manufacturer’s recommendation and gather the right tools—a microfiber mop or soft-bristle scrub brush, a bucket with a wringer, gloves, and a stiff-sided container for rinse water.
Work in small sections, agitating grime with the mop for light soil or the brush for stubborn spots. Change dirty solution often, avoid soaking paint, and inspect progress as you go.
Step 6 Rinsing and Drying Properly
1. After washing, rinse thoroughly with clean water to remove soap residue that can attract dirt.
Work from one side toward an exit or drain so rinse water flows away.
Use a wet vacuum, squeegee, or absorbent towels to remove standing water.
Let the floor air-dry fully or speed drying with fans to prevent streaks and moisture damage.
Step 7 Deep Cleaning for Built-Up Grime (pressure washing, floor scrubbers) when and how
When regular washing won’t budge grime, it’s time to deep-clean with a pressure washer or floor scrubber—tools that remove embedded dirt without stripping paint when used correctly.
Test a small area first, use low pressure and wide spray, or a soft-bristle disk on scrubbers.
Keep movement steady, avoid seams and edges, rinse thoroughly, and let the floor dry fully before resealing or heavy use.
Repair and Restore Before or After Cleaning
Before or after cleaning, you’ll want to address any loose paint, cracks, or surface damage so your finish lasts.
Use a scraper or wire brush to remove flaking paint, fill cracks and holes with a suitable concrete patch, and sand or etch glossy areas to promote adhesion.
Tackle repairs methodically so touch-ups or a full recoat bond evenly and look professional.
Removing Loose or Flaking Paint Safely
Start by evaluating the painted surface for any loose, peeling, or flaking areas you can lift with a putty knife or stiff brush. Tackling these spots first prevents further paint loss and helps the cleaner and any future coatings adhere properly.
Wear gloves, eye protection, and a dust mask. Scrape gently, remove debris, sand edges smooth, and vacuum before cleaning or repainting to guarantee a solid bond.
Filling Cracks and Patching Concrete
Assess the floor for hairline cracks, wider gaps, and surface spalling so you can choose the right repair method and materials.
For hairline cracks, use a concrete crack filler or epoxy; for wider gaps, chisel loose edges, clean debris, and apply a polymer-modified patching compound.
Feather edges smooth, follow manufacturer cure times, and sand or grind high spots before cleaning or painting for a uniform finish.
Preparing Surface for Touch-Up or Recoat (etching, sanding)
With cracks filled and patches feathered smooth, you’ll need to prepare the surrounding paint and concrete so touch-ups or a full recoat will bond properly.
Etch glossy or sealed areas with a mild muriatic solution or commercial etcher, rinse thoroughly, and let dry.
Lightly sand feathered edges and glossy paint, remove dust, then tack cloth before applying primer or paint for reliable adhesion.
Maintenance Strategies to Keep Floors Looking Fresh
Keep a simple routine—daily sweeping or mopping and quick spot-cleaning will prevent dirt buildup and staining.
Schedule monthly and seasonal tasks like deep cleans, reapplying protective coatings, and checking mats and furniture pads for wear.
Know when to reseal or add a topcoat (epoxy, acrylic, or polyurethane) to restore gloss and protection based on traffic and product recommendations.
Regular Cleaning Schedule and Quick Daily Habits
Because a little daily attention prevents bigger problems, creating a simple cleaning schedule will keep your painted cement floor looking fresh and extend its finish.
- Sweep daily to remove grit.
- Spot-clean spills immediately with mild detergent.
- Damp-mop high-traffic areas every few days.
- Inspect for chips or stains weekly and address them promptly to avoid damage.
Monthly and Seasonal Maintenance Tasks
Daily habits prevent most wear, but monthly and seasonal tasks catch issues that routine cleaning misses.
Each month, inspect for chips, mildew, or discoloration and spot-treat stains promptly.
Deep-clean with a gentle degreaser and soft scrub every few months.
Before seasonal changes, check for moisture intrusion, reseal joints if needed, and refinish high-traffic areas to maintain protection and appearance.
Use of Mats, Furniture Pads, and Protective Coatings
One simple habit will protect your painted cement more than frequent cleaning: place the right mats, furniture pads, and coatings where wear happens most.
Use low-profile, nonstaining mats at entries, absorbent rugs in high-traffic zones, and soft felt pads under chair and table legs.
Replace pads when compressed and wash mats regularly to prevent grit from scratching the paint.
When to Apply a Sealer or Topcoat (types and benefits)
Protective mats and pads do a lot of the heavy lifting, but you’ll still want a sealer or topcoat to lock in paint and resist stains, abrasion, and moisture.
Apply a water-based polyurethane for indoor clarity and low odor, or an epoxy for garages and heavy traffic.
Recoat every 2–5 years depending on wear; spot-seal high-traffic zones sooner to maintain protection.
Common Problems and How to Fix Them
You’ll run into a few common problems like peeling paint, stubborn stains, efflorescence from moisture, and faded or abraded color.
For each issue you can try targeted fixes—from scraping and re-priming peeling areas, to stronger stain treatments or moisture remediation, and deciding when touch-up will do versus a full repaint.
Keep reading for specific diagnosis steps and step-by-step repairs.
Peeling or Flaking Paint Causes and Solutions
If your painted cement floor is peeling or flaking, it’s usually a sign of poor adhesion, moisture issues, or inadequate surface prep; fixing it starts with diagnosing the root cause so you can choose the right repair method.
Scrape loose paint, clean and dry the concrete, etch or sand glossy areas, apply a concrete primer, then repaint with a breathable, exterior-grade paint.
Stubborn Stains That Won’t Come Out Advanced Treatments
When ordinary cleaners and scrubbing won’t budge oil, rust, or paint stains, you’ll need stronger, targeted treatments that break down the stain at its source rather than just masking it.
For oil use a degreaser or poultice of cat litter and detergent; for rust try a commercial rust remover; for paint spots gently use a solvent recommended for your floor paint, test first, then rinse thoroughly.
Efflorescence and Moisture-Related Issues Diagnosis and Repair
Because moisture moves through concrete, painted cement floors can develop white, powdery efflorescence, flaking paint, or persistent damp spots that signal deeper water issues.
You’ll want to diagnose the source—rising groundwater, slab leaks, poor drainage, or high indoor humidity—before repairing.
Remove efflorescence with a brush and mild acid rinse, fix drainage or plumbing, let slab dry fully, then apply a breathable masonry sealer and repaint if needed.
Paint Color Fading and Abrasion Touch-up vs. Repaint
After you’ve handled moisture and efflorescence, you’ll still notice wear: painted cement floors often lose pigment and show scuffs in high-traffic areas.
Assess severity—spot touch-ups work for small scratches; sand, clean, and feather new paint into old.
For widespread fading or uneven gloss, strip or scuff entire surface and repaint with appropriate masonry paint and sealer for uniform protection.
Cleaning Checklist and Supplies
Now you’ll gather the right tools and products so the job goes smoothly.
I’ll list essential supplies, recommend cleaners by stain type, and give a quick estimate of time and cost.
With that checklist in hand, you can start cleaning efficiently and confidently.
Essential Tools and Materials
Tools matter when you’re cleaning a painted cement floor: gather the right supplies so the job goes faster and you don’t damage the paint.
You’ll need basics for gentle, effective work and safety. Check tools before starting and replace worn items promptly.
- Soft-bristle broom or dust mop
- Microfiber mop and bucket with wringer
- Soft scrub brush and plastic scraper
- Rubber gloves, safety glasses, and knee pads
Recommended Cleaners and Products (by stain type)
With your supplies laid out and safety gear on, you’ll pick cleaners tailored to the type of stain and the paint finish so you don’t strip or dull the surface. Use pH-neutral cleaner for dirt, degreaser for oil, and diluted bleach for mold, testing a hidden spot first.
| Stain | Cleaner | Note |
|---|---|---|
| Dirt | pH-neutral | Gentle |
| Oil | Degreaser | Spot test |
Estimated Time and Cost Breakdown
Estimate about 1–3 hours for a typical room-scale painted cement floor and budget $15–60 for common supplies, depending on whether you already own basic tools.
Gather broom, mop, bucket, scrub brush, pH-neutral cleaner, degreaser spot treatment, microfiber cloths, and optional sealant.
Plan 30–60 minutes for prep, 30–90 minutes for cleaning and drying, plus extra time for stubborn stains or sealing.
FAQs
You’ll find answers to common concerns like how often to deep-clean, whether bleach or ammonia are safe, and if pressure washing will harm painted floors.
I’ll also cover how long to wait after painting before cleaning and the safest methods for removing oil stains without stripping the paint.
Read on for straightforward, practical guidance.
How often should I deep-clean a painted cement floor?
Generally, you should deep-clean a painted cement floor every 6–12 months, though high-traffic or exposed areas may need it more often.
Check for stains, salt buildup, or surface wear quarterly and spot-treat as needed.
If finish looks dull or dirt won’t lift with routine cleaning, deep-clean sooner.
Always test methods on a small area before treating the whole floor.
Can I use bleach or ammonia on painted concrete?
If deep-cleaning hasn’t removed stubborn stains or mildew, you might consider stronger cleaners like bleach or ammonia—but use them carefully.
Dilute bleach (1:10) or ammonia per label, spot-test hidden area, and avoid mixing with each other or acids.
Protect skin, eyes, and ventilation. Rinse thoroughly and recoating may be needed afterward.
Use sparingly to prevent paint damage and discoloration.
Is pressure washing safe for all painted floors?
Wondering if pressure washing will harm your painted concrete? It can if you use too much pressure, the wrong nozzle, or if the paint isn’t rated for outdoor or mechanical cleaning.
You should test a small area, use a fan nozzle at lower PSI, keep the wand moving, and avoid peeling or flaking paint.
When in doubt, consult the paint manufacturer.
How long after painting should I wait before cleaning?
Because cure times vary by paint type and conditions, wait until the coating has fully cured before aggressive cleaning — not just dry to the touch.
Check the paint can for manufacturer cure time—often 7–30 days. Gentle sweeping and light mopping are fine sooner, but avoid scrubbing, strong detergents, or pressure washing until cure is complete.
When in doubt, wait longer to protect the finish.
What’s the best way to remove oil stains without damaging paint?
How do you get oil out of painted cement without stripping the finish?
Blot fresh spills, then apply a poultice of baking soda or talc and dish soap. Let it sit 15–30 minutes, scrub gently with a soft brush, and rinse.
For stubborn spots, use a commercial oil stain remover labeled safe for painted surfaces. Test a small area first to verify no discoloration.