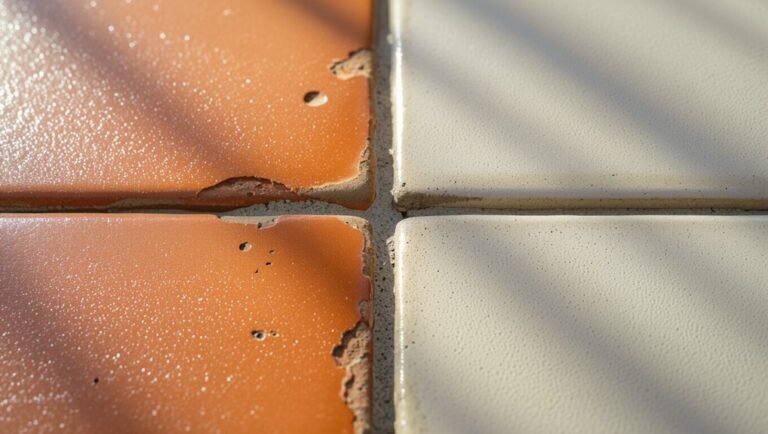
How to Remove Marble Floor Stains Without Etching or Discoloring
You can safely remove most marble floor stains by first identifying the stain type and using gentle, pH-neutral cleaners, soft cloths, and nonabrasive tools; avoid acids like vinegar or lemon and stay away from abrasive pads that etch. Use enzyme poultices for organic stains, solvent‑based poultices for oil, and marble‑safe rust removers for rust, applying poultices under plastic for 24–72 hours and rinsing with distilled water. Follow careful techniques and safety measures, and if you keep going you’ll find step‑by‑step treatments and prevention tips.
Quick Answer Safely Removing Marble Floor Stains Without Etching or Discoloring
The safest approach is to blot spills, use a pH-neutral cleaner or a poultice for stubborn spots, and test any method on an inconspicuous patch first.
If the stain won’t lift, looks etched, or covers a large area, don’t risk DIY fixes. Call a stone restoration professional to avoid further damage.
One-sentence summary of safest approach
While you’ll want to act promptly, the safest way to remove marble floor stains without causing etching or discoloration is to use a mild, pH-neutral cleaner, gentle blotting with soft cloths, and poultices for stubborn spots—always testing in an inconspicuous area first.
For clear guidance on how to clean marble floor stains, work gently, avoid acids or abrasive pads, and repeat poultice treatments as needed.
When to call a professional
If gentle cleaning and a poultice don’t lift a stain—or if the mark looks deep, spread, or is in a high-traffic or historic area—you should call a professional.
They’ll assess porosity, identify stain type, and decide on safe poultices, honing, or sealing without risking etching.
Call pros for persistent, widespread, or valuable marble, and when you lack proper tools or confidence.
Basic Understanding Why Marble Stains and What Causes Etching
Marble is a porous, calcium-based stone, so you’ll need to treat it gently because acids and oils can penetrate and react with the surface.
It helps to know the difference between a stain (a penetrated discoloration), etching (chemical dulling from acids), and general discoloration from wear or cleaners.
Common culprits you’ll encounter are acidic spills (citrus, vinegar), oils, rust, and organic matter like coffee or wine.
What marble is and why it’s sensitive ()
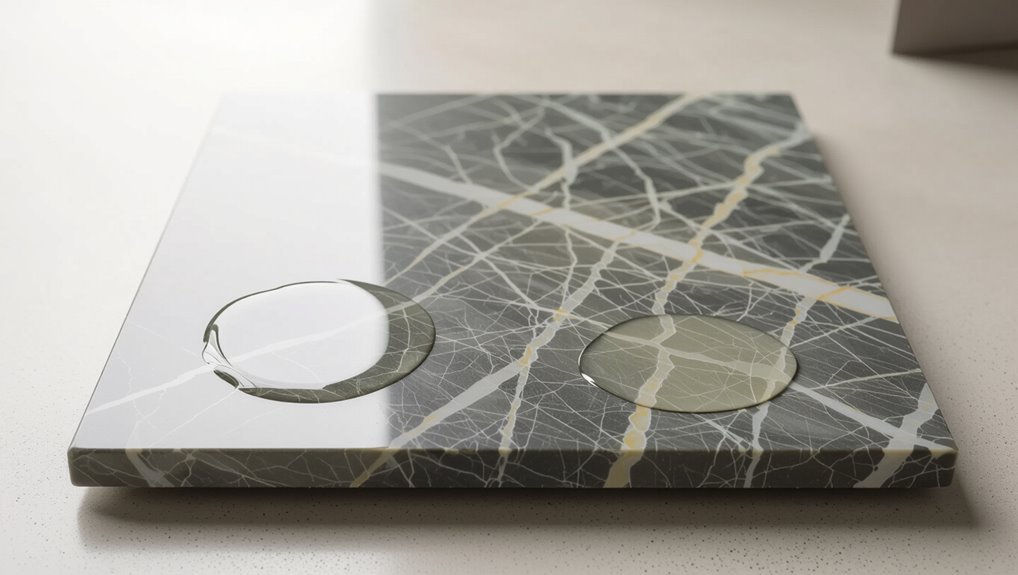
Stone like marble looks solid and timeless, but it’s actually a soft, porous carbonate rock that reacts easily with acids and abrasives.
You should know its calcium carbonate makeup dissolves on contact with acidic spills and that tiny pores hold oils and dyes.
Because it’s softer than many stones, scraping or harsh cleaners scratch and dull the surface, so you must treat it gently.
Difference between stains, etching, and discoloration
Because it reacts to acids and scratches easily, you’ll often see damage that looks similar but stems from different causes: stains, etching, and discoloration.
Stains penetrate pores and usually come from spills; etching is surface chemical corrosion that dulls or pits without color transfer; discoloration is broader—fading, darkening, or toner shifts from environment, cleaning, or finishes rather than a single spill.
Common causes of marble stains (acidic spills, oil, rust, organic matter)
If you leave acidic cleaners, wine, or citrus on your floor, they’ll quickly eat the shine and can cause visible etching as well as stains.
You should also watch for other culprits that penetrate or damage marble:
- Acidic spills (vinegar, soda)
- Oils (butter, cosmetics)
- Rust (metal contact)
- Organic matter (coffee, food residue)
Address spills fast to avoid permanent damage.
Assessment Identifying Stain Type and Extent
Start by looking and feeling the spot: stains usually sit on the surface and feel different from etch marks, which are dull or rough.
Try a water drop, a shallow scratch with a fingernail or coin, and blot with a paper towel to see if color lifts or liquid soaks in.
If the mark fades with these simple tests it’s likely surface-level; if it stays or looks like a change in the stone itself, it’s deeper and needs stronger treatment.
Visual and tactile checks to differentiate stains vs. etch marks
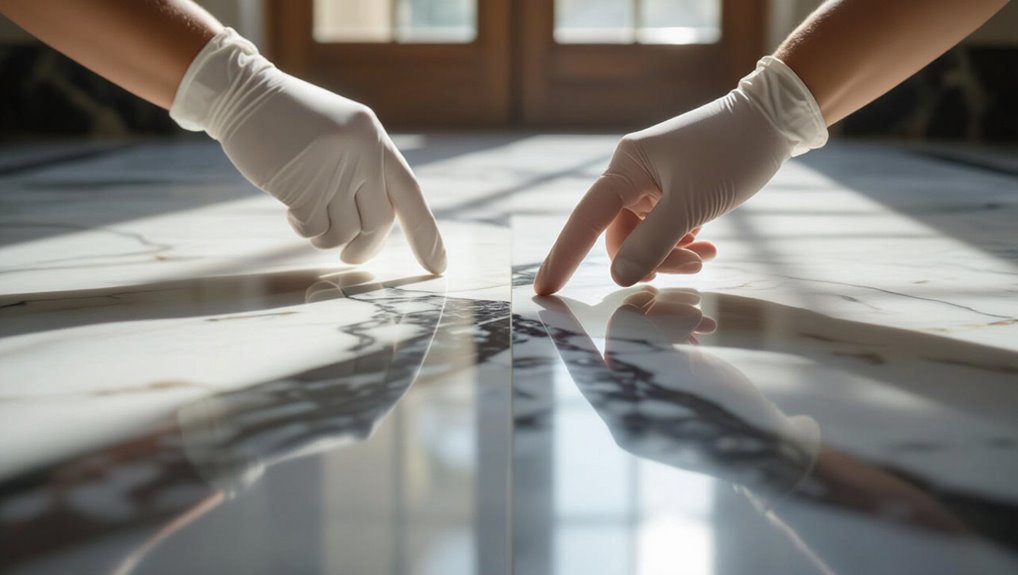
When you’re inspecting a marble floor, rely on sight and touch to tell stains and etch marks apart: stains sit in the pores and often have color, while etches are dull, lighter or darker spots caused by surface mineral loss and feel smooth or slightly indented to the fingernail.
Check edges for feathering, note depth and color contrast, and map affected areas before treating.
Simple tests (water drop, shallow scratch, paper towel)
Curious which marks are surface issues and which need deeper treatment?
- Drop water: see if it beads—if so, it’s likely sealed; if it soaks, note the area.
- Light scratch with fingernail: if it catches, it may be surface residue; if not, proceed cautiously.
- Blot with white paper towel: check for color transfer.
- Record results before cleaning.
When a stain is surface-level vs. deep-penetrating
If your simple tests showed no color transfer, beading, or a nail catch, you’ve probably got a surface-level mark you can remove with mild cleaners or polishing.
But if water soaks in, the paper towel picks up pigment, or the scratch tips into the stone, the stain has likely penetrated and will need poultices or professional attention.
Decide by testing small areas, document results, then choose cleaning or extraction.
Preparation Tools, Materials, and Safety Precautions
Before you start treating stains, gather gentle tools like soft microfiber cloths, a non‑ionic pH‑neutral cleaner, plastic scrapers, and mild poultice materials.
Avoid acidic or abrasive products—no vinegar, lemon, bleach, or scouring pads—as they can etch marble.
Wear gloves, eye protection, and keep the area well ventilated to protect yourself while cleaning.
Recommended tools and gentle cleaning supplies
You’ll need a small set of gentle, non-abrasive tools and cleaners to tackle marble stains safely: soft microfiber cloths, a soft-bristled brush, pH-neutral stone cleaner, distilled water, plastic scrapers, and poultice powder or baking soda for deeper spots.
- Microfiber cloths
- Soft brush
- Plastic scraper
- Poultice powder
Use measured dilutions, test first, wear gloves, ventilate.
Materials to avoid (acidic cleaners, abrasive pads, vinegar)
When cleaning marble, steer clear of acidic cleaners (like vinegar, lemon juice, or bathroom cleaners), abrasive pads, and bleach—they can etch, dull, or permanently damage the stone’s polished surface.
- Don’t use vinegar or citrus.
- Avoid ammonia or bleach solutions.
- Skip scouring powders and steel wool.
- Reject abrasive scrub pads and harsh brushes.
Use only pH-neutral, nonabrasive products recommended for marble.
Personal protective equipment and ventilation
1 essential step is gearing up properly and ensuring good airflow—wear chemical-resistant gloves, eye protection, and a dust mask or respirator rated for the cleaner you’ll use, and open windows or run fans to keep fumes from building up.
Also wear closed-toe shoes and long sleeves, remove pets and children, ventilate continuously during cleaning, and follow product label directions for safe handling and storage.
Step-by-Step Stain Removal Procedures (By Stain Type)
Now you’ll follow clear, stain-specific steps to get your marble looking its best again.
Start with routine cleaning for surface dirt and light marks, then use enzyme poultices for organic stains like coffee or food.
For oil and grease, use solvent-assisted poultices, and for rust spots (with precautions), use a marble-safe rust remover.
Finish by treating water rings and mineral buildup with a non-acidic descaler suitable for marble.
Step 1 General surface dirt and light stains (daily-safe method)
Start by clearing loose grit and dust so you won’t scratch the marble while cleaning; sweep or vacuum gently, then wipe the surface with a soft, damp microfiber cloth and a pH-neutral cleaner diluted according to the label.
Rinse with clean water, dry immediately with a soft towel, and repeat for stubborn spots.
Use felt pads under furniture to prevent future abrasion.
Step 2 Organic stains (coffee, tea, food) poultice method with enzyme cleaners
Tackle organic stains like coffee, tea, and food with a poultice made from an enzyme cleaner: enzymes break down the organic matter without harming your marble, and the poultice draws the loosened stain out of the stone.
Mix enzyme gel with a neutral-absorbent (diatomaceous earth or paper pulp) to paste consistency, apply, cover, tape edges, wait 24–48 hours, then gently lift and rinse.
Step 3 Oil and grease stains solvent-assisted poultice technique
For oil and grease stains, use a solvent-assisted poultice to dissolve the oil and draw it out of the marble without permanently etching the surface.
Apply a small amount of marble-safe solvent (acetone or mineral spirits) to kaolin or powdered chalk, mix to paste, spread over the stain, cover with plastic, tape edges, and wait 24–48 hours.
Remove, rinse, and repeat if needed.
Step 4 Rust stains safe commercial rust removers for marble (use and cautions)
Oil and solvent poultices work well for organic and greasy marks, but rust needs a different approach because metal oxide bonds more tightly to marble.
Use a commercial rust remover labeled safe for marble (phosphoric or oxalic acid at low concentration). Test an inconspicuous area, follow manufacturer directions, neutralize and rinse thoroughly, wear gloves, and avoid prolonged contact to prevent etching or discoloration.
Step 5 Water rings and mineral deposits non-acidic descaler options
Sometimes a faint ring or crust from hard water looks like it’s set in the marble, but you can remove it without acids by using gentle, non-acidic descalers or chelating cleaners designed for stone.
Test first in an inconspicuous spot, apply per instructions, agitate gently with a soft cloth or brush, rinse thoroughly, and dry.
Repeat until deposits lift; avoid scrubbing hard.
Step 6 Ink and dye stains targeted solvent and poultice approach
Once you’ve handled mineral rings, you can tackle ink and dye stains with a targeted solvent and poultice approach.
Test a solvent (isopropyl alcohol or acetone) in an inconspicuous spot. Apply sparingly, blot, then mix a thin poultice (powder plus solvent) to lift residual pigment.
Cover, wait per instructions, remove gently, and rinse. Repeat once if needed.
Step 7 Deep or old stains extended poultice and repeat-treatment protocol
For deep or old stains you’ll need an extended poultice and a repeat-treatment plan to draw embedded contaminants out of the marble without overworking the surface.
Mix a poultice with appropriate solvent and absorbent, apply thickly, cover, and leave 24–72 hours.
Remove, inspect, and repeat only as needed. Document cycles, adjust solvent strength cautiously, and protect surrounding areas.
Step 8 Final rinse, neutralization, and drying
Step 8 ties everything together: you’ll thoroughly rinse away poultice residues and solvents, neutralize any remaining chemicals, and dry the marble to prevent new stains or etching.
Use warm distilled water and soft microfiber cloths, rinse multiple times, then apply a mild neutralizer if needed.
Blot dry, then air-dry fully or use a low-speed fan; avoid heat or abrasive rubbing.
Tools, Poultice Recipes and Safe DIY Formulas
You’ll want a mix of marble-safe commercial products and simple DIY poultices tailored to the stain type.
For each stain I’ll list absorbent bases (like kaolin or paper pulp) plus the active agent to use, how long to leave the poultice, and the correct way to lift it off without scratching or etching.
Follow those recipes and timings closely to protect your marble while removing stains effectively.
Ready-made products that are marble-safe ()
When tackling stains on marble, reaching for a product labeled “marble-safe” can save time and prevent damage, but you’ll still want to know what’s inside and how it works. Choose pH-neutral cleaners, enzyme or oxygen-based stain removers, and stone-safe sealers; test in an inconspicuous spot first. Compare labels, contact manufacturers, and avoid acids or abrasives.
| Product type | Typical use |
|---|---|
| pH-neutral cleaner | Daily cleaning |
| Oxygen bleach | Organic stains |
| Enzyme cleaner | Grease/protein |
| Stone sealer | Protection |
DIY poultice recipes for different stain types (absorbent + agent)
If a store-bought, marble-safe cleaner doesn’t lift a stain, you can make a poultice to draw it out—mix an absorbent base with a targeted active agent and apply it like a compress.
Use these safe recipes:
- Baking soda + water for oil.
- Hydrogen peroxide + whiting for organic stains.
- Kaolin clay + acetone for ink.
- Calcium carbonate + ammonia for dye.
How long to leave a poultice and how to remove it without damage
Because poultices draw stains slowly, plan to leave them in place long enough to pull the blemish to the surface but not so long that the marble dries out or weakens—typically 24 to 72 hours depending on stain type and poultice ingredients.
Check periodically; when the paste’s top is dry and discolored, gently remove it with a plastic scraper, rinse with pH-neutral cleaner, and blot dry.
Troubleshooting If the Stain Doesn’t Come Out
If a stain stays after cleaning and poultices, it may be deeper in the stone—look for discoloration that doesn’t lighten, a shadow under light, or a soft-feeling spot.
Remember that etching from acids can look like a stain, so test by gently polishing a small area to see if the mark changes.
If the issue is structural or cosmetic beyond cleaning, you can call a pro for honing, polishing, and re-sealing to restore the marble safely.
Signs the stain is deeper than cleaning can reach
Wondering whether a stain goes beyond surface cleaning? If cleaning lifts only a faint halo, the discoloration stays after poulticing, or a dark patch penetrates grout lines, the stain’s likely absorbed deep into the marble.
You’ll also notice uneven texture or persistent odor. These signs mean simple cleaners won’t reach the source; professional assessment or deeper restoration is needed.
When etching looks like staining identification and next steps
When a dull, whitish mark refuses cleaning and looks like a stain, you’re probably dealing with etching—acid has chemically dulled the marble rather than depositing pigment.
Confirm by rubbing with a damp cloth; etch marks won’t lift.
Don’t keep scrubbing with abrasive cleaners. Instead, document the area, stop using acids, try a mild poultice only for true stains, and consider expert assessment if unsure.
Safe professional restoration options (honing, polishing, re-sealing)
After you’ve ruled out ordinary stains and confirmed etching or stubborn discoloration, a professional restoration will often be the most reliable fix.
You’ll want honing to remove shallow etches, followed by polishing to restore sheen, and finally a breathable re-seal to protect without trapping moisture.
Choose a certified stone restoration pro, ask about abrasives used, and get a clear warranty and maintenance plan.
Common Mistakes That Cause Etching or Discoloration
Watch what you use on marble: acidic cleaners like vinegar or lemon will chemically etch the surface, and abrasive scrubbing or the wrong pads will wear the finish.
Don’t overuse DIY chemicals or mix products—those combos can cause discoloration or permanent damage.
Also be careful with sealing: applying it too soon or over trapped stains will lock problems in rather than fix them.
Using acidic cleaners (vinegar, lemon) and why they etch
Although vinegar and lemon seem like safe, natural cleaners, they can quickly eat into marble’s calcium carbonate and leave dull, etched spots.
You’ll notice a matte, rough area where the acid dissolved the surface.
Don’t use citrus or vinegar on marble; they permanently change finish and increase porosity.
Instead, choose pH-neutral cleaners made for natural stone to protect appearance and longevity.
Abrasive scrubbing and wrong pads
Just as acidic cleaners can chemically damage marble, vigorous scrubbing and the wrong pads can physically abrade the surface and cause dull spots or scratches.
You should use soft microfiber or non-abrasive pads and gentle circular motions. Avoid steel wool, rough brushes, or coarse scrubbing pads.
Test any tool in an inconspicuous area first to prevent irreversible surface damage.
Overuse of DIY chemicals and risky combos
When you reach for extra-strength DIY solutions or start mixing household cleaners, you’re risking etching and long-term discoloration on marble that simple rinsing can’t fix.
Don’t combine acids, bleach, ammonia, or drain cleaners; their reactions eat polish and alter color.
Use pH-neutral stone cleaners in measured amounts, test a hidden spot, rinse thoroughly, and stop at the first sign of dulling.
Sealing mistakes that trap stains
If you skip proper sealing steps or use the wrong product, you can actually lock stains and moisture into marble instead of protecting it.
Don’t apply sealers over active stains, tacky residues, or damp surfaces. Test products on a hidden patch, follow manufacturer cure times, and avoid petroleum-based or darkening sealers on light marble.
Reapply per schedule to prevent trapped discoloration.
Prevention and Best Practices to Protect Marble Floors
To keep stains and etching away, you should stick to a simple daily cleaning routine with pH-neutral, marble-safe products and wipe up spills immediately.
Use protective measures like mats, coasters, felt pads, and runners in high-traffic or spill-prone areas.
Learn when and how to apply a marble sealer so you can renew protection safely without trapping moisture.
Daily cleaning routine and marble-safe products
A simple daily routine will keep your marble looking fresh and prevent stains from setting.
You should dust, mop gently, and use pH-neutral products. Avoid acidic cleaners or abrasives.
- Sweep or dust-mop daily.
- Damp-mop with pH-neutral cleaner.
- Use soft microfiber cloths.
- Place mats at entryways and under spills-prone areas.
Immediate spill-response actions
Act quickly when a spill happens—your prompt action can prevent permanent etching or staining on marble.
Blot liquid with a soft, absorbent cloth—don’t wipe and spread it. Rinse the area with distilled water, then blot dry.
For oily spills, sprinkle a small amount of baking soda paste, cover briefly, and gently lift; avoid acidic cleaners or abrasive scrubbing.
Protective measures: mats, coasters, felt pads, and runners
Start by placing protective barriers where wear and spills are most likely—you’ll cut down on scratches, stains, and etching by using mats at entries, coasters under drinks, felt pads on furniture legs, and runners in high-traffic zones.
Choose nonabrasive, low-dye materials, clean mats regularly, replace worn pads, and size runners to cover walkways so debris and moisture don’t reach the marble.
When and how to apply marble sealers safely
Protective mats and pads will reduce spills and wear, but sealing your marble gives a deeper layer of defense against stains and etching.
Apply a penetrating sealer every 1–3 years or after heavy cleaning. Test a small area first, follow manufacturer instructions, work in thin even coats, and allow full cure.
Avoid impregnating polish; ventilate and wear gloves.
Maintenance Schedule and Long-term Care
Set a simple maintenance schedule you can stick to: weekly gentle cleaning, monthly checks for dull spots or etching, and an annual deep clean and seal if needed.
Note when scratches or persistent haze appear so you can schedule professional honing or polishing before damage worsens.
Sticking to this routine will keep stains easier to remove and extend your marble’s life.
Weekly, monthly, and annual care checklist
Because regular care keeps marble looking its best, follow a simple schedule of weekly, monthly, and annual tasks to prevent stains and wear.
- Weekly: dry mop and spot-clean spills immediately with pH-neutral cleaner.
- Monthly: damp-mop high-traffic zones and inspect grout or sealant edges.
- Quarterly: reapply topical sealer where recommended and replace mats.
- Annually: deep-clean, check for persistent stains, and plan repairs promptly.
When to schedule professional maintenance (honing, polishing)
If you want your marble to keep its shine and avoid irreversible wear, schedule professional honing or polishing whenever you notice dullness, etching, or scratches that regular cleaning won’t fix.
Also arrange service every 3–7 years depending on foot traffic and finish.
Call a qualified stone technician when stains recur, grout fails, or seals wear thin so restoration prevents deeper damage.
FAQ Common Questions About Marble Stain Removal
You probably have a few quick questions about marble stain removal, like whether etching is reversible or if sealing stops every stain.
You’ll want clear guidance on using bleach or hydrogen peroxide, treating big rust or oil spots on polished marble, and whether a steam cleaner is safe.
I’ll answer each so you can choose the right repair and prevention steps.
Can I remove etching at home or is it permanent?
Wondering whether etching on marble is removable? You can often reduce light etches yourself using a marble polishing powder and a soft pad, working gently and testing a small area.
Deeper etches usually need a professional who can hone and repolish to restore finish without altering color.
Always clean first and avoid acidic cleaners that make etching worse.
Will sealing prevent all stains?
Light etching and stains are related but different problems, so once you’ve addressed etching you’ll naturally want to know how well sealing helps with stains.
Sealing reduces liquid absorption and makes cleanup easier, but it won’t stop every stain. It protects against many oil- and water-based spills if applied correctly and renewed periodically, yet aggressive chemicals, prolonged contact, or deep oil penetration can still stain.
Is bleach or hydrogen peroxide safe on marble?
How safe is bleach or hydrogen peroxide on marble? You shouldn’t use household bleach on marble—its harsh alkalinity and chlorine can etch and discolor.
Hydrogen peroxide (3%) is milder and can help organic stains, but test in an inconspicuous spot first. Apply briefly, rinse thoroughly, and don’t let it sit.
For persistent stains, consult a professional to avoid damage.
How to treat a large rust or oil stain on polished marble?
Tackle large rust or oil stains on polished marble by acting quickly and choosing the right method for the stain type: rust needs a poultice with a rust-dissolving agent, while oil requires an absorbent poultice and sometimes solvent-assisted cleaning.
Always test any product in a hidden spot, work gently to avoid etching the polish, and contact a stone professional if the stain’s deep or the surface dulls.
Use poultice, cover, wait, then lift residue and repeat.
Can I use a steam cleaner on marble floors?
If you’re dealing with stains and wondering whether a steam cleaner can help, be careful—marble doesn’t respond well to high heat or excessive moisture.
You shouldn’t use a steam cleaner; heat can open pores and moisture can penetrate, causing etching, discoloration, or delamination of sealers.
Instead, use pH-neutral cleaners, blot spills, and consult professionals for stubborn stains to avoid irreversible damage.
Appendix Quick Reference Charts and Visual Guides
You’ll find a compact stain-type to treatment quick chart in the appendix so you can match common stains to the right remedy at a glance.
There’s also a photo guide showing examples of stains versus etches to help you tell the difference visually.
Use these resources together to speed up diagnosis and choose the correct treatment.
Stain-type to treatment quick chart ()
Because stains come from different sources and respond to different treatments, a compact quick chart helps you match stain type to the correct poultice, cleaner, or professional action at a glance. Use the chart below to pick immediate steps; consult full instructions for application and safety.
| Stain | First response | Recommended treatment |
|---|---|---|
| Oil | Blot | Poultice (drying) |
| Organic | Rinse | Enzyme cleaner |
Photo guide: stain vs. etch examples ()
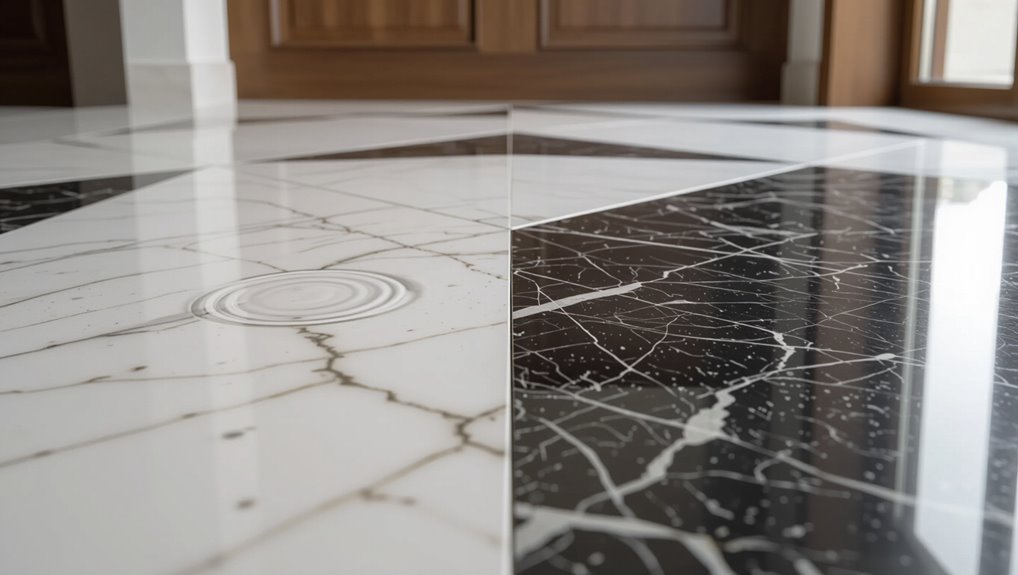
Now that you can match stains to treatments from the quick chart, learn to tell stains and etches apart visually so you pick the right fix.
Inspect photos showing discoloration: stains sit on the surface or within pores and often have irregular edges; etches appear as dull, matte spots with a soft halo where acid altered the polish.
Use scale and close-ups for comparison.