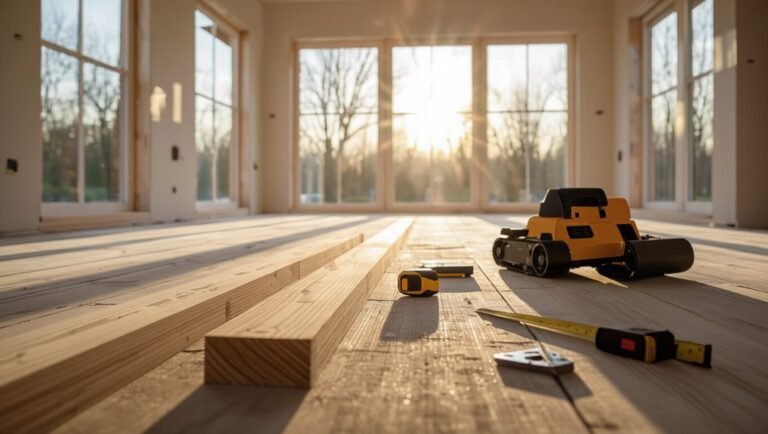
How to Clean a Really Dirty Floor: Best Methods for Any Floor Type
You can restore even the dirtiest floors by prepping, using the right cleaner, agitating grime, and rinsing thoroughly. Start by clearing and sweeping, test cleaners in a hidden spot, then pre-treat stains. Use minimal water on wood and pH-neutral solutions for stone; alkaline cleaners and stiff brushes for tile; gentle, solvent-free cleaners for vinyl. Work in sections, rinse to avoid residue, and dry. Keep going to learn specific steps and product picks for each surface.
How to Clean a Really Dirty Floor Quick Answer and What This Guide Covers
Quick answer: you can restore a really dirty floor with scraping, a strong cleaner, scrubbing, and proper rinsing.
This guide’s for homeowners and renters dealing with heavy grime—you’ll learn what to expect, tools to use, and that you can often get visibly clean results in one thorough session.
Follow safety tips for ventilation and gloves, and plan for a few hours depending on floor size and soil level.
One sentence quick answer
Start by sweeping or vacuuming up loose debris. Then mop with a concentrated cleaning solution and hot water to cut through grime.
For how to clean a really dirty floor, work in sections. Use scrub brushes or a machine for stubborn spots, rinse thoroughly, and dry to prevent streaks.
This guide breaks down methods, tools, and safety for each floor type.
Who this guide is for and results to expect
If that quick plan sounds like what you need, this guide is for anyone facing floors that regular sweeping and a light mop won’t fix—homeowners prepping for guests, renters tackling move-out cleanups, property managers, and DIYers restoring high-traffic areas.
You’ll get clear, step-by-step methods for tile, wood, laminate, vinyl, and concrete, realistic cleanliness goals, and tips to revive heavily soiled surfaces without costly pros.
Safety and time estimate
Because tackling a really dirty floor can involve strong cleaners, slippery surfaces, and heavy lifting, you should take basic precautions before you begin:
wear gloves and eye protection, guarantee good ventilation, use non-slip shoes, and lift or move furniture with help.
Estimate time by area and soiling: 30–90 minutes for a single room, several hours for whole-house deep cleans.
Prioritize breaks.
Basic Understanding Why Floors Get Really Dirty and How Cleanliness Differs by Type
You’ll first want to identify what’s making the floor dirty—grease, mud, pet messes, or long‑neglected residue each need different approaches.
Think about the material underfoot, since porous tiles, finished hardwood, and floors with seams all react differently to cleaners and scrubbing.
If stains are deep, finishes are compromised, or you’re unsure which method won’t cause damage, call a professional.
Common causes of heavy soil (grease, mud, pet messes, built-up residue)
Floors get filthy from a handful of predictable sources: grease tracked from kitchens, mud hauled in on shoes, pet accidents and dander, and years of built-up soap, wax, or mineral residue.
You’ll also see oily footprints, food spills that attract bacteria, gritty abrasives that scratch finishes, and sticky residues from spills or cleaners. Identifying these helps you choose targeted removal techniques.
How different floor materials respond to cleaning (porosity, finish, seams)
Knowing what soils show up where helps you pick the right approach, but the surface itself determines how well those methods work.
Porous materials (stone, unsealed wood) absorb stains and need gentler, often pH-neutral cleaners and sealing.
Finished floors (laminate, sealed hardwood) resist spills but scratch; use mild solutions.
Grouted seams trap dirt and need targeted agitation and rinsing to fully remove buildup.
When to call a professional
If dirt keeps returning despite your best efforts or stains penetrate finishes, it’s time to contemplate a pro — they can assess material porosity, finish condition, and seam issues to choose treatments that prevent damage and restore appearance.
Call a professional when odors persist, deep engrained grime resists safe cleaners, structural problems exist, or warranties require certified maintenance.
They’ll recommend repairs, refinishing, or specialized deep cleaning.
How to Prepare for Cleaning a Very Dirty Floor
Before you start, gather the right tools and supplies, put on protective gear, and open windows or set fans for ventilation.
Test any cleaner on a small hidden spot to make sure it won’t damage the floor, then clear the area and remove loose dirt and debris by sweeping or vacuuming.
Once the space is prepped and tested, you’ll be ready to tackle deeper cleaning safely and efficiently.
Tools and supplies checklist
Gather the right tools and supplies so you won’t stop mid-clean: a stiff broom and dustpan, a heavy-duty mop or microfiber flat mop, a bucket with a wringer, gloves, knee pads, a scrub brush, a putty knife for stuck-on gunk, a suitable floor cleaner or degreaser, and plenty of clean rags or disposable wipes.
- Gather durable tools
- Choose cleaners by floor type
- Stock extra consumables
Protective gear and ventilation
When you’re tackling a very dirty floor, prioritize protective gear and good ventilation to protect your lungs, skin, and eyes; wear gloves, eye protection, and knee pads, and choose a respirator or mask rated for dust and chemical vapors when using strong degreasers.
Open windows and run fans to exhaust fumes, limit exposure time, and keep a safe distance from others while cleaning.
How to test cleaners safely (spot test method)
If you’re about to use a new cleaner on a very dirty floor, always do a spot test first: apply a small amount to an inconspicuous area, wait the recommended dwell time, then blot and inspect for color change, surface damage, or residue.
Repeat in several spots and note results. If discoloration or softening appears, choose a milder product or consult manufacturer care instructions before proceeding.
Clearing the area and dry debris removal (sweeping, vacuuming)
Once your spot tests show the floor tolerates the cleaner, clear the room so you can work efficiently and avoid dragging grime around.
Remove furniture, rugs, and breakables. Sweep or vacuum thoroughly, getting corners and under edges.
Use a broom with stiff bristles for coarse dirt, a vacuum for fine dust and pet hair. Empty the vacuum before wet cleaning.
General Multi Step Cleaning Process (Step by Step)
Start by clearing loose dirt—sweep or vacuum thoroughly so grit won’t scratch the floor.
Spot-treat stains, pick the right cleaner and dilution, then agitate with a mop, scrub brush, or machine as needed.
Finish by rinsing well to remove residue and reveal a clean surface.
Step 1 Dry prep: sweeping, vacuuming, removing loose grit
Before you wet the floor, clear away loose dirt and grit by sweeping or vacuuming thoroughly — this prevents scratches and keeps your mop from turning dirty.
Work from farthest corner toward exits, use a stiff broom for grit and a vacuum with hard‑floor setting for edges.
Empty debris, shake rugs outside, and check for remaining pebbles before wet cleaning.
Step 2 Pre treatment: spot treating stains and high traffic areas
Step 2 focuses on pre-treating stains and high-traffic zones so your wet cleaning works faster and removes more grime.
Inspect for spots, grease, pet messes, and scuffs. Apply an appropriate spot cleaner or a diluted solution sparingly, let it dwell per instructions, then agitate with a brush or cloth.
Blot or lift residue before overall mopping to boost results.
Step 3 Choosing the right cleaner and dilution
3 key choices will determine how effectively you clean: the product type, its concentration, and whether it’s safe for your floor surface.
Match cleaner to material—wood-safe, pH-neutral for stone, stronger degreasers for tile.
Follow label dilution instructions, start weaker, test in an inconspicuous spot, and adjust only if necessary.
Use measured tools and never mix chemicals.
Step 4 Agitation: mopping, scrubbing, machine options
With the right cleaner and dilution set, it’s time to pick how you’ll agitate the soil—mopping, scrubbing by hand, or using a machine—because agitation moves grime off the floor and into your solution.
Use a mop for large areas, a stiff brush for stubborn spots, and a floor scrubber or rotary machine for heavy buildup.
Work in overlapping passes and adjust pressure for the surface.
Step 5 Rinsing thoroughly to remove residue
After agitation lifts the grime, you need to rinse thoroughly so no detergent or loosened soil remains to attract dirt later.
Use clean water and a fresh mop or rinse attachment, changing water frequently. Work in sections, overlap rinsed areas, and remove cloudy film with a final clear-water pass.
Check grout lines and edges for trapped residue and re-rinse if needed.
Step 6 Drying and finishing touches (buffing, resealing if needed)
Once the floor is rinsed and free of soapy film, let it dry promptly to prevent streaks and new dirt from sticking to damp areas.
Use microfiber mops or towels to speed drying, open windows or run fans for airflow, then buff gently to restore shine.
If your floor’s finish is worn, apply a recommended sealer or polish following manufacturer instructions.
Floor Type Specific Methods and Best Cleaners
Now you’ll match cleaners and techniques to each floor type so you don’t damage surfaces while getting them truly clean.
For hardwood use safe degreasers and as little water as possible, reserving refinishing for worn finishes; for laminate, stick to pH-neutral solutions and avoid standing water.
Use alkaline cleaners with grout brushes or steam for tile, solvent-free cleaners and gentle scrubbing for vinyl/linoleum, and only stone-safe, non-acidic products for marble, slate, and travertine.
Hardwood floors: safe degreasers, minimal water method, refinishing when necessary
While hardwood’s beauty draws your eye, its sensitivity to water and harsh chemicals means you should stick to gentle, oil-based degreasers and a nearly dry cleaning method; reserve sanding and refinishing only when scratches, deep stains, or finish failure can’t be fixed with touch-ups.
Wipe with a damp microfiber, spot-treat grease with oil-based cleaner, dry immediately, and consult a pro for full refinishing.
Laminate floors: pH neutral cleaners, avoiding standing water
Because laminate has a sealed wear layer, you can clean it effectively with pH-neutral solutions and very little water—use a damp (not wet) microfiber mop, avoid soaking seams, and wipe up any standing moisture immediately to prevent swelling and delamination.
Spot-treat stubborn marks with a soft cloth and mild cleaner, rinse the cloth, dry the area, and never wax or polish laminate surfaces.
Tile and grout: alkaline cleaners, grout brushes, steam cleaning
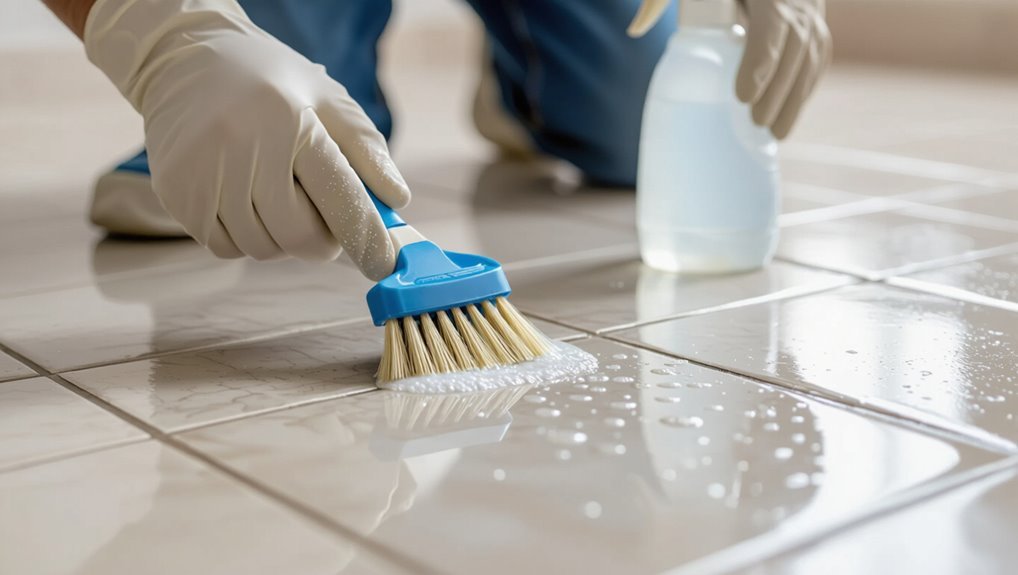
If your tile and grout look dull or stained, tackle them with an alkaline cleaner, a stiff grout brush, and, when appropriate, a steam cleaner.
Alkaline solutions cut grease and mineral buildup, the brush agitates trapped dirt, and steam lifts residues without harsh chemicals.
Rinse thoroughly, work in small sections, scrub grout lines firmly, and seal grout after drying to resist future staining and simplify maintenance.
Vinyl and linoleum: solvent free cleaners, gentle scrubbing
Vinyl and linoleum respond best to mild, solvent-free cleaners and gentle scrubbing—use a pH-neutral floor solution or a mix of warm water and a few drops of dish soap to lift dirt without stripping finish.
Mop with a microfiber or soft-speed spin mop, spot-scrub scuffs with a non-abrasive pad, rinse to remove soap residue, and dry to prevent streaks or moisture damage.
Natural stone (marble, slate, travertine): stone safe cleaners, avoid acids
Moving from resilient surfaces like vinyl, natural stone floors—marble, slate, travertine—need a gentler, more specific approach. Use pH-neutral, stone-safe cleaners, soft mops, and blot spills quickly; never use acids or vinegar. Test cleaners in an inconspicuous spot first.
| Stone | Cleaner type | Notes |
|---|---|---|
| Marble | pH-neutral | Avoid acid |
| Slate | Stone-safe | Gentle scrub |
| Travertine | Neutral | Rinse well |
| Sealed stone | Mild | Re-seal when needed |
Concrete floors (sealed and unsealed): degreasers, pressure washing, sealers
Concrete floors—whether sealed or raw—need different treatments, and you’ll get the best results by matching cleaner, tool, and technique to the surface.
For sealed concrete, use mild pH-neutral cleaners and soft mopping; avoid harsh solvents.
For unsealed, apply industrial degreasers, scrub with a stiff brush or rotary scrubber, then pressure wash and let dry.
Finish with an appropriate sealer to protect and simplify future cleaning.
Carpeted areas and rugs (extreme soil): deep cleaning, shampoo vs. hot water extraction
Hard floors may take solvent rinses and pressure washing, but carpeted areas call for a different approach when soil’s extreme: you’ll need methods that pull grit, oils, and deeply embedded stains out of the fibers without leaving residue.
Pre-vacuum, pretreat with enzyme or alkaline cleaners, then choose shampooing for agitation or hot water extraction (preferred) for rinsing and powerful soil removal.
Finish with deodorizer.
Comparison Best Tools and Machines for Heavy Floor Cleaning
You’ll want to weigh manual tools like microfiber mops, scrubbing and grout brushes against powered options such as scrubbers, floor buffers, steam cleaners, and pressure washers to match the task.
Consider cost versus effectiveness—some machines justify buying for frequent heavy use, while rentals suit one-off jobs.
I’ll help you decide which tool fits your floor type, level of dirt, and budget.
Manual tools: microfiber mops, scrubbing brushes, grout brushes
When tackling a really grimy floor, manual tools give you control and precision that machines can’t always match; microfiber mops lift fine dust and grime, scrubbing brushes knock loose stuck-on soil, and grout brushes reach the narrow channels between tiles.
- Use microfiber mops for dust, spills, and gentle agitation.
- Choose stiff scrubbing brushes for caked-on debris.
- Use narrow grout brushes for grout lines and corners; rinse and repeat as needed.
Powered options: scrubbers, floor buffers, steam cleaners, pressure washers
Several powered machines can cut cleaning time and elbow grease—scrubbers, floor buffers, steam cleaners, and pressure washers each tackle grime differently. You’ll pick based on surface, soil type, and access. Scrubbers replace mopping, buffers restore finish, steam sanitizes without chemicals, and pressure washers handle outdoors.
| Machine | Best use |
|---|---|
| Scrubber | Large indoor floors |
| Pressure washer | Outdoor hard surfaces |
Cost vs. effectiveness and when to rent vs. buy
Although buying industrial equipment can seem like a good investment, weigh upfront cost against how often you’ll actually use it: rent for occasional deep cleans or one-off jobs, buy if you need regular, heavy-duty performance.
Factor maintenance, storage, training, and resale value.
Compare rental rates versus depreciation and downtime; choose the option that minimizes total cost while delivering required cleaning effectiveness.
Stain and Spot Solutions (Common Tough Stains)
You’ll tackle common stubborn spots differently depending on their source, from grease and oil to tracked-in mud.
Use targeted cleaners and methods for pet urine and biological stains, and mechanical or solvent approaches for paint, adhesive, and gum.
I’ll walk you through safe, effective options for each so you can choose the right fix.
Grease and oil removal
Tackle grease and oil stains quickly, because they sink into pores and attract more dirt over time. Blot excess with paper towels without rubbing.
Sprinkle baking soda or cornstarch to absorb oil, let sit 15–30 minutes, then sweep. Apply dish soap or a degreaser, scrub gently with a soft brush, rinse, and dry.
Repeat for stubborn spots, testing cleaners first.
Mud and tracked in dirt
After dealing with grease, you’ll often face mud and tracked-in dirt that smears across floors and grits into seams.
Let dry slightly, then sweep or vacuum loosened grit.
For tile or sealed wood, mop with warm water and a few drops of dish soap; for unsealed wood or stone, use a pH-neutral cleaner.
Rinse, dry, and repeat stubborn areas with a soft scrub brush.
Pet urine and biological stains
When pet urine or other biological stains hit your floor, act quickly to blot up moisture, then neutralize odors and bacteria rather than just masking them.
Use enzyme cleaners for organic breakdown, follow label dwell times, rinse thoroughly, and dry fully.
For hard floors, dilute peroxide solutions target stains; for carpets, blot, apply enzyme product, then extract with clean water to prevent residue and re-soiling.
Paint, adhesive, and gum removal
If paint, adhesive, or gum lands on your floor, act fast and choose a method that matches the surface and substance—solvents for fresh paint, heat or freezing for gum, and mechanical scraping plus appropriate removers for old adhesive.
Test cleaners in an inconspicuous spot. Use plastic scrapers, solvent-soaked cloths, or an ice pack/hairdryer as needed.
Rinse, neutralize, and dry to prevent damage.
Common Mistakes That Make Dirty Floors Worse
Don’t make your floor harder to fix by using too much water or the wrong cleaner, which can swell or stain some surfaces.
Scrubbing with harsh tools can strip finishes, and leaving soap residue from not rinsing will attract more dirt.
Always check and follow the manufacturer’s care instructions so you don’t undo warranties or cause irreversible damage.
Using too much water or wrong cleaner
Although you want the floor to look spotless, pouring on water or the wrong cleaner will usually make things worse: excess moisture can warp wood, strip protective coatings, and leave streaks, while harsh detergents can dull finishes or gum up grout.
Test cleaners in an inconspicuous spot, follow manufacturer guidance, use minimal water, and blot spills promptly to protect surfaces and seals.
Over aggressive scrubbing that damages finishes
Overuse of water or the wrong cleaner isn’t the only way you can harm a floor—scrubbing too hard will strip finishes, scratch surfaces, and wear down sealants over time.
Use gentle tools, soft pads, and appropriate cleaners for your floor type. Let solutions soak briefly to loosen dirt, then wipe with light, even strokes.
Test a hidden spot before heavy cleaning.
Not rinsing residue and leaving soap film
If you skip rinsing after mopping, soapy residue can dry into a cloudy film that attracts more dirt and makes floors look dull.
You should always follow with clean water or a neutral rinse solution to remove detergent traces. Wipe or squeegee excess moisture so no tacky layer remains.
Regular rinsing preserves shine, reduces re-soiling, and won’t trap grime in grout.
Ignoring manufacturer care instructions
When you skip the manufacturer’s care instructions, you risk voiding warranties and damaging finishes with the wrong cleaners or tools.
Follow recommended products, dilution rates, and techniques for your floor type. Test cleaners on a hidden spot first.
Using abrasive scrubbers, acidic solutions, or excess water can cause permanent harm.
Stick to the guide to preserve appearance, performance, and warranty coverage.
Prevention and Maintenance to Keep Floors from Getting Really Dirty Again
Keep dirt from building up by setting simple daily and weekly routines—sweeping or vacuuming high-traffic areas and spot-cleaning spills as they happen.
Control entry points with mats, shoe rules, or boot brushes and schedule periodic deep cleans plus quick spot protocols for messy days.
Protect your floors with the right finishes or sealers and plan routine re-coating to keep surfaces easier to maintain.
Daily and weekly maintenance routines
A quick sweep or shake mat placed at every entrance cuts down on grit and saves you time later; keep a short daily routine and a deeper weekly session to prevent buildup.
Do quick spot-mops, sweep high-traffic paths, and empty entryway debris daily.
Weekly, mop thoroughly and check grout or finish.
- Daily: quick sweep or spot-mop
- Weekly: full mop and inspect
- As needed: targeted touch-ups
Entryway controls: mats, shoe rules, boot brushes
You can stop most dirt at the door with a few smart habits and simple tools.
Place durable, textured mats outside and inside to trap grit; empty and shake them weekly.
Ask guests and family to remove shoes or use indoor slippers.
Keep a boot brush near the entrance for mud, and store a small tray for wet footwear to protect floors.
Periodic deep clean schedule and quick spot protocols
Set a simple rhythm—weekly quick checks, monthly deep cleans, and seasonal overhauls—so dirt never gets a foothold.
Tackle spills immediately with appropriate cleaners, blotting rather than rubbing.
Schedule vacuuming or sweeping midweek, mop weekly with the right solution, and deep-scrub high-traffic zones monthly.
Keep a small kit for spot treatment and log problem areas to adjust frequency as needed.
Protective finishes, sealers, and routine re coating
When you seal and finish floors correctly, they resist dirt, stains, and wear so routine cleaning stays quick and effective; choose products matched to your floor type and traffic level, apply them per manufacturer instructions, and schedule timely re-coating to maintain the barrier.
Inspect finishes regularly, repair chips promptly, use recommended cleaners, and limit abrasive tools. Recoat before wear shows to prevent deep damage.
Cost, Time and Environmental Considerations
Decide whether you’ll buy supplies and tackle the job yourself or hire pros by comparing upfront costs and long-term value.
Estimate time by room size and how filthy each area is—a tiny mudroom can take minutes, a large kitchen or heavily soiled garage can take hours or need multiple sessions.
Choose eco-friendly cleaners and follow proper waste disposal to protect your budget and the environment.
Budgeting supplies vs. hiring pros
Although buying your own supplies can look cheaper on paper, you’ll want to weigh upfront costs, time investment, and environmental impact against the convenience and expertise a pro brings.
Calculate supply prices, protective gear, and machine rental versus a service quote.
Consider your schedule, skill level, and eco-friendly product availability.
Sometimes pros save time and reduce waste despite higher fees.
Time estimates for rooms by size and soil level
Estimate cleaning time by matching room size and soil level to the tasks you’ll do: a lightly soiled 100–150 sq ft bedroom usually takes 20–30 minutes for vacuuming and spot-mopping, while a heavily soiled 300–400 sq ft kitchen with grout buildup can demand 1.5–3 hours including scrubbing and drying.
Adjust for furniture moving, stain treatments, and ventilation; add buffer for breaks.
Eco friendly cleaners and waste disposal best practices
When you want to clean effectively without harming the planet or your wallet, pick concentrated, plant-based cleaners and simple DIY solutions like vinegar and baking soda for most floor types; they’ll cut costs, reduce plastic waste, and usually take the same or less time than harsh chemical options.
Dispose solids in compost when safe, recycle containers, dilute and use greywater where allowed, and avoid mixing chemicals.
Frequently Asked Questions
You probably have a few specific questions, like how often to deep clean very dirty floors and whether bleach or steam cleaners are safe to use.
I’ll explain the safest ways to remove stubborn grime without harming finishes and how to tell if a floor needs refinishing or replacement.
Read on for clear, practical answers to those common concerns.
How often should I deep clean floors that get very dirty?
High-traffic spaces usually need deep cleaning more often than quieter rooms, so plan to deep clean floors that get very dirty every 1–2 weeks to keep grime, allergens, and bacteria from building up.
Adjust frequency for pets, kids, or heavy foot traffic—you may need weekly cleaning.
For moderate use, every 2–4 weeks suffices.
Inspect regularly and spot-clean between deep sessions.
Can I use bleach on heavily soiled floors?
Wondering if bleach’s strong stain-fighting power makes it a good choice for heavily soiled floors?
You can use diluted bleach on unsealed, colorfast surfaces like ceramic or porcelain, but test first.
Avoid bleach on wood, laminate, natural stone, or colored grout.
Wear gloves, ventilate, and rinse thoroughly after cleaning to remove residue.
Don’t mix bleach with ammonia or other cleaners.
What is the safest way to remove stubborn grime without damaging finish?
If something’s left baked-on or gritty, tackle it gently to protect the finish: start by sweeping and vacuuming, then test a mild cleaner in an inconspicuous spot.
Use a soft nylon brush or microfiber pad with diluted cleaner, working in small sections. Rinse thoroughly and dry.
Avoid harsh abrasives, steel wool, or strong solvents that strip or dull finishes.
How do I know if my floor needs refinishing or replacement?
How can you tell whether your floor needs refinishing or full replacement? Inspect for deep gouges, repeated water damage, warped boards, mold, or structural movement—these often mean replacement.
Surface scratches, worn finish, minor stains, or dullness usually call for refinishing.
Consider age, repair history, and cost; when repairs are frequent or subfloor compromised, replacement is the smarter, longer-lasting choice.
Are steam cleaners safe for all floor types?
Curious whether steam cleaners will damage your floors? You can use steam safely on ceramic, porcelain, sealed tile, and many sealed hardwoods, but avoid unsealed wood, laminate, vinyl with click locks, and some natural stone.
Test a small area first, follow manufacturer guidelines, use low steam settings, and dry surfaces quickly to prevent moisture damage and warping.