
How to Fix Vinyl Flooring That Is Lifting at the Edges or Seams
You can fix vinyl lifting at edges or seams yourself by first cleaning and drying the area, then using the right adhesive or seam sealer for your vinyl type, pressing the material down firmly and weighting it until the glue cures. For planks or tiles you may need seam adhesive; for sheet vinyl inject adhesive and roll flat, trimming any ragged edges. If glue won’t hold, replace damaged pieces. Keep tools, safety gear, and moisture control handy — keep going to learn step-by-step tips.
Quick Answer Can You Fix Vinyl Flooring Lifting at the Edges or Seams?
You can often fix lifted edges or seams by cleaning the area, applying vinyl adhesive, and pressing or weighting the seam until it sets.
If the lift is small and the backing is intact, you can do it yourself with basic tools; call a pro if there’s water damage, large buckling, or repeated lifting.
A professional can assess subfloor issues and guarantee a long-term repair.
Short summary of solutions
If the edges or seams of your vinyl are lifting, you can usually fix them without replacing the whole floor:
You can re-glue lifted edges, press seams back together, trim and heat-bond loose sections, clean and dry the subfloor, and use seam sealer or adhesive strips.
For significant gaps or damage, replace affected planks.
This covers quick how to fix vinyl flooring that’s lifting steps.
When to DIY vs. call a professional
While small edge lifts and separated seams are often something you can handle with basic tools and a bit of care, call a pro when you spot widespread buckling, water damage, persistent subfloor issues, or if seams keep opening after repeated repairs.
You should DIY for isolated lifts, minor glue-ups, or seam resealing if you’re comfortable; hire a pro for structural, moisture, or extensive aesthetic problems.
Basic Understanding What Causes Vinyl to Lift?
You’ll usually see vinyl lift because of moisture, temperature changes, subfloor problems, or poor installation.
Different products—sheet, luxury vinyl plank/tile, and vinyl tiles—behave differently and show lifting as gaps at seams, curled edges, or bubbles.
Learn to spot these signs early so you can choose the right fix.
Common causes (moisture, temperature, subfloor issues, improper installation)
Because vinyl is a thin, flexible surface bonded to a substrate, it reacts quickly to changes in moisture, temperature, subfloor conditions, and installation mistakes—any of which can cause it to lift.
You’ll see edges curl or seams separate when conditions change.
Common causes include:
- Moisture intrusion from spills, leaks, or high humidity.
- Temperature swings causing expansion and contraction.
- Uneven, damp, or improperly prepared subfloors and poor installation.
Types of vinyl flooring and how they affect lifting (sheet, luxury vinyl plank/tile, vinyl tiles)
Different vinyl types behave differently when they lift, so knowing which product you have helps you diagnose and fix the problem. Sheet vinyl often peels at edges; LVP/LVT may buckle at seams; vinyl tiles can pop loose. Use appropriate adhesives and moisture checks.
| Type | Typical lift | Fix |
|---|---|---|
| Sheet | Edge peel | Re-adhere |
| LVP/LVT | Seam buckle | Clamp/glue |
Signs to identify lifting edges, seams, and bubbled areas
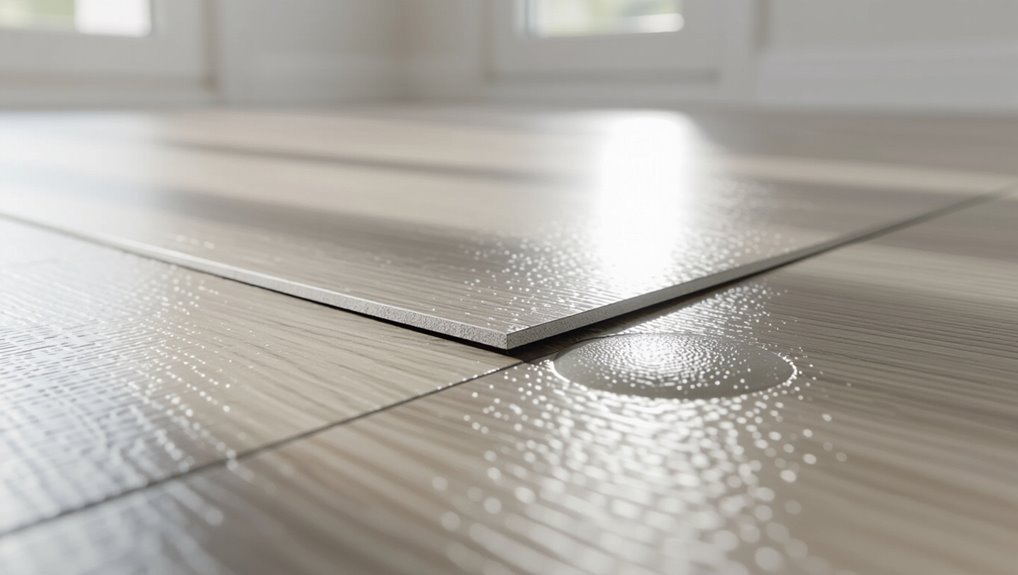
When vinyl starts to lift, you’ll usually see three clear signs: raised edges where the material peels away from the substrate, gaps or misaligned seams in plank or tile installations, and surface bubbles or blisters that trap air or moisture.
You’ll also notice loose corners that catch your foot, grout lines widening, and soft or hollow sounds when you press affected areas, indicating adhesion loss.
Tools, Materials, and Safety Precautions
Before you start, make sure you’ve got the right tools and adhesives for your vinyl type—seam rollers, putty knife, trowel, and a manufacturer-recommended adhesive or seam sealer will cover most jobs.
Wear safety gear like gloves, eye protection, and a mask when working with adhesive fumes, and ventilate the area.
Also prep the surface by cleaning, drying, and removing old adhesive so the new bond will hold.
Essential tools and adhesives for different vinyl types
One clear set of tools and the right adhesive make fixing lifted vinyl much faster and longer-lasting.
You’ll need different glues for sheet, plank, or luxury vinyl tile: contact cement for sheets, pressure-sensitive adhesive for planks, and a urethane-based or vinyl-specific seam sealer for LVT.
Match adhesive to backing and follow manufacturer cure times.
- Tools: roller, trowel, scraper
- Adhesives by vinyl type
- Small clamps or weights
Safety gear and surface prep guidelines
Although you can fix lifted vinyl quickly, wear proper safety gear and prep the surface carefully to avoid injury and secure a lasting bond.
Use gloves, safety glasses, and a dust mask.
Remove debris, old adhesive, and moisture; sand glossy spots lightly.
Vacuum and wipe with a recommended cleaner.
Allow full drying before applying adhesive to guarantee a secure, long-lasting repair.
Step-by-Step Repairs Fixing Lifting Edges and Seams
First, you’ll assess the lifting to decide whether re-gluing, seam repair, sheet vinyl edge work, or full plank/tile replacement is best.
Then you’ll follow the appropriate method—A for loose edges, B for peeled luxury planks/tiles, C for sheet vinyl edges, or D if a damaged piece must be replaced.
I’ll walk you through each step so you can fix the problem safely and effectively.
Assess the problem and choose the right repair method
Before you grab adhesive or a roller, take a close look at the lifting area so you can pick the right repair method: note whether the edge or seam is curling, bubbling, or partially detached, measure how many inches are affected, check for underlying moisture or debris, and determine if the vinyl is glued to a subfloor or floating.
Then decide if simple re-gluing, patching, or moisture remediation fits.
Method A Re-gluing loose edges and seams
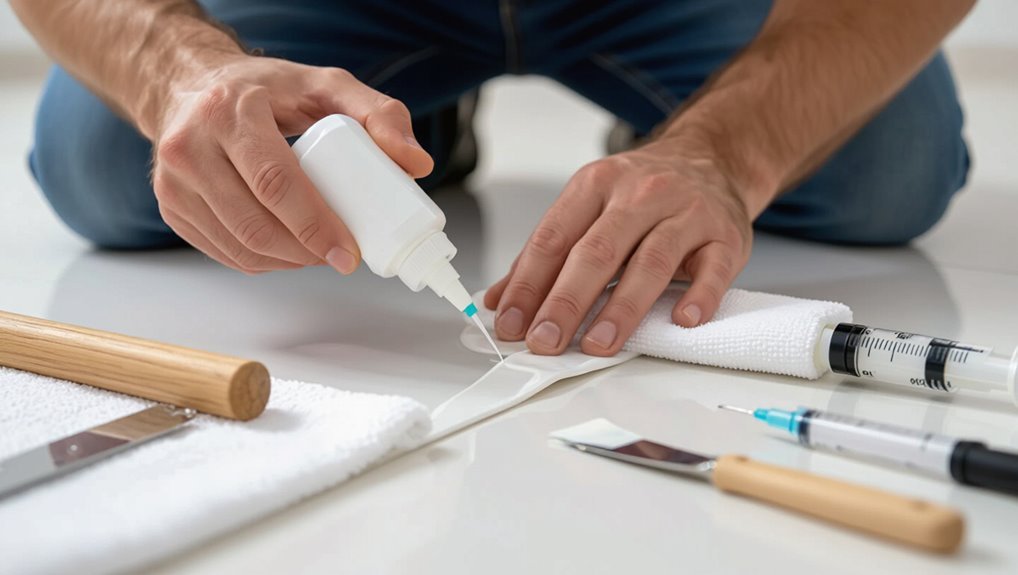
Start by cleaning and drying the lifted edge or seam so the adhesive can bond properly: remove dust, old adhesive residue, and any debris with a vacuum and a damp cloth.
Then let the area dry completely; if you find moisture, address that first.
Then apply appropriate vinyl adhesive, press the edge down, and weight it until cured.
- Clean and dry
- Apply adhesive
- Press and weight
Method B Repairing peeled seams on luxury vinyl planks/tiles
When seams on luxury vinyl planks or tiles begin to peel, you can fix them yourself with a few tools and steady hands: clean the seam, lift edges slightly, apply a recommended vinyl seam adhesive sparingly, press seams together, wipe excess adhesive, and use weights or seam rollers until cured.
Trim frayed edges, repeat for each affected area, and allow full cure before foot traffic.
Method C Fixing lifted sheet vinyl edges
If you handled plank or tile seams, fixing lifted sheet-vinyl edges follows a similar hands-on approach but uses different tools and adhesive types.
You’ll clean, lift, apply adhesive, and press flat with a roller. Work quickly to avoid bubbles and align edges.
- Clean and dry substrate.
- Inject sheet-vinyl adhesive under edge.
- Roll, weight, and trim excess.
Method D Replacing damaged plank/tile if re-gluing won’t work
Sometimes re-gluing won’t restore a plank or tile that’s cracked, warped, or missing its locking ridge, so you’ll need to remove and replace the damaged piece.
Cut out the damaged plank/tile, clean the subfloor, and test-fit the replacement. Follow these steps:
- Score and lift damaged piece carefully.
- Prepare subfloor and apply adhesive or locking system.
- Install replacement, trim edges, and press firmly.
Post-repair checks and curing times
After you’ve fitted and secured the replacement plank or re-glued the seam, check the repair area for proper alignment, firm adhesion, and any gaps that might let moisture in.
Press seams, remove excess adhesive, and weight the area per adhesive instructions.
Allow the full curing period—usually 24–72 hours—before heavy traffic.
Recheck edges afterward and address any lifting immediately to prevent recurrence.
Troubleshooting Common Repair Problems
If your adhesive won’t stick or the bond keeps failing, you’ll need to check surface prep and adhesive type.
If seams are still visible after repair, you’ll want to reassess alignment and trimming before resealing.
And if lifting or bubbling keeps coming back, you’ll inspect for moisture or subfloor movement that requires addressing.
Adhesive not sticking or bond failing
When the adhesive won’t grab or the bond gives way, you’ll want to check surface prep, product compatibility, and installation conditions first.
Clean and dry the subfloor, remove old adhesive residue, and verify temperature/humidity match manufacturer specs.
Use the recommended vinyl adhesive and proper open time.
Press seams firmly, weight them while curing, and replace adhesive if it skins over or smells off.
Visible seam lines after repair
Because seams should disappear into the floor, visible lines after a repair usually mean a problem with leveling, adhesive coverage, or seam finishing — and you can fix them by pinpointing the cause.
Check that subfloor and vinyl edges are flat, add or remove thinset or leveling compound as needed, reapply adhesive evenly, and trim or heat-seam edges for a flush, invisible join.
Recurring lifting and bubbling
Though you’ve glued seams and smoothed edges, recurring lifting and bubbling tells you something’s still wrong beneath the surface.
Check for moisture, trapped air, or adhesive failure. Test subfloor for dampness and verify proper acclimation of vinyl.
Remove affected section, dry and clean thoroughly, then reapply appropriate adhesive or replace underlayment.
Monitor temperature and humidity to prevent repeat issues.
Prevention and Best Practices
To keep vinyl from lifting again, you’ll want to focus on proper installation: prep the subfloor, let the planks acclimate, and choose the right adhesive for your floor and traffic.
Control moisture and room conditions to prevent adhesive failure and warping.
Stick to a simple maintenance routine—regular cleaning and prompt spill cleanup—to prolong adhesive life and performance.
Proper installation tips to avoid future lifting (subfloor prep, acclimation, adhesive selection)
When you take the time to prepare the subfloor, let the vinyl acclimate, and pick the right adhesive, you’ll prevent most lifting problems before they start.
Level and clean the subfloor, repair imperfections, and remove debris. Unbox and rest vinyl per manufacturer temperature/time guidelines.
Choose compatible adhesive rated for your vinyl type and traffic. Apply evenly, follow open time, and press seams firmly.
Moisture control and environmental recommendations
If you want your vinyl to stay flat and secure, control moisture and the room environment before and after installation: test the subfloor for moisture, fix any leaks or high vapor emissions, and keep indoor humidity between about 35–65% while the adhesive cures.
Use vapor barriers where recommended, guarantee good ventilation and consistent temperature, and avoid wet-mopping or exposing edges to standing water.
Maintenance routines to prolong adhesive life
Controlling moisture and room conditions lays the groundwork; now focus on regular maintenance routines that keep the adhesive performing over time.
- Vacuum and sweep weekly to remove grit that stresses seams.
- Wipe spills promptly with a damp cloth and mild cleaner to prevent breakdown.
- Inspect edges monthly, reapply compatible adhesive or seam sealer at the first sign of lifting to avoid larger repairs.
Cost, Time, and When to Replace Entire Floor
You can often save money and time by fixing small lifted sections yourself—DIY patching typically takes a few hours and costs under $100, while pro repairs run higher but finish faster for complex issues.
If large areas are buckling, seams keep separating, or moisture has damaged the underlayment, replacing the whole floor is usually the smarter long-term choice.
We’ll compare rough cost and time estimates for DIY versus professional work and list clear signs that warrant full replacement.
Typical cost and time estimates for DIY vs. professional repairs
Repairing a few lifted vinyl planks yourself can cut costs and time dramatically compared with hiring a pro, but scope matters: small spot fixes often take an hour or two and under $50 in materials, while patching several panels or addressing adhesive failure can run several afternoons and $100–$300 in supplies. You’ll save labor, but pros finish faster for complex jobs.
| Task | DIY time | Pro cost |
|---|---|---|
| Single seam | 1–2 hrs | $75–$150 |
| Several panels | 4–8 hrs | $200–$400 |
| Adhesive reapply | 3–6 hrs | $150–$350 |
| Full room estimate | 1–2 days | $400–$1,200 |
Signs that indicate full replacement is wiser than repair
If the damage keeps cropping up across multiple planks, shows widespread adhesive failure, or the floor’s been through years of wear (stains, warping, or fading), replacing the entire floor usually makes more sense than patchwork—it’s often cheaper in time and hassle when repairs become recurring or the underlying subfloor is compromised.
You should replace when damage is extensive, odors persist, seams split repeatedly, or costs approach replacement.
Common Mistakes to Avoid
Don’t grab any adhesive at random — using the wrong type or the wrong amount will give you poor bond and wasted time.
You can’t skip proper subfloor prep, because dirt, moisture, or unevenness will make the repair fail.
And don’t rush curing or put heavy use on the floor too soon, or you’ll lift the patch all over again.
Using wrong adhesive or too much/few adhesive
Because adhesives differ by vinyl type and installation method, picking the wrong one—or using too much or too little—can ruin a repair before you finish it.
Always match adhesive to sheet, plank, or tile and the manufacturer’s recommendations.
Apply an even, appropriate amount: excess squeezes out and won’t bond; too little leaves gaps and lift.
Use proper spreader and follow cure times.
Skipping subfloor preparation
Even with the right adhesive, your repair can fail when the subfloor’s dirty, uneven, or damp—so you need to prepare it first.
Clear debris, vacuum dust, and remove old adhesive. Check for high or low spots and sand or level as needed.
Verify moisture with a meter; if it’s high, address the source before gluing. Proper prep prevents re-lifting and wasted effort.
Rushing curing times or heavy use too soon
If you rush the adhesive’s cure or put furniture and foot traffic back on the patch too soon, the bond won’t reach full strength and the vinyl can lift again within days.
You should wait the manufacturer’s recommended cure time, protect the area, and test before heavy use.
Examples of what to avoid:
- Placing a sofa after a few hours
- Walking heavily across seams
- Rolling appliances back into place
FAQ
You probably have a few quick questions about repairs, like how long a seam fix will last and whether superglue or household caulk will work.
You’ll also want to know if heat guns can flatten bubbles, whether you can repair over an uneven subfloor, and how to keep seams from reopening.
Read on for concise answers and practical tips.
How long will a vinyl seam repair last?
How long will a vinyl seam repair last? It depends on adhesive quality, prep, traffic, and moisture.
With proper cleaning, a strong seam adhesive, and minimal heavy traffic or moisture exposure, repairs often last years.
In high-traffic, wet, or poorly prepped areas, expect shorter life and plan for redoing the seam or replacing flooring sooner to maintain appearance and performance.
Can I use superglue or household caulk to fix lifted vinyl?
Repairs that last years usually come from the right glue and prep, not quick fixes, so you’ll want to be careful about reaching for superglue or household caulk.
Superglue can dry brittle and yellow; caulk won’t bond vinyl securely. Use a vinyl-specific adhesive or seam sealer.
Clean, dry, and clamp the seam while adhesive cures for a durable, professional result.
Will heat guns help flatten bubbled vinyl?
Curious whether a heat gun can fix bubbled vinyl? You can use a heat gun carefully to soften vinyl, press out small bubbles, and re-seat edges, but keep temperature low and move constantly to avoid scorching or melting.
For bubbles caused by trapped air or adhesive failure, heating may only be a temporary fix; larger issues need adhesive reapplication or panel replacement.
Can I repair vinyl flooring over an uneven subfloor?
Wondering if you can install or repair vinyl flooring over an uneven subfloor?
You shouldn’t just glue vinyl over bumps or dips—unevenness causes lifting, seam gaps, and premature wear.
Fix the subfloor first: sand high spots, fill low areas with patching compound or self-leveling underlayment, then prime.
Once flat and dry, reinstall or repair vinyl for a durable, long-lasting finish.
How do I prevent seams from reopening after repair?
Once you’ve flattened and stabilized the subfloor, focus on preventing seams from reopening by addressing the causes: movement, moisture, and poor bonding.
Use flexible, appropriate adhesive and apply it evenly; press seams with a roller and weight until set.
Control humidity, repair joist/sill movement, and leave expansion gaps per manufacturer specs.
Inspect periodically and reapply adhesive at first sign of separation.