Is Installing Laminate Flooring Hard? What Beginners Should Know First
You can install laminate flooring yourself if you’re handy with basic tools, patient with measuring and cuts, and willing to prep the subfloor properly. It’s not trivial—expect a weekend for a typical room, extra time for tricky layouts, and care with acclimation, expansion gaps, and moisture barriers. Click-and-lock systems make it easier, but uneven subfloors or complex rooms might merit a pro. Keep tools, spacers, and underlayment ready, and continue for practical tips and step-by-step guidance.
Quick Answer Is Installing Laminate Flooring Hard?
Short answer: it’s doable for most DIYers with basic tools and patience, but it’s not trivial.
If you’re comfortable following instructions and handling cuts/underlayment, you can save money; hire a pro if the room has lots of obstacles, uneven subfloor, or you want a flawless finish.
Expect a weekend for an average room and modest material costs—labor will raise the price considerably.
Direct, concise verdict
If you can follow basic instructions and handle simple tools, installing laminate flooring isn’t hard—you’ll spend most time measuring, cutting, and fitting planks, not wrestling with complex techniques.
In short: is installing laminate flooring hard? Not usually. You can do it with patience, basic tools, and attention to layout.
Expect doable steps, occasional challenges, and a satisfying DIY result if you stay precise.
Who should consider DIY vs hiring a pro
Now that you know installing laminate usually isn’t hard, decide whether to DIY or hire a pro based on your skills, time, and the job’s complexity.
DIY if you’re handy, patient, and tackling a straightforward room; you’ll save money and learn.
Hire a pro if subfloor prep, tricky layouts, moisture issues, or tight deadlines are beyond your comfort or tools.
Time and cost expectations for a typical room
Because laminate installs are mostly a floating click-and-lock system, you can usually finish a typical 12×12 room in a weekend if you work steadily and have basic tools.
Expect 6–12 hours of active work.
Material costs run $1–$4/ft² for mid-range planks; underlayment and trim add $0.50–$1.50/ft².
If you’re new, budget extra time and $100–$200 for unexpected supplies or repairs.
What Is Laminate Flooring and Why People Choose It
Laminate flooring is a layered product with a photographic surface that mimics wood, stone, or tile and comes in several types like AC-rated planks for different durability levels.
You’ll find it’s usually cheaper and easier to install than hardwood, more rigid than vinyl, and less moisture-resistant than tile, so there are trade-offs to evaluate.
Think of laminate for living rooms, bedrooms, and low-moisture kitchens where you want good looks and durability without the hardwood price.
Composition and common types of laminate
Think of laminate flooring as a smart, layered system that gives you the look of wood or stone without the cost or maintenance.
It’s built from a durable core, a printed design layer, a protective wear layer, and a backing that stabilizes the planks.
You’ll find HDF or MDF cores, embossed or smooth surfaces, water-resistant options, and varying AC ratings indicating durability for different rooms.
Advantages and limitations compared to hardwood, vinyl, and tile
1 clear reason people pick laminate is its balance of looks, durability, and cost—you get convincing wood or stone visuals, good scratch and stain resistance, and a lower price tag than hardwood or tile. You’ll trade some resale value and water resistance for affordability and easy installation.
| Feature | Laminate | Comparison |
|---|---|---|
| Cost | Low | Cheaper than hardwood |
| Durability | Moderate | Better scratch resistance |
Typical use cases and ideal rooms
If you want a durable, budget-friendly floor that mimics wood or stone, laminate works well in many everyday spaces.
Use it in living rooms, bedrooms, hallways, home offices, and dining areas where moisture is low. You can install water-resistant laminates in kitchens or basements with caution.
Avoid wet rooms like full bathrooms unless you choose specialized, waterproof planks designed for frequent moisture.
How Difficult Is Installation Key Factors That Affect Complexity
How hard installation will be depends on a few practical factors you’ll want to check first. The condition of your subfloor, room layout (angles, doorways, stairs), and the specific laminate locking system all change the job’s complexity, as do moisture issues and the underlayment you choose. You’ll also need the right tools, some basic skills, and the physical stamina to cut, fit, and finish the boards.
Subfloor condition and preparation needs
Because your subfloor sets the stage for everything that follows, evaluating and preparing it correctly is the single biggest factor in how easy your laminate installation will be.
Check for level, moisture, and structural soundness. Repair squeaks, fill low spots, and install appropriate underlayment.
If the subfloor’s uneven or damp, you’ll need extra work or professional fixes before laying laminate.
Room layout complexity (angles, doorways, stairs)
When your room has odd angles, multiple doorways, or stairs, installation gets trickier and takes more time and precision.
You’ll need careful measuring, more cutting and fitting, and extra connector pieces at thresholds.
Corners and stair nosings demand patience and sometimes specialty tools.
Expect slower progress, additional waste from angled cuts, and plan for precise layout to maintain consistent seams and visual flow.
Type of laminate and locking system
Although the basic click-and-lock idea stays the same, the specific laminate type and locking system you choose greatly affect how hard the job will be; some boards snap together easily by hand while others need tapping blocks, spacers, or even adhesive for a secure fit.
Higher-quality systems align better and reduce mistakes, while thinner, budget planks can be fussy and more prone to gaps or damage.
Tools, skills, and physical demands required
Tools, skills, and physical effort all shape how hard laminate installation will feel—basic hand tools and steady hands let you handle most DIY jobs, while specialized cutters, a tapping block, and a pull bar make tight fits and complex layouts much easier.
You’ll need measuring accuracy, straight cuts, and patience. Expect kneeling, lifting, and repetitive motions; help speeds up heavy moves and tricky corners.
Moisture and underlayment considerations
Because moisture and the right underlayment determine whether your floor lasts or warps, you’ll want to address them before you click planks together.
Test subfloor moisture, choose vapor barriers for concrete, and pick underlayment that matches your laminate and room (sound, thermal, moisture).
Install underlayment flat, overlap or tape seams per manufacturer, and leave expansion gaps so your floor can move without buckling.
Step-by-Step Guide: Installing Laminate Flooring (Beginner-Friendly)
You’ll start by measuring the room and calculating how much material you need so you don’t run short.
Next you’ll pick the right underlayment and moisture barrier, prep and level the subfloor, and let the laminate acclimate.
Then you’ll lay the first row, keeping a consistent expansion gap to prevent buckling.
Step 1 Measuring the room and calculating materials
Before you cut or buy a single plank, measure the room carefully so you know exactly how much flooring and underlayment you’ll need. Measure length and width, note odd shapes, and calculate total square footage.
Add 10% for waste. Buy whole boxes. Record plank dimensions and pattern direction.
- tape measure
- sketch
- calculate sqft
- waste allowance
- note thresholds
Step 2 Choosing underlayment and moisture barrier
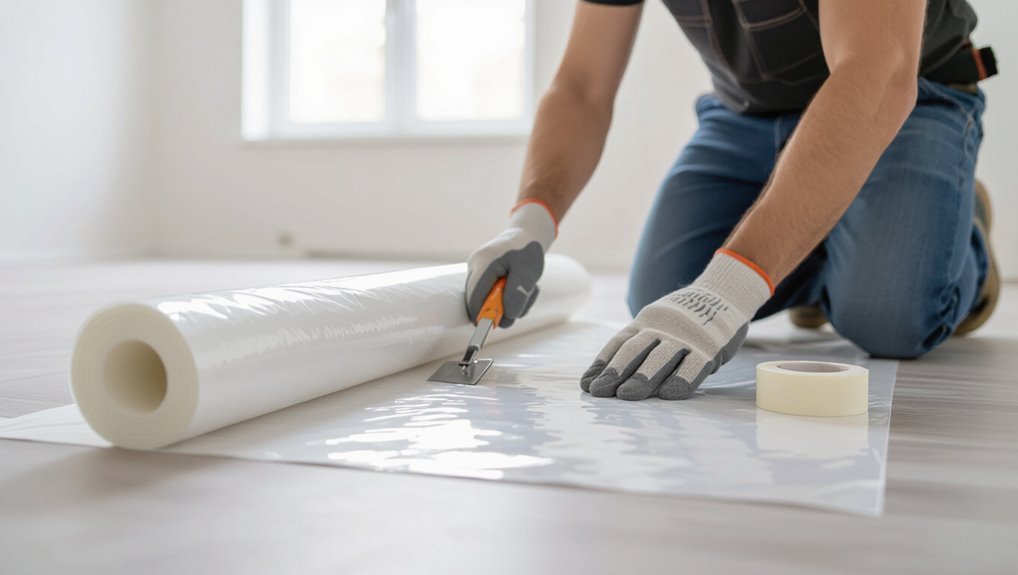
Step 2 is picking the right underlayment and moisture barrier—choices that affect comfort, sound, and the lifespan of your laminate.
You’ll match underlayment type to subfloor (foam for wood, cork or rubber for better sound), choose a vapor barrier for concrete, and consider thickness and R-value.
Proper pairing reduces noise, provides cushioning, and protects against moisture damage.
Step 3 Preparing the subfloor (cleaning, leveling, fixing)
1 important task remains: get the subfloor clean, level, and sound before you lay any laminate.
You’ll inspect, repair, and prep so planks sit flat and last.
- Sweep and vacuum debris
- Remove adhesive and protrusions
- Fill gaps/low spots with floor-leveler
- Replace rotten or soft sections
- Check with a straightedge for high/low spots
Step 4 Acclimating the laminate planks
You’ve prepped the subfloor; now let the laminate adjust to the room’s temperature and humidity so it won’t warp or gap after installation.
Move sealed boxes into the installation room and open them for 48–72 hours, stacking planks flat.
Maintain normal HVAC settings, avoid direct sunlight on stacks, and periodically rotate boxes for even acclimation.
Check manufacturer’s recommended time and conditions.
Step 5 Laying the first row and establishing expansion gaps
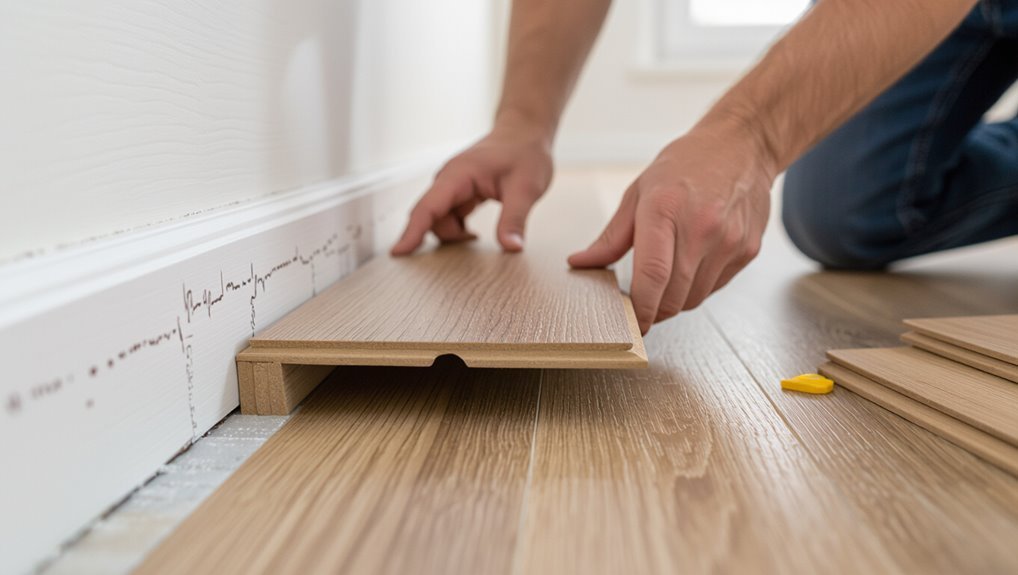
Now it’s time to lay your first row and set the expansion gaps that keep the floor from buckling; start along the longest, straightest wall and work left to right so tongue faces the adjacent row.
Use spacers to maintain a consistent 1/4″–3/8″ gap at walls and around obstacles.
Trim the last plank lengthwise for a snug fit, keeping gaps intact.
Step 6 Locking rows together and staggering seams
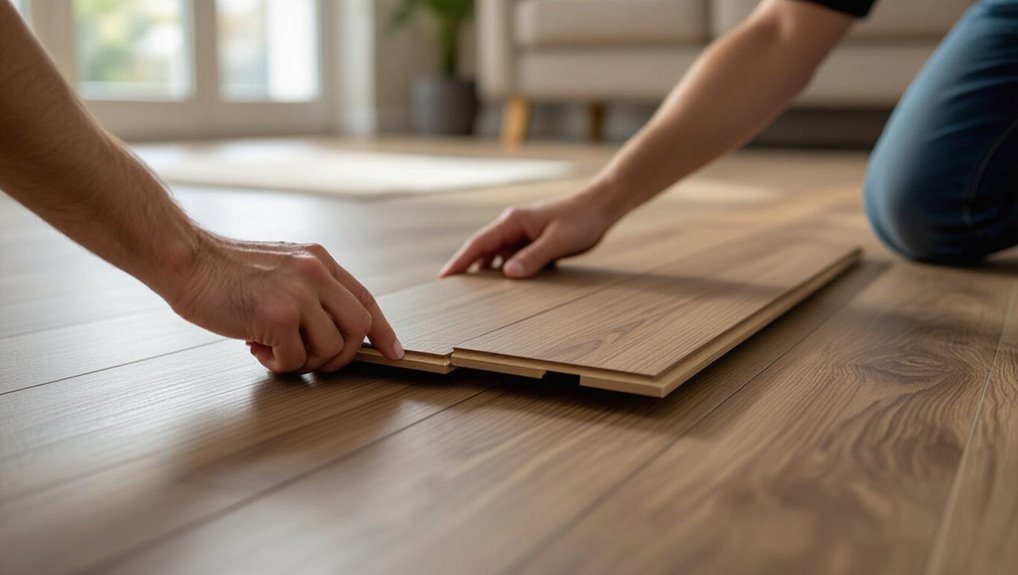
With the first row locked in, start the next by angling the tongue of each plank into the groove of the installed row and gently snapping them down to lock; work left to right so the tongues face the unfinished side.
Stagger end seams at least 12–24 inches for strength and appearance. Tap seams with a block and mallet to guarantee tight joints, checking alignment as you go.
Step 7 Cutting and fitting around obstacles and trim
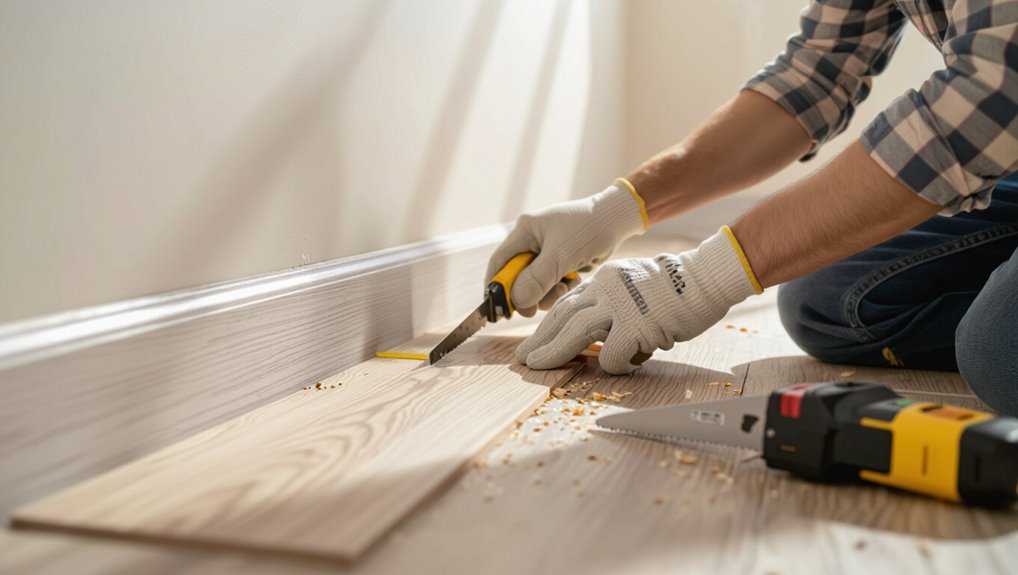
Because rooms rarely come in perfect rectangles, you’ll need to cut and fit planks around doorways, vents, pipes, and trim so the floor looks professional and functions properly.
Measure carefully, mark plank outlines, and use a jigsaw or pull saw for curves and notches.
Allow expansion gaps at walls and around pipes, use spacers, and test-fit pieces before final placement to guarantee clean seams.
Step 8 Installing transitions, thresholds, and baseboards
After fitting planks around obstacles and confirming proper expansion gaps, finish the job by installing the pieces that join rooms, cover thresholds, and hide the gap at the walls.
Choose matching junction strips for doorways, secure thresholds to subfloor (not tight to laminate), and attach baseboards or quarter-round to the wall only.
Leave expansion space and check alignments as you fasten.
Step 9 Final inspection and clean-up
Once you’ve finished installing changes, thresholds, and trim, take a methodical walk-through to inspect the whole floor for gaps, loose planks, scratches, or uneven seams.
Tighten or reseat any problem pieces, fill hairline gaps with matching putty, and buff minor scuffs.
Clean debris with a vacuum and damp mop, replace furniture using pads, and dispose of waste and excess materials responsibly.
Tools and Materials Checklist for Beginners
Before you start, make a clear tools and materials checklist so you won’t get halfway through and realize you’re missing something.
You’ll need essentials like a saw, spacers, mallet, tapping block, and pull bar, plus underlayment, trim, and any adhesives your product requires.
Optional items—jig saw, flooring jack, or an electric laminate cutter—can speed the job and improve the finish.
Essential tools (saw, spacers, mallet, tapping block, pull bar)
You’ll want a handful of basic tools to get laminate flooring installed cleanly and quickly: a saw for cutting planks, spacers to maintain expansion gaps, a mallet with a tapping block to snug joints without damage, and a pull bar for tight end pieces.
- Saw (circular, jigsaw, or handsaw)
- Spacers (plastic wedges)
- Rubber mallet
- Tapping block
- Pull bar
Optional tools that speed up the job or improve finish
Those basic tools will get the job done, but a few optional items can speed things up and give a more professional finish.
You’ll work faster and neater with extras like:
- Flooring nailer or pneumatic stapler for quick fixing
- Jigsaw for intricate cuts
- Knee pads to protect knees during long installs
- Carpenter’s square for precise layouts
- Edge roller to seat joints and underlayment
Materials and consumables (underlayment, trim, adhesives if needed)
While the right materials can’t replace careful installation, they make the job smoother and determine the floor’s comfort, noise level, and longevity.
You’ll need quality underlayment, trims, and adhesives where specified. Choose products for your subfloor and moisture conditions.
- Foam or cork underlayment
- Vapor barrier (if required)
- Threshold strips and reducers
- Quarter round or baseboard
- Flooring adhesive for engineered edges
Common Problems and Mistakes Beginners Make
Before you start, be aware of common mistakes that can ruin a laminate floor: skipping proper subfloor prep or leveling, forgetting expansion gaps that cause buckling, and failing to stagger seams correctly.
You’ll also want to avoid cutting errors that nick plank edges and make sure moisture protection is adequate to prevent warping.
Catching these issues early saves time and keeps the installation looking professional.
Improper subfloor preparation and leveling
If you skip proper subfloor preparation and leveling, your new laminate can buckle, gap, or wear unevenly within months.
You’ll want to remove debris, fix squeaks, and replace soft or damaged plywood. Use a level to find low spots and apply self-leveling compound or underlayment shims where needed.
A flat, stable base prevents premature failure and keeps seams tight.
Ignoring expansion gaps leading to buckling
After you’ve leveled and prepped the subfloor, don’t forget to leave proper expansion gaps around the room’s edges and at fixed obstacles.
If you skip them, boards will swell and push against walls, causing buckling or warping.
Follow manufacturer gap recommendations, use spacers while installing, and cover gaps with moldings so the floor can expand and contract without damage.
Poor seam staggering and pattern mistakes
When you lay boards with seams that line up or follow no consistent pattern, the floor looks amateurish and becomes structurally weaker; seams should be staggered so joints don’t coincide across rows.
Plan row offsets, follow manufacturer stagger recommendations, and vary plank lengths. Consistent staggering distributes load, hides seams, and prevents weak lines.
Check layout before locking planks to avoid rework.
Cutting errors and damaged plank edges
Although cutting laminate seems straightforward, common mistakes like inaccurate measurements, dull blades, or rushing can leave you with uneven ends and chipped edges that ruin the install.
You should measure twice, use a sharp blade or fresh saw blade, clamp planks securely, and score before snapping when appropriate.
Sand minor chips and discard badly damaged pieces to keep seams tight and professional-looking.
Inadequate moisture protection causing warping
If you skip proper moisture protection, your new laminate can cup, swell, or separate at the seams within months.
You must test subfloor moisture, install a vapor barrier or underlayment rated for damp areas, and seal junctions in bathrooms or basements.
Skipping these steps lets humidity and spills warp planks, ruin locks, and force costly replacements you could’ve avoided.
Prevention, Tips, and Best Practices
Before you start laying boards, inspect and prep the subfloor so it’s flat, clean, and dry, and measure and plan the layout to cut waste.
Use proper cutting techniques and tools to prevent chipping, control moisture by acclimating planks and sealing junctions, and keep up with simple maintenance.
Know the red flags—uneven slabs, persistent moisture, or complex layouts—and call a pro when a job exceeds your tools or experience.
How to inspect and prepare the subfloor correctly
One clear inspection can save you hours of trouble later, so start by checking the subfloor for flatness, moisture, damage, and secure fastening.
Then take these steps before laying laminate:
- Use a straightedge to find high/low spots.
- Measure moisture with a meter.
- Replace rotten or soft sections.
- Screw or nail loose boards.
- Sand or level minor dips with patch compound.
Smart measuring and layout strategies to minimize waste
With the subfloor flat, dry, and secure, plan your layout to cut waste and speed installation.
Measure room length and width, map plank runs, and stagger end joints at least 12 inches. Start along the longest wall, factor expansion gaps, and calculate leftover piece sizes to use in adjacent rows.
Sketch cuts beforehand to reduce offcuts and trips to the saw.
Cutting techniques to avoid chipping and splintering
Cutting laminate without chipping comes down to choosing the right blade, supporting the plank, and using steady, controlled strokes so you get clean edges every time.
Use a fine-tooth carbide blade or laminate blade, score with a utility knife before sawing, clamp and backer-board the cut line, feed material slowly, and finish edges with light sanding to remove any minor splinters.
Moisture control, acclimation, and maintenance tips
After you’ve mastered clean cuts, you also need to manage moisture and acclimate planks before installation to prevent warping, buckling, or gaps later on.
Keep subfloor dry, use a vapor barrier where recommended, and let unopened boxes sit 48–72 hours in the installation room.
Maintain stable indoor humidity, clean spills quickly, and use felt pads on furniture to protect the surface and seams.
When to call a professional red flags and difficult scenarios
If you hit unexpected issues—uneven subfloor, persistent moisture, warped planks, or unfamiliar stair and threshold work—call a pro rather than pushing on and risking costly damage.
You should also get help for complex layouts, large rooms, radiant-heat systems, or active leaks.
A pro can diagnose structural problems, guarantee proper moisture barriers, and finish changes neatly, saving time and preventing warranty voids.
Cost and Time Estimates
Expect typical laminate material costs to range from about $1 to $5 per sq. ft. (with premium options higher) and plan labor time differences—DIY installs often take a weekend for a medium room while pros can finish faster but cost more.
Also consider factors that raise cost or time, like subfloor prep, room layout, trims, and removing old flooring.
Typical material costs (per sq. ft.) and budget ranges
Typical laminate flooring materials run roughly $0.70 to $5.00 per square foot, depending on quality, thickness, and brand, so you can plan a basic budget quickly by multiplying your room size by the per-square-foot cost you choose. Factor in underlayment, trims, and waste (usually 5–10%). Below is a quick cost guide:
| Item | Typical Cost |
|---|---|
| Budget | $0.70–$1.50/ft² |
| Mid-range | $1.50–$3.00/ft² |
| Premium | $3.00–$5.00/ft² |
| Extras | $0.10–$0.50/ft² |
Labor time estimates for DIY vs professional installation
When you measure your room and decide whether to DIY or hire pros, time is one of the biggest cost drivers.
DIYers should plan for several hours to a few days depending on room size and skill, while pros can usually finish the same job in a fraction of the time.
Expect a single small room DIY to take 4–8 hours; pros may do it in 2–4.
Factors that increase cost or time
Although laminate installation can seem straightforward, several factors can noticeably raise your time and cost.
Uneven subfloors need leveling, moisture barriers or underlayment add material and labor, complex room shapes and lots of trim require more cutting and finishing, and junctions or thresholds increase parts.
Moving furniture, removing old flooring, and installing radiant heat-compatible boards also extend project duration and expense.
Comparison: DIY vs Hiring a Professional
You can weigh your own skill level against the warranty and finish quality a pro offers to decide if this project’s within your reach.
Consider cost-benefit scenarios—materials, time, and possible rework—so you’re not surprised by hidden expenses.
Use a simple checklist (skill, tools, time, warranty, budget) to make a clear choice.
Skill, warranty, and quality differences
If you’ve got basic tools and patience, you can handle many laminate installs yourself, but professionals bring refined technique and guaranteed results that most DIYers can’t match. You’ll trade savings for warranty and finish quality; pros minimize gaps, guarantee proper subfloor prep, and back work with guarantees, while you gain control and learning but accept risk.
| Aspect | Implication |
|---|---|
| Skill | Precision vs learning curve |
| Warranty | Professional coverage vs limited |
Cost-benefit scenarios and decision checklist
Many homeowners face a simple trade-off: save money and learn a new skill by doing the install yourself, or pay more for a pro’s speed, warranty, and polished finish.
You’ll weigh time, budget, and confidence—use this checklist to decide:
- Budget: materials vs labor
- Time: project length and disruptions
- Skill: tool comfort and learning curve
- Warranty: coverage differences
- Quality: finish expectations
Real-World Scenarios and Mini Case Studies
You’ll read a simple single-room DIY example that outlines a realistic timeline and common pitfalls so you know what to expect.
Then you’ll see a tougher multi-room/wet-area case that highlights additional planning and waterproofing challenges.
Finally, you’ll learn how professionals corrected common DIY mistakes and what that taught the homeowners.
Simple single-room DIY example (timeline and pitfalls)
Tackle a small 12×12-foot bedroom to get comfortable with laminate flooring: you’ll plan for a weekend project, gather tools and materials the day before, and lay the boards in about 6–8 hours once you start.
Expect 1–2 hours prepping subfloor, 1–2 hours trimming and underlayment, and finishing plus trim in 1–2 hours.
Watch for uneven spots and tight door clearances.
Challenging multi-room or wet-area installation example
After you’ve handled a single-room weekend job and felt confident with tools and basic techniques, move on to a multi-room or wet-area project to learn how complexity changes the process.
You’ll manage shifts, expansion gaps, and door thresholds across rooms, and account for moisture barriers in kitchens or bathrooms.
Plan sequencing, acclimate planks, and verify underlayment continuity to prevent buckling or leaks.
When pros fixed common DIY mistakes
When a DIY install goes wrong, pros step in to diagnose the root cause and fix it without tearing up more floor than necessary.
You’ll see fixes for gapped seams, cupping from moisture, and poor connections.
Pros relevel subfloors, replace damaged planks, correct expansion gaps, and reinstall thresholds.
You’ll save time, prevent future damage, and learn techniques to avoid repeats.
FAQ
You’re probably wondering about common concerns like installing over existing floors, how much expansion gap to leave, and whether basements or concrete need special underlayment.
You’ll also want to know how to shift between laminate and other floor types and what to expect for lifespan and maintenance.
I’ll answer each of those questions clearly so you can make the right choices.
Can I install laminate flooring over existing flooring?
Wondering if you can lay new laminate over what’s already on the floor? Yes, often you can—over hardwood, vinyl, or tile—if the surface is flat, dry, and securely attached.
Remove loose pieces, fix high spots, and clean thoroughly. Avoid installing over carpet or damaged subfloors.
Check manufacturer guidelines and verify underlayment compatibility to maintain warranty and performance.
How much space should I leave for expansion?
Because laminate expands and contracts with temperature and humidity changes, leave a consistent gap around the room so the floor can move without buckling.
Aim for a 1/4 to 1/2 inch (6–12 mm) gap along walls and fixed objects; increase to 3/4 inch (18 mm) for large rooms over 40 feet or when manufacturer specifies.
Cover gaps with trim or threshold strips.
Is special underlayment required for basements or concrete slabs?
Walls and trim hide the expansion gap, but if you’re installing over a basement or concrete slab you’ll also need to think about moisture and insulation under the flooring.
Use a vapor barrier or underlayment with built-in moisture protection rated for concrete.
If the slab is cold or damp, pick insulated underlayment or add a subfloor system.
Always check manufacturer requirements for warranty.
How do I transition between laminate and other floor types?
1 clear junction piece will make the connection between laminate and another floor look finished and protect the edges from damage.
Pick a junction strip that matches height and profile—T-molding, reducer, or threshold. Measure gap, dry-fit, then secure per manufacturer instructions.
Allow expansion space, trim undercut door casings if needed, and use caulk only where recommended for a clean, durable seam.
How long does laminate flooring last and how do I maintain it?
While lifespan depends on quality and use, most laminate floors last 15–25 years with proper care.
To maintain yours, vacuum or sweep regularly, mop with a damp (not wet) microfiber, and use cleaners made for laminate.
Wipe spills immediately, use felt pads under furniture, and avoid steam cleaners.
Replace damaged planks promptly to prevent moisture and wear from spreading.