How to Seal Vinyl Flooring for Extra Protection and Easier Cleaning
You can protect vinyl flooring and make cleaning easier by prepping, choosing the right sealer, and applying thin, even coats. Clean and repair damage first, test a small area, then use a compatible primer or vinyl-specific polyurethane or acrylic finish. Work in small sections, sand lightly between coats, and allow full curing before heavy use. Reinspect yearly and recoat as needed for wear. Keep going to learn product choices, step-by-step tips, and troubleshooting.
How to Seal Vinyl Flooring for Extra Protection and Easier Cleaning
You can seal some vinyl floors, and in many cases it’s worth doing for extra protection and easier cleaning.
Sealing helps resist stains, scuffs, and water intrusion but won’t fix existing wear or change poorly adhered seams.
We’ll cover when you should seal, which products work, and the limits to expect.
Quick Direct Answer Can you and should you seal vinyl flooring?
Curious whether you can—and should—seal vinyl flooring? You can, but you usually don’t need to.
For worn, unprotected or glued seams, sealing can help. If you decide to, clean thoroughly, use a vinyl-compatible sealer, and follow manufacturer instructions.
Ask how do you seal vinyl flooring when choosing products—proper prep and the right sealer determine results and avoid damage.
Summary of benefits and limitations
Although you don’t usually have to seal vinyl, doing so can add a protective layer that makes cleaning easier and extends the floor’s life in specific situations.
You’ll weigh pros and cons: sealants help resist stains and wear but can alter appearance or trap moisture if applied improperly.
- Improves durability and cleaning
- Risks finish change or adhesion issues
- Not needed for most modern vinyl
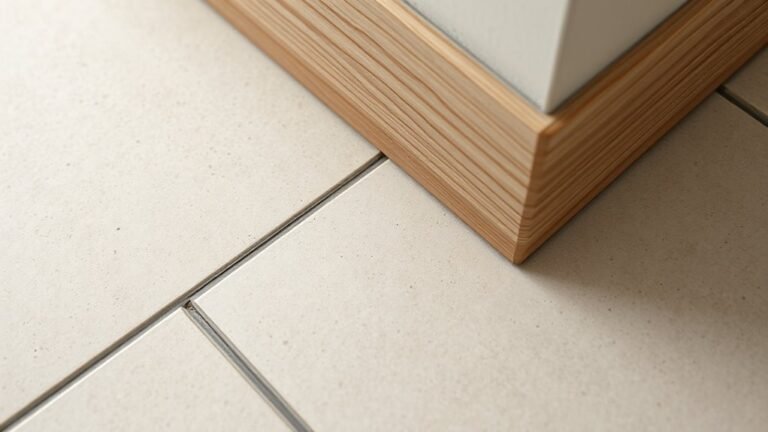
Basic Understanding What Is Vinyl Flooring and Why Seal It?
Vinyl comes in sheet, plank, and luxury tile formats, and you’ll want to know which type you have because the material and wear layer affect how it performs.
The surface composition—PVC core, printed layer, and a clear wear coat—determines whether a sealer will add protection or just sit on top.
You can skip sealing if you have a factory-applied wear layer or if the manufacturer specifically advises against it.
Types of vinyl flooring (sheet, plank, luxury vinyl tile)
Flooring comes in three common vinyl forms—sheet, plank, and luxury vinyl tile (LVT)—and each one behaves a bit differently when it comes to sealing and maintenance.
You’ll choose sealers and methods based on type:
- Sheet: continuous, fewer seams, easier to seal along edges.
- Plank: individual pieces, watch seams and edges.
- LVT: tile-like, grout lines may need special attention.
Surface composition and why sealing can help
Composition matters: vinyl combines a wear layer, printed design layer, core (or backing), and often a protective topcoat. Knowing those parts helps you see why sealing can be useful.
You’ll find scratches, seams, and porous edges where moisture or dirt can penetrate. Sealing fills tiny gaps, reinforces the surface, and makes cleaning easier without altering the visible design or flexibility.
When sealing is unnecessary or not recommended
Although sealing can protect some vinyl types, you don’t always need it—especially for modern, fully finished luxury vinyl planks or tiles that already have a durable factory-applied topcoat.
You shouldn’t seal low-quality sheet vinyl, glued seams, or floors with existing coatings that repel adhesives.
Avoid sealing in high-moisture areas if the manufacturer warns against it.
Always check manufacturer guidance before applying any sealant.
Overview of Sealers and Protective Products
You’ll encounter several sealer and coating options—acrylics, polyurethanes (water- and solvent-based), urethane finishes, topical floor coatings, waxes, and cleaners with protective polymers—each with different durability and maintenance needs.
Decide between DIY versus professional application by weighing ease, cost, and the risk of compatibility or VOC issues.
Use a simple product checklist (VOC level, vinyl compatibility, expected durability, sheen, and drying time) to narrow choices before you start.
Types of sealers and coatings (acrylic, polyurethane, water-based, solvent-based, urethane finishes)
Choosing the right sealer makes a big difference in how long your vinyl floor will look and perform. You’ll pick between acrylic (easy, glossy), polyurethane (durable), water-based (low odor), and solvent-based (tough). Urethane finishes balance clarity and wear. Compare options:
| Type | Benefit | Drawback |
|---|---|---|
| Acrylic | Easy apply | Less durable |
| Polyurethane | Very durable | Stronger odor |
| Water-based | Low odor | Softer finish |
Protective alternatives: floor finishes, topical coatings, waxes, cleaners with protective polymers
When you want to protect vinyl beyond basic sealers, several alternatives—topical finishes, polymer-based cleaners, waxes, and specialty coatings—offer different levels of protection and maintenance needs.
You can choose low-build topical finishes for easier recoats, polymer cleaners for routine protection, paste or liquid wax for gloss and scratch resistance, or durable specialty coatings for high-traffic areas—each balances durability, appearance, and upkeep.
Pros and cons of DIY vs. professional application
After weighing topical finishes, polymer cleaners, waxes, and heavy-duty coatings, you’ll need to decide whether to apply them yourself or hire a pro.
You’ll weigh cost, time, and skill. DIY saves money but risks uneven results; pros guarantee consistent application and warranty.
- DIY: cheaper, flexible schedule
- Pro: expertise, faster
- Both: require prep and proper ventilation
Product selection checklist (VOC, compatibility, durability, sheen, drying time)
One clear way to narrow your options is to run each sealer through a short checklist—VOC level, compatibility with your vinyl, expected durability, sheen, and drying time—so you can match product performance to your needs.
Check low VOC for indoor air quality, confirm manufacturer vinyl compatibility, estimate wear resistance for traffic, choose a sheen that hides flaws, and pick a drying time that fits your schedule.
Preparation What You Need Before Sealing
Before you start sealing, gather a checklist of tools and materials—sealant, applicators, patch kits, cleaners, gloves, and a respirator—and make sure the room has good ventilation.
Inspect the vinyl for tears, lifting seams, or gouges and repair them so the surface is smooth and stable.
Finally, thoroughly clean and degrease the floor, removing all residue so the sealer can bond properly.
Tools and materials checklist
Because proper sealing starts with the right gear, gather the essential tools and materials before you touch the floor: a mild cleaner, microfiber mop, vacuum or broom, painter’s tape, patching compound for seams or gouges, a compatible vinyl sealant or finish, clean applicator pads or lambswool rollers, disposable gloves, and rags for cleanup.
- Tape, patch, and prep materials
- Applicators and cleaning tools
- Sealant and disposal supplies
Safety precautions and ventilation
Now that you’ve gathered your tools and supplies, focus on safety and ventilation to protect yourself and your home during sealing.
Open windows and use fans to create cross-ventilation.
Wear a respirator rated for VOCs, nitrile gloves, and eye protection.
Keep pets and children out of the area.
Read product labels for specific hazards and follow disposal instructions for rags and containers.
Inspecting and repairing vinyl (tears, lifting seams, gouges)
Start by closely inspecting the entire floor for tears, lifting seams, and gouges so you can address problems that will compromise the seal.
Repair small tears with vinyl adhesive and a patch; press seams flat and inject seam sealer.
For deeper gouges, fill with a vinyl repair compound, sand smooth once cured, and make certain repairs sit flush before sealing.
Cleaning steps to ensure adhesion (degreasing, removing residue)
Before sealing, thoroughly clean the vinyl so the sealer can bond properly: sweep and vacuum to remove grit, then degrease with a mild detergent or a manufacturer-recommended vinyl cleaner to lift oils, waxes, and film.
Rinse twice with clean water, dry completely, and wipe with isopropyl alcohol on a microfiber cloth to remove residue.
Test a small area before full application.
Step-by-Step Sealing Process
Before you start, test the sealer in an inconspicuous spot to make sure it won’t harm the vinyl.
Then clean and dry the floor, repair any seams or damage, and apply a primer or compatibilizer if the product requires it.
Finally, use the right tools and technique to apply the first coat and allow the recommended drying time before proceeding.
Step 1 Test in an inconspicuous area
Pick a small, hidden spot—behind a cabinet, under a closet lip, or a corner beneath furniture—and apply the sealer exactly as you plan to for the rest of the floor.
Wait the recommended cure time, then inspect for color change, gloss variation, adhesion, and any surface softening.
If results are acceptable, proceed; if not, choose a different product or adjust application.
Step 2 Clean and dry the floor thoroughly
If your test patch looks good, move on to cleaning the whole floor so the sealer will bond properly.
Sweep or vacuum to remove grit, then mop with a pH-neutral cleaner to avoid residue.
Rinse thoroughly with clean water, changing buckets as needed.
Let the floor air-dry completely or speed drying with fans—no moisture should remain before you apply sealer.
Step 3 Repair seams and damaged areas
Once the floor’s clean and dry, you’ll want to fix any seams, cuts, or gouges so the sealer bonds evenly and looks smooth.
Press seams together, trim frayed edges, and use vinyl adhesive for gaps.
Fill deeper gouges with a vinyl patch compound, level it flush, and sand lightly when cured.
Remove dust before sealing to guarantee a seamless finish.
Step 4 Apply primer or compatibilizer if required
After repairing seams and filling gouges, check the vinyl manufacturer’s instructions and the sealer label to see whether a primer or compatibilizer is required for proper adhesion; some vinyl floors and water-based sealers need a specific product to bond correctly.
If required, choose the recommended primer, apply thin even coats with a lint-free applicator, let dry fully, and verify the surface is dust-free before proceeding.
Step 5 Apply first coat (technique, tools, drying times)
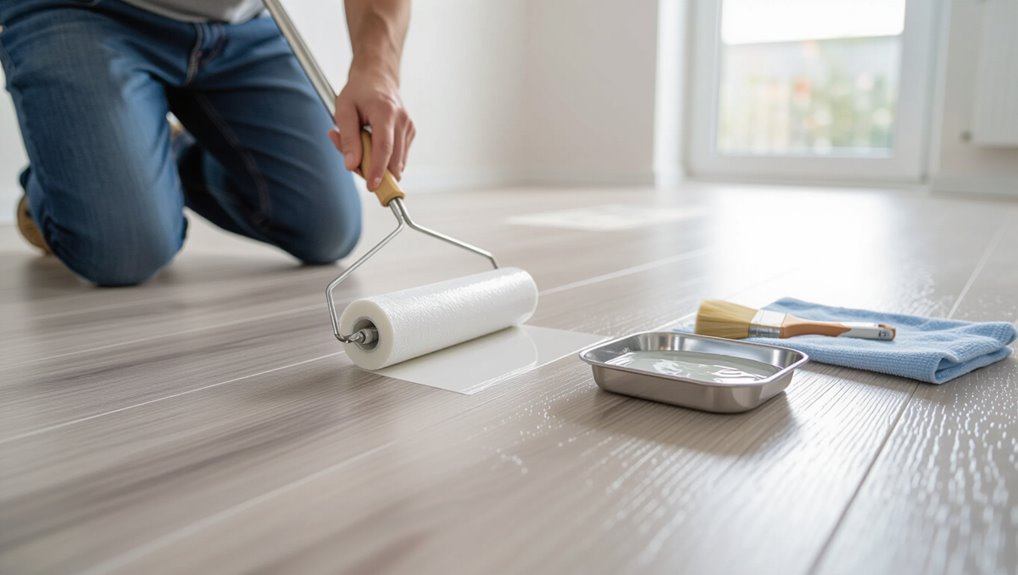
Start by gathering your tools—roller with a low-nap cover, angled brush for edges, a clean paint tray, and the manufacturer-recommended sealer—then work in small sections so the product stays wet enough to level smoothly; load the roller evenly, cut edges with the brush, roll thin consistent coats, avoid puddles, follow label drying times (typically 2–4 hours), and guarantee proper ventilation while the first coat cures.
Step 6 Light sanding or scuffing between coats (when applicable)
Although the first coat will look smooth, you’ll want to lightly sand or scuff the surface before applying another coat to promote adhesion and remove any dust nibs or raised texture.
Use fine-grit sandpaper or a scuff pad, work gently and evenly, vacuum or tack cloth dust, and avoid sanding through the sealer. This creates a key for the next layer without damaging the finish.
Step 7 Apply additional coats and final cure time
Now that the surface is clean and lightly scuffed, apply additional coats to build durability and an even sheen.
Work thinly and evenly, following manufacturer drying intervals between layers.
Lightly sand or scuff if recommended, then remove dust before each coat.
Allow the final coat to cure undisturbed for the full time specified—temperature and humidity affect cure—before light traffic.
Step 8 Post-application inspection and first-use guidelines
Before you walk on the floor or move furniture back in, inspect the surface carefully for uniform sheen, missed spots, runs, or dust nibs, and verify the sealer has cured to the firmness the manufacturer specifies.
If you find flaws, spot-sand and recoat per instructions.
Wait recommended cure time before heavy use, avoid wet cleaning for the period specified, and use felt pads under furniture.
Maintenance After Sealing
Once your vinyl is sealed, keep it clean with a regular routine of sweeping and damp mopping using pH-neutral cleaners to protect the finish.
Use soft cloths or microfiber mops and avoid abrasive pads, harsh chemicals, or wax-based products that can damage the sealant.
Check the floor every 6–12 months for dull spots or wear and recoat following the manufacturer’s instructions when you see thinning or diminished protection.
Recommended cleaning routine for sealed vinyl
If you want your sealed vinyl to keep its finish and resist wear, follow a simple, regular cleaning routine that avoids harsh chemicals and abrasive tools.
Wipe spills quickly, sweep daily, and mop weekly with a pH-neutral cleaner. Don’t let dirt build up.
- Sweep or vacuum high-traffic areas daily
- Damp-mop with approved cleaner weekly
- Spot-clean spills immediately
Safe cleaning products and tools to use and avoid
While sealed vinyl is durable, you should use the right products and tools to protect the finish and longevity.
Use gentle, pH-neutral cleaners and microfiber mops; avoid harsh chemicals, abrasive pads, and steam cleaners that can damage the sealant.
- pH-neutral cleaner + microfiber mop
- Soft-bristled broom or vacuum (no beater bar)
- Avoid bleach, ammonia, scouring powders
How to refresh or recoat the sealant (frequency and signs)
Because wear shows up gradually, you should check your vinyl’s sealant every 6–12 months and sooner in high-traffic areas; recoat when you see dull spots, scratches that don’t buff out, or water beading failure.
Lightly clean, scuff with a fine pad, remove dust, then apply a thin, even maintenance coat. Let cure fully before regular use.
Common Problems and How to Fix Them
If you spot bubbling, peeling, or flaking, check for moisture, poor prep, or incompatible products and strip and recoat the affected area.
For uneven sheen or streaks, clean and lightly scuff the surface, then apply thinner, even coats with the recommended applicator.
If adhesion’s failing, test small patches to identify the cause and correct it with proper cleaning, priming, or a compatible sealer.
Bubbling, peeling, or flaking causes and fixes
When vinyl starts to bubble, peel, or flake, it’s usually a sign that the adhesive failed, moisture got under the surface, or the floor was damaged during installation or by extreme temperature changes.
You should dry and dehumidify the area, cut out and replace badly damaged sections, reapply compatible adhesive for loose edges, and guarantee proper acclimation and temperature control to prevent recurrence.
Uneven sheen or streaks troubleshooting steps
Although vinyl is durable, uneven sheen or streaks can make a floor look old or poorly maintained. You’ll want to diagnose the cause before resealing.
Check for residue: clean with a pH-neutral cleaner and rinse thoroughly.
Test a small area with your sealer to confirm compatibility.
Guarantee even application technique, correct drying times, and consistent lighting to spot remaining imperfections before proceeding.
Adhesion failures diagnosing and corrective actions
Uneven sheen issues often point to surface contamination or application technique, but you’ll also want to watch for adhesion failures that can cause peeling, lifting, or bubbling.
If coating peels, test adhesion by taping and pulling; if it lifts, check for wax, oils, or old polish.
Remove contaminants, abrade lightly, reapply primer or compatible sealer, and allow proper cure between coats.
Comparison Sealing vs. Other Protective Options
When you compare sealing to regular maintenance and cleaners, sealing adds a protective barrier that reduces wear between cleanings.
You’ll also weigh sealing against replacing with higher-grade vinyl, which costs more up front but can offer built-in durability.
Consider the short-term savings of cleaning versus the long-term cost-benefit of sealing or upgrading to decide what fits your budget and lifespan goals.
Sealing vs. regular maintenance and cleaners
If you want long-lasting protection for your vinyl floor, sealing gives a durable, water-resistant barrier that regular maintenance and cleaners can’t match; routine cleaning removes dirt and surface grime, but doesn’t restore worn finishes or fill seams the way a proper sealer can. You’ll still clean regularly, but sealing reduces wear and eases spill cleanup.
| Task | Effect |
|---|---|
| Cleaning | Removes dirt |
| Sealing | Fills seams |
Sealing vs. replacing with higher-grade vinyl
Sealing gives your existing vinyl a protective layer that extends its life and hides minor wear, but you might also consider swapping in a higher-grade vinyl for a longer-term solution.
If you want quicker improvement and less disruption, seal.
If you need superior durability, enhanced textures, or warranty-backed performance, replacing with premium vinyl delivers those benefits—just plan for installation time and proper subfloor prep.
Cost-benefit summary (short-term vs long-term)
Although sealing gives you quick protection and immediate cosmetic improvement, you’ll want to weigh upfront cost, downtime, and expected life against alternatives like higher-grade vinyl, area rugs, or professional recoating.
Sealing is cheap, fast, and good short-term; higher-grade vinyl or professional recoating costs more but lasts longer.
Choose based on budget, traffic, aesthetics, and how long you plan to keep the floor.
Best Practices and Expert Tips
Pick the right time and conditions—work when temperatures and humidity are within the product’s recommended range so the sealant cures properly.
For high-traffic or moisture-prone rooms, you’ll want more durable products and extra coats, plus regular maintenance to protect the finish.
Choose a sheen that balances appearance and cleaning needs: satin for hiding wear, gloss for easy wiping, or matte for a low-reflective look.
Timing and environmental conditions for best results
When you’re planning to seal vinyl flooring, choose a window of dry, moderate weather and give the room time to acclimate—ideally 48 hours with temperatures between 60–80°F (16–27°C) and relative humidity under 60%.
Seal during daylight so you can spot missed areas, keep windows closed to prevent dust, and allow each coat to cure fully per product instructions before light use.
Tips for high-traffic areas and moisture-prone rooms
Because high-traffic zones and moisture-prone rooms face extra wear, you’ll need to choose tougher sealers and use techniques that boost durability and water resistance.
Pick a commercial-grade, water-resistant sealer; apply extra thin coats with proper drying between layers; reinforce seams and edges with waterproof caulk; use mats at entries; clean spills promptly; schedule more frequent resealing based on wear.
How to choose sheen and finish for appearance and cleaning ease
After reinforcing seams and choosing a heavy-duty sealer for traffic and moisture, you’ll want to decide on sheen and finish since they affect both appearance and how easy the floor is to keep clean.
Choose low-sheen (matte) to hide scratches and dirt, satin for balance, or gloss for shine and easier wiping.
Test samples, consider room lighting, and match style and maintenance needs.
Frequently Asked Questions
You probably have a few practical questions before you start sealing, like whether you can seal over existing finish or wax and how long a sealer will last on vinyl.
You’ll want to know if sealing will change the color or texture, whether it’s safe for kitchen and bathroom floors, and if vinyl plank over concrete can be sealed.
I’ll answer each of these clearly so you can choose the right products and prep methods.
Can I seal over existing floor finish or wax?
Wondering if you can seal over an existing finish or wax? You shouldn’t.
Sealers need direct contact with vinyl to bond properly. Remove wax or old finish with a recommended stripper or by thorough cleaning and deglossing, then rinse and dry.
Once the surface is bare and clean, apply the sealer per instructions for best adhesion and long-lasting protection.
How long does a sealer last on vinyl flooring?
How long a sealer lasts on vinyl depends on the product, traffic, and maintenance—most commercial vinyl sealers hold up between 3 and 7 years under normal household use, while high-traffic areas or cheaper products may need reapplication every 1–2 years.
Check manufacturer recommendations, monitor wear in entryways and kitchens, and plan inspections annually to catch thinning or dull spots early.
Will sealing change the color or texture of my vinyl?
Will sealing change the color or texture of your vinyl? Generally no—most clear sealers are formulated to be non-yellowing and won’t alter texture noticeably.
However, high-gloss coatings can add shine and some sealers might slightly deepen printed colors.
Test a small hidden area first so you can confirm visual changes before treating the entire floor.
Is sealing safe for kitchen and bathroom vinyl floors?
If a clear sealer doesn’t noticeably change your vinyl’s look, you may still be wondering whether it’s safe to use in wet rooms like kitchens and bathrooms.
Yes—properly formulated sealers designed for vinyl are water-resistant and protect against spills, stains, and wear.
Test compatibility first, follow manufacturer instructions, guarantee good ventilation during application, and avoid slippery glossy finishes in high-moisture areas.
Can I seal vinyl plank flooring installed over concrete?
Wondering whether you can seal vinyl plank flooring that’s been installed over concrete?
Yes—you can, but only if the vinyl is fully adhered and the surface is clean, dry, and free of alkaline efflorescence.
Use a compatible, breathable sealer recommended by the flooring manufacturer.
Test a small area first.
Avoid coatings that trap moisture beneath the vinyl or alter its finish or flexibility.
Appendix Quick Reference Resources
Before you begin, you’ll want a quick sealing checklist to confirm tools, surface prep, and safety steps.
Pick products with the right adhesion, low-VOC formulas, and clear curing times listed.
If the floor has major damage, persistent moisture, or you’re unsure about adhesion, call a professional.
Quick sealing checklist before you start
Grab these essentials and run through a quick checklist so you won’t stop mid-job:
- Clean, dry floor and tack cloths to remove dust and debris
- Appropriate sealant, application tools (brush/roller), and gloves
- Ventilation plan, drop cloths, and access restriction signs
Confirm surface repairs are done.
Test a small patch for adhesion, and schedule curing time before foot traffic.
Recommended product features to look for
When you’re choosing a sealant, focus on key features that guarantee adhesion, durability, and compatibility with vinyl: look for products labeled specifically for vinyl or resilient flooring, high solids content for better film build, UV and chemical resistance, and a slip-resistant finish if the area gets wet.
- VOC-compliant and low-odor for indoor use
- Water-based for easy cleanup and flexibility
- Clear, non-yellowing formula for appearance preservation
When to call a professional
If you’re unsure about surface prep, have extensive damage, or face complex layouts, call a professional—these situations need the experience and tools that DIYers usually don’t have.
You’ll save time and avoid costly mistakes.
Consider hiring pros when:
- seams need repair or replacement
- subfloor issues exist (moisture, unevenness)
- warranty or large-area sealing is required