How to Clean Textured Floor Tiles Without Leaving Grime in the Grooves
You can get textured floor tiles truly clean by sweeping or vacuuming first, applying a pH‑neutral cleaner, agitating grooves with a soft nylon or grout brush (or rotary attachment for large areas), then rinsing thoroughly and drying with a microfiber mop to remove residue. For stubborn grime use a steam cleaner or targeted stain treatments and test on a hidden spot. Follow a regular schedule, seal grout where appropriate, and keep going below for detailed steps and product tips.
How to Clean Textured Floor Tiles Without Leaving Grime in the Grooves (Quick Answer)
You can beat grime in textured tile grooves with a quick, targeted routine.
Start by sweeping, then scrub grout lines with a stiff brush and a mild cleaner, rinse, and blot dry.
Finish by running a microfiber mop over the surface to lift any remaining residue.
Short step-by-step summary for fast cleaning
Start by sweeping or vacuuming to remove loose dirt from the surface and grooves.
Mix mild detergent with warm water, apply with a mop or brush, and agitate grout lines. Rinse with clean water and a microfiber mop.
Spot-treat stubborn grime with a soft brush or baking soda paste.
Dry thoroughly and seal grout if needed to keep textured tiles cleaner longer.
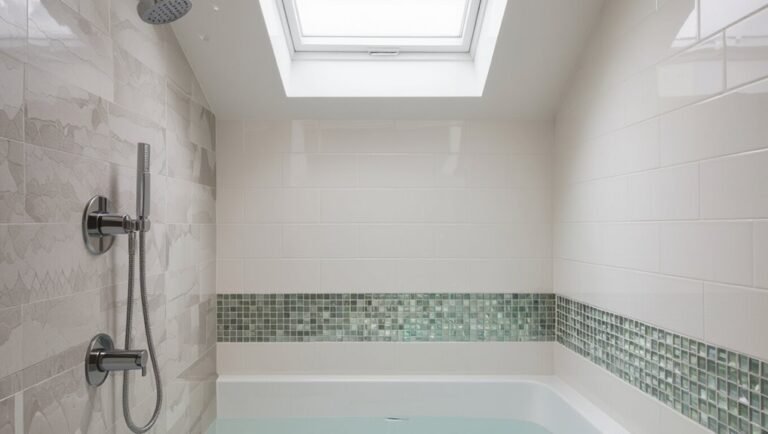
Why Textured Tiles Trap Grime (Basic Understanding)
You’ll notice textured surfaces and grout lines catch dirt because their tiny ridges and pores give oil, mud, pet hair, and soap scum places to cling.
Different materials behave differently—porcelain and ceramic tend to have tighter textures that are easier to scrub, while natural stone’s pores hold grime and need gentler, targeted care.
Knowing the common grime types and your tile material makes it easier to choose the right cleaning method.
How texture and grout lines collect dirt
Because textured tiles and grout lines create tiny valleys and ridges, dirt, dust, and liquids get trapped where smooth surfaces would shed them.
You’ll notice particles settle in crevices, grout absorbs spills, and foot traffic grinds debris deeper.
Moisture holds grime, encouraging stains and mildew.
Regular sweeping, targeted scrubbing, and quick drying prevent buildup and make cleaning more effective.
Types of textured tiles and how they affect cleaning (porcelain, ceramic, natural stone)
Tile material matters: porcelain, ceramic, and natural stone each have different textures, porosity, and grout interactions that change how grime settles and what cleaning they need.
You’ll scrub porcelain less—dense, low-porosity surface resists staining.
Ceramic with textured glaze cleans easily but may trap debris in mold.
Natural stone soaks and etches; you’ll need pH-neutral cleaners and sealant-maintenance to prevent deep dirt.
Common sources of grime (oil, mud, pet hair, soap scum)
When textured floors have grooves and pits, they hold onto common grime like oil, mud, pet hair, and soap scum more than smooth surfaces do.
You’ll find oil from kitchens seeps into crevices, mud from shoes packs in, pet hair nests and traps dirt, and soap scum clings after bathing.
Target each source with appropriate pre-treating and agitation to avoid residue buildup.
Tools and Supplies You Need (Preparation)
Before you start, gather essential tools like a broom, stiff and scrub brushes, a microfiber mop, and gentle cleaners such as neutral or pH-safe detergents (or simple homemade mixes).
Skip abrasive pads and harsh acids that can damage textured tiles, and keep steam cleaners or pressure washers in mind for deep-set grime—used carefully and only when the tile and grout can handle them.
With the right supplies and a clear plan, you’ll avoid harm and make cleaning more effective.
Essential tools (brooms, stiff brushes, scrub brushes, microfiber mop)
Get a few sturdy tools on hand so you can remove dirt from the grooves and restore the texture’s grip: a broom for dry debris, a stiff brush for grout lines, a handheld scrub brush for spot cleaning, and a microfiber mop for a final pass.
- Broom — sweep loose grit.
- Stiff brush — work grooves.
- Scrub brush — target stains.
- Microfiber mop — lift residue.
Recommended cleaning solutions (neutral cleaners, pH-safe detergents, homemade mixes)
Now that you’ve gathered the right tools, choose cleaners that protect the tile’s texture and grout.
Use neutral, pH-safe detergents diluted per label; avoid concentrated acids.
Try mild homemade mixes like vinegar-free baking soda paste for spots or a few drops of castile soap in warm water for general cleaning.
Recommended options:
- pH-neutral floor cleaner
- Gentle dish soap mix
- Baking soda paste
- Castile soap solution
Tools to avoid (abrasive pads, harsh acids)
Steer clear of anything abrasive or highly acidic that can scratch textured tiles or eat away grout—things like steel wool, scouring pads, and concentrated bleach or muriatic acid.
You should also avoid tools or chemicals that leave residues or damage sealants. Use gentler options instead.
- Steel wool
- Scouring pads
- Concentrated acids
- Harsh, residue‑forming cleaners
When to use steam cleaners or pressure washers
Although steam cleaners and pressure washers can be powerful allies, you should only use them when your textured tiles and grout are in good condition and the manufacturer’s guidelines allow it; otherwise, high heat or force can lift grout, strip sealants, or damage delicate textures.
Test a small area, use low pressure/temperature, keep moving, and avoid joints or loose tiles to prevent harm.
Step-by-Step Cleaning Process
Start by pre-cleaning the floor to remove loose debris and dust so your cleaner can work effectively.
Pick a cleaner suited to your tile, apply it and let it dwell for the recommended time.
Then agitate the grooves with a proper brush using short, controlled strokes.
Finish by rinsing thoroughly to remove all residue.
Step 1 Pre-clean: remove loose debris and dust
1. Start by sweeping or vacuuming the textured tiles to lift loose dirt, hair, and grit.
Work methodically from one corner toward an exit so you don’t reintroduce debris. Use a soft-bristled broom or a vacuum with a hard-floor setting to protect the texture.
Empty the vacuum or dustpan frequently to prevent redistributing collected particles.
Step 2 Choose the right cleaner for your tile type
Choose a cleaner that matches your tile material—ceramic, porcelain, natural stone, or sealed concrete—because using the wrong product can damage finishes or leave residues in the texture.
Read labels for pH: neutral cleaners suit stone and sealed concrete; mild alkaline works for ceramic and porcelain.
Avoid bleach or acidic cleaners on stone.
Test a small inconspicuous area before full use.
Step 3 Apply cleaner and let it dwell (dwell time guidelines)
Now apply the cleaner evenly across a manageable section of tile—about a 4×4-foot area—and let it dwell so the solution can penetrate the texture and loosen dirt and oils.
Let most mild cleaners sit 3–5 minutes; stronger or enzymatic products may need 10–15 minutes. Don’t let residues dry completely; rewet if needed.
After dwell, proceed to agitation and rinsing.
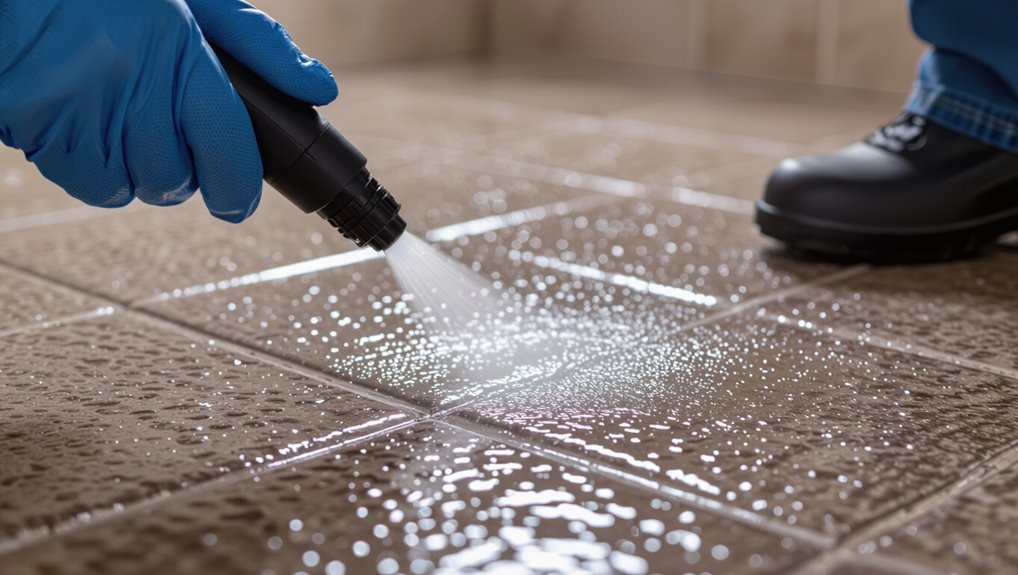
Step 4 Agitate grooves with the correct brush technique
Scrub the grout and textured grooves with a stiff nylon brush, working in short, overlapping strokes so you don’t miss embedded dirt; hold the brush at a slight angle to reach into recesses and keep consistent pressure to avoid damaging the tile.
Focus on small sections, lift debris with quick back-and-forth motions, and use a corner brush for tight spots so you clean thoroughly without scrubbing forever.
Step 5 Rinse thoroughly to remove residue
After you finish agitating the grooves, rinse the area thoroughly to lift loosened dirt and any cleaning solution left behind.
Use clean water and a stiff-flow spray or mop, working from one side toward a drain or exit.
Check grooves for remaining residue, repeat targeted rinses as needed, and change rinse water frequently so you don’t redeposit grime.
Step 6 Dry and buff to prevent water spots and residue
Once the tile is rinsed, dry it promptly with a microfiber mop or absorbent towels to prevent water spots and mineral streaks from forming.
Work in small sections, wiping grooves and edges.
After drying, buff with a clean, dry microfiber cloth or mop to lift any remaining residue and restore texture.
Inspect under good light and touch up damp areas immediately.
Deep Cleaning and Stain Removal Techniques
When your regular cleaning won’t cut it, you’ll need targeted deep-cleaning methods for grout lines and textured grooves using stiff brushes or powered scrubbers.
Consider steam or ultrasonic cleaners to lift embedded grime, and use specific treatments for oil, rust, mold, and hard-water deposits.
If stains persist or the tile is delicate, call a professional to avoid damage.
Tackling ingrained dirt in grout and grooves (scrubbing methods)
Grab a stiff brush and get ready to tackle the grout lines and textured grooves where dirt and stains hide; deep cleaning here needs targeted scrubbing more than just mopping.
Work small sections, apply a pH-appropriate cleaner, scrub along grooves with firm, consistent strokes, rinse frequently, and blot excess moisture.
Repeat stubborn spots, then seal grout when dry to prevent future buildup.
Using steam or ultrasonic cleaners for deep grime
If you’re fighting grime that’s rooted deep in textured tiles, steam and ultrasonic cleaners can loosen and lift soils without harsh chemicals; they work by breaking bonds between dirt and the surface so you can wipe it away more easily.
Use low-pressure steam or a handheld ultrasonic unit, move slowly, test a hidden area, and follow manufacturer guidelines to avoid damage and trapped moisture.
Removing specific stains: oil, rust, mold, hard water deposits
Tackle stubborn spots with targeted methods: oil needs a degreaser or absorbent powder, rust calls for a chelator or mild acid, mold responds to a biocide or diluted bleach, and hard water deposits dissolve with an acid-based cleaner or vinegar solution.
- Blot oil, sprinkle powder, wait, brush, vacuum.
- Test rust remover on a hidden tile first.
- Scrub mold with a stiff brush, rinse well.
- Soak deposits, scrub gently, neutralize acid.
When to call a professional
When stains penetrate deep into grout or textured pores, or when repeated home treatments haven’t restored the tile, call a professional—especially for extensive oil seepage, embedded rust, biohazardous mold, or mineral encrustations that resist safe acids.
You should call a pro when DIY risks damage, warranties matter, specialized equipment or chemical control is needed, or persistent odors and staining indicate hidden contamination.
Comparison: Cleaning Methods and Their Effectiveness
You’ll want to weigh manual scrubbing against steam cleaning to see which handles grout and texture best.
Compare commercial cleaners to homemade solutions for cost, safety, and residue.
Also consider the pros and cons of pressure washing for textured tiles, since it can be effective but may damage grout or loosen tiles.
Manual scrubbing vs. steam cleaning
1 clear choice often comes down to whether you want hands-on control or a quicker, less physical option: manual scrubbing gives you targeted pressure for stubborn grime, while steam cleaning sanitizes and loosens dirt with minimal elbow grease. You’ll choose based on time, effort, and tile durability.
| Factor | What it means |
|---|---|
| Effort | Physical vs low |
| Speed | Slow vs fast |
| Effectiveness | Spot vs overall |
| Risk | Scratches vs moisture |
Commercial cleaners vs. homemade solutions
Although both commercial cleaners and homemade solutions can remove dirt from textured tiles, they differ sharply in ingredients, cost, and how they tackle grime. You’ll pick commercial for fast, standardized results; homemade for budget and gentler chemistry. Test first.
| Type | Cost | Effectiveness |
|---|---|---|
| Commercial | Higher | Consistent |
| Homemade | Lower | Variable |
Pros and cons of pressure washing for textured tiles
Because pressure washing blasts away embedded dirt and mildew with high-pressure water, it can be the quickest way to restore textured tiles, especially outdoors or in heavily soiled areas.
You’ll remove deep grime fast, save time, and need fewer chemicals. However, you risk etching grout, loosening adhesive, and forcing water into seams.
Use appropriate pressure, nozzle, and distance, or hire a pro.
Common Mistakes That Leave Grime Behind
Don’t overload textured tiles with too much soap or the wrong pH cleaner, because residue will trap grime.
Avoid flat mops that don’t agitate the surface, skip poor rinsing or drying, and don’t use a soft brush or excessive pressure that leaves dirt in grooves.
I’ll walk you through the right products, tools, and techniques to actually remove buildup.
Overuse of soap or wrong pH cleaners
When you reach for a generous squirt of soap thinking more will clean better, you can actually trap dirt in the tile’s grooves and leave a filmy residue that attracts grime.
Use a mild, pH-neutral cleaner and dilute it per instructions. Rinse thoroughly and change mop water often.
Avoid acidic or alkaline solutions that can etch glaze or leave sticky deposits that collect dirt.
Using flat mops without agitation
Relying on a flat mop alone can leave dirt trapped in the grooves of textured tiles, even if you used the right cleaner and rinsed well.
You need agitation: scrub with a brush or microfiber pad to dislodge grit, work the cleaner into grooves, and lift residue.
Move the mop frequently, change pads when soiled, and inspect grooves to guarantee you’re not just pushing grime around.
Rinsing poorly or skipping drying
Skip proper rinsing or drying and you’ll leave a hazy film, sticky residue, or trapped grime that quickly attracts more dirt.
After scrubbing, rinse with clean water to remove detergent and loosened soil from the grooves.
Wring mops often, change rinse water, and blot puddles with a microfiber cloth.
Finish by air-drying or using a dry mop to prevent streaks and buildup.
Using the wrong brush type or too much pressure
Although a stiff bristle brush might look like the quickest fix, using the wrong brush or scrubbing too hard can grind dirt deeper into textured tiles and damage grout.
Use a soft nylon brush or a brush with angled, flexible bristles and let cleaning solutions loosen soil.
Apply moderate pressure, work with the texture, and check grout frequently to avoid abrasion and trapped residue.
Prevention and Best Practices to Keep Grooves Clean
Keep a simple maintenance schedule with quick daily routines so dirt never builds in the grooves.
Use sealers, mats, and entryway controls to block grit before it reaches your textured tiles, and follow a seasonal deep-clean checklist to tackle embedded grime.
After cleaning, reapply protective finishes as needed to preserve appearance and slip resistance.
Regular maintenance schedule and quick daily routines
When you follow a simple daily routine and stick to a regular schedule, you’ll prevent dirt from building up in the grooves and cut down on deep-cleaning time.
Do these quick steps regularly:
- Sweep or vacuum high-traffic areas each day.
- Damp-mop with a mild cleaner every few days.
- Spot-clean spills immediately.
- Inspect grout weekly and address small buildup promptly.
Protective measures: sealers, mats, and entryway controls
To prevent dirt from settling into grooves, use a combination of sealers, entryway controls, and strategically placed mats that stop grit at the door and simplify cleaning.
Seal textured tiles with a recommended penetrating sealer to reduce absorption, place coarse scraper mats outside and absorbent mats inside, and enforce shoe removal or a walking-zone mat to minimize tracked debris and extend time between deep cleans.
Seasonal deep-clean checklist
Although grooves trap grit, a focused seasonal deep-clean lets you restore textured tiles without damage.
Work room by room: sweep, vacuum with brush attachment, and pre-treat grout and grooves with pH-neutral cleaner.
Agitate with a soft-bristle brush, rinse thoroughly, and extract standing water.
Inspect for residue, repeat stubborn spots, then allow full drying.
Reinstall mats and note next deep-clean date.
How to maintain finish and slip resistance after cleaning
If you want your textured tiles to stay safe and looking their best, focus on preventing buildup and protecting the finish after each clean.
Rinse thoroughly, neutralize cleaners, and dry to prevent residue. Apply a manufacturer-approved anti-slip treatment if needed.
Use microfiber mops and do regular spot-cleaning of grooves. Re-seal grout annually and avoid waxes that clog texture or reduce traction.
Cost, Time, and Frequency Guide
How often you clean textured tiles depends on foot traffic and the tile material—low-traffic areas might need weekly attention while high-traffic zones may need daily spot cleaning and monthly deep scrubs.
Routine cleaning usually takes minutes per session and costs little, while deep cleaning can take a few hours and may justify hiring help or renting equipment.
Consider investing in a steam cleaner or powered scrubber if you have large areas, frequent heavy soil, or stubborn grout, since the time saved often offsets the cost.
How often to clean based on traffic and tile type
Traffic and tile type determine how often you’ll need to clean textured floor tiles, and tailoring your schedule to both can save time and money.
High-traffic areas (entryways, kitchens) need weekly sweeping and mopping; moderate-traffic rooms can be biweekly.
Porous or deeply textured tiles require more frequent attention than smooth ceramic.
Adjust frequency after a month to match wear and visible grime.
Estimated time and cost for routine vs. deep cleaning
Because your tile type and room use affect effort and expense, you’ll save time and money by distinguishing routine care from occasional deep cleans.
Routine maintenance: 10–30 minutes weekly for sweeping and quick mopping, low cost for basic supplies.
Deep cleaning: 1–3 hours quarterly or yearly, higher cost for specialty cleaners and grout work.
Adjust frequency for traffic and stains.
When investment in tools (steam cleaner, scrubber) pays off
If your routine and periodic cleaning start eating up time or still leave stubborn grout and textured grooves dirty, it’s worth weighing whether a steam cleaner or motorized scrubber will pay off.
Calculate purchase vs. rental, hourly labor saved, and how often you deep-clean.
Buy if you clean frequently, manage large areas, or need chemical-free sanitizing; otherwise rent for occasional intensive jobs.
Tools & Product Recommendations (Quick Shopping Guide)
You’ll want the right brush heads and models for textured tiles—stiff nylon scrub brushes and a rotary brush attachment work best for deep grooves.
Pick commercial cleaners formulated for your tile type (pH-neutral for natural stone, stronger biodegradable cleaners for glazed ceramic) and always test first.
Finish with a grout sealer and a compatible surface sealer to protect grout lines and textured surfaces from stains and wear.
Top brush types and models for textured tiles
Choosing the right brush can make cleaning textured floor tiles faster and more effective, so pick tools that match the tile’s grit and the type of grime you face.
You’ll want durable, ergonomic options:
- Stiff nylon deck brush — scrubs grooves without scratching.
- Soft-bristle scrub brush — for delicate textures.
- Grout brush — targets narrow lines.
- Power scrub attachment — speeds large areas.
Recommended commercial cleaners by tile type
Different tile materials call for specific cleaners, so match products to ceramic, porcelain, natural stone, or quarry tiles to avoid damage and get the best results.
Choose pH-neutral or manufacturer-recommended cleaners for sensitive stone, stronger alkaline cleaners for porcelain/ceramic, and heavy-duty degreasers for quarry. Test first on a hidden spot.
- Ceramic: mild alkaline cleaner
- Porcelain: concentrated degreaser
- Natural stone: pH-neutral stone soap
- Quarry: industrial floor cleaner
Sealer recommendations for grout and textured surfaces
Because grout and textured tile trap dirt and moisture, sealing them is one of the most effective steps you can take to protect appearance and simplify maintenance.
Choose a penetrating sealer for grout and unglazed textures to repel water without changing look. Use a topical sealer only on glazed or decorative surfaces.
Reapply every 1–3 years, test compatibility, and follow manufacturer instructions for best results.
FAQ
You’ll find quick answers here to common concerns like using a steam cleaner on textured tiles, whether grout sealing keeps grime out of grooves, and the best way to lift oil stains from textured porcelain.
You’ll also learn if vinegar is safe for your tiles and how to scrub deep grooves without scratching the surface.
If you have a specific tile type or stain, mention it and we’ll tailor the advice.
Can I use a steam cleaner on all textured tiles?
Can you use a steam cleaner on textured tiles? You can on most unglazed and glazed ceramic or porcelain tiles, but check manufacturer guidance first.
Avoid steam on delicate natural stone, loose tiles, or damaged grout—high heat and moisture can crack or lift materials.
Test a small hidden area, use low pressure, and dry grooves thoroughly to prevent moisture damage or mold.
Will sealing grout prevent grime in the grooves?
How well sealing grout keeps grime out of grooves depends on the sealer quality and how well you apply it. A good penetrating or epoxy sealer fills pores, repels water and dirt, and makes routine cleaning easier.
You’ll need to clean grout thoroughly before sealing, follow manufacturer instructions, and reseal periodically; otherwise grime can still accumulate in textured crevices over time.
How do I remove oil stains from textured porcelain?
Sealing helps keep grime out of grout, but oil stains on textured porcelain need a different approach because they penetrate tiny surface pores and cling in grooves.
Blot fresh oil, then apply a dry absorbent like baking soda or cornstarch for 15–30 minutes. Sweep up, then use a pH-neutral degreasing cleaner with a nylon brush; rinse and repeat until the stain lifts.
Is vinegar safe for cleaning textured floor tiles?
Wondering whether vinegar’s safe on textured floor tiles?
You can use diluted white vinegar (about 1 part vinegar to 10 parts water) for ceramic or glazed porcelain, but avoid strong concentrations and repeated use on natural stone, unglazed tiles, or grout.
Test a small area first, rinse thoroughly with clean water, and dry to prevent residue or etching.
How can I avoid scratches while scrubbing deep grooves?
When you’re scrubbing deep grooves, pick tools and motions that clean without scraping the surface.
Use soft-bristled nylon brushes, microfiber cloths, or a toothbrush for tight spots. Work with gentle, circular motions and avoid metal scrapers or stiff brushes.
Rinse frequently to remove grit that causes abrasion, and test any new tool on an inconspicuous tile before full use.