
How to Install Bathroom Tile Around a Tub Like a Pro
You can install tile around a tub like a pro by prepping the surface, fixing any rot or plumbing issues, and using cement backer board with a waterproof membrane. Plan a layout, measure for cuts, and use the right thinset and trowel for full coverage. Set tiles with spacers, check level and flatness to avoid lippage, then grout, seal, and caulk joints. Follow proper cure times and tips below to learn the full process.
Quick Answer Can You Install Tile Around a Tub and What to Expect
Yes — you can tile around a tub by prepping the surface, waterproofing the backer, setting tiles, and grouting; a small surround can take a weekend while larger jobs may need a few days.
If you’re comfortable with measuring, cutting tile, and waterproof details, DIY can save money, but call a pro for complex layouts, shower-tub combos, or if plumbing or waterproofing is uncertain.
Expect to spend more time on prep and waterproofing than on laying tile itself.
Short summary of steps and time estimate
You can install tile around a tub yourself, but expect several focused steps and a few days of work depending on your experience and bathroom size.
Start by demo and waterproofing, then measure, cut, and set tile using proper mortar and spacers.
Grout, seal, and reinstall trim.
For how to install bathroom tile around tub, plan 2–5 days for small to medium jobs; longer if complex.
When to hire a pro vs. DIY
After you’ve mapped out the steps and time involved, decide whether to tackle the job yourself or call a pro based on your skill level, schedule, and the project’s complexity.
If you’ve tiled before, have steady hands, and can manage waterproofing, you’ll save money DIY.
Hire a pro for tricky layouts, uneven walls, plumbing moves, or if you need guaranteed waterproofing and a warranty.
Basic Understanding Materials, Tools, and Concepts
Before you start tiling around a tub, you’ll want to know which tile types are safe for wet areas, how waterproofing works (backer board, cement board, membranes, and sealants), and which tools and supplies you’ll need and why.
You’ll also learn key measurements and layout principles so tiles fit cleanly and drains and fixtures align. This foundation will make the actual installation faster and prevent moisture problems later.
Types of tile suitable for tub surrounds
Choosing the right tile for a tub surround matters because it affects water resistance, durability, and maintenance.
You’ll want materials rated for wet areas like porcelain, ceramic, glass, natural stone with proper sealing, and engineered stone, each offering different slip resistance, grout needs, and aesthetic options.
- Porcelain/ceramic: durable, low-porosity.
- Glass: non-porous, decorative.
- Natural/engineered stone: needs sealing, premium look.
Waterproofing basics: backer board, cement board, waterproof membrane, and sealants
When you’re tiling a tub surround, waterproofing is the foundation that keeps moisture out of the wall cavity and prevents mold and rot.
It combines the right backer board, a continuous waterproof membrane, and proper sealants to create a durable, water-tight system.
You’ll choose cement or fiber backer, apply a membrane over seams, and seal penetrations carefully.
- Backer board choice
- Continuous membrane
- Sealant and joints
Tools and supplies checklist with purpose
Now that your waterproofing basics are set, gather the right tools and materials so you can work efficiently and avoid mistakes.
You’ll need quality tile, thinset, grout, and sealant plus trowel, tile cutter, spacers, level, rubber float, and sponge. Know each item’s purpose to prevent rework.
- Cutting: tile cutter, nippers
- Setting: trowel, thinset, spacers
- Finishing: grout, float, sealant
Key measurements and layout principles
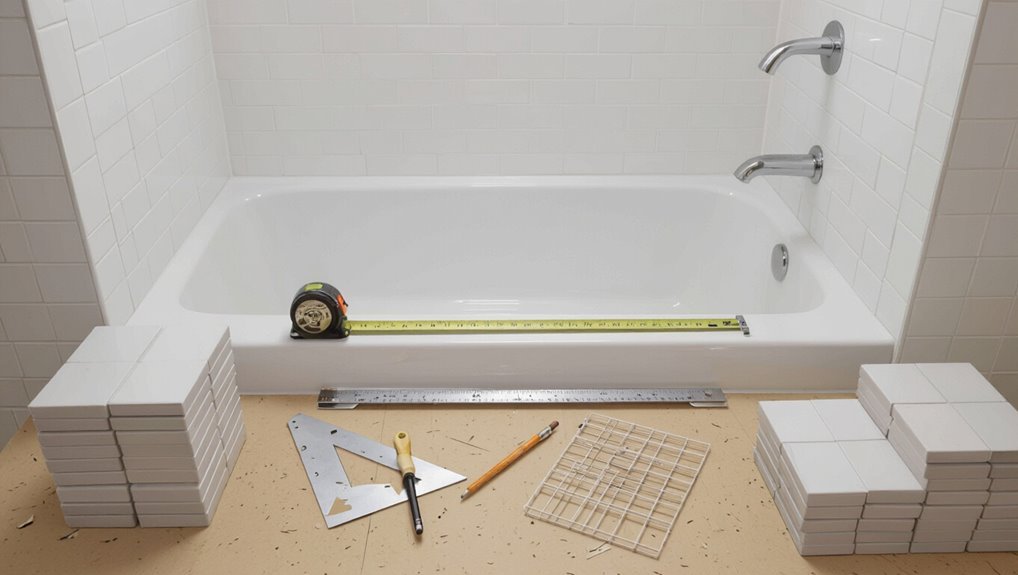
Start by measuring the room and plotting a simple layout so you know where tiles will fall and which cuts you’ll need; accurate measurements let you center focal areas, minimize awkward slivers at edges, and calculate how much tile and setting material to buy.
Use a level and chalk lines to establish plumb and level baselines, plan for grout joints, and layout dry runs to verify symmetry.
Prep Work Safety, Demolition, and Surface Preparation
Before you start tiling, assess the existing tub and surrounding walls for damage, rot, and any plumbing issues that could affect the job.
Remove old tile, drywall, and trim carefully with proper PPE, then inspect and repair framing, studs, and plumbing as needed.
Finally, install or replace backer board and a waterproofing membrane to create a solid, moisture-resistant surface for your new tile.
Assessing the existing tub and surrounding walls
Assess the tub and surrounding walls carefully to identify water damage, mold, loose tiles, and the type of substrate you’re dealing with; this determines whether you can tile over the existing surface or need to demo down to the studs.
Check for soft spots, wood rot, and compromised backing; inspect caulking, flange attachment, and plaster or cement board condition so you can plan repairs and proper waterproofing.
Removing old tile, drywall, and trim safely
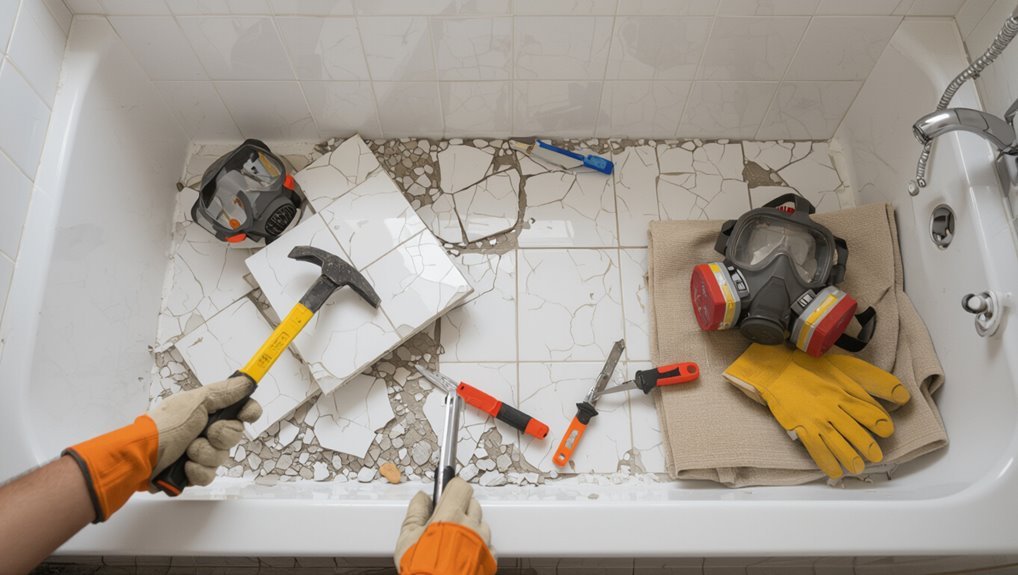
Once you’ve confirmed where damage and weak backing exist, move on to removing old tile, drywall, and trim with safety and control in mind.
Wear eye, lung, and hand protection; score grout to limit breakage; pry trim gently to save pieces.
Follow waste disposal rules and keep water off exposed framing.
- PPE
- Controlled demolition
- Clean, dry work area
Inspecting and repairing framing, studs, and plumbing
When you pull back the tile and drywall, take a careful look at the studs, framing, and any exposed plumbing so you can spot rot, mold, loose fasteners, or leaks that would compromise the new installation.
Replace or sister damaged studs, secure framing, tighten or replace corroded fasteners, and repair plumbing leaks or fittings before proceeding so the substrate is solid and dry.
Installing or replacing backer board and waterproofing membrane
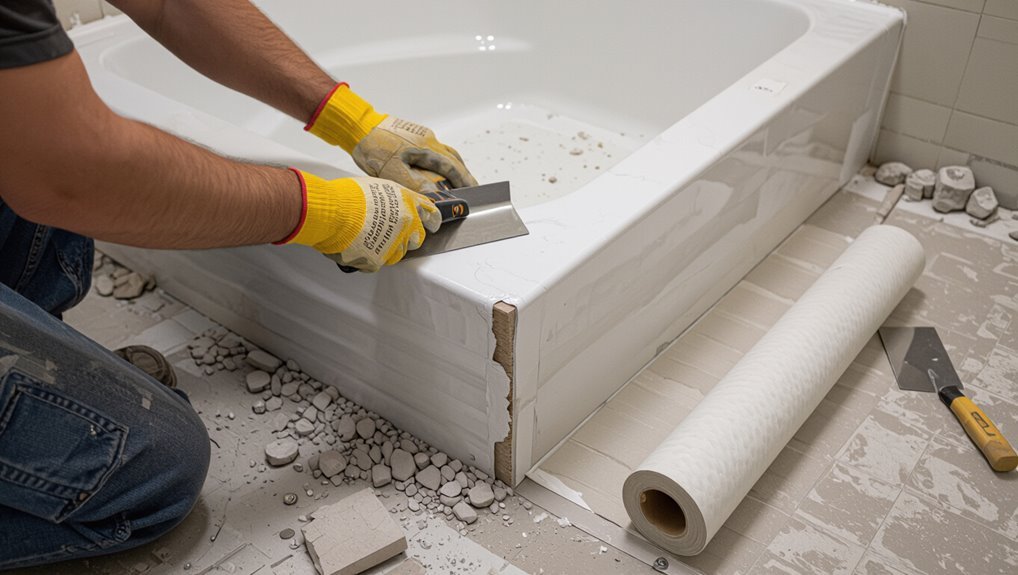
Start by removing any remaining drywall or old backer board down to the studs so you can fit new cement board or waterproof panels flush and level.
Cut cement board to fit, leave 1/8″ gaps at seams, and fasten with corrosion-resistant screws.
Tape seams with alkali-resistant mesh, apply thinset, then install a waterproofing membrane or liquid waterproofing per manufacturer directions before tiling.
Planning and Layout Tile Pattern, Cuts, and Spacing
Before you start setting mortar, pick a tile pattern and grout joint width that suits the room and your skill level.
Do a dry layout with reference lines and leveling checks, accounting for fixtures, valves, and tub flanges so cuts fall in logical places.
Finally, calculate quantities with a waste allowance to make sure you have enough tile and matching extras.
Choosing a tile pattern and grout joint width
Anyone can make a big visual impact by picking the right tile pattern and grout joint width, since those choices set the room’s rhythm, scale, and perceived size.
You’ll match pattern to room scale, choose grout width for style and maintenance, and plan cuts to minimize awkward pieces.
- Scale: large tiles enlarge space
- Pattern: straight, staggered, herringbone
- Grout: narrow for modern, wider for texture
Dry layout: marking guidelines, leveling, and reference lines
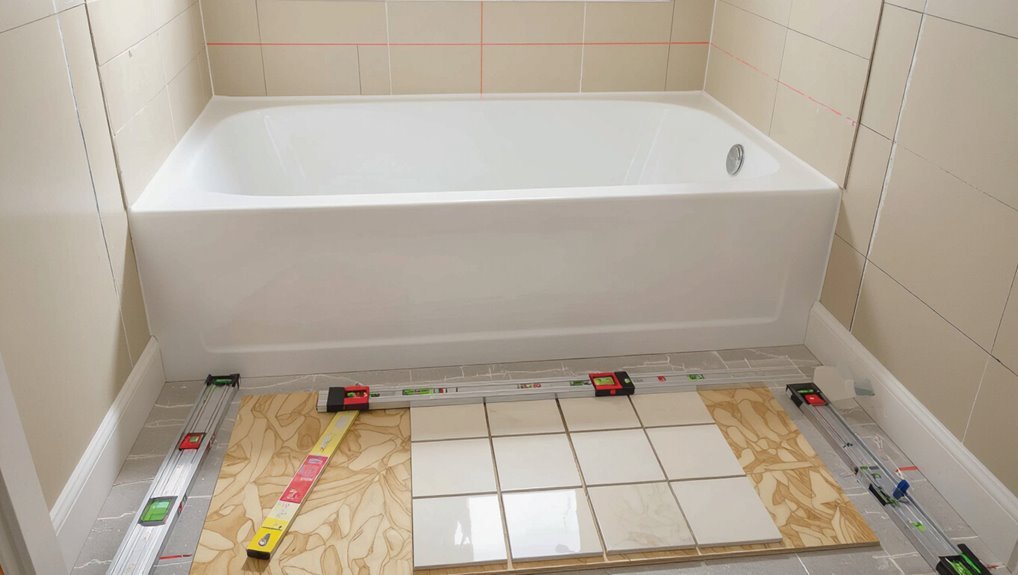
After you’ve settled on pattern and grout width, lay out your tiles dry on the floor to mark guidelines, check fit, and plan cuts so you won’t be surprised once adhesive’s down.
Snap chalk lines from your center reference, establish level baselines, and transfer key marks to walls.
Adjust spacing for even edge cuts, note high or low spots, and record final reference lines before tiling.
How to account for fixtures, shower valves, and tub flanges
When you plan your tile layout, account for fixtures, shower valves, and tub flanges early so cuts and spacing don’t turn into costly surprises.
Measure centers and offsets from reference lines, mark exact pipe protrusions, and mock-up tiles to confirm clearances.
Cut tiles with proper holes or notches, leave grout/joint gaps, and use escutcheons or trim for a watertight, professional finish.
Calculating material quantities and waste allowance
Because tile comes in fixed box quantities and your cuts and off-cuts add up, you should calculate needed material and a waste allowance before you order. Measure wall area, subtract fixtures, add pattern repeat. Allow 10–15% waste for straight layouts, 15–25% for diagonal or complex cuts. Use the table to estimate boxes and extras.
| Area (sq ft) | Tile size | Waste % |
|---|---|---|
| 20 | 12×12 | 10 |
| 40 | 12×24 | 15 |
| 60 | 3×6 | 20 |
Step-by-Step Installation From Mortar to Grout
Now you’ll move from planning into the actual install, starting with mixing the right thin‑set and choosing the proper trowel size.
You’ll apply mortar and set your first course, work carefully around the tub flange and corners, and make precise cuts for edges, niches, and fixtures.
Finally, you’ll install trim pieces like bullnose and connectors before grouting.
Step 1: Mixing thin-set mortar and selecting trowel size
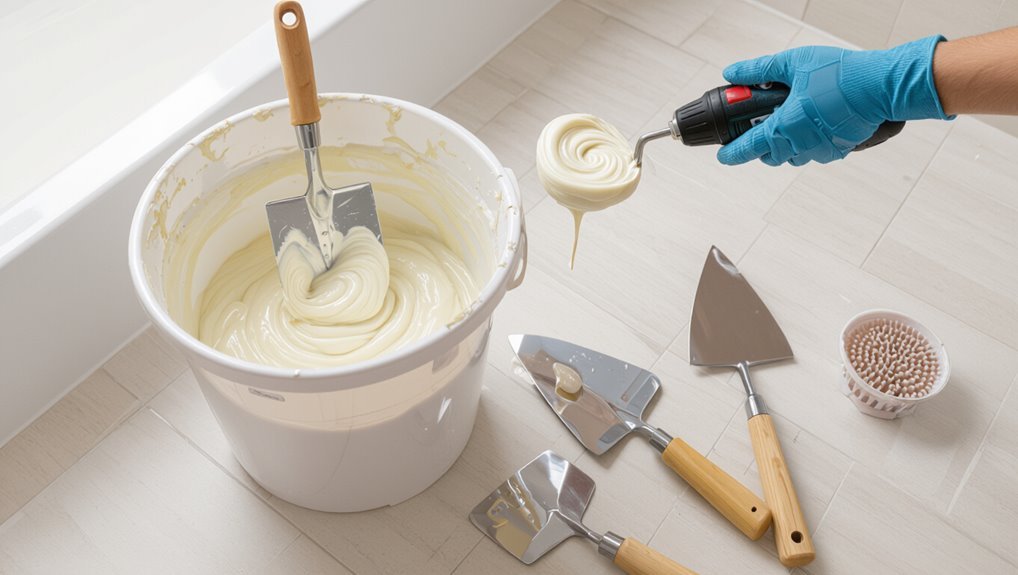
Step 1 is mixing the thin-set and choosing a trowel that matches your tile and substrate; get this right and your tiles will set evenly and hold up over time.
Measure water per manufacturer, add powder slowly, mix to a stable, lump-free consistency. Let slake, remix, and use within pot life.
Pick notch size based on tile back and substrate flatness.
Step 2: Applying mortar and setting the first course of tiles
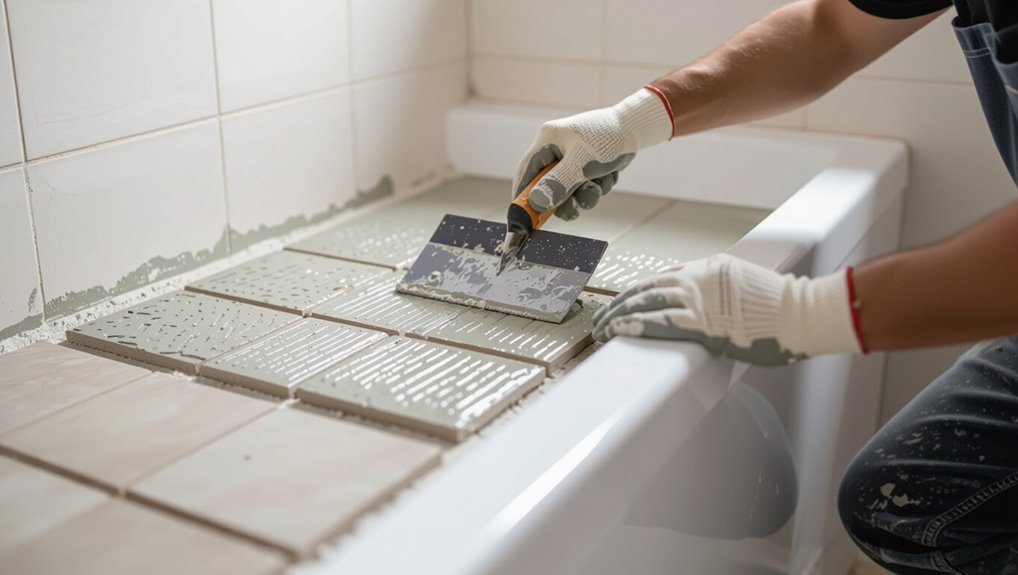
Start by spreading a consistent bed of thin-set onto the substrate with the flat side of your trowel.
Then comb it with the notched edge to create uniform ridges that help tiles bond and sit level.
Press each tile firmly into place, twist slightly to collapse ridges, and use spacers to maintain grout lines.
Check alignment and level as you progress.
Step 3: Working around the tub flange and corners techniques and tips
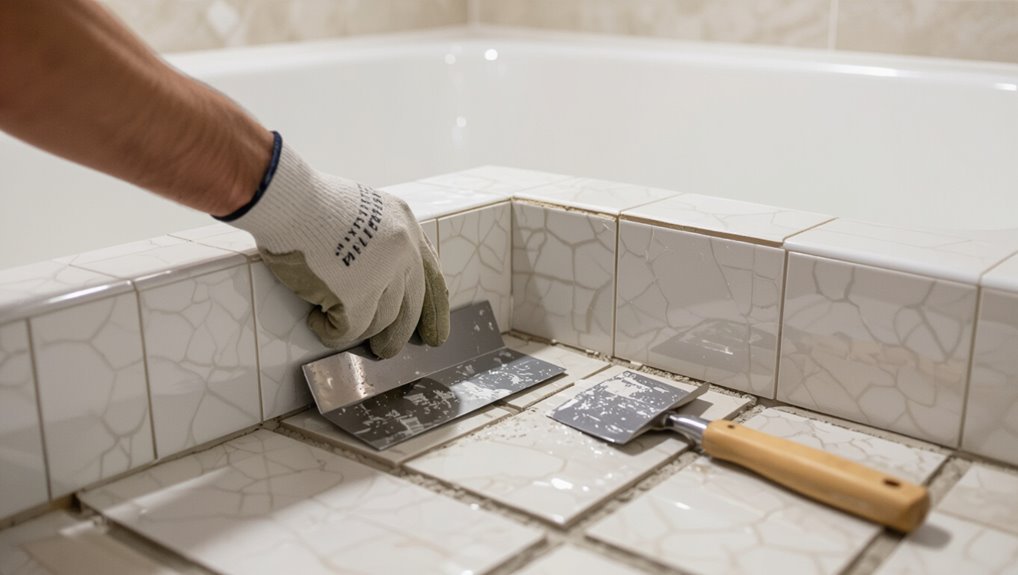
With your first course set and checked for level, move on to areas that need extra care: the tub flange and inside corners.
Press tiles firmly against the flange, angling thinset so it fills gaps and prevents voids. Use spacer-adjusted cuts to maintain grout lines into corners.
Back-butter tiles near corners, wipe excess promptly, and check alignment frequently for a watertight, tidy finish.
Step 4: Cutting tiles for edges, niches, and around fixtures

Once you’ve set the field tiles, you’ll move on to cutting pieces to fit edges, niches, and fixtures—this is where precision matters most.
Use a wet saw for straight cuts, a nibbling tool for curves, and a diamond hole bit for pipes. Measure twice, mark clearly, and dry-fit before installing to guarantee clean joints and accurate adhesive coverage.
- Plan cuts
- Use proper blades
- Dry-fit first
Step 5: Installing trim tiles, bullnose, and transition pieces
Finish the look by installing your trim tiles, bullnose, and junction pieces carefully so edges are protected and connections flow smoothly.
Dry-fit pieces, check orientation, apply thinset sparingly, and press tiles level with adjacent field tiles.
Use spacers for consistent grout joints, wipe excess mortar promptly, and reinforce corners with caulk where tile meets tub or trim.
Verify alignment before mortar skins over.
Step 6: Letting mortar cure timing and environmental considerations
After setting your trim and bullnose, let the mortar develop full strength before grouting; rushing this stage can shift tiles or crack joints.
Keep temperature between 50–85°F and humidity moderate. Protect the work from drafts, direct sun, and water for at least 24–72 hours depending on thinset type.
Follow manufacturer cure times, check bond, and avoid loading or moving fixtures until fully cured.
Step 7: Grouting: choosing grout type, mixing, application, and cleanup
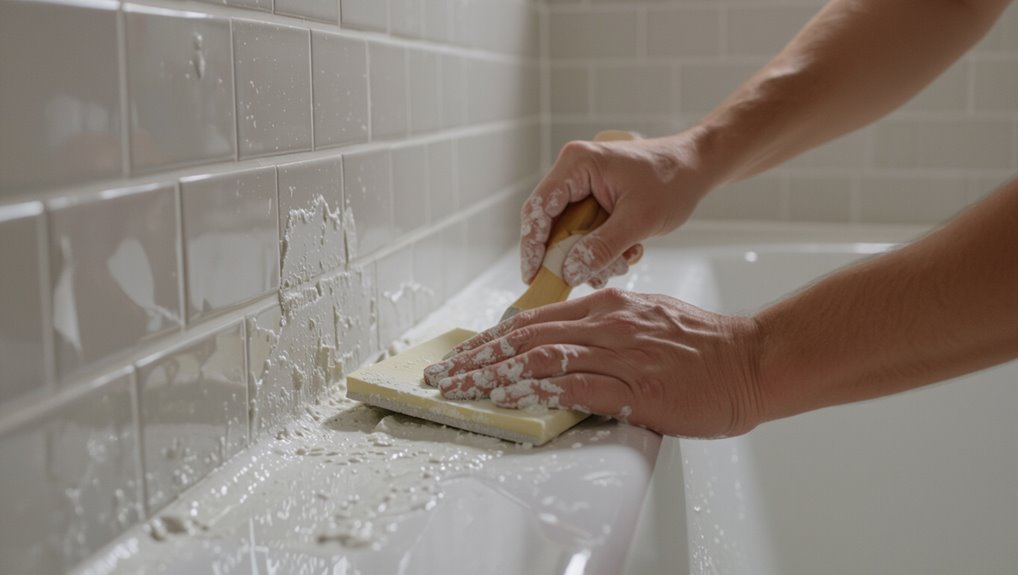
Now you’ll move from cured mortar to grout, the compound that fills joints, bonds tiles, and finished looks depends on the right type and application.
Choose sanded for wider joints, unsanded for narrow or delicate surfaces.
Mix to a peanut-butter consistency, apply with a rubber float at 45°, remove excess, then wipe haze with a damp sponge.
Let grout set per instructions before light traffic.
Step 8: Sealing grout and final waterproofing touch-ups
Because grout itself isn’t fully water-resistant, you should seal it to lock out moisture and protect your work, especially in showers and tub surrounds.
After grout cures, apply penetrating sealer evenly, wipe excess, and recoat per instructions.
Check caulk joints and replace or touch up silicone. Maintain annually.
- Seal grout
- Inspect/replace caulk
- Reapply yearly
Common Problems and How to Fix Them
You’ll run into issues like uneven tiles (lippage), cracked tiles or grout, and water intrusion that can lead to mold if you’re not careful.
Learn how to prevent and correct lippage, identify and repair cracks, and spot leaks early so you can remediate mold and damaged substrate.
Also pay attention to movement joints and expansion needs to avoid future failures.
Uneven tiles or lippage prevention and correction
When tiles don’t sit flush, lippage not only looks bad but also creates tripping hazards and makes grout wear unevenly.
So you’ll want to prevent it from the start and know how to fix it quickly if it appears. Use a flat substrate, proper thinset coverage, and tile spacers or leveling clips.
For minor lippage, grind high edges, re-bed loose tiles, or use self-leveling compound under affected areas.
Cracked tiles or grout causes and repair methods
If a tile or its grout cracks, it usually signals movement, impact, poor installation, or moisture issues that you should address promptly to avoid bigger problems.
Inspect for loose tiles, hairline vs. full cracks, and grout separation.
Replace broken tiles, remove and reapply grout, and use flexible sealant at junctions.
Correct substrate movement and use proper mortar and grout to prevent recurrence.
Water intrusion and mold issues detection and remediation
Because water finds the smallest gaps, even a tiny flaw in grout, a cracked tile, or a poorly sealed junction can let moisture reach the substrate and feed mold growth.
So you should spot and stop intrusion quickly. Inspect seams, grout lines, and behind access panels for discoloration or musty odors.
Remove wet materials, dry thoroughly, fix seals, replace damaged backerboard, and treat mold with proper cleaners.
Dealing with movement joints and long-term expansion concerns
1 key thing to plan for with bathroom tile is movement: temperature changes, settling, and flexible substrates cause tiles and grout to crack unless you provide proper expansion and movement joints.
You should create control joints at junctions, corners, and long runs, use flexible sealant (silicone or urethane), follow manufacturer spacing guidelines, and inspect annually to replace deteriorated caulk before leaks or cracks form.
Best Practices, Tips, and Time-Saving Tricks
You’ll learn professional shortcuts for getting clean lines and tight corners without redoing work.
I’ll show how to move efficiently in a small bathroom so you save time and avoid mistakes.
Finally, you’ll get simple maintenance tips to keep tile and grout looking new longer.
Professional shortcuts for clean lines and tight corners
When you want crisp lines and snug corners without spending extra hours, adopt a few pro shortcuts that pros use to speed the job and raise the finish quality.
- Use a quality tile trim and pre-cut corner pieces for uniform edges.
- Spy small gaps with a straightedge and adjust spacers before adhesive sets.
- Back-butter tiles in tight spots and use a caulk-bead for waterproof, neat junctions.
How to work efficiently in small bathrooms
Although small bathrooms can feel cramped, you can work quickly and accurately by planning a tight workflow, staging materials within arm’s reach, and tackling one wall or zone at a time so tools and wet tiles aren’t constantly shuffled.
Use compact tool trays, pre-cut tiles, and magnetic holders for screws.
Move in predictable sequences, keep cleanup supplies handy, and limit foot traffic to one helper.
Maintenance tips to keep tile and grout in top condition
If you want your tile and grout to look new for years, set up a simple maintenance routine and stick to it: wipe down tiles after showers, dry grout lines, and ventilate to prevent mold.
Clean weekly with pH-neutral cleaner, spot-treat stains promptly, and reseal grout every year or as needed.
Inspect for cracks and repair grout to avoid water damage.
Tools and Materials Comparison
Next you’ll compare thin-set and epoxy mortars, different grout types, and waterproofing membranes so you can pick what suits your bathroom’s needs.
We’ll also look at when hand tools are sufficient and when power tools will save time and improve results.
Thin-set types, grout types, and waterproofing membranes compared
Choosing the right thin-set, grout, and waterproofing membrane can make or break your bathroom tile job, so you should match materials to the tile type, substrate, and wet-area exposure. Use modified thin-set for porcelain, unmodified for natural stone, epoxy grout for high-water areas, sanded vs unsanded by joint width, and a bonded waterproof membrane under wet zones.
| Material | Best use |
|---|---|
| Modified thin-set | Porcelain/large format |
| Unmodified thin-set | Stone with polymer |
| Epoxy grout | Showers/tubs |
| Cement grout | Floors/walls |
| Waterproof membrane | Wet areas under tile |
Hand tools vs. power tools: when each is appropriate
Now that you’ve matched thin-set, grout, and membranes to your tile and substrate, you’ll need the right tools to put those materials to work.
Use hand tools for detail, tight spots, and fragile tiles; pick power tools for speed, cutting, and mixing. Match tool choice to task and skill to avoid damage.
- Hand: precision
- Power: efficiency
- Safety: priority
Estimated Costs and Project Timeline
You’ll want to budget for materials (tile, thinset, grout), any specialty tools you don’t already have, and either your time if DIY or labor costs if you hire a pro.
Expect DIY savings on labor but factor in extra time and possible mistakes; pros cost more but usually finish faster and cleaner.
For a standard tub surround, plan roughly 2–4 days from prep to grout for DIY and 1–2 days with a contractor, depending on drying times.
Typical cost breakdown: materials, tools, labor (DIY vs pro)
A clear cost picture helps you decide whether to DIY or hire a pro: expect materials (tile, thinset, grout, backer board) to run $2–$15 per sq ft depending on quality, tools and consumables to add $50–$400 if you need to buy them, and labor to range from $4–$15 per sq ft for a basic install to $20–$50+ for intricate patterns or premium tile—so a 50 sq ft bathroom can land anywhere from a few hundred dollars DIY to several thousand with a contractor.
| Item | DIY | Pro |
|---|---|---|
| Materials | Low–High | Same |
| Tools | $0–$400 | Included |
| Labor | $0 | $200–$2500 |
Sample timeline for a standard tub surround installation
With costs and choices outlined, let’s map out how the work actually unfolds so you can plan time and budget for a standard tub surround install.
Day 1: demo and prep walls.
Day 2: waterproofing and backer board.
Day 3: tile layout and setting.
Day 4: grouting and cleanup.
Allow 24–48 hours for adhesive and grout curing; total 4–6 days.
Step-by-Step Checklist Printable Project Workflow
You’ll want a printable workflow to keep the project on track from start to finish.
Start with a pre-installation checklist for materials and prep, use a daily installation checklist to monitor progress and quality, and finish with a post-installation checklist for cleanup and final inspections.
These clear lists will save time and help you avoid costly mistakes.
Pre-installation checklist
Before laying a single tile, go through a concise pre-installation checklist so you won’t run into avoidable delays or mistakes; confirm substrate flatness and waterproofing, verify tile and grout quantities plus layout, gather all tools and safety gear, and schedule drying and curing times.
Use this compact list to prep efficiently:
- Inspect and repair substrate.
- Confirm materials and layout.
- Organize tools, PPE, and time.
Daily installation checklist
Now that your substrate, materials, and tools are confirmed, start each workday with a compact, repeatable checklist that keeps the project on schedule and prevents costly errors.
You’ll verify layout lines, mix fresh adhesive, and inspect tiles for defects. Use the checklist to focus tasks, track progress, and log issues.
- Layout, lines, and reference points
- Mix, trowel, and set tiles
- Inspect, adjust, and document
Post-installation checklist
After tiles are set and grout has cured, run through a concise post-installation checklist to confirm your work, catch defects, and prepare the area for handover.
Inspect grout lines, tile alignment, and caulk seams. Test drainage and fixtures. Clean and protect surfaces, then document results and client sign-off.
- Visual inspection and touch-ups
- Functional testing
- Final cleaning and documentation
FAQ Common Questions About Tiling Around a Tub
You’re probably wondering whether you can tile over drywall, need a vapor barrier, or how to seal the gap between the tub and tile.
You’ll also want to know how long to wait before using the shower and whether subway or big-format tile will work around a tub.
I’ll answer each question plainly so you can pick the right materials and timing for a watertight surround.
Can I tile directly over drywall around a tub?
Can you tile directly over drywall around a tub? You generally shouldn’t.
Standard drywall isn’t water-resistant and will degrade from moisture and splashes. Use cement backer board or greenboard rated for wet areas, properly sealed at seams and fasteners.
Verify joints are waterproofed and the wall is firmly secured before tiling to prevent mold, delamination, and tile failure.
Do I need a vapor barrier behind tile in a tub surround?
Do you need a vapor barrier behind tile in a tub surround? Generally no—modern cement backer boards and waterproofing membranes serve better.
You should use a proper waterproofing membrane (liquid or sheet) over backer board or a fully bonded membrane system to protect studs and framing.
That prevents moisture intrusion, mold, and structural damage; always follow manufacturer and local code recommendations.
What is the best way to seal the gap between tub and tile?
The best way to seal the gap between tub and tile is to use a flexible, mold-resistant caulk—typically a 100% silicone or a high-quality siliconized latex—after you’ve installed a backer rod for wider joints and made sure both surfaces are clean and dry.
Apply a smooth, continuous bead, tool it for adhesion and profile, and wipe excess; choose matching color and replace caulk if it cracks.
How long should I wait before using the shower after tiling?
After grouting and caulking, wait long enough for both to fully cure before using the shower—typically 24–72 hours for grout and 24 hours for 100% silicone caulk (longer for silicone if manufacturers recommend), and up to several days for cement-based grout to reach full hardness and water resistance.
Test small areas, follow manufacturer cure times, and avoid heavy moisture for the recommended period to prevent staining or weakened bonds.
Can I use subway tile/big-format tile around a tub?
Wondering whether subway tile or big-format tile will work around your tub? Yes — both work if you choose the right materials and methods.
Use waterproof backerboard, proper thinset, and flexible sealants.
Subway tiles suit classic looks and easier cuts; big-format tiles need extra support, careful leveling, and fewer grout joints.
Plan waterproofing, slopes, and expansion joints for a durable, leak-free install.