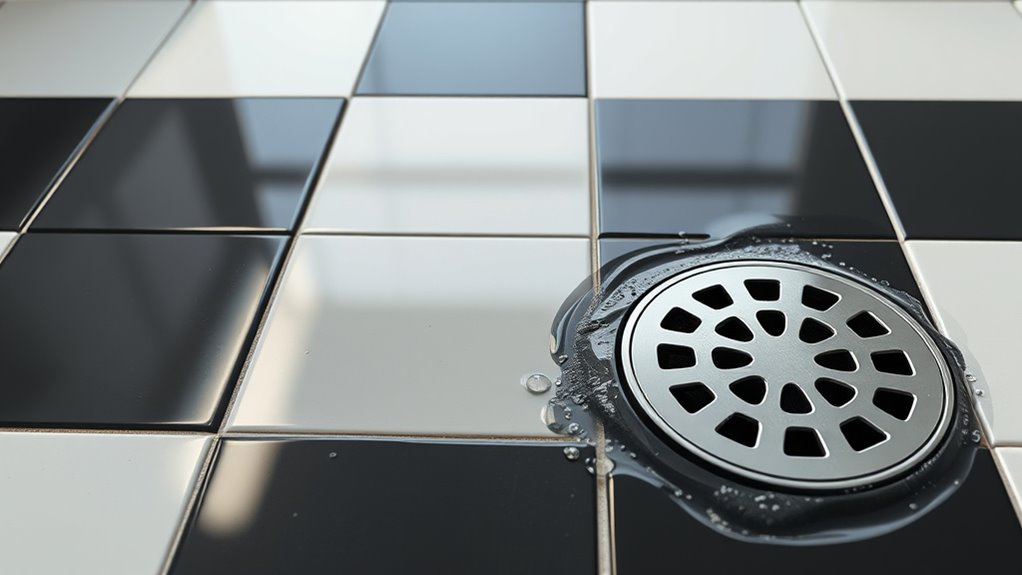
How to Clean Black and White Floor Tiles Quickly
You can make black-and-white floor tiles look sharp fast: sweep or vacuum to remove grit, spot-treat spills with warm water and a few drops of dish soap, then microfiber-mop or wipe edges with a damp cloth and rinse to avoid residue. Buff dry with a clean microfiber for shine and check grout for trouble spots. Keep a small toolkit handy for touch-ups. Stick to this routine and you’ll see immediate improvement—keep going for full maintenance tips.
Clean Black-and-White Tiles in Under 15 Minutes

If you’re short on time but want spotless black-and-white tiles, you can get them looking great in under 15 minutes by focusing on quick, high-impact steps.
Start by sweeping or vacuuming to remove grit that dulls color contrast. Spot-treat scuffs with a damp microfiber and gentle cleaner, working along grout lines where dirt hides.
Use a squeegee or dry cloth to wipe excess moisture so watermarks don’t form on tile patterns. Finish by buffing high-traffic areas to restore shine.
You’ll maintain visual pop without deep scrubbing, keeping black-and-white floors crisp between full cleans.
Tools and Supplies to Have Ready
Before you start, gather the essential tools like a soft-bristle broom, microfiber mop, grout brush, and a bucket.
Pick recommended supplies such as a pH-neutral floor cleaner, mild bleach or hydrogen peroxide for grout stains, and a microfiber cloth for spot work.
Having these on hand will speed the job and protect your black-and-white tile finish.
Essential Cleaning Tools
What do you need on hand to get black-and-white floor tiles spotless and protected? You’ll want tools that respect color contrast and preserve tile patterns.
Start with a soft-bristle broom and a microfibre dust mop to remove grit without scratching.
Use a gentle scrub brush with non-abrasive bristles for grout lines and stubborn spots.
A flat mop with a removable, washable pad gives even coverage and avoids streaks.
Have a bucket with a wringer to control water and a spray bottle for spot treatments.
Keep a few clean microfiber cloths for drying and edge work.
Recommended Cleaning Supplies
Now that you’ve gathered the basic tools, turn to the specific supplies that’ll keep black-and-white tiles looking crisp without harming contrast or grout.
Stock a pH-neutral floor cleaner for regular use, distilled white vinegar diluted for occasional deep clean (test first), and a mild bleach solution reserved for stubborn grout spots.
Have microfiber mops, soft-bristled grout brushes, and non-abrasive sponges on hand.
Keep baking soda for gentle scrubs and hydrogen peroxide for safe stain removal.
Include a spray bottle, rubber gloves, and microfiber cloths.
These cleaning hacks minimize damage while speeding up maintenance and restoring shine.
How to Spot-Test Cleaners Safely
Before you use a new cleaner on your black and white tiles, test it in a hidden area like an inside corner or under a cabinet.
Apply a small amount, wait the recommended time, then rinse.
Inspect the spot for any discoloration, dulling, or residue before treating visible areas.
Test in Hidden Area
When you’re unsure how a cleaner will affect your black-and-white tiles, try it first in a hidden spot like a closet threshold or behind a baseboard so you can see the result without risking a visible area.
Choose a small, representative area for testing surfaces: grout, matte or glossy tile, and any painted trim. Apply the cleaner sparingly, follow label instructions, and note immediate reactions like color change, etching, or dulling.
Use a damp cloth to blot excess, then let the spot dry. Check under normal light; if it looks unchanged, it’s likely safe to use elsewhere.
Wait And Inspect
Although you’ve tested a cleaner in a hidden spot, wait at least 24 hours and inspect the area under normal light before treating visible tiles. Some reactions—faint discoloration, surface dulling, or grout softening—can take time to appear.
Take a breath and use simple relaxation techniques to avoid rushing—deep breaths steady judgment.
Use inspection tools like a magnifying loupe, flashlight, and soft cloth to check sheen, color, and grout integrity.
Note any changes, photograph the spot for comparison, and record the cleaner used.
If you spot damage, rinse thoroughly and choose a milder product or consult a professional.
Microfiber vs Mop: Fastest Daily Tool
If you want the fastest daily clean for black-and-white tile, microfiber pads usually beat traditional string or sponge mops: they pick up dust and hair, trap fine grit, and dry quickly so you can move room-to-room without streaks.
You’ll prefer microfiber cloths on a flat mop head for corners and grout edges; they glide and lift debris without excess water. Use a light mist of cleaning sprays for spot soil and to boost shine, but avoid soaking the floor.
Swap or launder pads often to prevent redepositing dirt. Quick, targeted passes keep tiles pristine with minimal effort.
Speed-Clean Before Guests Arrive
Before guests arrive, clear surface clutter so you can see and reach every black and white tile.
Grab a damp microfiber cloth or a small mop for quick spot mopping of scuffs and drips.
Focus on entryways and high-traffic patches for the biggest visual impact in minutes.
Clear Surface Clutter
When guests are due any minute, move quickly through each room and gather loose items—mail, shoes, toys, and papers—into a laundry basket or bin so surfaces look tidy without a deep clean.
Scan tabletops, counters, and the porch; clear anything that masks your black-and-white floor’s decorative patterns or distracts from subtle color variations. Stack magazines, stash remotes, and tuck kid’s crafts into the basket.
Use a small tray for keys and loose change to keep entry areas controlled. Carry the basket to a closet or car, then walk rooms once more to restore a calm, uncluttered appearance.
Quick Spot Mopping
Need a quick shine? Grab a microfiber mop or damp cloth and target visible spills and footprints on black and white tiles.
You’ll work fast: blot sticky spots, swipe in the direction of grout lines, and rinse the cloth often to avoid streaks that ruin the color contrast.
For patterned areas, follow the pattern design flow so you don’t miss crevices.
Use a gentle cleaner diluted per instructions to prevent haze.
Finish by buffing dry with a clean microfiber cloth to restore luster.
This focused spot mopping keeps floors guest-ready without a full deep clean.
5-Minute Routine: Start-to-Finish Steps
Although it only takes a few focused minutes, this minute-by-minute routine will get your black and white tiles clean, streak-free, and ready to use.
Start by sweeping or vacuuming to remove grit that dulls your color contrast and emphasizes tile patterns.
Mix a mild cleaner with warm water in a bucket.
Mop from the far corner toward the exit in S-shaped passes, rinsing the mop every 2–3 passes.
For edges, use a damp microfiber cloth.
Finish with a dry microfiber mop to prevent streaks.
Inspect for missed spots and touch up immediately to keep tiles pristine.
Grease and Sticky Spots on Checkerboard Tiles: Quick Fix

If grease or sticky residue sits on your checkerboard tiles, you can remove it fast with simple household supplies and a targeted technique. Blot excess with a paper towel, then apply a mixture of warm water and dish soap; let it sit 1–2 minutes.
Scrub gently with a soft-bristled brush along grout lines to avoid spreading grime. Rinse with clean water and dry with a microfiber cloth.
For stubborn spots, use a paste of baking soda and water, scrub, then rinse.
After cleaning, inspect grout for damage—consider grout repair—and apply tile sealing to protect surfaces from future sticky messes.
Remove Scuffs From Black Tiles Fast
Got scuff marks on your black tiles? Grab a Magic Eraser for quick lifting.
Use rubbing alcohol on stubborn spots to restore the shine. Test alcohol in an inconspicuous area first and rub gently to avoid dulling the finish.
Use A Magic Eraser
When scuff marks show up on your black tiles, grab a Magic Eraser—its melamine foam lifts those dull streaks fast without harsh chemicals.
Dampen the sponge slightly, squeeze excess water, then test a hidden spot to verify finish safety.
Gently rub scuffs with light pressure; the foam sands and absorbs marks without scratching when you don’t press hard.
Rinse the tile with a damp microfiber to remove residue and buff dry to restore shine.
For stubborn spots, use fresh sections of the Magic Eraser to avoid smearing.
This quick stain removal trick saves time and preserves tile appearance.
Apply Rubbing Alcohol
Although rubbing alcohol seems harsh, it removes scuff marks from black tiles quickly and cleanly without soaking the floor. You’ll dab a small amount onto a microfiber cloth or cotton ball and rub gently in the direction of the tile pattern to avoid streaks.
Test an inconspicuous area first so the color contrast between black and white tiles stays true. Work in small sections, wiping residue with a damp cloth, then drying immediately to prevent haze.
For stubborn scuffs, repeat once. Avoid grout lines and don’t mix with other cleaners. This method’s fast and preserves sharp tile patterns.
Brighten White Tiles Without Bleach
If your white tiles have dulled from dirt or hard-water stains, you can brighten them effectively without bleach by using gentler, safer cleaners and a few simple techniques.
Start by sweeping and vacuuming to remove grit that scratches finishes. Then mop with a mixture of warm water and a few drops of mild dish soap or white vinegar diluted (test first). Use a microfiber mop to polish, following grout lines and tile patterns so every surface gets attention.
Rinse well with clean water to avoid residue. Keep a simple cleaning schedule—weekly light clean, monthly deeper wipe—to maintain brightness.
3-Minute Grout Touch-Up for Dingy Lines
Start by scanning the grout lines for stains and soft spots so you know where to focus.
Use a quick cleaning mix—baking soda paste or a diluted vinegar spray—and scrub with a stiff brush to lift dingy residue.
Finish by sealing the grout or wiping it dry to help prevent future discoloration.
Quick Grout Assessment
When you run a quick grout check, focus on the high-traffic seams and any lines that look visibly darker than the surrounding tile; they often just need a targeted touch-up rather than a full regrout.
You’ll inspect grout discoloration by brushing with a stiff toothbrush and water, then blotting to see if stains lift.
Test a small area with diluted hydrogen peroxide or baking soda paste; if it brightens, proceed. If not, note spots for deeper treatment.
After cleaning, consider tile sealing on repaired lines to prevent future staining.
Record locations so touch-ups stay minimal.
Fast Cleaning Solution
Now that you’ve identified the problem lines, attack dingy grout with a fast, targeted remedy that takes minutes rather than hours. You’ll mix a baking soda paste or hydrogen peroxide, apply with a small brush, and scrub only the stained joints so color contrast between tiles and grout snaps back without over-wetting tile patterns. Rinse and dab dry immediately.
| Tool | Use |
|---|---|
| Toothbrush | Precise scrubbing |
| Paste | Lifts stains |
Work in short sections, inspect results, and repeat on stubborn spots. This keeps cleanup quick and focused.
Prevent Future Discoloration
Because a quick touch-up prevents grime from settling back into grout, make this minute routine part of your cleaning habit. Wipe dingy lines with a damp microfiber cloth, then apply a small amount of baking soda paste to stubborn spots and scrub with an old toothbrush. Rinse and dry thoroughly.
Every few months, inspect grout and consider grout coloring to refresh faded sections—it’s faster than full regrouting.
After cleaning and any coloring touch-ups, apply tile sealing on porous grout to repel stains and reduce future upkeep. These quick steps keep black and white tiles crisp without major effort.
One-Minute Rinse Trick to Avoid Streaks
If you want streak-free black and white tiles, rinse the floor within a minute after you mop so cleaner and dirt don’t dry and leave marks.
Wring your mop or swap to a clean microfiber mop and pass over the surface once with clear water, moving along tile lines to lift residue without smearing.
Prompt rinsing helps final stain removal by preventing cleaner residue from re-depositing grime, and it reveals areas needing targeted attention.
After drying, inspect grout lines; consistent grout sealing reduces future discoloration so your quick rinse keeps tiles crisp and makes upkeep faster.
Safe Homemade Cleaners That Work Fast
Rinsing quickly keeps streaks and residue from setting, but you can speed up cleaning and protect tile finishes by using safe homemade solutions that work fast.
Mix a tablespoon of mild dish soap with a gallon of warm water for everyday grime; it cuts grease without dulling tiles.
For tougher spots, combine half a cup white vinegar with a gallon of water—test a hidden area first.
Sprinkle baking soda on grout, scrub, then rinse.
These natural remedies are inexpensive, effective, and qualify as eco friendly solutions.
Wring mops well and dry promptly to prevent water spots and streaks.
Best Store-Bought Cleaners for Black-and-White Tiles
When you want reliable results without mixing solutions yourself, several store-bought cleaners are formulated specifically for black-and-white tiles and will cut dirt, protect finishes, and minimize streaks. You’ll pick products that enhance tile patterns and preserve color contrast.
Choose pH-neutral floor cleaners for regular use, a spray mop formula for quick touch-ups, and a concentrated cleaner for deep scrubbing. Consider these options:
- pH-neutral tile cleaner — gentle on grout and patterns.
- Spray-and-wipe formula — fast, low-residue for high-contrast areas.
- Concentrated cleaner — dilutable for stubborn grime.
Test a small spot first and follow label directions.
Handling Waxed or Sealed Tile Finishes Safely
Because waxed and sealed finishes change how tiles respond to cleaners and tools, you’ll want to treat them differently than bare ceramic or porcelain.
Test any cleaner in a hidden spot to confirm compatibility with sealed finishes. Use pH-neutral, non-abrasive solutions and soft mops to avoid dulling or stripping the seal.
Always spot-test cleaners on a hidden area. Use pH-neutral, nonabrasive solutions and soft mops to protect seals.
For wax removal, apply a manufacturer-recommended stripper sparingly, following label directions and ventilating the area. Rinse thoroughly and allow full drying before re-sealing or waxing.
Spot-treat stains gently; don’t use steel wool, scouring pads, or harsh acids that can damage the protective layer.
Preventive Daily Habits to Keep Tiles Sharp
After you’ve confirmed seal compatibility and handled any waxing or stripping, keep your black and white tiles looking sharp with a few simple daily habits. You’ll protect tile patterns and preserve color contrast by staying consistent.
- Sweep or vacuum high-traffic areas daily to remove grit that dulls finish.
- Wipe spills immediately with a damp microfiber to prevent staining and avoid streaks.
- Place mats at entrances and felt pads under furniture to reduce wear.
Quick spot-mopping and routine inspections catch small issues before they affect the overall look, so you’ll maintain crisp lines and lasting shine.
Troubleshooting Quick-Clean Problems
If a quick clean isn’t giving you the results you expect, start by pinpointing the problem—streaks, residue, or dull spots each have different causes and fixes.
If you see streaks, switch cleaners: a mild, residue-free solution and a microfiber mop prevent film.
Try a mild, residue-free cleaner and a microfiber mop to eliminate streaks and film.
For residue after wax or cleaner, rinse with warm water and buff dry.
Dull spots may mean worn tile sealant; reapply following manufacturer directions to restore shine.
If grout discoloration persists after scrubbing with a grout brush and baking soda paste, try a pH-neutral cleaner or targeted grout stain remover for better results.
When to Call a Professional Deep Clean
When regular cleaning no longer removes embedded dirt, stubborn grout stains, or worn sealant, you should call a professional deep clean; you’ll preserve tile durability and aim for color restoration that DIY won’t achieve.
Consider hiring pros if:
- Grout is permanently discolored despite scrubbing.
- Tiles show etching, dullness, or fading affecting pattern contrast.
- Sealant failure or recurring staining returns after treatments.
A technician uses specialized cleaners, hot extraction, and resealing to restore appearance and protect longevity. You’ll get an assessment, targeted restoration, and a maintenance plan to avoid costly replacements and keep black-and-white tiles crisp.
Daily 5-Minute Maintenance Checklist
Want to keep your black-and-white tiles looking sharp with just five minutes a day? Start by sweeping or using a microfiber dust mop to remove grit that dulls the color contrast.
Keep black-and-white tiles sharp in five minutes: sweep or microfiber-mop to remove grit and restore contrast.
Spot-treat spills immediately with a damp cloth and a gentle cleaner suited for your grout and tile finish.
Wipe high-traffic edges and corners where dirt hides, following tile patterns to make certain no stripe or checker is missed.
Rinse the cloth and buff any streaks for a uniform shine.
Finish by checking grout lines for spots that need a deeper clean later this week.
Repeat daily.
Frequently Asked Questions
Can Black-And-White Tiles Be Steam Cleaned Safely?
Yes — you can steam clean black-and-white tiles, but you’ll want to test first and use low temperature to protect color preservation, since grout and some tiles show heat sensitivity; don’t overdo it or soak seams.
Will Vinegar Damage Grout Sealer Over Time?
Think of vinegar as a rainstorm: it won’t wash away good foundations quickly, but prolonged exposure can erode sealant compatibility. You’ll risk grout discoloration over time, so avoid frequent vinegar use on sealed grout.
How to Remove Permanent Marker From Tile?
You can remove permanent marker from tile by rubbing alcohol or acetone, letting it sit, then wiping; try toothpaste or baking soda paste next. These permanent marker removal tile stain solutions usually work without harming sealed grout.
Can Pets’ Nails Scratch Glossy Tiles?
Like tiny knives, you can see pet nail scratches on glossy tile damage if nails aren’t trimmed; you’ll prevent deep gouges by trimming, using nail caps, and placing mats, since even brief scratching can dull that glossy finish.
Are There Eco-Friendly Commercial Tile Cleaners?
Yes — you can find eco friendly cleaning commercial solutions designed for tiles; they use biodegradable ingredients, low VOCs, and cruelty-free formulas. You’ll reduce harsh chemicals while keeping floors spotless and safer for pets.
Conclusion
So you’ve learned to zap grout ghosts and buff tile tuxedos in under 15 minutes — handy, since nobody ever notices your Oscars for floor sparkle. Keep a microfiber wand and a tiny bottle of miracle cleaner by the door, and you’ll fake “just-deep-cleaned” like a pro. When stains stage a comeback, call for reinforcements. Meanwhile, enjoy guests’ compliments as you pretend it’s effortless — again.