
How to Clean and Wax Tile Floors at Home
You can restore many tile floors yourself by cleaning well, testing a small spot, and using the right product for your tile type. Start by sweeping, deep-cleaning with a mild tile cleaner, rinsing, and letting the floor dry completely. Apply a compatible wax or sealer in sections, follow the manufacturer’s cure times, then buff for shine. Unglazed stone or old terrazzo may take wax; glazed ceramic often resists it. Keep going to learn tips, timing, and tools.
Quick Answer: Can You Wax Tile?
Yes—you can wax some tile floors, but not all types benefit from it. You’ll want to check the tile manufacturing materials: glazed ceramic and porcelain usually resist wax, while unglazed natural stone or older terrazzo might accept it.
Yes—some tile can be waxed, but glazed ceramic and porcelain usually resist it; unglazed stone or terrazzo may accept wax.
Historical context matters—waxing was common before modern sealers and glazes, so older tiles may need wax to restore sheen.
Modern sealants often outperform wax for durability and maintenance.
You’ll evaluate porosity and finish: if water beads, skip wax; if it absorbs, you can consider a compatible paste or liquid wax.
Test a small area first to confirm results.
How to Follow This Clean-and-Wax Plan (Time & Skill Needed)
You can expect the whole clean-and-wax process to take a few hours for a small room and half a day for larger areas, depending on drying times.
You don’t need special skills—basic cleaning experience and attention to directions are enough—but some steps (like buffing) get easier with practice.
Follow a simple step-by-step schedule: clear and sweep, clean and rinse, allow to dry, apply wax in sections, then buff after curing.
Time Required
Because the job has distinct stages—cleaning, drying, and waxing—you can plan your time more accurately and avoid rushing any step. You’ll typically spend 30–45 minutes prepping and cleaning a medium room, 1–2 hours drying (ventilate for faster cure), and 30–60 minutes applying wax. Use Maintenance routines weekly to keep shine and choose Eco friendly products to protect finishes and indoor air.
| Stage | Approx Time | Notes |
|---|---|---|
| Prep/Clean | 30–45 min | Sweep, mop, spot clean |
| Drying | 60–120 min | Ventilate, wait fully |
| Waxing | 30–60 min | Thin coats, follow label |
| Total | 2–4 hours | Varies by room size |
Skill Level Needed
Although this plan’s steps are straightforward, it helps to have basic DIY confidence and attention to detail so you’ll prep, dry, and apply wax correctly. You don’t need professional training, but you should know how to read product labels, test a small area, and use a mop, scrub brush, and applicator pad without overworking grout.
Familiarity with routine tile installation issues—like uneven grout lines or loose tiles—lets you address problems before waxing. Choosing the right product also ties to color options; pick a wax compatible with your tile finish and desired sheen to avoid discoloration.
Step-by-Step Schedule
Before you start, set aside about 2–4 hours for an average room and block the time into prep, cleaning, drying, and waxing so each phase gets the attention it needs. You’ll prep (15–30 min), deep-clean grout (30–45 min), let dry (30–60 min), and apply wax (30–60 min). Match wax sheen to Color options and account for lighting considerations when choosing finish. Work from far corner toward exit, use thin coats, and test a small area. Keep ventilation on. Refer to this quick timing guide:
| Phase | Time |
|---|---|
| Prep | 15–30 min |
| Clean | 30–45 min |
| Dry | 30–60 min |
| Wax | 30–60 min |
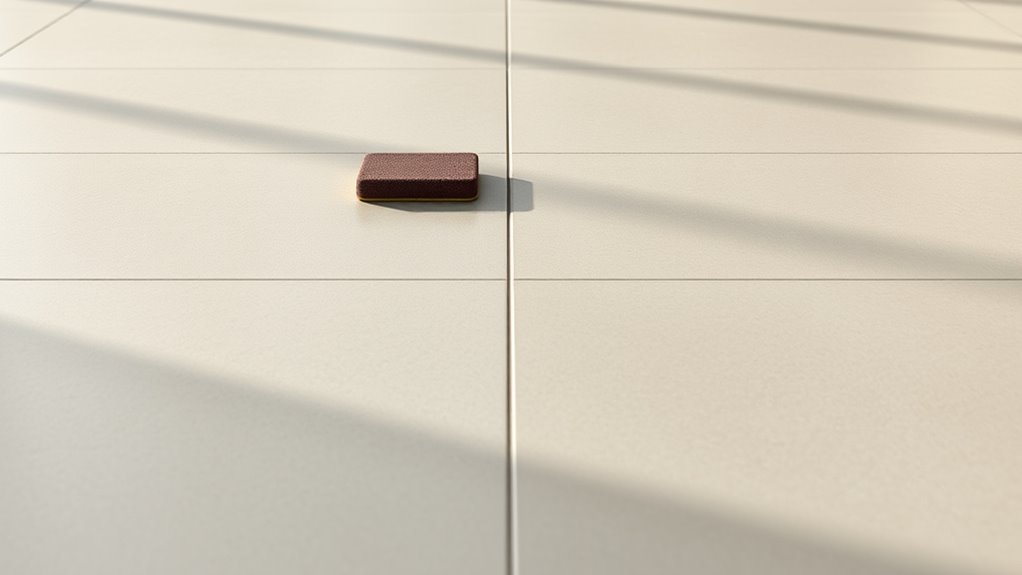
Which Tile Types Can and Cannot Be Waxed
When deciding whether to wax a tile floor, you’ll want to check the tile material and finish first, since some tiles take wax well while others won’t benefit or may even be damaged.
Before waxing tile, inspect the material and finish—some tiles benefit, others can be harmed.
You can wax glazed ceramic and porcelain with care; they resist moisture and accept wax for added sheen, though intricate tile patterns may show buildup.
Avoid waxing unglazed stone—like travertine, marble, or slate—since wax can trap dirt and alter appearance; these need sealers designed for stone.
Also don’t wax textured or heavily grooved tiles, where grout sealing and cleaning are more important than wax for protection.
How to Tell If Your Tile Finish Needs Waxing
Now that you know which tiles accept wax and which don’t, check the finish to see if waxing will help. Run your hand over the tile: a dull, chalky surface or visible micro-scratches means wax can restore sheen.
Shine backed by water beading indicates a sealed finish—wax might cause buildup. Inspect grout colors for fading or darkening; waxing won’t fix grout issues but can highlight contrast in tile patterns.
Test a small, inconspicuous area with a bit of wax to confirm adhesion and appearance. If the test improves uniformity without slipperiness, proceed with waxing the full floor.
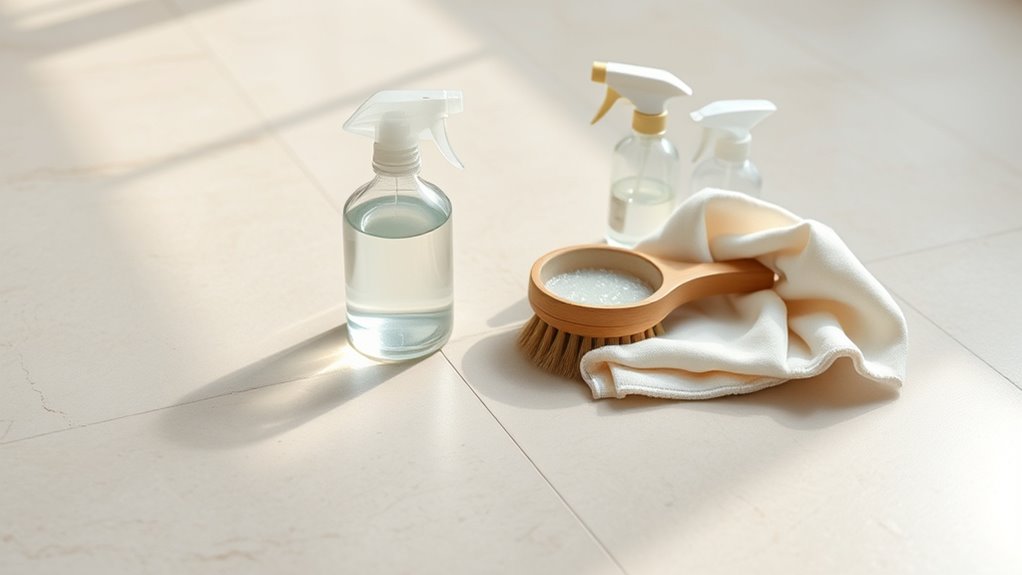
Essential Tools & Supplies (Budget-Friendly Options)
If you want a good result without overspending, focus on a few multipurpose, durable tools and affordable supplies that do the heavy lifting. You’ll appreciate how simple tools echo historical context—many basics haven’t changed—while cultural significance shapes choices like natural vs. synthetic waxes. Prioritize versatility and longevity.
- Microfiber mop with replaceable pads
- Stiff nylon scrub brush for grout
- Plastic bucket with wringer or spin mop
- Affordable paste wax and applicator pads
Buy refillable bottles, compare reviews, and choose items that save time and reduce waste for budget-friendly, effective care.
Best Cleaners for Ceramic and Porcelain Tile
Because ceramic and porcelain respond well to pH-balanced, nonabrasive solutions, you’ll get the best results using cleaners formulated for glazed tile or mild all-purpose cleaners diluted per label instructions.
Choose a cleaner that removes grease and soap scum without dulling glaze—look for “tile-safe” on the label.
Avoid acidic or abrasive products that can harm grout or finish.
For older floors with vintage patterns, test a small area first to make sure colors don’t fade.
After tile installation, wait recommended cure times before heavy cleaning.
Rinse thoroughly and dry to prevent streaks and residue buildup.
Safe Cleaners for Natural Stone Tile
While ceramic and porcelain tolerate pH-balanced cleaners, natural stone—like marble, travertine, limestone, and slate—needs a gentler approach because acid or alkaline products can etch or discolor the surface. You’ll choose pH-neutral stone cleaners or mild dish soap diluted in water, testing a hidden spot first.
Appreciate the historical context and cultural significance of stone floors by preserving their patina with safe products and soft tools. Follow these essentials:
- pH-neutral stone cleaner for routine cleaning
- Microfiber mop and soft brush
- Distilled water for rinsing
- Stone-specific sealer applied per manufacturer instructions
Grout-Safe Degreasers and Stain Removers
When grout traps grease and stains, you’ll need degreasers and stain removers that clean deeply without damaging the porous mortar or surrounding tile. Choose pH-neutral, non-bleach formulations labeled grout-safe; they break down oil and organic stains without etching.
Apply concentrated gel to vertical joints, let it dwell per instructions, then agitate with a stiff nylon brush. Rinse thoroughly and dry to assess results.
For faded grout, use products offering color enhancement; for worn surfaces, seek options claiming texture restoration to subtly revive grout profile.
Always spot-test, ventilate the area, and wear gloves.
Choosing the Right Wax for Your Tile Type
You’ll want to match the wax to your tile material—vinyl, ceramic, and natural stone each need different formulations. Think about the finish you want (matte, satin, or high gloss) and how much foot traffic the area gets, since durability varies by product.
Choose a wax rated for your tile type and traffic level to get the best protection and appearance.
Match Wax To Tile
Choosing the right wax for your tile keeps it protected and looking its best, so start by identifying the tile material—vinyl, ceramic, porcelain, or natural stone—because each needs a different formula.
Match wax to tile by considering Color matching and Wax durability: pick a clear wax for light-colored or patterned tiles, a tint for faded vinyl, and a pH-safe stone wax for porous natural stone.
Test a small area first. Follow manufacturer guidance for application frequency.
- Vinyl: flexible, non-yellowing wax
- Ceramic/Porcelain: clear, low-build wax
- Natural stone: pH-neutral stone wax
- Patterned tiles: color-matched tint
Consider Finish And Durability
After matching wax to your tile material and color, think about the finish and how long you want it to last. You’ll choose between matte, satin, or high-gloss sheens; each hides or highlights Tile color and Floor patterns differently.
Matte masks imperfections and suits busy Floor patterns, while gloss amplifies depth and sheen but shows scratches. Consider traffic: durable polymer or acrylic blends resist wear in entryways; softer formulations work for low-traffic rooms.
Test a small area to confirm look and longevity, then follow manufacturer cure times. Replace or recoat based on scuffing frequency to maintain protection.
Water-Based vs Solvent-Based Floor Waxes
While both types protect and shine tile, water-based and solvent-based floor waxes behave differently and suit different needs. You’ll choose based on odor tolerance, drying time, and finish.
Water-based dries quickly, has low odor, and preserves delicate vintage patterns without yellowing.
Solvent-based gives tougher, glossier coats and resists scuffs during heavy seasonal changes but smells stronger and takes longer to cure.
Match wax to traffic and ventilation, and plan application timing accordingly.
- Water-based: low odor, fast dry
- Solvent-based: durable, high gloss
- Maintenance: frequency varies
- Safety: ventilate for solvents
How to Test a Cleaner or Wax in an Inconspicuous Spot
Pick a hidden spot—behind a cabinet or under a rug—to test any cleaner or wax so you won’t damage a visible area.
Apply a small amount and wait for the product to dry according to the label.
Check for color transfer or discoloration before treating the rest of the floor.
Choose Hidden Test Area
Before you apply any cleaner or wax to the whole floor, find a small, out-of-the-way spot—behind a cabinet, inside a closet, or under a piece of furniture—where you can safely test product compatibility and appearance.
Try a bit of product, wait the recommended time, then inspect for color matching and texture enhancement. Note reaction to grout and sealant.
- Clean the spot first so results aren’t skewed.
- Apply a tiny amount with a cotton swab.
- Wait fully for drying per instructions.
- Photograph the area to compare before/after over 24–48 hours.
Check For Color Transfer
If the test spot shows no discoloration after drying, you still need to check for color transfer by rubbing the area with a white cloth or paper towel dampened with the same cleaner or water you’ll use. This reveals any dye or finish that might bleed onto shoes or rugs.
Gently rub for several seconds, then inspect the cloth. If color transfer appears, try another product and repeat.
If nothing transfers, test stain removal by applying a tiny stain, treating it, and checking results.
Record successful cleaners and avoid those that bleed—prevention beats fixing later damage.
Prep the Room: Clear, Ventilate, and Protect
Once you’ve cleared a path, open windows and doors to bring in fresh air and set up fans to speed drying and disperse fumes. You’ll remove loose items, protect nearby surfaces, and plan layout changes without moving heavy furniture yet. Consider tile color options and historical significance if you want to spotlight patterns after waxing. Prep prevents accidents and preserves finishes.
Clear a path, ventilate with fans, protect surfaces, and plan changes—prep prevents accidents and preserves finishes.
- Tape plastic along baseboards and doorways.
- Lay down breathable drop cloths over walkways.
- Keep a trash bin and microfiber cloths handy.
- Position fans for cross-ventilation and odor control.
How to Remove Furniture and Cover Fixtures Safely
With the room aired and walkways protected, start moving furniture out of the way or toward the center to create a clear working perimeter. Lift heavy pieces with a partner or use furniture sliders to prevent strain and avoid damaging tile.
For efficient furniture rearrangement, remove small items first, then disassemble bulky pieces when possible. Protect remaining pieces with drop cloths or plastic, and tape blankets over sharp edges.
For fixture covering, wrap lamps, vents, and baseboards with painter’s plastic to keep wax off hardware. Label stacked items for easy return, and keep a clear path to exit so you won’t trip while working.
Dry Sweep & Vacuum Without Scratching
Start by removing loose debris with a broom or dust mop so grit won’t get ground into the tile.
Use soft-bristle tools and microfiber heads to avoid scratches while collecting dirt.
When you vacuum, pick a hard-floor setting or a brushless attachment and move slowly to protect the surface.
Remove Loose Debris
Wondering how to prevent scratches while clearing away dust and grit? You start by removing loose debris before wet cleaning. Use gentle motions, keep grit from grinding into tiles, and prioritize DIY safety—gloves and knee pads if needed. Consider eco friendly options like corncob or microfiber cloths to trap particles without chemicals.
- Pick up large debris by hand or with a dustpan.
- Work from farthest corner toward the exit.
- Vacuum with a non-scratching floor attachment.
- Empty and check the vacuum canister often to avoid redistributing grit.
This step saves time and protects your finish.
Use Soft-Bristle Tools
When you dry-sweep or vacuum, choose soft-bristle tools so you don’t grind grit into the tile or scratch the finish. Use a brush or broom with synthetic, flexible bristles to protect grout, clear dust, and preserve any color variation or tile patterns. Work along seams and edges, and flip the brush regularly to remove trapped grit. Check bristles for wear and replace when stiff. Don’t press hard; let the tool lift particles. Below are simple tool tips:
| Tool | Best use |
|---|---|
| Soft broom | Quick daily sweep |
| Microfiber brush | Edges, corners |
| Rubber broom | Pet hair |
| Soft duster | Light dusting |
Vacuum With Care
Before you vacuum, make sure your tool and settings won’t scratch the tile or grind grit into grout; choose a soft-bristle floor attachment or a vacuum with a hard-floor mode and lift any large debris by hand first.
You’ll protect finish and grout by vacuuming gently and often, especially in a humid climate where grit sticks. Use low suction settings on delicate edges and avoid beater bars.
Pet hair collects fast, so empty the canister frequently to prevent re-depositing.
- Pick soft-bristle or hard-floor mode.
- Remove large debris by hand.
- Reduce suction near trim.
- Empty filters and canisters promptly.
How to Mop for Deep Dirt Removal Without Spreading Grime
Although mopping can look simple, doing it the right way prevents you from just pushing grime around. Start by sweeping or vacuuming thoroughly so you don’t drag grit across color patterns or disturb tile patterns.
Use a two-bucket method: one with clean warm water and mild detergent, the other for rinsing the mop. Wring the mop well to avoid excess water that spreads soil.
Mop in small sections, following grout lines, and rinse the mop often. Finish with a clean-water rinse and dry with a microfiber cloth or towel to lift remaining dirt and prevent streaks.
Deep Grout Cleaning for Embedded Stains
Before you start, check the grout for cracks, loose sections, and how deeply stained it’s so you know what treatment it needs.
Pick a cleaner that matches the grout type and stain—alkaline for grease, oxygen bleach for organic stains—and test it in an inconspicuous spot.
Agitate with a stiff brush, then rinse thoroughly to remove residue and prevent re-soiling.
Assess Grout Condition
When you’re checking grout for embedded stains, look closely for discoloration, crumbling, or gaps that indicate dirt has penetrated below the surface. These signs tell you whether routine cleaning will suffice or if you need deep-cleaning methods like steam, chemical treatments, or grout replacement.
You’ll inspect joints under good light, probe with a screwdriver for softness, and note odor or mold. Prioritize areas near sinks and entryways.
After repair or cleaning, consider Grout sealing to prevent recurrence and Tile polishing to refresh surrounding tiles. Assess and document problem zones to plan targeted restoration.
- Visual inspection under bright light
- Tap/probe for structural integrity
- Smell for mildew or odors
- Map and photograph stained sections
Choose Appropriate Cleaner
Now that you’ve identified stained or damaged grout and mapped problem areas, pick a cleaner that matches the stain type and grout material.
For oil or grease, use a degreasing cleaner; for mold or mildew, choose a mildew-specific product; for mineral stains, opt for an acidic grout-safe solution.
Test on an inconspicuous patch to confirm compatibility with your grout and surrounding tile.
Consider outdoor durability if grout sits in exterior passages or porches after Tile installation.
Use pH-appropriate formulas for sealed versus unsealed grout, follow manufacturer directions, and avoid mixing chemicals to protect surfaces and your health.
Agitate And Rinse Thoroughly
Although the cleaner loosens surface grime, you’ll need to agitate grout lines to pull embedded stains free: work in small sections, scrub with a stiff nylon brush or grout brush using firm, even strokes, and reapply cleaner where foam or residue fades.
After scrubbing, rinse thoroughly to remove loosened debris and cleaner trace that can cause color fading. Use warm water mindfully—temperature effects influence cleaner activity and grout expansion. Blot excess moisture and let grout air-dry.
Repeat stubborn spots, then neutralize with a mild rinse. Maintain ventilation and wear gloves to protect skin.
- Target small areas
- Scrub consistently
- Rinse until clear
- Dry completely
Using a Steam Cleaner on Tile: When to Use It and When to Avoid It
If you’ve got stubborn grime, deep grout stains, or want a chemical-free boost, a steam cleaner can be a fast, effective option for many tile floors. Use it on glazed ceramic or porcelain where sealed grout exists; steam lifts dirt without harsh detergents.
Avoid steam on unglazed, porous tiles, weak grout, or floors with suspect subfloor stability—excess moisture can worsen mold growth or cause warping. Test a small area first.
Move slowly, keep sessions short, and dry thoroughly afterward. Don’t use steam on adhesive-set vinyl, luxury vinyl plank, or any floor labeled “no steam.”
How to Neutralize Alkaline Residues After Cleaning
Before you rinse, test the floor’s pH with strips to see if alkaline residue remains.
If it’s high, use a mild acid rinse (like diluted vinegar or a commercial neutralizer) to bring the pH down.
Once neutralized, rinse with clean water and buff dry to prevent streaks and restore shine.
Test pH Before Rinsing
Why check the pH before you rinse? You want to avoid leaving alkaline residue that dulls color enhancement and hinders texture restoration. Test strips or a pH meter quickly tell you if neutralizing is needed.
- Dip a strip into rinse water or onto grout.
- Compare reading to neutral (pH 7) and note deviations.
- Record results for different floor areas to spot uneven cleaning.
- If readings stay high, don’t rinse fully—adjust your approach.
Use Mild Acid Rinse
After testing pH and spotting alkaline readings, neutralize that residue with a mild acid rinse to restore color and texture. You’ll mix diluted white vinegar or citric acid (eco friendly options) with water, apply lightly, and let it dwell briefly. Rinse thoroughly to avoid etching. This helps color enhancement by bringing out tile tones without harsh chemicals. Test a hidden spot first.
| Solution | Mix Ratio |
|---|---|
| White vinegar | 1:10 |
| Citric acid | 1 tsp:1 cup |
| Rinse water | Plain warm water |
Wring mop frequently and ventilate the area.
Neutralize And Buff Dry
Since alkaline cleaners can leave a dull, soapy film, you’ll want to neutralize and then buff the floor so tile color and shine come back. Mix a mild vinegar solution (1/2 cup white vinegar per gallon warm water) or a manufacturer-approved neutralizer, mop thoroughly, then rinse with clean water. Dry in sections with a microfiber mop.
- Test a hidden area for color matching and finish reaction.
- Use a soft, clean cloth or buffer on low speed.
- Replace gritty pads to avoid scratches on vintage patterns.
- Inspect under varied light, re-rinse if any haze remains.
Removing Soap Scum and Hard-Water Deposits From Tile
When soap scum and hard-water deposits build up on tile, they dull the finish and make grout look grimy; you’ll want to tackle them before waxing.
Mix white vinegar and warm water (1:1) for ceramic and porcelain; apply, let sit a few minutes, then scrub with a nylon brush.
For natural stone, use a pH-neutral cleaner to avoid etching.
Use a plastic scraper for stubborn spots, then rinse thoroughly.
After drying, assess color enhancement and pattern restoration—clean grout lines with a paste of baking soda and water if needed.
Finish by buffing dry to reveal shine.
Dealing With Oil and Grease on Kitchen Tile Floors
Although kitchen grease can seem stubborn, you can remove it effectively with the right approach and cleaners. First, blot fresh cooking spills, don’t rub, to avoid spreading oil.
Sprinkle baking soda on older slick spots, let it sit, then scrub with a nylon brush and warm water.
For persistent residue, use a degreasing dish soap solution, rinse thoroughly, and dry to prevent slipping.
If pets track pet stains with grease, treat both grease and organic mess promptly. Follow with a mild tile-safe cleaner and proper ventilation.
Avoid abrasive powders that might dull tile finish.
- Blot spills immediately
- Use baking soda
- Apply dish soap degreaser
- Rinse and dry
How to Remove Paint, Adhesive, or Other Stubborn Spots
Start by testing any solvent on an inconspicuous tile and grout joint to make sure it won’t damage the finish.
If the spot’s softened, gently scrape with a plastic putty knife at a low angle to lift residue without scratching.
Repeat testing and scraping in small sections until the stain is gone.
Solvent Spot Testing
Want to remove paint, adhesive, or other stubborn spots without damaging your tile? Test solvents first on an inconspicuous area to check for color fading or pattern matching issues. Work with small amounts, blot—not rub—and wait several minutes before evaluating.
Start with mild options, progress slowly to stronger solvents, and always ventilate.
- Choose solvent: water-based, rubbing alcohol, acetone, commercial remover.
- Apply to hidden spot; note color fading or finish change.
- Wipe gently; if residue lifts, stop and neutralize.
- If no damage, proceed to treat visible stains, re-testing as needed.
Gentle Scraping Technique
When solvents and spot testing haven’t loosened a stain, use gentle scraping to lift paint, adhesive, or other stubborn spots without harming the tile. Work slowly with a plastic scraper or putty knife at a low angle, keeping pressure steady to avoid scratching.
Soften residues first with warm water or a recommended remover, then scrape in the direction of grout lines. Avoid overheating tiles, especially with floor heating systems, and never force sharp metal tools.
After removal, clean the area, let it dry, and inspect for damage; reseal if needed as part of proper tile sealing maintenance.
Preparing Cracked or Loose Grout Before Waxing
If your grout is cracked or loose, you’ll need to fix it before waxing so the sealant adheres evenly and the floor looks professional. Start by removing debris and old grout from joints, then dry the area completely.
Patch with matching grout, smooth joints, and let cure fully. After curing, test small sections to confirm stability before applying grout sealing and proceeding to tile polishing.
Maintain ventilation and follow manufacturer cure times.
- Clear loose grout and dust.
- Use a grout saw for removal.
- Apply new grout and tool joints.
- Cure, seal, then polish tiles.
When to Repair Tile or Grout Instead of Waxing
If tiles are cracked, loose, or rocking underfoot, don’t wax them—repair or replace them first to prevent further damage.
The same goes for grout that’s crumbled, missing, or severely deteriorated; waxing won’t fix structural problems.
You’ll save time and money by addressing these issues before attempting any finish.
Cracked Or Loose Tiles
Though a shiny finish can hide minor blemishes, cracked or loose tiles need repair before you wax, because waxing won’t fix structural problems and can make them worse.
You should inspect tile patterns for cracks, lifted edges, or hollow sounds when tapped. Fix loose tiles and reapply adhesive, replace broken pieces, and guarantee grout sealing is intact around repaired areas. Don’t wax until repairs cure.
- Remove loose tile and old mortar.
- Clean substrate and apply proper adhesive.
- Replace tile, align with existing tile patterns.
- Let adhesive set, then check grout sealing before waxing.
Severely Damaged Grout
When grout is crumbling, missing, or deeply stained, you shouldn’t wax the floor until you repair or replace it. Damaged grout lets moisture and dirt undermine both tiles and any finish you apply.
Inspect the joints: if grout powdering, gaps, or mold appear, remove and re-grout those areas. Match grout color to existing lines or recolor the whole floor for consistency.
After curing, apply appropriate sealing techniques to protect pores and prevent stains. Only once grout integrity and seal are restored should you clean and wax.
Proper prep ensures the wax bonds evenly and the floor lasts longer.
How to Choose a Safe Floor Primer or Sealer for Tile
Why choose a primer or sealer specifically labeled for tile? You want adhesion, stain blocking, and compatibility with glaze and grout. Wrong products can peel or trap moisture.
Choose a tile-specific primer or sealer for proper adhesion, stain blocking, and safe glaze and grout compatibility.
For safe floor primer selection, pick low-VOC, water-based formulas and check tile manufacturer recommendations. Consider eco-friendly options if indoor air quality matters.
- Verify chemical compatibility with your tile and grout.
- Choose water-based, low-VOC primers or sealers.
- Look for breathable sealers to prevent moisture entrapment.
- Test in an inconspicuous area for adhesion and appearance.
Follow label directions and allow full cure before waxing.
Set Up a Waxing Workspace for Tile Floors
Now that your primer or sealer has fully cured, prepare a dedicated, well-lit workspace for waxing so you can work efficiently and avoid mistakes. Clear the area of furniture and rugs, and tape off baseboards and thresholds to protect surfaces.
Lay down clean drop cloths and arrange tools—wax, applicators, microfiber pads, and a small fan—within easy reach. Keep a labeled sample board for color matching and test spots so you can confirm sheen and tone before treating the whole floor.
Confirm grout sealing is complete and dry; mark any damp areas to avoid streaks. Maintain good ventilation and adequate lighting throughout.
How to Apply Wax by Hand for Small Areas
Before you start, gather your wax, a soft applicator pad or lambswool mitt, a clean microfiber cloth, and gloves so you can work confidently and avoid smudges.
Work in small sections, testing wax on an inconspicuous tile to check color matching.
Work in small sections, testing wax on an inconspicuous tile to ensure the color matches before proceeding.
Apply thin, even coats with light pressure, moving in circular motions; let each coat dry per manufacturer instructions.
For edges, use the cloth to feather and remove excess for a seamless finish.
When removing wax buildup, use a dedicated wax removal product and repeat spot-cleaning until the surface is uniform.
- Test color and finish
- Apply thin coats
- Feather edges
- Clean up excess
Using a Floor Buffer or Polisher for Larger Spaces
When you’re covering a larger area, a floor buffer or polisher speeds the job and gives a more uniform finish than hand waxing; choose a machine that matches your tile type and the size of the room, fit the correct pad or brush, and make sure all cords and obstacles are cleared before you start. You’ll work in overlapping passes, monitor pad wear, and avoid excess pressure to protect grout and decorative patterns. For rooms with floor heating, confirm temperature limits before polishing. Test a small area, use proper ventilation, and follow manufacturer safety guidelines for best results.
| Task | Tip |
|---|---|
| Machine | Match tile type |
| Pad | Use correct grade |
| Passes | Overlap slightly |
| Safety | Clear cords |
| Test | Small area first |
Correct Wax Application Technique and Stroke Pattern
Before you apply wax, make sure the tile is clean, dry, and free of dust or residue so the finish will bond properly.
Apply thin, even coats of wax with a clean pad or mop, working small sections at a time to avoid puddling.
Use long, overlapping strokes in a consistent pattern—typically straight lines or an “S” motion—to blend edges and achieve an even shine.
Surface Preparation Steps
Once you’ve cleaned and dried the tile thoroughly, prep the surface for waxing by removing remaining dust, scuffs, and grout haze with a microfiber mop or tack cloth so the finish lays down evenly.
Inspect for chips, loose grout, or residue; repair chips and regrout before waxing. Consider color options and texture variations when choosing wax sheen to complement tile. Mask edges and vents to avoid buildup.
- Vacuum and tack cloth sweep.
- Spot-treat scuffs with a gentle cleaner.
- Repair grout and chips; let cure.
- Degrease high-traffic zones; dry completely before waxing.
Proper Wax Application
Now that the surface is prepped and dry, you’re ready to apply wax with a controlled technique that guarantees even coverage and a smooth finish. Start by pouring a small amount of wax into a clean tray and loading your applicator lightly to avoid drips.
Work in manageable sections, overlapping edges so no area’s missed. Keep a steady pace and maintain consistent pressure for uniform sheen.
If you’re choosing color options or considering semi-transparent tints, test a patch first.
For areas with design patterns, follow grout lines to preserve definition.
Let each coat dry fully before adding more.
Stroke Pattern Techniques
Although the exact stroke pattern depends on your applicator and tile size, use long, overlapping strokes in a consistent direction to avoid streaks and visible seams. You’ll work methodically, keeping pressure even so the wax lays thin and uniform.
For color enhancement, follow grout lines and feather edges to blend coats.
For texture restoration, let each layer cure before buffing lightly.
Change direction only between full coats to avoid banding.
Keep a clean pad and replace when soiled.
- Start along one wall, move toward light.
- Overlap by 50%.
- Maintain steady pressure.
- Buff between coats.
How Many Coats of Wax You Should Apply and Why
Because the right number of wax coats affects both appearance and durability, you’ll usually apply two thin coats for everyday tile floors and three for high-traffic or older surfaces that need extra protection.
You’ll choose two coats when mosaic patterns or recent tile installation already provide visual depth and a good base finish. Apply thin, even layers so each bonds well without buildup in grout lines or textured tiles.
Three coats add resilience where wear is heavy. Between coats, inspect for streaks or puddles and remove excess.
Ultimately, balance sheen and protection for your usage and floor condition.
Drying and Cure Times for Common Waxes
Expect drying times to vary—most floor waxes set in 20 minutes to an hour but can take 24 hours or more to fully cure.
Humidity, temperature, ventilation, and coat thickness all affect how fast the wax dries and cures.
Wait the manufacturer’s recommended recoat window (usually 1–4 hours for touch-dry layers, longer for full cure) before applying another coat.
Drying Time Ranges
When you’re choosing a wax, remember drying and cure times vary widely by formulation and conditions. You’ll see fast-dry synthetics that set in 20–60 minutes and harder finishes needing hours to tack-free.
Natural, eco friendly materials often take longer to fully harden but offer safer color options and finishes. Plan your schedule: apply when temperature and humidity are stable, and avoid traffic until the specified time.
- Quick-dry synthetic: 20–60 minutes surface dry.
- Standard floor wax: 2–4 hours tack-free.
- Hardening cure: 24–48 hours before heavy use.
- Full cure: 7 days for peak durability.
Factors Affecting Cure
Now that you’ve planned around tack-free and full-cure windows, consider what actually controls those times: formulation, environment, and application.
You’ll find solvent-based waxes cure faster than polymer emulsion types; read labels for cure chemistry.
Temperature and humidity shift cure dramatically—warm, dry air accelerates cure, cold or humid conditions slow it.
Application thickness and overlap matter: heavy coats trap solvents, extend cure, and poor pattern alignment or visible color variations can signal uneven drying.
You’ll improve results by applying thin, even coats, controlling room climate, and following manufacturer cure times for safe foot traffic and maintenance.
When To Recoat
Because different waxes cure at different rates, you’ll want to match recoat timing to the product type and the conditions in the room. Wait until the surface feels dry to the touch and tack-free. Solvent-based waxes often recoat in 30–60 minutes, water-based need 2–4 hours, heavy films may need 24.
Consider humidity, temperature, your mopping frequency, and tile texture—rough tiles may hide wet spots and slow cure. Plan recoats to avoid trapping moisture or dirt.
- Check manufacturer label for minimum recoat time.
- Test tack and visual clarity.
- Keep ventilation steady.
- Avoid heavy foot traffic until fully cured.
How to Avoid Streaks, Bubbles, and Uneven Sheen
If you want a smooth, uniform finish, control the amount of product you apply and work in thin, consistent sections so the wax can level before it dries. Check tile patterns and grout lines as you go to keep application even; follow natural seams, not random swipes.
Use a high-quality applicator and moderate pressure to prevent bubbles. Maintain consistent overlap and avoid reworking areas once tacky.
Watch floor lighting angles to spot streaks immediately and buff lightly with a soft mop or cloth while the wax is still forgiving.
Allow full cure time and avoid foot traffic until sheen settles.
Tips for Waxing Around Baseboards and Edges
After you’ve kept application thin and even across open areas, focus on the edges and baseboards where buildup or missed strips are most visible. Use a small brush or foam applicator to lay a thin bead of wax right along the seam, then lightly feather it with a soft cloth so it blends with the main floor.
Consider Color options if matching sheen matters near trim. Choose Eco friendly alternatives when possible to reduce fumes.
Work in short sections and avoid overloading tools. Let each section dry before walking. Inspect under good light to catch streaks or pooling before it cures.
- Use small tools for control
- Feather into main field
- Match sheen and Color options
- Prefer Eco friendly alternatives
How to Safely Remove Old Wax Before Re-Waxing
When the old finish’s buildup dulls the tile or causes uneven drying, you’ll want to strip it completely before re-waxing to guarantee adhesion and an even look.
Start by clearing and sweeping the area, then test a small inconspicuous spot to ensure grout and tile won’t discolor.
Work in well-ventilated spaces and wear gloves and eye protection.
After removing residue, rinse thoroughly and let the floor dry to prevent trapped moisture that undermines mold prevention and future finishes.
Inspect grout lines, repair if needed, and apply proper tile sealing once dry so new wax bonds and lasts.
How to Strip Wax Using Chemical Strippers vs Mechanical Methods
Although both chemical strippers and mechanical methods remove wax effectively, choosing the right approach depends on the finish, the tile and grout condition, ventilation, and how much labor you want to do.
You’ll weigh potency versus safety: chemical strippers act fast but need ventilation and PPE; mechanical methods (scrubbing, floor machines) avoid harsh fumes and suit delicate finishes.
For greener choices, try Eco friendly alternatives and Chemical free methods like hot water extraction and biodegradable emulsifiers.
Assess grout depth and sealer integrity before starting, and test a small area.
- Safety gear and ventilation
- Test patch first
- Time versus effort
- Disposal plan
Maintaining a Waxed Tile Floor: Daily Habits
Because daily care prevents buildup and keeps your wax looking fresh, make quick routines part of your day. Sweep or vacuum high-traffic areas each morning to remove grit that scratches the finish. Wipe spills immediately with a damp microfiber to avoid staining or dulling.
Use a barely damp mop with pH-neutral cleaner when needed, then buff dry to restore shine. Rotate mats at entrances to reduce tracked debris.
Note how historical trends and cultural significance influence flooring choices—many people still favor wax for its warm look. These small habits preserve appearance and extend time between deeper maintenance steps.
Weekly and Monthly Care Routine for Waxed Tiles
If you want your waxed tile to keep its luster between deep treatments, set a simple weekly and monthly routine you can stick to.
Weekly, sweep or vacuum along tile patterns to remove grit, damp-mop with a pH-neutral cleaner, and buff dry to restore shine.
Monthly, inspect for scuffs, spot-clean with a gentle wax-safe solution, and check edges for buildup that could require wax removal.
Follow this numeric checklist:
- Sweep/vacuum along grout and tile patterns.
- Damp-mop with pH-neutral cleaner.
- Buff dry after cleaning.
- Monthly inspection and targeted wax removal if needed.
How to Handle High-Traffic Areas and Entryways
Place durable doormats both outside and inside entryways to trap grit before it reaches your tiles.
Sweep high-traffic paths daily to remove abrasive debris that wears down wax.
Consider applying a reinforced protective coating in these zones to extend the life of your finish.
Durable Doormat Placement
When you’re dealing with high-traffic entryways, a durable doormat is your first line of defense against grit and moisture that can wear down tile and tracking wax residue inside.
Place a heavy-duty mat outside and an absorbent one just inside to trap debris before it reaches sealed tile or undermines tile sealing.
Choose mats with non-slip backing and low-profile edges to prevent tripping.
Decorative patterns can disguise wear while guiding traffic.
Rotate and shake mats weekly; launder or hose them as recommended.
Replace mats when fibers thin to maintain protection and preserve your finish.
- Choose durable material
- Use double mats
- Select non-slip backing
- Rotate and clean regularly
Targeted Daily Sweeping
Those protective doormats help, but you still need daily attention in high-traffic zones and entryways to keep grit from scratching tile and dragging wax residue inward.
Focus on quick, targeted sweeping: sweep toward the entrance, collecting debris before it reaches the rest of the floor. Use a soft-bristle broom or microfiber dust mop to preserve finish and reveal dirt that blends with your floor color or hides in tile patterns.
Empty sweepings immediately and spot-sweep under benches and shoe racks. Rotate sweeping direction daily to dislodge trapped grit.
Consistent, brief sessions prevent buildup and protect wax without extra work.
Reinforced Protective Coating
Because entryways and hallways take the brunt of foot traffic, you’ll want a reinforced protective coating to keep tile and wax intact in those zones. Apply a solvent-free, wear-resistant product where tile patterns meet thresholds and around doorways. Test compatibility with grout and floor heating before full application. Let coatings cure fully; avoid traffic until recommended.
- Seal seams and edges near doors.
- Use a tougher topcoat on high-traffic strips.
- Add non-slip additives where needed.
- Refresh thin coats annually or biannually.
Regular spot repairs preserve finish and extend the life of your floors.
Spot Maintenance for Scuffs, Scratches, and Wear Spots
If a high-traffic area shows scuffs, scratches, or a dull patch, you can fix it quickly without redoing the whole floor. Start by cleaning the spot with a pH-neutral cleaner to remove dirt; this prevents further color fading and helps you see damage clearly.
Light scuffs often lift with a melamine sponge or gentle buffing. For shallow scratches, apply a matching wax or tile polish in thin layers, blending edges to preserve texture preservation.
Deep gouges need filler matched to grout or tile color, then seal and re-wax the repaired area to protect and blend.
When to Recoat Wax vs When to Strip and Redo
When you notice the wax finish thinning but the tile still cleans up evenly, a simple recoat will usually restore protection and shine without heavy work. Recoat when wear is uniform, no deep scratches exist, and regular mopping techniques keep soil from building.
Strip and redo if wax flakes, shows dark embedded dirt, or grout sealing has failed and stains persist.
- Inspect for uneven wear or buildup.
- Test adhesion with a small recoat patch.
- Strip if patches resist new wax.
- Consider grout sealing before recoating for lasting results.
Keep Waxed Tiles Safe: Anti-Slip Tips
When you wax your tiles, pick a slip-resistant formula designed for floors to keep traction without sacrificing shine.
You can also mix in a recommended anti-slip additive to boost grip on high-traffic or wet-prone areas.
Test any product on a small patch first so you’re sure it performs and looks right.
Choose Slip-Resistant Wax
Although waxing makes tile shine, you’ll want a slip-resistant formula to keep everyone safe—especially in entryways and bathrooms where moisture and foot traffic combine. Choose a product labeled “anti-slip” or “low-slip” and check suitability for your tile type. Consider color options to match finish and hide wear, and texture variations that offer grip without trapping dirt. Test a small area for appearance and feel.
- Read labels for coefficient of friction ratings.
- Match wax to tile material and sheen.
- Apply thin, even coats per instructions.
- Reassess after drying and light traffic.
Use Anti-Slip Additives
If you want extra grip beyond choosing a low-slip wax, add anti-slip additives to the finish for measurable traction without sacrificing shine. You’ll mix small, manufacturer-recommended amounts into wax, spread thinly, and let layers cure. Test a hidden patch first and follow Safety precautions: ventilate, wear gloves, and keep pets away during curing. Reapply selectively in high-traffic or wet zones. Maintenance stays simple—regular cleaning won’t strip beads if you use compatible products.
| Additive Type | Particle Size | Best Use |
|---|---|---|
| Polymer beads | Fine | Bathrooms |
| Sand | Coarse | Garages |
| PVA grit | Medium | Kitchens |
Eco-Friendly Cleaners & Waxes Safe for Tile
Because you want a clean floor without harming your home or the planet, choose eco-friendly cleaners and waxes formulated for tile surfaces. You’ll protect finishes, indoor air, and avoid residues that attract pests.
Integrate green products into seasonal maintenance to keep tiles resilient and reduce the need for harsh pest control chemicals.
- Plant-based pH-neutral cleaner for daily mopping.
- Microfiber mop to lift grit before waxing.
- Water-based tile wax for a non-toxic finish.
- Natural stone sealant for porous tiles.
Test any product in a hidden spot first to guarantee compatibility.
Troubleshooting Common Problems After Waxing
When you notice streaks, haze, or tackiness after waxing, quick diagnosis lets you fix the problem without stripping the floor; start by checking humidity, product compatibility, and application thickness, then tackle the issue with targeted cleaning or reapplication. Use gentle cleaners or natural remedies like vinegar solutions sparingly, test an inconspicuous spot, and reapply thin coats following floor patterns to avoid buildup. If tacky, wait longer or buff; if hazy, clean with a microfiber pad and mild solvent recommended by the wax maker. Stay calm—most issues are reversible with patience and correct technique.
| Concern | Emotion | Action |
|---|---|---|
| Streaks | Frustration | Rebuff gently |
| Haze | Worry | Mild clean |
| Tacky | Annoyance | Thin coats |
How to Remove Discoloration Caused by Wax Buildup
Although wax can give tile a glossy finish, buildup over time can yellow or dull surfaces and leave uneven color that stands out against clean grout and trim. You’ll tackle color fading and restore uniform sheen by stripping old wax, testing a small area, and using a mild solvent or commercial wax remover.
Restore tile shine by testing, stripping old wax, and using a mild remover—rinse, neutralize, then buff for even gloss.
Work in sections, rinse thoroughly, and neutralize residue so new wax adheres evenly. For stubborn patches, lightly buff with a soft pad. Finish with proper stain removal on grout or tiles if needed, then apply thin, even coats of fresh wax.
- Test first
- Strip in sections
- Rinse and neutralize
- Buff gently
Storing Wax and Cleaners Safely Between Uses
If you want your waxes and cleaners to stay effective and safe between uses, store them in a cool, dry place away from direct sunlight and heat sources, and keep lids tightly sealed to prevent contamination and evaporation. Label containers with purchase date, contents, and dilution instructions so you’ll handle them correctly. Keep incompatible chemicals separate and out of reach of children and pets. Note how color variations in products can signal contamination or aging; check containers before use. Store items near where you’ll work so you can match wax to tile patterns without running back and forth.
| Item | Storage Tip | Check |
|---|---|---|
| Wax | Upright, sealed | Color variations |
| Cleaner | Cool, ventilated | Smell |
| Pads | Dry, breathable | Integrity |
| Gloves | Accessible | Size |
Cost Estimate and Time Planning for a DIY Waxing Project
Because you can get a more accurate plan by breaking tasks down, start by listing materials, tools, and each step’s time so you know what the project will cost and how long it’ll take.
Estimate supplies (wax, cleaner, applicator), rental or tool costs, and small extras like floor mats or replacement microfiber pads.
Add time for prep, cleaning, drying, waxing, and curing; factor in breaks and accent lighting adjustments if you’ll inspect sheen.
Use this checklist to total expenses and hours before starting.
- Supplies and quantities
- Tools or rentals
- Step-by-step times
- Contingency budget and buffer time
When to Call a Professional Floor Care Service
Once you’ve mapped out costs and timing, decide whether the job still makes sense to handle yourself or if you should call a pro.
Call a professional when stains, grout damage, or wear exceed your tools or skills, or when large areas and tight deadlines make DIY impractical.
Professionals also help preserve historically influenced flooring patterns and respect restoration needs shaped by historical trends and cultural influences.
If warranties, high-value materials, or commercial liability are factors, hire experts.
Get referrals, compare certifications, and request written estimates.
You’ll save time and reduce risk when complexity, value, or preservation concerns outweigh DIY benefits.
Quick Checklist for a Successful Clean-and-Wax Session
Before you start, gather everything you need and lay out a clear plan: brooms and vacuums, pH-appropriate cleaner, microfiber mops, clean buckets, floor wax or sealer suited to your tile, applicator pads or mop heads, safety gear (gloves and knee pads), and warning signs if the area’s public.
Check tile condition, grout stains, and test cleaner in a hidden spot.
Decide decorative patterns or simple uniform coats and note any color options for waxes or sealers.
Follow this quick checklist before you begin:
- Sweep/vacuum thoroughly.
- Deep-clean grout.
- Apply wax in thin coats.
- Allow full cure time.
Tips for Preserving Your Floor’s Shine Year-Round
If you want your tile to keep that freshly-waxed glow, stick to a simple maintenance routine: dust and mop regularly with a pH-appropriate cleaner, wipe up spills immediately, use felt pads under furniture, and place mats at entrances to trap grit.
Rotate mats and rugs to avoid uneven wear that highlights floor patterns.
Reapply a compatible wax once or twice yearly, adjusting for traffic and the original tile installation method.
Avoid harsh abrasives and steam cleaners that strip finishes.
Inspect grout and seal when needed to prevent moisture damage.
Small, consistent steps preserve shine and extend the floor’s life.
Frequently Asked Questions
Will Waxing Tile Affect Radiant Floor Heating Efficiency?
Yes — you might see a slight drop in heat transfer if the wax layer’s thick; choose wax durability suited to radiant systems and confirm tile surface compatibility so you don’t insulate the floor and reduce heating efficiency.
Can Wax Cause Mold or Mildew Growth in Damp Areas?
Like a sealed book, wax can trap moisture and promote mold or mildew in damp areas. You’ll need mold prevention and moisture control measures, since wax alone can encourage growth by keeping surfaces damp and reducing breathability.
Are Pets Harmed by Wax Fumes or Residues?
Pets aren’t usually harmed by wax residues, but you should worry about pet safety from fume exposure during application; keep pets away, ventilate well, and use low-VOC products to minimize respiratory irritation and accidental ingestion risks.
How Does Wax Interact With Underfloor Sensors or Floor-Mounted Electronics?
Want to avoid surprises? You shouldn’t let wax contact underfloor sensors or floor-mounted electronics because wax can cause sensor interference and harm electronic compatibility, so you’ll seal edges, use compatible products, and test functionality afterward.
Can Waxing Change Tile Slip Resistance Ratings for Building Codes?
Yes — waxing can alter slip resistance ratings; you’ll change traction as wax durability and surface gloss evolve, so you’ll need testing and compliant products to guarantee maintained code-level slip resistance after waxing.
Conclusion
You can definitely make your tile gleam like a mirror with the right clean-and-wax routine — and it’s easier than you think. Follow the steps, use recommended supplies, and only wax tiles that tolerate it. Stay on top of spills, sweep often, and recoat as needed to keep that showroom shine. If in doubt or pressed for time, call a pro. You’ll thank yourself every time you walk across your gleaming floors.