
What to Clean Timber Floors With: Safe Products That Protect the Wood
You should clean timber floors with gentle, pH-neutral wood cleaners, a soft microfiber mop, and minimal water to avoid damage. For oiled floors use dedicated oil cleaners or maintenance oils; for sealed or polyurethane floors stick to diluted pH-neutral sprays and avoid oils or waxes. Spot-clean with a damp microfiber cloth and mild dish soap if needed, and always dry promptly. Follow manufacturer guidance and keep using proper products to protect finish and learn practical care tips.
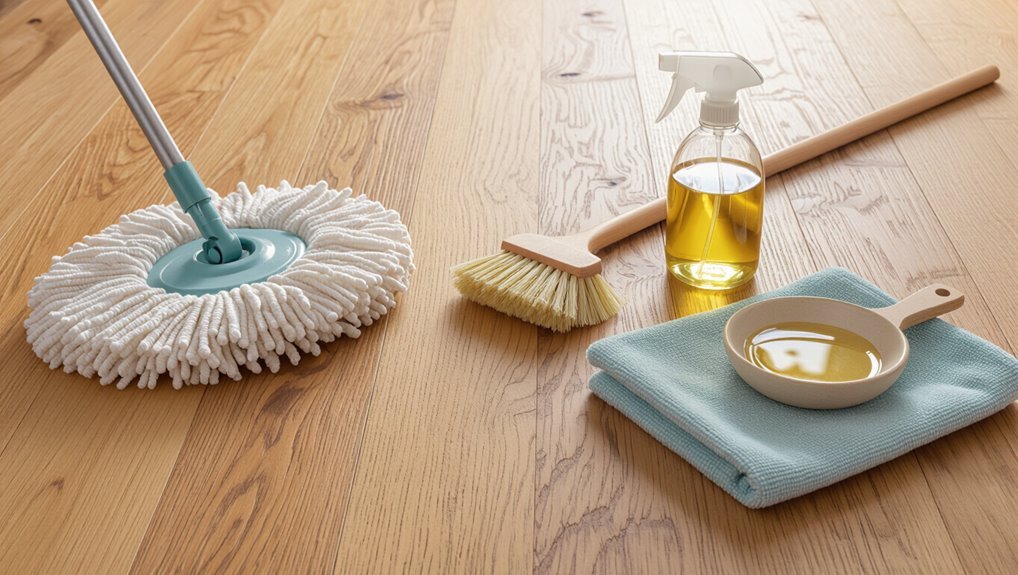
Best Products to Clean Timber Floors
You’ll want a gentle, pH-neutral cleaner as your go-to for timber floors.
I’ll list the top five safe product types—pH-neutral floor cleaners, microfibre mops, diluted dish soap, specially formulated wood shampoos, and approved oil-based cleaners—and briefly note what to avoid.
Steer clear of bleach, ammonia, steam cleaners, and abrasive scrubbers that can damage the finish.
One-sentence recommendation
When you want a quick, reliable pick, choose a pH-neutral, water-based timber floor cleaner—like Bona or a similarly rated brand—because it cleans effectively without dulling the finish or leaving residue.
For what to clean timber floors with, use a microfiber mop and follow label dilution; you’ll remove dirt safely, avoid over-wetting, and maintain shine with minimal effort.
Top 5 safe product types
Here are five types of cleaners that safely tackle timber floors: you’ll pick based on finish and soil.
Use pH-neutral hardwood cleaners, diluted dish soap for spot cleaning, gentle enzyme cleaners for organic stains, and commercial oil-based maintenance products for oiled floors.
- pH-neutral hardwood cleaners
- Diluted mild dish soap
- Enzyme stain removers
- Oil-based maintenance products
Products to avoid (brief)
Although it might be tempting to grab whatever cleaner you have on hand, avoid harsh chemicals like bleach, ammonia, straight vinegar, and oil soaps—these can strip finishes, dull shine, or leave residues that attract dirt.
Also skip abrasive scrubbers, steam mops on older finishes, and wax-based products unless your floor is specifically waxed.
Test new cleaners in an inconspicuous spot first.
Understanding Timber Floors: Basics You Need to Know
You’ll encounter several timber flooring types—solid, engineered, laminated, and parquet—each with different durability and moisture tolerance.
Finishes like polyurethane, oil, wax, and lacquer change the floor’s look and how you should clean it.
Knowing your floor type and finish helps you pick the right cleaning methods and products.
Types of timber flooring (solid, engineered, laminated, parquet)
Different timber floors suit different homes and lifestyles, so it helps to know the main types before you pick one.
Solid timber is single-piece hardwood, durable and sandable.
Engineered has a real wood veneer over plywood, stable in humidity.
Laminate mimics wood with a resin top and particleboard core.
Parquet uses patterned wood blocks for decorative layouts; maintenance varies by construction.
Common finishes (polyurethane, oil, wax, lacquer)
When choosing a finish for your timber floor, think about how you use the room and how much maintenance you want, since finishes affect appearance, durability, and care.
Polyurethane gives tough, water-resistant protection; oil penetrates and highlights grain but needs periodic re-oiling; wax offers a soft sheen and easy spot repair yet wears faster; lacquer dries quickly but can chip and may require refinishing.
How finish affects cleaning choices
Because each finish responds differently to water, cleaners, and abrasion, your cleaning choices should match the coating on the floor. You’ll use gentle, pH-neutral cleaners for oil and wax, water-safe cleaners for sealed polyurethane, and solvent-based products sparingly for lacquer. Test first in an inconspicuous spot and avoid harsh scrubbing that removes finish.
| Finish | Cleaning Note |
|---|---|
| Polyurethane | Water-safe, mild cleaner |
| Oil | pH-neutral, minimal water |
| Wax | Use wax-friendly products |
| Lacquer | Solvent sparingly |
| Refinished | Follow manufacturer |
Why Choosing the Right Cleaner Matters
Using the wrong cleaner can damage your timber—causing dull finishes, swelling, or even permanent surface harm.
You’ll want products with the right pH and without harsh solvents or abrasives, because those chemicals alter wood and coatings.
Watch for signs like persistent cloudiness, raised grain, or sticky residue to catch cleaning damage early.
Risks of wrong products (damage, dulling, swelling)
If you pick the wrong cleaner, you’ll quickly see problems—stripped finishes, a dulled shine, or swollen boards from excess moisture.
You’ll notice gaps, lifting edges, and weakened seals that invite stains and mold. Harsh or oily products can leave residues that attract dirt, forcing more frequent treatments.
Use approved, minimal-moisture cleaners to preserve finish integrity and long-term floor stability.
How PH, solvents and abrasives affect timber
Chemicals matter: pH, solvents and abrasives each attack timber in different ways, so you should choose cleaners that match your floor’s finish and species.
Acidic or alkaline cleaners can strip finishes or raise grain; solvents dissolve oils, finishes and adhesives; abrasive scrubs scratch and dull.
Use pH-neutral, solvent-free cleaners and soft tools to protect finish integrity and wood fibers.
Signs your floor has been damaged by cleaning
Notice anything odd about your timber after cleaning? You might see dull patches, whitening, sticky residue, or raised grain—signs a cleaner was too alkaline, acidic, or solvent-heavy.
Finish erosion, discoloration, or soft spots mean moisture or harsh chemicals damaged the coating or wood.
Stop using the product, rinse with clean water, and consult a professional for repair or appropriate restoration steps.
Safe Cleaning Products and Ingredients (Primary Guide)
You’ll want to start with pH-neutral cleaners for general use, since they won’t strip finishes and are safe for most sealed timber floors.
For tougher grime, mild dish soap solutions and purpose-made timber floor products work well—look for non-abrasive, low-residue formulas and clear guidance for oiled versus sealed floors.
If you prefer DIY or natural options, follow dilution rules (avoid strong vinegar mixes on delicate finishes) and use oil-based blends only where recommended, not on all surfaces.
pH-neutral floor cleaners what they are and recommended uses
While pH-neutral cleaners balance acidity and alkalinity to avoid damaging timber finishes, they still clean effectively without stripping oils or dulling sealants.
You can use them for routine damp-mopping, spot-cleaning spills, and maintenance between deeper treatments.
Choose labeled pH-neutral wood or hardwood formulas, dilute per instructions, wring mops well, and avoid soaking joints or leaving residue that could attract dirt or affect finishes.
Mild dish soap solutions when and how to use
Although gentler than harsh detergents, mild dish soap works well for occasional cleaning of timber floors when you need to cut grease or remove sticky residues without harming finish layers.
Mix a few drops in warm water, wring the mop until damp, and wipe along the grain. Rinse with clean water and dry promptly.
Use sparingly to avoid buildup or dulling.
Commercial timber/wood floor cleaners features to look for
When choosing a commercial timber floor cleaner, focus on formulations that protect the finish, lift dirt without leaving residue, and clearly list safe, recognizable ingredients.
You want pH-neutral blends, biodegradable surfactants, minimal solvents, and no harsh abrasives.
Check for manufacturer approval for your floor type and clear dilution instructions to avoid overuse.
- pH-neutral
- Biodegradable surfactants
- Low solvents
- Manufacturer-approved
Natural/DIY cleaners that are safe (vinegar dilute rules, oil-based blends) cautions
You can use natural or DIY solutions for timber floors, but you need to know which recipes are safe and which can harm finishes.
Use diluted white vinegar (about 1/2 cup per 4 litres) sparingly; avoid acidic or abrasive mixes.
Mild soap with water or oil-based maintenance blends (commercially formulated) can nourish sealed timber.
Always test a small, hidden area first and avoid overwetting.
Products for oiled vs. sealed floors specific recommendations
Because oiled and sealed timber take different maintenance approaches, choose products formulated for your floor’s finish and follow label instructions closely.
For oiled floors, use gentle oil cleaners or maintenance oils to nourish and restore slip resistance.
For sealed/polyurethane floors, pick pH-neutral cleaners and avoid oils or waxes that dull the finish.
Test any product in an inconspicuous spot first.
Step-by-Step Cleaning Process for Timber Floors
You’ll start with a simple daily routine—sweeping or using a microfiber mop and spot-treating high-traffic areas to keep dirt from building up.
Once a week you’ll follow a wet-cleaning sequence: prepare the area, mop with a mild cleaner, rinse if needed, and dry promptly to protect the wood.
For tougher grime or stains you’ll use targeted deep-cleaning steps and stronger spot treatments, focusing only on affected areas.
Daily/regular maintenance routine tools and frequency
A simple daily routine keeps timber floors looking great and prevents grit from causing scratches:
- Sweep or vacuum high-traffic areas morning and evening to remove dirt.
- Use a microfiber dust mop daily for whole-room dust pickup.
- Place entry mats and felt pads under furniture to reduce wear.
- Spot-clean spills immediately with a damp microfiber cloth; dry promptly.
Weekly wet-cleaning step-by-step (prepare, mop, rinse, dry)
After your daily dusting routine removes grit and loose debris, set aside one day each week for a gentle wet clean to remove film and ground-in dirt.
Fill a bucket with warm water and a manufacturer-approved cleaner, wring a microfiber mop until damp, work in sections, rinse the mop often, then dry each section with a clean towel or dry mop to prevent water damage.
Deep cleaning for grime and stains targeted steps
When grime or stubborn stains won’t budge with your weekly routine, tackle them with a targeted deep-clean that follows a clear step-by-step process:
vacuum or sweep thoroughly,
test a mild wood-safe cleaner in an inconspicuous spot,
apply diluted cleaner with a microfiber pad,
gently agitate stains with a soft brush,
blot excess moisture,
rinse with clean damp cloths,
and dry immediately to prevent damage.
Cleaning high-traffic areas and spot treatment
Because high-traffic zones show wear faster, focus your cleaning there first: sweep or vacuum to remove grit, then mop with a pH-neutral timber cleaner diluted per instructions.
For spots, blot spills immediately, use a soft cloth and cleaner, and gently rub stubborn marks with a soft brush.
Dry the area quickly and consider reapplying a protective polish to restore shine.
Comparison: Cleaners by Floor Type and Finish
You’ll want different products for solid timber and engineered boards, so I’ll point out which cleaners suit each.
I’ll also explain the key dos and don’ts for oiled versus polyurethane finishes.
Finally, you’ll get a quick comparison of natural versus commercial cleaners so you can weigh pros and cons.
Solid timber vs engineered timber recommended products
Although both solid and engineered timber look similar, they need different cleaners and care routines depending on the finish and construction. You should choose pH-neutral, low-moisture cleaners for engineered boards and gentler, feed-and-clean products for solid timber where appropriate. Test any product in a hidden spot first.
| Floor Type | Recommended Product |
|---|---|
| Engineered | pH-neutral cleaner |
| Solid | Wood-specific cleaner |
| Finish-safe | Microfiber mop |
| Deep-clean | Diluted manufacturer cleaner |
Oiled finishes vs polyurethane finishes dos and don’ts
When deciding between oiled and polyurethane finishes, know that they demand different cleaners and routines: you’ll treat oiled floors with gentle oil-friendly cleaners and spot oiling, while polyurethane needs pH-neutral mops and avoids oils or waxes.
| Oiled | Polyurethane |
|---|---|
| Use oil cleaners | Use pH-neutral |
| Re-oil spots | Avoid oils |
| Gentle mop | Damp mop only |
| No wax | No oil-based polishes |
| Refresh periodically | Recoat when worn |
Natural cleaners vs commercial cleaners pros and cons
Because different floor types and finishes react to ingredients in distinct ways, choosing between natural and commercial cleaners comes down to what your wood needs and how much risk you’re willing to accept.
Natural cleaners are gentler, eco‑friendly, and low‑cost but may need more effort and won’t protect finishes.
Commercial products offer targeted protection and durability but can contain harsh chemicals and require careful selection for your specific finish.
Common Mistakes and How to Avoid Them
Don’t soak timber floors or let standing water warp the boards; use a barely damp mop and dry promptly.
Skip harsh chemicals, abrasive scrubbers, and wrong mop types that can strip finishes or scratch surfaces.
Also avoid over-polishing, which causes buildup and dulls the floor over time.
Using too much water or soaking the floor
Although water seems like the safest cleaner, using too much or letting your timber soak can warp boards, lift seams, and ruin finishes.
Don’t mop with puddles or leave wet cloths on the floor. Use a barely damp microfiber mop, wring thoroughly, and dry any damp spots immediately.
For spills, blot promptly and finish with a dry cloth to prevent moisture damage.
Harsh chemicals and abrasive tools to avoid
If you want your timber floor to last, steer clear of harsh chemicals and abrasive tools that strip finishes or scratch wood fibers.
Don’t use bleach, ammonia, solvent-based cleaners, steel wool, or scouring pads. Choose pH-neutral cleaners, soft microfiber cloths, and nonabrasive brushes.
Test products in a hidden spot first, follow manufacturer guidance, and rinse residues promptly to protect finish and wood.
Wrong mop types and improper drying
When you pick the wrong mop—too wet, too abrasive, or designed for other floors—you’ll risk swelling, warping, or scratched finishes.
Letting water sit will only make those problems worse; choose a well-wrung microfiber mop or a flat mop with a manufacturer-approved pad and dry the surface promptly to prevent damage.
Wring thoroughly, mop along grain, avoid steam mops, and towel-dry any damp spots.
Over-polishing and buildup problems
Because too much polish builds up quickly, you’ll start noticing a cloudy, sticky film that dulls rather than enhances your timber floors.
Stop over-applying polish, follow manufacturer directions, and use a microfiber pad for thin, even coats.
Strip old buildup with a recommended cleaner before resealing.
Polish only when floors are clean and dry, and maintain with gentle, pH-neutral products to avoid recurrence.
Maintenance, Prevention and Best Practices
To keep your timber floors looking great, start with simple protective measures like mats, furniture pads, and consistent humidity control.
Set a maintenance schedule for re-oiling, recoating or sanding as needed, and act fast on spills to prevent stains.
Use gentle, routine-safe products for regular upkeep and reserve stronger restoratives for professional or occasional treatments.
Protective measures (mats, furniture pads, humidity control)
Although you can clean and refinish timber floors, preventing damage in the first place will save you time and money—use entry mats, furniture pads, and proper humidity control to protect the surface and finish.
- Place heavy-duty mats at entrances to trap grit and moisture.
- Attach felt pads to furniture legs; replace regularly.
- Use humidifiers/dehumidifiers to keep 40–60% RH.
- Avoid rubber-backed mats and dragging heavy items across floors.
Scheduling periodic maintenance (re-oiling, recoating, sanding)
When you follow a clear maintenance schedule, your timber floors will keep their appearance and avoid costly repairs.
Check finish wear annually, recoat every 3–5 years for high-traffic areas, and re-oil softwoods or oiled finishes as manufacturer suggests (often 6–12 months).
Plan sanding only when scratches penetrate finish or boards warp.
Keep records so you act before damage worsens.
Stain prevention and immediate response tips
If you want stains to stay out of your timber floor, act fast and use the right products: blot spills immediately with a clean, dry cloth, then dab with a damp microfiber and mild pH-neutral cleaner.
Avoid harsh scrubbing or ammonia. For oil or wine, sprinkle absorbent powder before blotting.
Test cleaners in an inconspicuous spot, dry thoroughly, and place mats where spills are likely.
Safe products for routine upkeep vs restorative care
Because routine care and restorative work require different approaches, choose products designed for each task: gentle pH-neutral cleaners and microfiber mops for weekly upkeep, and manufacturer-recommended restorers, refinishing kits, or professional-grade oils for deeper repair.
You should test products on an inconspicuous spot, follow label instructions, avoid ammonia or vinegar, and hire pros for structural damage or full refinishes to protect finish and grain.
Product Recommendations and Buying Guide
When choosing cleaners, read labels and ingredient lists to match products to your floor’s finish and avoid harmful solvents.
I’ll recommend specific cleaners for sealed, oil-finished, and waxed timber plus eco-friendly and pet-safe alternatives.
Follow the label instructions and test any product in an inconspicuous spot before full use.
How to read labels and ingredient lists
Start by scanning the product label for explicit claims like “for hardwood,” “water-based,” or “solvent-based,” and check the ingredients list for oils, waxes, surfactants, and preservatives so you can match the cleaner to your floor’s finish and avoid harmful chemicals.
Look for pH info, “no ammonia” or “no VOCs,” concentration directions, and any cautions; prioritize simple, transparent ingredient lists.
Recommended product examples for each finish
After you’ve matched cleaners to your floor’s finish, here are clear product recommendations so you can pick the right option quickly:
- Bona Hardwood Floor Cleaner — water-based for sealed polyurethane finishes, streak-free.
- Murphy Oil Soap — gentle for waxed or oiled floors, conditions wood.
- Weiman Wood Floor Cleaner — for polyurethane and acrylic finishes, quick-dry.
- Howard Feed-N-Wax — restores and protects oil-finished surfaces without buildup.
Eco-friendly and pet-safe options
Because eco-friendly cleaners cut chemical exposure for you and your pets, choosing the right product matters: look for biodegradable ingredients, low VOCs, and non-toxic labels that list ingredients or third-party certifications.
Pick pH-neutral hardwood cleaners, enzyme-based spot removers, or diluted castile soap for regular use. Test any product on an inconspicuous area, follow label dilution, and store safely away from pets.
Troubleshooting Common Problems
You’ll learn how to tackle common issues like water stains and white spots, remove sticky residue and buildup, and restore dull or scratched finishes.
I’ll explain simple fixes you can try yourself and clear signs that it’s time to call a pro.
Follow these tips to decide the safest, most effective next step for your timber floors.
Removing water stains and white spots
If water rings or white cloudy spots appear on your timber floor, don’t panic—you can often lift them without sanding.
Gently rub with a soft cloth and a small amount of non-gel toothpaste or baking soda paste; wipe damp, then dry.
For deeper marks, try a clothes iron over a cloth on low heat briefly.
Reapply finish spotwise if shine is lost.
Tackling sticky residue and buildup
Once you’ve dealt with water rings and restored the finish, sticky residue and buildup present a different kind of challenge: they’re often from cleaners, spills, or pet messes that attract dirt and dull the surface.
Start with a damp microfiber mop and gentle pH-neutral cleaner, blotting—not scrubbing—stubborn spots.
For sticky patches, use a diluted vinegar solution sparingly, then rinse and dry thoroughly.
Repairing dull or scratched finishes when to DIY vs call a pro
Wondering whether to tackle dullness or scratches yourself or call a pro?
Small surface scuffs and mild dulling you can fix: clean, buff, and apply a compatible floor polish or thin coat of finish.
Deeper scratches, finish failure, or large faded areas need a pro—sanding, stain matching, and re-coating require skill and equipment to avoid uneven color or further damage.
Visual Guide and Tools
You’ll find clear images showing the right mop types and how to use them, so you can avoid excess water and streaks.
We’ll also show photos of common finish damage alongside the likely causes, so you can spot problems early.
Use these visual tools to compare your floor and pick the correct cleaning approach.
Images: correct mop types and application techniques
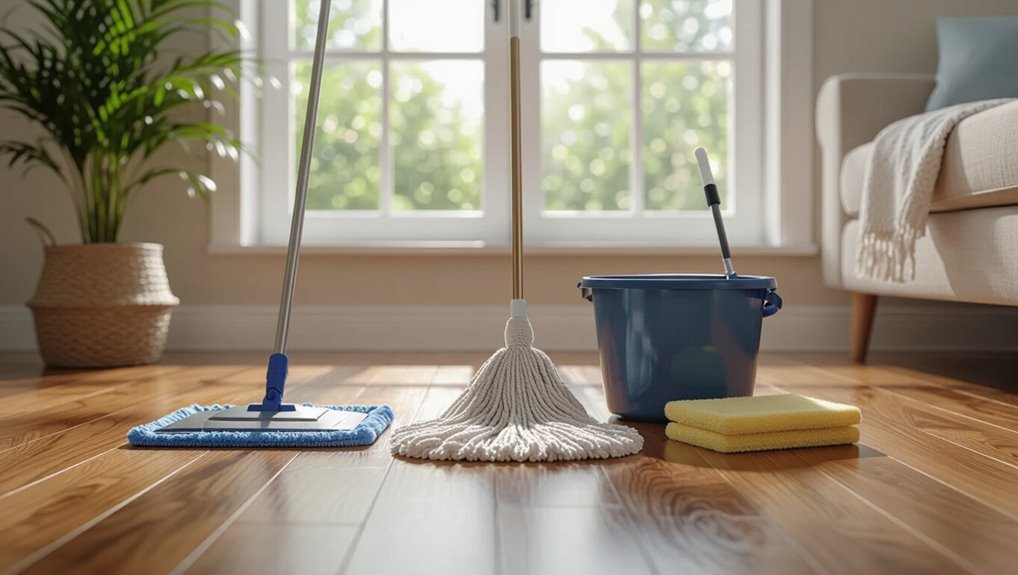
When choosing a mop for timber floors, pick one that matches your finish and cleaning routine so you don’t damage the wood.
Use flat microfiber for light dusting and damp cleaning, a wrung-out sponge mop for sealed floors, and a lambswool pad for gentle polishing.
Wring thoroughly, mop with the grain, and rinse or swap pads often to avoid grit scratching the surface.
Images: examples of finish damage and what caused it
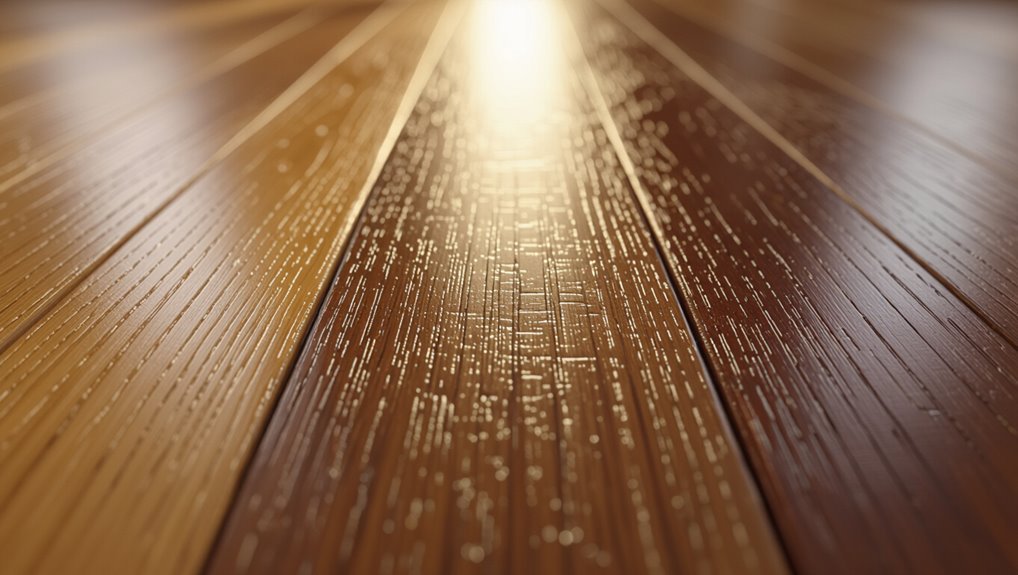
Because finishes tell a clear story, a few close-up images can help you quickly spot common damage and trace it back to its cause.
Look for scratches from grit, dulling from wax buildup, water rings from spills, sun-bleached patches, and chemical etching from harsh cleaners.
Label each photo with the suspected cause and a brief fix so you can prevent repeats.
Frequently Asked Questions (FAQ)
You probably have quick questions like whether vinegar or steam mops are safe for timber floors, how often you should wet-clean, or the best way to remove scuff marks.
You’ll also want to know how to tell if your floor is oiled or sealed. Below are clear answers to those common concerns.
Can I use vinegar on timber floors?
Can you use vinegar on timber floors? You can, but cautiously.
Dilute white vinegar with water (about 1/2 cup per gallon) and test a hidden area first.
Avoid over-wetting, harsh scrubbing, or using on unfinished, waxed, or oil-finished floors.
Rinse lightly with clean water and dry immediately.
For delicate or sealed floors, consider a manufacturer-approved cleaner instead.
How often should I wet-clean timber floors?
How often you should wet-clean timber floors depends on foot traffic, finish type, and visible soil.
For low-traffic, sealed floors, mop with a damp—not wet—cloth every 2–4 weeks and spot-clean as needed.
High-traffic or unsealed floors may need gentle wet-cleaning weekly.
Always follow manufacturer guidance, avoid excess water, and dry promptly to prevent damage.
What is the safest way to remove scuff marks?
Wondering how to remove scuff marks without harming your timber floors?
Gently rub with a soft cloth and a small amount of wood floor cleaner or diluted dish soap; avoid abrasive pads.
For stubborn marks, use a melamine sponge lightly dampened, testing first in an inconspicuous spot.
Wipe dry immediately and apply a suitable wood polish or conditioner sparingly to restore protection and shine.
Are steam mops safe for timber flooring?
Thinking of using a steam mop on your timber floors? You’ll want caution: steam can force moisture into seams, warp boards, or soften finishes.
If your floor’s well sealed and manufacturer permits steam, use low steam, minimal passes, and a microfiber pad.
Avoid on older, unsealed, or engineered floors with vulnerable veneers.
When in doubt, choose a damp mop instead.
How do I know if my floor is oiled or sealed?
Curious whether your timber floor is oiled or sealed? Check a hidden spot: drop a few water drops. If water beads, it’s sealed; if it sinks in and darkens the wood, it’s oiled.
Sealed floors feel smoother and resist stains; oiled floors absorb finishes and can be spot-treated.
When in doubt, consult your installer or test a small area before cleaning.
