
How to Replace Sections of Laminate Flooring Without Redoing the Whole Floor
You can replace just damaged laminate planks without redoing the whole floor if you have matching boards and access to seams. Remove trim, carefully disengage or cut out the affected planks, prep the subfloor and underlayment, then fit new planks by angling the tongue into the groove and tapping them flush. Clean, reattach trim, and allow adhesives or sealants to cure. Continue for guidance on tools, tricky glued installations, and tips to make the repair invisible.
Can You Replace Sections of Laminate Flooring Without Redoing the Whole Floor?
You can often replace just damaged laminate planks rather than redoing the whole floor, but the decision depends on matching, damage extent, and installation type.
If you have extra matching planks and the damage is isolated, a partial repair is usually viable and quick.
If the boards are discontinued, the pattern is widespread, or the floor is glued down, you’ll likely need a full replacement.
Short, actionable summary
Yes—you can often replace sections of laminate without redoing the whole floor, but success depends on the damage location, the plank profile, and how the floor was installed.
Quickly assess matching planks, gather tools, and isolate damaged boards.
Use a reliable method to remove and install pieces, guarantee tight seams, and test stability.
Learn how to replace sections of laminate flooring safely and efficiently.
When partial replacement is a viable option
If the damage’s size, location, and your plank profile line up, you can often replace just the affected laminate instead of redoing the whole floor.
You should consider partial replacement when damage is isolated, matching planks are available, and surrounding boards are stable.
You’ll also need access to seams and the right tools.
Partial fixes save time and money when done carefully.
When full replacement is recommended
When damage is widespread, the subfloor is compromised, or matching planks aren’t available, you’ll need to replace the entire laminate floor rather than patch sections.
You should also replace the whole floor if moisture has warped many boards, junctions look uneven, or repeated repairs fail.
Full replacement guarantees consistent appearance, restores structural integrity, and prevents future issues from hidden rot or adhesive failure.
Basic Understanding What Is Laminate Flooring and How It’s Installed
You’ll want to know that laminate planks are built from a wear layer, a dense core, and a backing that together determine durability and how they handle moisture.
Installation methods—click-lock, glued, or floating—change how planks fit together and whether you can remove a damaged section without disturbing the rest.
Understanding both the construction and the installation type makes it clear which partial-repair approaches will work for your floor.
Laminate components: wear layer, core, backing
Think of laminate flooring as a three-layer system that works together to look good and hold up: the wear layer protects against scratches and stains, the core provides strength and stability, and the backing prevents moisture from warping the planks.
When replacing sections, match wear-layer thickness and AC rating, verify the core material (HDF or MDF) matches, and keep the backing consistent for moisture control.
Common installation methods: click-lock, glued, floating
Although laminate looks simple, it’s installed three main ways—click-lock, glued, or as a floating floor—each affecting repair and replacement.
Click-lock panels snap together and lift out row by row. Glued installations bond directly to subfloor and need careful adhesive removal.
Floating floors rest on underlayment and aren’t attached, letting you remove sections more easily without disturbing surrounding planks.
How installation type affects partial repairs
Now that you know the three main installation styles—click-lock, glued, and floating—you can see how each method changes what’s involved in a partial repair.
With click-lock you can remove and replace planks from an edge; floating floors let you lift a section if seams allow; glued installations often need careful cutting and adhesive work, sometimes requiring matching adhesive and subfloor cleanup.
Tools, Materials, and Preparations You’ll Need
Before you start, gather an essentials checklist: pry bar, tapping block, pull bar, saw, measuring tape, and safety gear.
Make sure you have matching replacement planks, connector pieces, and underlayment, and verify matches for color, thickness, and bevel.
Clear and protect the workspace, wear eye and hand protection, and plan how you’ll remove and fit the new sections.
Essential tools checklist
You’ll need a compact set of tools and materials to replace laminate sections efficiently: a pry bar, tapping block, pull bar, utility knife, measuring tape, pencil, rubber mallet, replacement planks, underlayment (if damaged), spacers, and wood glue or laminate adhesive for splines or repairs.
- Inspect damage and gather tools.
- Measure and mark cuts.
- Remove damaged planks carefully.
- Fit and secure replacements, checking alignment.
Materials: matching planks, transition pieces, underlayment
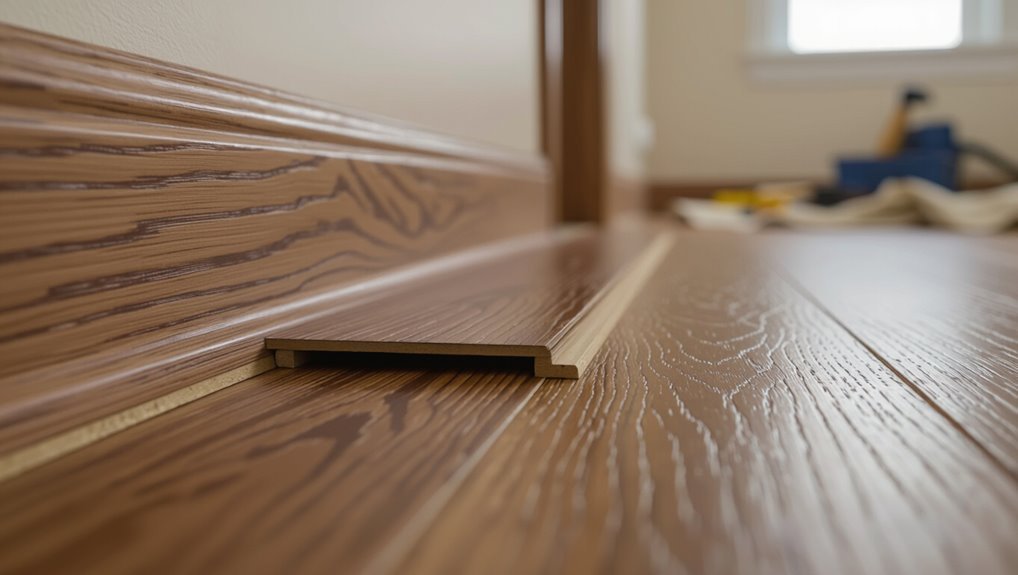
Color and profile matching matters: pick replacement planks that match the existing board’s thickness, finish, and locking profile so seams stay invisible and the floor performs correctly.
Also get junction strips for doorways and room joins, and a compatible underlayment for sound and moisture control.
Buy extra planks for cuts and future repairs, and check that adhesives or moisture barriers suit your subfloor.
How to assess plank matching (color, thickness, bevel)
1 clear way to make sure replacement planks blend in is to compare samples side-by-side under the same lighting, checking color, gloss, thickness, and beveled edges.
Hold planks together at seams to confirm bevel alignment, stack to verify identical thickness, and view from different angles for sheen.
Note manufacturer codes and batch numbers; photograph samples for reference when buying replacements.
Safety and workspace prep
Before you cut into the floor, clear and secure your workspace, gather the right tools and safety gear, and plan the sequence of cuts so you work efficiently and safely.
Put down drop cloths, move furniture, and tape off the area.
Wear safety glasses, gloves, knee pads, and a dust mask.
Have a pry bar, saw, measuring tools, replacement planks, and wood glue ready.
Step-by-Step Guide to Replacing Individual or Multiple Laminate Planks
Start by inspecting the damaged area and mapping a clear repair plan so you know which planks to remove and whether you’re replacing one or several.
You’ll then remove trim and thresholds, extract damaged planks (using different techniques for click-lock versus glued systems), and prep the subfloor and underlayment.
Finally, install replacement planks and check seams for a tight, even fit.
Step 1 Inspect damage and create a repair plan
A quick, thorough inspection is the first thing you should do: identify which planks are loose, cupped, swollen, or scratched, and note whether damage is isolated or spreading.
Check adjacent rows, under cabinets, and near seams for moisture or gaps.
Map damaged planks, count replacements, list tools and matching laminate needed, and decide if single-plank or multi-plank replacement is required.
Step 2 Remove trim and transition pieces
Remove the baseboards, quarter-round, and any edge strips that border the damaged area so you can access the ends of the planks.
Use a pry bar and putty knife to gently lift trim, protecting walls with a scrap of wood. Label and store removed pieces for reinstallation.
Remove threshold strips between rooms, keeping fasteners and clips organized for an exact refit later.
Step 3 Remove damaged planks (techniques for click-lock vs glued)
You’ll lift out damaged boards differently depending on whether your floor clicks together or was glued down.
For click-lock, release adjacent rows, unsnap toward an edge, and slide planks out.
For glued planks, score seams, heat adhesive if needed, and pry up sections with a chisel and pry bar, working slowly to avoid subfloor damage.
Dispose of debris and clean the area.
Step 4 Prepare the subfloor and underlayment
Inspect the exposed subfloor and underlayment for moisture, debris, or unevenness before you lay new planks.
Remove nails, adhesive residue, and loose particles, then vacuum thoroughly.
Repair dips or high spots with a leveling compound or sand high areas until flat.
Replace damaged underlayment sections and roll a new moisture barrier if needed.
Verify the surface is clean, dry, and perfectly even.
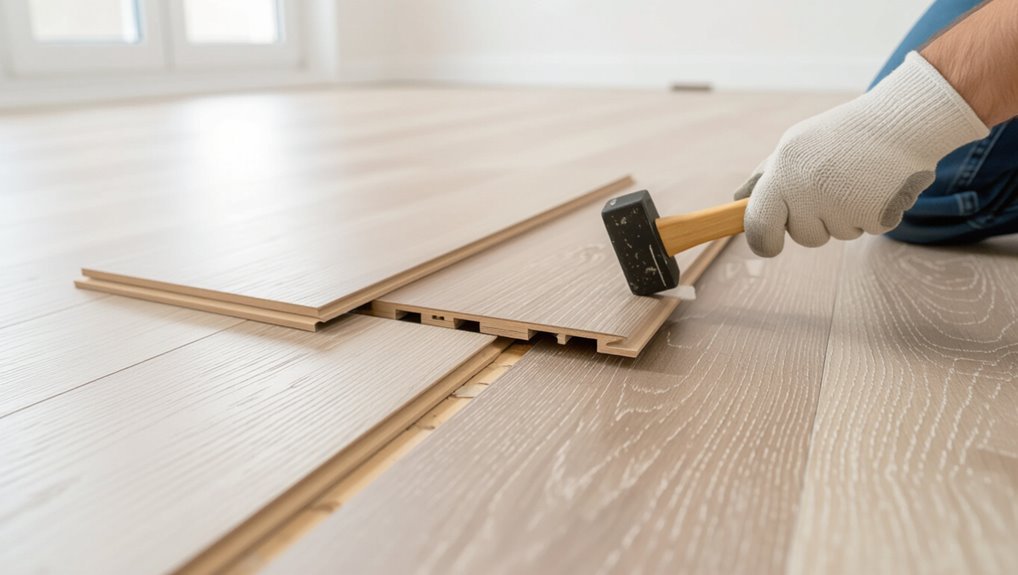
Step 5 Install replacement planks and ensure tight seams
With the subfloor prepped and flat, fit your replacement planks into the gap one at a time, starting from the longest intact row nearest the opening.
Angle each tongue into the groove, lower and tap gently with a block and mallet to lock joints.
Stagger seams to match pattern, trim end pieces for snug fit, and check alignment with a straightedge as you proceed.
Step 6 Reinstall trim, transitions, and finish cleanup
Reattach the baseboards, connector strips, and any threshold pieces to restore the room’s finished look and protect the edges of your new planks.
Use finish nails or adhesive as original, align seams, and check joints sit flush.
Clean dust and adhesive residue, inspect for gaps, and touch up paint or caulk.
Allow adhesives to cure before moving furniture back.
Alternative Methods for Common Scenarios
When full plank removal isn’t practical, you can use cut-out inserts to patch small damaged areas quickly.
You’ll also learn techniques for replacing edge or border planks without disrupting whole rows, and how to handle larger jobs like a room section or doorway threshold replacement.
Choose the method that matches the damage and your skill level to get the best result.
Patch repair using cut-out inserts
Cut-out inserts let you replace only the damaged boards instead of ripping out an entire floor, saving time and money while keeping the pattern intact.
You’ll cut a precise rectangle, remove the damaged plank, trim a matching insert to fit, and glue or lock it in place.
Take care to match grain, height, and seam alignment for an invisible repair.
Repairing edges or border planks without disrupting entire rows
Edge and border planks often show wear first, but you don’t have to dismantle whole rows to fix them—small, targeted techniques let you replace only the affected pieces.
Slide out baseboards, loosen adjacent planks, and remove the damaged edge using a pull bar or saw.
Install replacement edge planks with adhesive or tongue-and-groove reconnection, then reseal and reinstall trim for a seamless finish.
Replacing an entire room section or doorway threshold
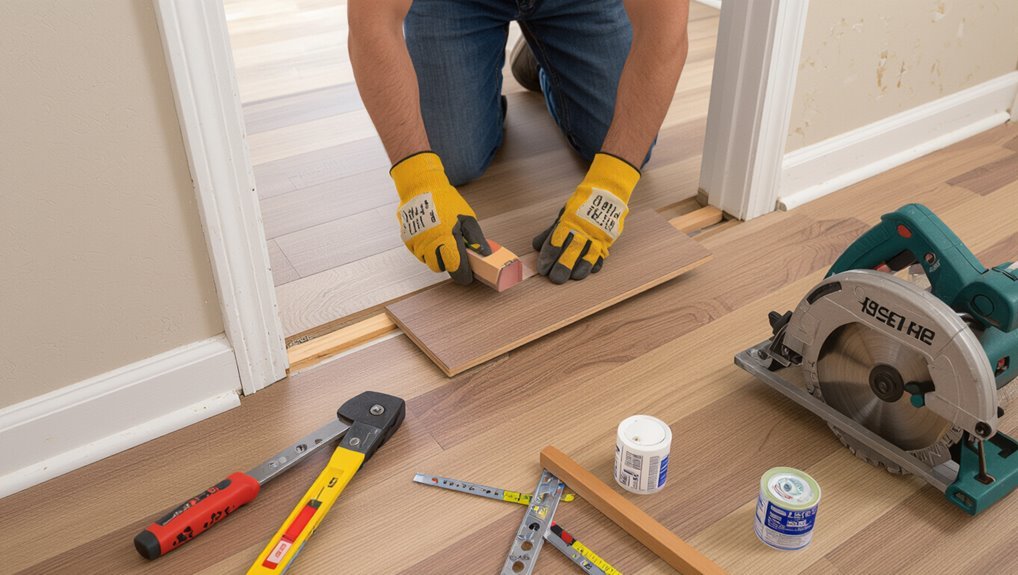
If you need to replace a larger area—like an entire room section or a doorway threshold—the approach changes from spot repairs to planning for movement, alignment, and matching profiles.
Measure and remove full rows as needed, preserve expansion gaps, and prep subfloor for level shifts.
Match plank color, thickness, and seam pattern.
Reinstall threshold trim and test door clearance before final fastening.
Matching New Planks to Existing Floor Tips and Techniques
If you can’t find the exact plank, start by hunting discontinued lines, close-match colors, or salvage pieces from the same batch.
You can blend old and new with light staining, area rugs, or careful placement, and use threshold strips where color or texture differences are obvious.
Choose a threshold strip when seams would be distracting or when the replacement involves a different plank thickness.
Finding discontinued or close-match products
Wondering how to match new planks to an existing laminate floor when the original product’s discontinued?
Search manufacturer archives, contact customer service with batch codes, and check local dealers or salvage yards.
Bring a plank sample and take photos under natural light.
Compare wear layer thickness, locking profile, and color tone.
Consider custom-order close matches from specialty mills or online marketplaces for surplus stock.
Techniques for blending old and new (staining, rugs, transitions)
When you’re installing new planks next to older laminate, seamless blending takes a mix of small tweaks and strategic camouflage: light sanding and color-matched stain can tone down contrast, area rugs hide junction lines and pattern mismatches, and decorative thresholds or reducers create a clean visual break where match is impossible.
Test stains on scrap, feather edges, pick rug sizes to balance scale and traffic.
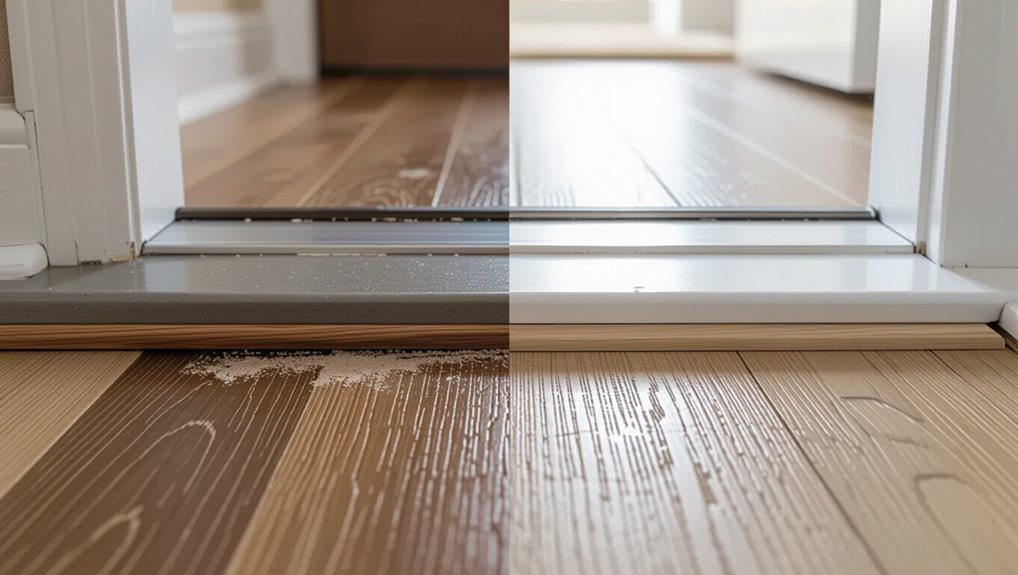
When to use transition strips to disguise differences
Although you want the new planks to look like they’ve always been there, sometimes a changeover strip is the smartest way to hide color, sheen, or pattern differences without reworking the whole floor.
You’ll use a junction when seams are visible, thresholds meet, uneven subfloors exist, or room functions differ.
- Visible seam
- Threshold gap
- Uneven plane
- Different room use
Problems You May Encounter and How to Solve Them
You’ll likely run into a few common problems—warped or swollen planks from water, gaps or misaligned seams after swapping pieces, stubborn glued boards, or unexpected subfloor damage.
I’ll show how to assess each issue, when you can fix it yourself, and when to call a pro.
Follow the step-by-step solutions to get the floor stable and looking seamless again.
Warped or swollen planks after water damage
If water soaks into your laminate, planks can swell, cup, or warp, breaking the tongue-and-groove connection and creating uneven, loose sections that need attention.
First, dry the area thoroughly and remove damaged boards. Replace swollen planks with matching pieces, ensuring joints fit snugly.
Check underlayment for mold or deterioration and replace it if compromised before reinstalling new boards.
Gaps or misaligned seams after replacement
When seams don’t line up or you see visible gaps after replacing planks, it usually means the boards weren’t seated correctly, the subfloor or underlayment shifted, or the replacement pieces don’t match the original profile; you can fix this by identifying the root cause, reseating or rehabbing the affected boards, and ensuring proper expansion space and alignment before locking them back in.
Check tongue-and-groove engagement, shim or plane edges, and replace mismatched pieces.
Difficult glued installations and removal challenges
Glued-down laminate presents a different set of headaches than loose-click planks, and if seams were a problem you may already suspect how stubborn adhesive can be.
You’ll need scrapers, heat, a chisel and patience. Heat softens glue, scrapers lift layers, and a floor adhesive remover helps.
Work slowly to avoid damaging adjacent planks, and wear eye and respiratory protection.
Subfloor issues revealed during repair
Because laminate repairs expose the base beneath, you’ll often find hidden problems like rot, unevenness, or moisture damage that you didn’t expect.
Inspect the subfloor thoroughly, pry out damaged sections, and dry or replace rotted plywood.
Level uneven areas with a self-leveling compound or shims, treat moisture sources, and install a moisture barrier.
Secure and reseat new flooring planks before finishing.
Common Mistakes to Avoid
When replacing planks, don’t mix different batch or lot numbers or you’ll see mismatched color and texture.
Don’t force click-lock joints or you can crack tongues and grooves, and make sure you address any moisture issues before reinstalling.
Finally, don’t skip acclimating new planks so they don’t expand or gap after installation.
Not matching plank batch/lot leading to visible differences
If you swap in planks from a different batch or lot, you’ll often see subtle color, grain, or wear variations that stand out after installation.
Always check batch numbers and compare samples under the room’s light before buying.
If exact matches aren’t available, consider ordering extra boards from the original manufacturer or blending replacements strategically to minimize contrast and maintain a cohesive appearance.
Forcing click-lock joints and damaging tongues/grooves
You might try to force in a replacement plank to match a different batch, but that habit will often lead to damaged tongues or crushed grooves.
Don’t jam pieces; they should click smoothly. If you meet resistance, stop, check alignment and plank orientation, and trim or replace the damaged piece.
Damaged joints ruin stability and make future repairs far harder.
Ignoring moisture issues before reinstalling
Before you reinstall any laminate, check and address moisture — failing to do so invites cupping, bubbling, and joint failure.
Measure subfloor humidity and inspect for leaks or trapped damp.
Dry, repair, and install a proper vapor barrier where needed.
Don’t just cover visible stains; hidden moisture will ruin new planks and force another replacement sooner than you expect.
Skipping acclimation of new planks
Because laminate adapts to temperature and humidity, skipping acclimation can leave new planks warped, gapped, or stressed once they’re installed.
You should store boxes flat in the room for 48–72 hours, keeping ambient temperature and humidity steady. Don’t install straight from the garage or basement.
Proper acclimation prevents buckling, separation, and premature wear, saving time and avoiding costly repairs.
Best Practices and Prevention Tips
You can extend your laminate’s life with routine maintenance and by wiping up spills or moisture immediately.
Keep a few extra matching planks on hand for quick future repairs, and follow proper installation practices now to make partial replacements much easier later.
These simple steps will save time and money when problems arise.
Routine maintenance to extend laminate life
While regular checks and simple habits won’t fix major damage, they can prevent most wear and keep your laminate looking new longer.
Sweep or vacuum weekly to remove grit, use felt pads under furniture, and rotate rugs to even traffic.
Clean with a manufacturer-approved cleaner, avoid abrasive tools, and inspect seams periodically so you catch loose or lifting boards before small issues become replacements.
Quick response to spills and moisture
If water or spills sit even briefly, they can seep into seams and swell the core, so act fast to blot and dry affected areas.
Use absorbent towels, a wet/dry vacuum, and a fan to speed drying. Lift trim if needed to ventilate edges.
Disinfect stains with a mild cleaner, then inspect seams for gaps so you can repair before mold or warping sets in.
Keeping extra planks for future repairs
Because damage can show up months or years after installation, keep a few leftover planks from your original batch so you can match color, grain, and finish exactly when repairs are needed.
Store them flat, in original packaging if possible, away from sunlight and humidity. Label with purchase date and product code.
Having spares saves time, guarantees seamless replacements, and avoids costly color mismatches.
Proper installation practices to ease future partial repairs
When you install laminate with future repairs in mind, you’ll save time and avoid unnecessary damage down the road.
Plan plank orientation, stagger seams for removable sections, and leave uniform expansion gaps.
Use floating click systems or discreet adhesive patterns where replacements may occur.
Label and store extra planks, match batch numbers, and document installation layout to speed future partial repairs.
Cost Considerations and When to Hire a Professional
You’ll want to compare estimated DIY costs—materials and tools—with professional quotes to see which fits your budget.
If the project’s scope, time constraints, or tricky subfloor issues make the job hard or slow, hiring a pro can save headaches and mistakes.
To find a qualified flooring contractor, check local reviews, ask for references and written estimates, and verify licensing and insurance.
Estimated DIY vs professional cost breakdown
Estimating costs for replacing laminate flooring sections hinges on whether you tackle the job yourself or hire pros: you’ll save on labor but pay for tools and potential mistakes; pros cost more upfront but include warranty and speed. Compare typical line items:
| Item | DIY Avg Cost | Pro Avg Cost |
|---|---|---|
| Materials | $1–3/ft² | $1–3/ft² |
| Tools/consumables | $30–150 | Included |
| Labor | $0 | $2–6/ft² |
| Extras/waste | Variable | Often included |
Time and difficulty factors that justify hiring a pro
Consider hiring a pro if the job involves complex cuts, changeover pieces, subfloor repairs, or working around built-ins, because those issues add time and raise the risk of visible mistakes that can negate any DIY savings.
You should also weigh your skill level, available tools, schedule constraints, and tolerance for trial-and-error—professionals speed completion and reduce rework when precision or structural fixes are required.
How to find a qualified flooring contractor
Looking for the right flooring contractor starts with clear priorities: define your budget, timeline, and the exact scope—patches, full-panel replacement, subfloor repair, or connections—and use those to screen prospects.
Get written estimates, check references and licensing, confirm insurance, inspect past work for matching changes and color, and ask about warranties.
Hire someone who communicates clearly and guarantees workmanship.
Before-and-After Case Examples and Repair Scenarios
You’ll see three practical before-and-after scenarios that walk you through fixes for a single damaged plank, a cluster damaged by water, and worn edges in high-traffic areas.
For each case you’ll get a quick assessment, step-by-step repair actions, and tips to prevent recurrence.
Use these examples to match your situation and decide whether you can tackle the repair or should call a pro.
Small isolated damage (single plank) walkthrough
Start by evaluating the damaged plank and the surrounding joints so you know whether you can remove just that single piece or must work from a seam; most small hits, chips, or water stains can be repaired by swapping one plank if you take care with cuts, tapping, and moisture barriers.
Remove baseboard, release adjacent planks, cut out the damaged board, fit the replacement, seal joints, and reattach trim.
Water-damaged cluster of planks walkthrough
When a cluster of planks has soaked through, you’ll need a different approach than for a single damaged board: assess how far the moisture traveled, whether the substrate or underlayment is compromised, and whether adjoining rows have swollen or buckled.
Remove affected planks, dry and inspect subfloor, replace damaged underlayment, fit matching plank replacements, and reinstall surrounding rows ensuring tight joints and proper expansion gaps to prevent recurrence.
High-traffic edge wear walkthrough
After handling soaked clusters, shift attention to worn edges where foot traffic and doorways shave the laminate finish and weaken joints.
You’ll inspect seam gaps, loose tongues, and frayed bevels. Remove affected planks, clean subfloor, and fit matching replacements.
If connections or thresholds caused wear, adjust or replace them. Finish with sealant and test stability to prevent recurrence.
FAQ
You’ll find answers here to common concerns like replacing glued planks, removing a board without harming neighbors, and whether new pieces will match your floor.
I’ll also cover how long a partial repair typically takes and whether removed planks can be reused elsewhere.
If you have a specific scenario, mention it and we’ll address it directly.
Can I replace laminate planks that are glued down?
Can you replace laminate planks that were glued down? Yes, but it’s harder than floating floors.
You’ll typically need to cut out the damaged plank, clean the subfloor, and glue a replacement in place or use adhesive-compatible repair pieces.
Expect careful trimming, possible subfloor repair, and matching adhesive type.
If glue’s stubborn, consider consulting a pro to avoid further damage.
How do I remove a plank without damaging adjacent ones?
Start by scoring the perimeter of the damaged plank with a utility knife to cut through the wear layer and any sealant so you don’t tear adjoining boards; then drill a series of small holes down the center of the plank to weaken it and pry out the pieces with a thin pry bar or chisel, working slowly toward the edges to avoid levering against neighboring planks.
Remove residual tongue pieces, clean the groove, and test-fit the replacement, easing it into place without forcing.
Will new planks look different from my existing floor?
How different your replacement planks look will depend on age, batch variation, and wear—so expect some mismatch unless the originals are recent and you use the same production lot.
You can minimize contrast by matching plank texture, color tone, and sheen, choosing leftovers from the original purchase, or buying from the same manufacturer and dye lot.
Test a sample in place before committing.
How long does a partial laminate repair take?
Wondering how long a partial laminate repair will take? You can usually finish small jobs in 1–3 hours: removing damaged planks, prepping the subfloor, and fitting replacements.
Larger patches or tricky cuts take half a day. Allow extra time for acclimating new planks, cleaning, and reinstalling trim.
If you’re inexperienced, budget a full day to avoid rushed mistakes.
Can I reuse removed planks elsewhere?
Can you reuse removed laminate planks elsewhere? Yes, if they’re undamaged and the finish matches.
Inspect tongues, grooves, and surface for chips, warping, or wear. Clean and dry planks thoroughly before reuse.
Keep spare planks acclimated to the room to avoid gaps from expansion.
Note: repeated removal weakens locking joints, so reserve reused pieces for low-traffic areas when possible.