How to Install Subfloor the Right Way: A Complete Beginner’s Guide
You can install a solid subfloor in a weekend by inspecting joists, removing old materials, and choosing the right panel type and thickness for your span. Repair small rot or replace compromised sections, then acclimate plywood or OSB for 48–72 hours. Lay panels perpendicular to joists, stagger end joints, leave 1/8″ gaps, and fasten with approved screws or nails and adhesive per manufacturer spacing. Finish with a thorough inspection for flatness and squeaks, and keep going to learn step-by-step techniques and pro tips.
How to Install Subfloor the Right Way and Overview
You’ll get a clear rundown of what to expect and how long each step should take so you can plan the job.
I’ll help you decide when to repair an existing subfloor versus replace it entirely.
You’ll also see a concise list of the essential tools, materials, and safety gear to have on hand.
What to expect and time estimate
Before you start, know that installing a subfloor usually takes a weekend for a single room but can stretch to several days for larger areas or complex layouts.
Plan tasks: remove old flooring, measure and cut panels, fasten and seal joints, and allow adhesives or sealants to cure.
If you follow clear steps for how to install sub flooring, expect steady, methodical work and predictable pacing.
When to replace vs. repair existing subfloor
Once you’ve cleared the room and estimated time, decide whether the existing subfloor needs repair or full replacement.
Inspect for rot, widespread water damage, major soft spots, or structural sagging—replace when joists or large areas are compromised.
Repair small localized damage, loose panels, or minor deflection.
Consider age, cost, and future flooring choices to guide your decision.
Tools, materials, and safety gear at a glance
Tools and materials matter as much as technique, so gather everything you’ll need before cutting into the floor: circular saw with a fine-tooth blade, jigsaw, drill/driver, framing square, chalk line, pry bar, and a plate or flooring nailer, plus screws and ring-shank nails rated for subfloor work.
Wear eye protection, dust mask, hearing protection, knee pads.
- Gloves
- Safety glasses
- Dust mask
- Knee pads
Basic Understanding What Is a Subfloor and Why It Matters
A subfloor is the structural layer beneath your finish flooring—usually plywood, OSB, concrete, or engineered panels—that supports weight and keeps floors flat.
Your choice of material and installation affects insulation, sound transmission, and the overall strength of the floor system.
Understanding these factors helps you pick the right subfloor for durability, comfort, and performance.
Definition and role in flooring systems
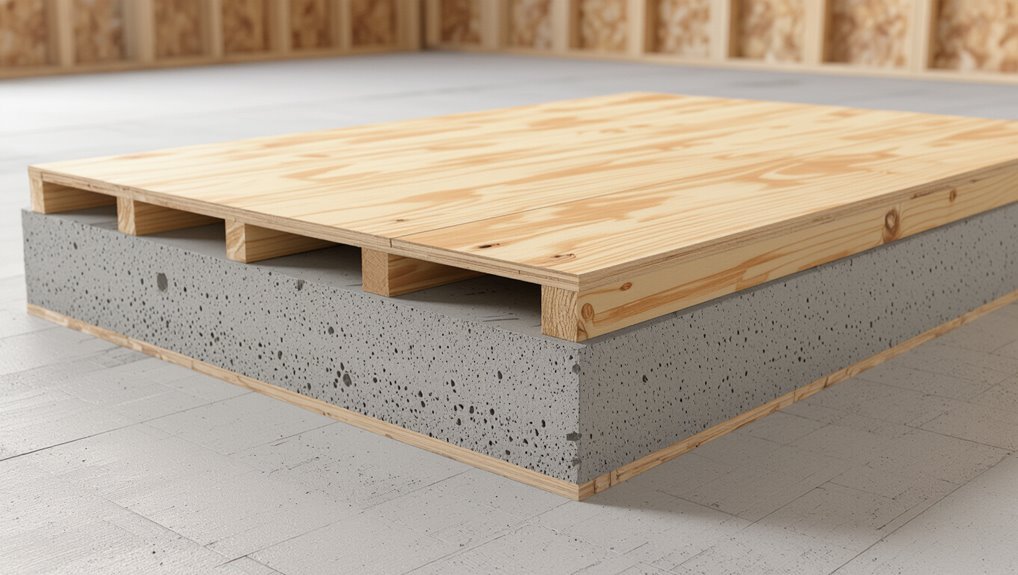
Think of the subfloor as the structural skin beneath your finished flooring: it’s the flat, load-bearing layer—usually plywood or OSB—nailed or screwed to the joists that supports everything above, transfers loads to the framing, and helps keep the floor stiff, level, and quiet.
You rely on it for structural integrity, impact resistance, moisture buffering, and a stable base for adhesives or fasteners.
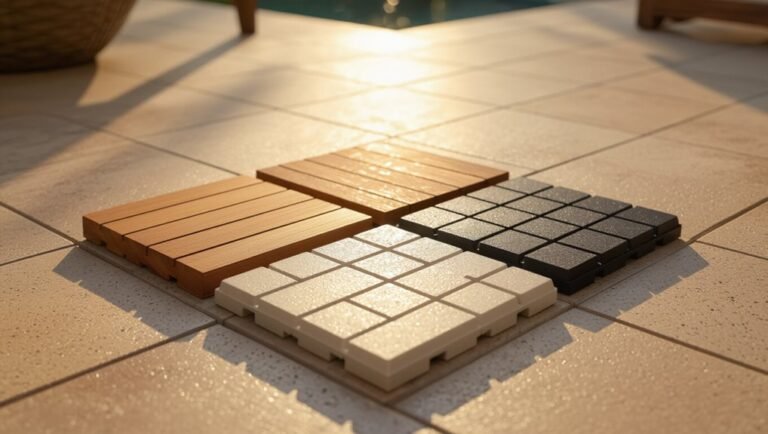
Common subfloor materials (plywood, OSB, concrete, engineered)
Materials matter when you’re choosing a subfloor—each type has different strength, moisture resistance, cost, and installation needs. You’ll pick plywood for durability, OSB for economy, concrete for slabs, or engineered panels for stability. Match material to environment and budget, and follow manufacturer specs for fastening and moisture control.
| Material | Key trait |
|---|---|
| Plywood | Durable |
| OSB | Affordable |
| Concrete | Permanent |
| Engineered | Stable |
How subfloor affects insulation, sound, and structural integrity
Flooring plays a big role in how your home feels and performs: the subfloor ties insulation, sound control, and structural strength together.
You’ll choose materials and thickness to limit heat loss, reduce airborne and impact noise, and transfer loads safely to joists.
Proper installation, sealing gaps, and fastening prevent drafts, rattles, and sagging, preserving comfort, acoustics, and long-term stability.
Signs You Need a New Subfloor
If you notice visible damage like rot, mold, sagging, or soft spots, you’ll likely need a new subfloor.
Performance issues—persistent squeaks, uneven areas, or flooring that won’t adhere—are other clear signs.
Also consider a professional inspection or moisture testing whenever water damage or unexplained problems show up.
Visible damage: rot, mold, sagging, and soft spots
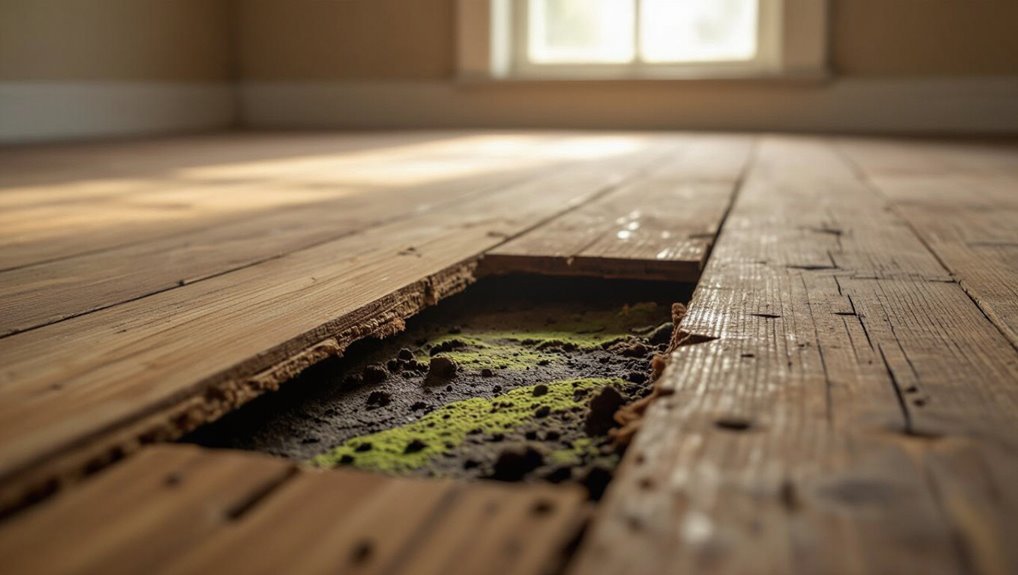
Spotting rot, mold, sagging, or soft spots underfoot tells you the subfloor’s failing and needs prompt attention; these visible issues weaken structural support, harbor moisture, and can spread damage to joists and finished flooring.
Inspect systematically: probe discolored areas, lift carpets, check seams and around plumbing.
If wood crumbles, mold grows, or floors dip, plan replacement to prevent further structural and health risks.
Performance issues: squeaks, uneven floors, poor finish adhesion
Listen for squeaks and walk the rooms to feel for dips or bouncing underfoot—these performance problems often point to a failing subfloor.
If your floor creaks, gaps form at seams, tiles or hardwood lift, or finishes peel despite proper prep, the subfloor may be unstable.
You should replace or reinforce it before installing new flooring to guarantee stability and lasting adhesion.
When inspections or moisture testing are necessary
When you notice water stains, mold growth, persistent dampness, or a musty odor after a leak or in high-humidity areas, get a professional inspection and moisture testing before proceeding—these signs often mean the subfloor has absorbed moisture and could be compromised.
You should also test after floods, sewage backups, long-term plumbing leaks, or before installing sensitive flooring.
Follow recommendations: repair, dry, or replace as needed.
Preparing the Site Inspection and Prep Work
Before you start laying new subfloor, follow a safety checklist and put on protective gear to prevent injuries and dust exposure.
Measure the room and calculate materials with a waste factor, then remove old flooring and the existing subfloor carefully to avoid damaging joists.
Finally, inspect and repair joists, blocking, and supports so your new subfloor has a solid, level foundation.
Safety checklist and protective measures
Although you’ll be keen to get started, take time to run a concise safety checklist and put protective measures in place so you and your crew stay safe and the site stays clean.
Wear PPE, secure loose boards, mark hazards, and ventilate dust. Follow local codes and emergency plans.
- Hard hats and eye protection
- Gloves and knee pads
- Dust masks/respirators
- Temporary barriers and signage
Measuring and calculating materials needed (waste factor)
Start by measuring each room’s length and width, then multiply to get square footage and add a realistic waste factor—typically 5–10% for straight layouts and 10–15% for diagonal or irregular cuts—to cover offcuts, mistakes, and damaged boards.
Next, list required sheets or panels, underlayment, fasteners, adhesives, and threshold pieces. Round up quantities and note delivery/storage needs.
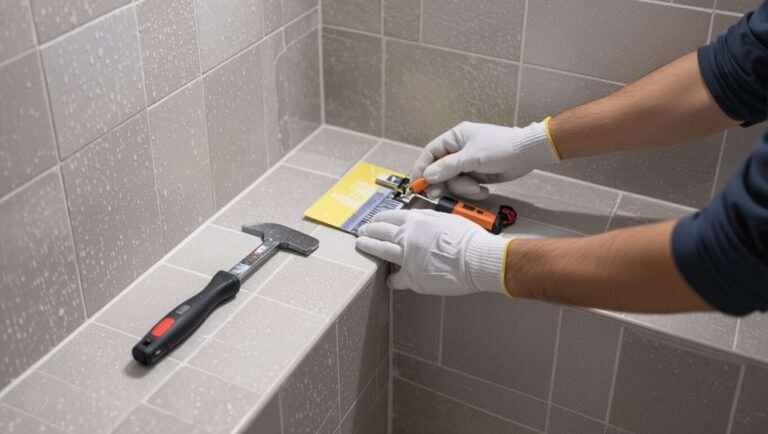
Removing old flooring and existing subfloor safely
With your material list in hand and delivery scheduled, inspect the site for hazards and plan how you’ll remove the existing floor and subfloor safely.
Shut off utilities, clear furniture, and ventilate the area.
Wear PPE, test for asbestos or lead if older materials exist, then remove finish flooring, underlayment, and fasteners methodically.
Dispose of debris per local regulations.
Inspecting and repairing joists, blocking, and supports
Inspect the joists, blocking, and supports for straightness, rot, insect damage, and proper fastening before you lay the new subfloor; any compromised members must be repaired or replaced to guarantee a stable, level base.
Shim warped joists, sister or replace rotten ones, add or tighten blocking where spans deflect, and secure loose hangers and straps.
Recheck with a level and straightedge.
Step-by-Step Installation Process
Now you’ll walk through the installation step by step, starting with choosing the right material and thickness for your floor.
Acclimate and cut panels to your layout, then lay them with staggered joints and correct orientation while deciding on screws, nails, or adhesive for fastening.
Finish by sealing joints and gaps to control moisture and protect the subfloor.
Step 1 Choose the right subfloor material and thickness
1 important decision you’ll make before installing a subfloor is choosing the right material and thickness for your specific room and use, because that choice affects durability, moisture resistance, sound transmission, and how the finished floor will perform.
Pick plywood, OSB, or tongue-and-groove panels based on budget and moisture exposure; select thickness to meet span ratings and local building codes for a stable, squeak-free floor.
Step 2 Acclimating and cutting panels to layout
With your material and thickness decided, let the panels acclimate in the room for at least 48–72 hours so they adjust to the site’s humidity and temperature; this reduces future cupping or gaps.
Measure and mark your layout, account for joist spacing and seams, then cut panels with a circular saw or table saw outside the room.
Label pieces and dry-fit before fastening.
Step 3 Laying panels: staggered joints and orientation

Start by positioning the first panel so its long edge runs perpendicular to the joists and its face aligns with your chalk lines; this gives the floor maximum stiffness and makes fastening straightforward.
Stagger end joints by at least 2 feet between adjacent rows, maintain 1/8-inch gaps at panel edges for expansion, and check alignment frequently so seams stay tight and panels lay flat.
Step 4 Fastening methods: screws vs. nails vs. adhesive
When fastening your subfloor, choose the method that matches your material, traffic load, and tolerance for squeaks—you can use screws, ring-shank nails, or construction adhesive, or combine them for the best results. Use screws for holding power and easy removal, nails for speed with ring-shank for grip, and adhesive to reduce movement; follow manufacturer spacing.
| Method | Strength | Speed |
|---|---|---|
| Screws | High | Slow |
| Nails | Medium | Fast |
| Adhesive | High | Medium |
Step 5 Sealing joints and gaps for moisture control
1. Seal joints and gaps to prevent moisture intrusion: run a bead of polyurethane or construction adhesive along panel edges and seams, then press panels tight.
Fill larger gaps with low-expansion foam or backer rod plus sealant. Confirm seams are flush, wipe excess, and let cure per product instructions.
Proper sealing protects subfloor from swelling and mold without trapping moisture beneath.
Step 6 Handling openings, transitions, and floor penetrations
After sealing seams, you’ll address openings, thresholds, and any pipes or vents that pass through the subfloor to keep the assembly tight and level.
Cut precise openings, shim and pack around pipes, and fasten clips or blocking at junctions.
Use flexible sealant or gaskets for movement, secure threshold plates to framing, and verify that penetrations are waterproofed and flush with the subfloor surface.
Step 7 Final inspection and preparing for finished flooring
Before you install the finished flooring, perform a thorough final inspection to confirm the subfloor is flat, clean, securely fastened, and free of gaps or moisture that could compromise the finish.
Check for squeaks, level with a straightedge, tighten loose fasteners, fill seams and low spots, and verify proper moisture readings.
Allow acclimation time for flooring materials before laying the finish.
Tools, Materials, and Cost Breakdown
Now you’ll see the exact tools you need—plus cheaper or rental alternatives—and the materials options with typical price ranges so you can choose what fits your budget.
I’ll also outline time and labor estimates so you can compare a DIY install to hiring a pro.
With that info you’ll be able to plan costs and decide the best route for your project.
Detailed tool list and alternatives
Tools make the job faster and safer, so you’ll want to gather the right ones and a few alternatives before you cut any plywood.
You’ll need reliable basics plus backups if something fails.
- Circular saw (or jigsaw for curves)
- Cordless drill and impact driver (or corded drill)
- Pneumatic nailer (or finish nailer with pilot holes)
- Chalk line, tape measure, speed square
Material options and pricing ranges
Choosing the right subfloor material affects durability, sound transfer, and overall cost, so you’ll want to weigh options and price ranges before you buy. Common choices: plywood (economical, good strength), OSB (cheaper, slightly less moisture-resistant), and tongue-and-groove plywood (premium, better stability). Compare thickness and local prices.
| Material | Typical Price/ft² | Best Use |
|---|---|---|
| Plywood | $0.50–$1.50 | General |
| OSB | $0.40–$1.00 | Budget |
| T&G Plywood | $0.80–$2.00 | High-end |
Time and labor cost estimates for DIY vs. pro installation
Because installation time and labor vary with room size, subfloor type, and your experience, plan both a realistic schedule and a clear budget before you start.
DIY saves labor costs but takes longer—expect 1–3 days for a small room, longer if inexperienced.
Pros finish faster (often a day) but charge $2–$6/ft² labor.
Factor in cleanup, tools, and possible fixes.
Common Problems and Mistakes to Avoid
When you install subfloor, watch panel orientation and make sure fasteners are correct and properly spaced.
Don’t ignore joist damage or gaps in support, and control moisture and ventilation to prevent rot and warping.
Measure carefully to avoid overcuts, keep seams tight, and smooth shifts to the finished floor.
Incorrect panel orientation or insufficient fastening
If you orient panels the wrong way or don’t fasten them properly, you’ll create squeaks, weak spots, and alignment issues that can ruin the floor later.
Always stagger panel joints perpendicular to joists, follow manufacturer grain/edge markings, and leave proper expansion gaps.
Use recommended screws or nails at specified spacing, countersink fasteners, and check for tight seams to guarantee a stable, noise-free subfloor.
Ignoring joist problems or inadequate subfloor support
Mistakes with panel orientation and fastening won’t matter long if the joists beneath are warped, rotted, or spaced improperly; you need to inspect and repair joists before laying any subfloor.
Check for sagging, soft spots, insect damage, and correct spacing.
Replace or sister compromised joists, shim or level as needed, and guarantee solid blocking/bridging so panels have continuous, stable support.
Failing to control moisture and ventilation
Because moisture and poor ventilation quickly ruin even a well-installed subfloor, you’ve got to manage both before sealing anything up.
Check for leaks, grade exterior soil away from the foundation, and install proper vapor barriers.
Confirm crawlspace and attic ventilation meet code, use dehumidifiers if needed, and allow materials to acclimate.
Don’t ignore condensation risks or blocked vents—address them promptly.
Overcutting, improper seams, and poor transitions
When you overcut panels, leave uneven seams, or skip proper shifts, the subfloor ends up weak, noisy, and prone to movement; these errors also make installing finish flooring much harder.
You should cut accurately, stagger seams over joists, maintain recommended gaps, and guarantee smooth changes between sheets and rooms.
Correct joints and supports prevent squeaks, deflection, and finish-floor damage.
Best Practices and Professional Tips
Plan your layout to cut down on waste and seams, use the right fastening patterns and spacing for a stable floor, and add moisture barriers, insulation, or soundproofing where needed.
Know the signs that a job is beyond your skill—complex leveling, structural repairs, or moisture issues—and don’t hesitate to call a pro.
When you do hire someone, check licenses, references, and examples of similar work before signing a contract.
Layout strategies to minimize waste and seams
If you want to cut material costs and create a stronger, neater floor, start by laying out sheets so seams fall over joists and long runs align with the room’s longest dimension.
Stagger end joints like brickwork, plan full-sheet runs first, and trim only at room edges.
Measure twice, mock up layouts dry, and reuse offcuts where grain and thickness match for minimal waste.
Fastening patterns and spacing for long-term stability

Because the way you fasten subfloor panels determines how the floor sounds and performs over time, follow consistent patterns and correct spacing to prevent squeaks, gaps, and deflection.
Stagger panel joints, fasten edges every 6–8 inches and field every 8–10 inches with construction screws or ring-shank nails, keep 1/8-inch gaps at ends, and sink fasteners flush for lasting rigidity.
Moisture barriers, soundproofing, and insulation tips
Proper fastening keeps the structure stable, but controlling moisture, airborne sound, and thermal loss will determine how comfortable and durable the floor assembly stays.
Use a continuous vapor barrier on concrete and seams taped; allow perimeter gaps for expansion.
Install resilient underlayment or acoustic matting under finish floors to cut impact noise.
Fill rim joist cavities with insulation and seal penetrations to prevent drafts and mold.
When to hire a pro and how to vet contractors
When projects get complex—structural repairs, uneven joists, compromised moisture barriers, or work that affects your home’s electrical or plumbing systems—you’ll want a licensed pro to avoid costly mistakes and code violations.
Vet candidates by checking licenses, insurance, references, written estimates, and warranties. Ask about experience with subfloors, timelines, and permits.
Consider:
- License and insurance verification
- Local references and photos
- Detailed written estimate
- Warranty and permit handling
Comparison: DIY vs. Hiring a Professional
You’ll weigh the pros and cons of doing the subfloor yourself—saving money but risking mistakes—against hiring a pro for speed and reliability.
Consider when expertise is worth the cost, especially for uneven joists or complex layouts.
Ask contractors about timelines, materials, warranties, and proof of insurance before you commit.
Pros and cons of DIY installation
Although tackling subfloor installation yourself can save money and give you control over every step, it also demands time, tools, and some carpentry skill that you might not have. You’ll gain satisfaction and cost savings, but risk mistakes, delays, and warranty issues if you’re inexperienced. Weigh effort, skill, and schedule before committing.
| Benefit | Drawback | Consideration |
|---|---|---|
| Lower cost | Time-consuming | Your schedule |
| Skill growth | Possible errors | Tool access |
| Control | No contractor warranty | Complexity |
When professional expertise is worth the cost
If you’re short on time, tooling, or confidence with structural work, hiring a pro often pays off because they bring experience, speed, and liability protection that DIY usually can’t match.
You should hire a pro when job complexity, subfloor leveling, moisture mitigation, or load-bearing concerns exceed your skills.
Expect faster completion, correct materials, and reduced risk of costly mistakes.
Questions to ask contractors and expected warranties
What should you ask a contractor before they start— and what warranty should you expect—so you can compare hiring a pro to doing the job yourself?
Ask about timeline, licensing, materials, and past work. Expect a workmanship warranty (1–5 years) plus manufacturer coverage. Get everything written.
- Timeline and milestones
- Proof of insurance/licensing
- Materials and brands used
- Written warranty details
Maintenance and Longevity
You should inspect the subfloor regularly for soft spots, persistent squeaks, moisture stains, or cracks that hint at future failure.
Small, localized damage can often be repaired, but widespread rot or structural issues mean you’ll need a full replacement.
Before changing finished flooring, you’ll want to prep the subfloor—check flatness, moisture levels, and repair or replace areas that won’t meet the new material’s requirements.
Routine checks and signs of future failure
Routine checks every few months help you spot small issues before they become major subfloor failures; inspect for soft spots, unevenness, moisture stains, and any squeaks that indicate loose fasteners or degrading joists.
Check trim gaps, warped boards, musty odors, and nail pops.
Note persistent dampness, recurring movement, or spreading stains—these are early warnings to monitor and address promptly.
Repairing localized damage vs. full replacement
Noticing small soft spots or spreading stains earlier makes the repair decision clearer: you’ll weigh fixing a localized area against replacing the whole subfloor based on extent, cost, and long-term performance.
If damage’s limited, cut and sister new plywood or replace joists, seal and dry the area.
Choose full replacement for widespread rot, structural compromise, or when repairs won’t restore stiffness.
Preparing subfloor before changing finished flooring types
Before installing a new finish, take time to prepare the subfloor so your new flooring performs and lasts—this means checking flatness, fastening loose panels, addressing moisture, and repairing or replacing damaged sections.
Remove old adhesives, sand high spots, fill low areas with appropriate compound, install a moisture barrier if needed, and verify joists are sound.
Proper prep prevents squeaks, warping, and premature failures.
FAQ
You probably have specific questions like how thick the subfloor should be for hardwood, tile, or laminate and whether you can install new subfloor over an existing one.
You’ll also want quick answers on stopping squeaks, acceptable moisture levels before installation, and how long a properly installed subfloor should last.
Read on and you’ll get straightforward guidance for each of these points.
How thick should my subfloor be for hardwood, tile, or laminate?
Wondering how thick your subfloor should be for hardwood, tile, or laminate?
Generally, use 3/4″ tongue-and-groove plywood or OSB for nail-down hardwood.
For tile, add a 1/2″ cement backerboard over 3/4″ subfloor or use 1-1/8″ total thickness to prevent flex.
Floating laminate works over 3/4″ subfloor; underlayment may be required.
Check manufacturer specs and joist spacing.
Can I install new subfloor over existing subfloor?
If your existing subfloor looks solid, you might think about layering new material over it instead of tearing everything out. You can in many cases, but inspect for rot, mold, delamination, unevenness, or structural issues first.
Secure loose panels, shim low spots, and make sure added thickness won’t interfere with doors or changes. Follow manufacturer guidelines for the new subfloor material.
How do I stop a squeaky floor?
A common fix for a squeaky floor is to locate the source, then tighten, shim, or fasten the subfloor and joists to stop movement.
Walk the floor to mark squeaks, then access from below or above. Use screws, construction adhesive, or shims to eliminate gaps.
For joist-to-subfloor movement, toe-screw or add blocking.
Recheck and tighten until noise stops.
What moisture levels are acceptable before installing subfloor?
Once you’ve stopped squeaks by tightening or shimming the subfloor, check moisture before installing new panels or finish flooring.
Use a reliable moisture meter: wood subfloor should read 6–12% (depending on species) and concrete slabs should be below 3–4% (calcium chloride) or pass a relative humidity test under 75%.
Allow drying, improve ventilation, or use a vapor barrier if readings are high.
How long does a properly installed subfloor last?
How long should you expect a properly installed subfloor to last? With quality materials, correct moisture control, and proper installation, expect 30–50 years or longer.
Longevity depends on traffic, humidity, pests, and maintenance. Fix leaks promptly, control indoor humidity, and inspect periodically.
Replace sections showing rot, delamination, or persistent mold to avoid structural and finish-floor damage.