How to Lay Ceramic Floor Tiles: A Complete DIY Installation Guide
You can lay ceramic floor tiles yourself by prepping a clean, level subfloor, planning a centered layout, and gathering tools like a wet saw, notched trowel, spacers, and grout float. Mix thin-set to a peanut-butter consistency, comb it with a notched trowel, set tiles along reference lines with spacers, cut edge pieces as needed, let mortar cure, then grout and seal joints. Follow the step-by-step process below to learn detailed tips and troubleshooting.
How to Lay Ceramic Floor Tiles Quick Answer
You’ll prep the substrate, lay out a grid, spread thinset, set tiles, grout, and seal for a durable floor.
Tackle DIY if you’re comfortable with measuring, cutting, and following precise steps for a small to medium project.
Hire a pro for large rooms, complex patterns, uneven substrates, or when you need guaranteed waterproofing and warranty.
Short summary of the process
Before laying a single tile, clear and level the subfloor. Then plan a layout that minimizes cuts and keeps focal lines centered.
You’ll mix thinset, snap chalk lines, and set tiles with spacers. Ask “how do i lay ceramic floor tiles” to focus steps: measure, dry-fit, and work outward.
Finish with grout, cleanup, and sealant as needed.
- Prep subfloor
- Set tiles
- Grout and seal
When DIY tiling is appropriate vs hire a pro
If your space is small, level, and mostly square with simple cuts (think a single bathroom or a small kitchen nook), you can handle ceramic-floor tiling yourself with basic tools and patience; hire a pro when the layout is large, uneven, involves complex patterns, or when plumbing/electrical adjustments, heated floors, or waterproofing details are required.
- Small, simple rooms — DIY.
- Unlevel or irregular spaces — pro.
- Technical systems or patterns — pro.
Basic Understanding What Are Ceramic Floor Tiles and Why Choose Them
You’ll first want to know the basic types—glazed or unglazed, and porcelain versus ceramic—so you can match durability and water resistance to the room.
Consider common sizes, shapes, and finishes since they affect layout, grout lines, and slip resistance.
We’ll also weigh the pros and cons for floors so you can pick tiles that suit traffic, maintenance, and budget.
Types of ceramic tiles (glazed, unglazed, porcelain vs ceramic)
Tiles come in several types—glazed, unglazed, porcelain, and standard ceramic—and each has different durability, water resistance, and finish that affect where you can use them and how they’ll perform. You’ll pick glazed for easy cleaning, unglazed for grip, porcelain for strength, and ceramic for cost‑effectiveness.
| Type | Best use |
|---|---|
| Glazed | Bathrooms |
| Unglazed | Outdoors |
| Porcelain | High traffic |
| Ceramic | Budget rooms |
Common tile sizes, shapes, and finishes
Now that you’ve considered tile types and where they belong, size, shape, and finish will determine the look, slip resistance, and layout possibilities for your floor.
Choose standard sizes (12×12, 18×18, 24×24) or planks and mosaics for patterns. Rectangles suit staggered or herringbone layouts; large formats reduce grout lines.
Finishes—matte, satin, polished, textured—affect grip and maintenance.
Pros and cons for floors
Because ceramic combines durability with low maintenance, it’s a go-to choice for many floors—you’ll get a hard, water-resistant surface that handles heavy foot traffic and regular cleaning without fuss.
You’ll benefit from stain resistance, wide style options, and longevity.
Downsides: tiles can feel cold and hard, grout needs sealing, and improper installation can cause cracking or unevenness.
Tools, Materials, and Preparations
Before you start, you’ll want a clear materials checklist and the right tools—both essentials and handy extras—so you’re not scrambling mid-job.
Make sure you’ve got safety gear and a tidy workspace set up to protect yourself and the floor.
Finally, learn the coverage math so you buy the correct number of tiles, thinset, and grout with a little extra for cuts and waste.
Full materials checklist
Gather the right tools and materials so your tile job goes smoothly: a quality tile saw or cutter, notched trowel, grout float, spacers, rubber mallet, level, tape measure, chalk line, mixing bucket and paddle, a drill for mixing, knee pads, and safety gear (glasses, gloves, dust mask).
- Thin-set mortar, tile adhesive, and primer
- Tile grout (sanded or unsanded) and sealer
- Backerboard, screws, and waterproofing membrane
Essential tools and optional tools
You’ll want a compact set of essential tools that’ll handle the core tasks—measuring, cutting, spreading mortar, setting tiles, and grouting—while a few optional items can speed the work or improve the finish.
Focus on getting a good tile cutter or wet saw, a notched trowel, grout float, spacers, level, tape measure, chalk line, mixing paddle and bucket, and safety gear.
Then add optional extras like a tile nipper, wet vacuum, tile leveling system, and pneumatic or long-reach grout tools as your budget and project complexity allow.
- Essential: cutter, trowel, float, spacers, level.
- Mixing/marking: paddle, bucket, tape, chalk.
- Optional: nipper, wet vac, leveling system.
Safety gear and workspace setup
Although tile work can seem straightforward, proper safety gear and a well-organized workspace keep you efficient and prevent injuries and costly mistakes.
You’ll wear gloves, knee pads, eye and dust protection, and a mask.
Clear the area, set proper lighting, and arrange tools for flow.
Follow local ventilation and disposal rules.
- PPE first
- Clean, lit workspace
- Tool layout and access
How to calculate tile and material quantities (coverage math)
Before you cut or lay a single tile, calculate how many tiles, how much thinset, and how much grout you’ll need—mistakes here cost time and money. Measure room area, add 10% waste, then compute thinset (sq ft per bag) and grout (per joint width). Use this quick reference:
| Item | Unit | Note |
|---|---|---|
| Tiles | sq ft | +10% waste |
| Thinset | bags | per manufacturer |
| Grout | tubs | joint width |
| Backer | sheets | if needed |
Site Assessment and Pre-Installation Prep
Before you start laying tile, inspect the subfloor—wood, concrete, or existing tile—for level, moisture, and any structural issues that need fixing.
You’ll need to remove old flooring if required, perform moisture tests, and plan any leveling or repairs so the surface is stable.
Finally, do a dry layout to determine centerlines, tile orientation, grout line spacing, and the pattern you’ll follow.
Inspecting and preparing subfloor (wood, concrete, existing tile)
When you’re getting ready to lay ceramic tile, a thorough inspection and proper prep of the subfloor—whether it’s wood, concrete, or existing tile—determine how well the installation will hold up over time.
- Check for structural soundness: secure loose boards, repair cracks, remove lippage.
- Clean and degrease: sweep, vacuum, and strip contaminants for proper adhesion.
- Prime or bond: apply recommended primer or thin-set to guarantee a stable surface.
Moisture testing and leveling requirements
Because moisture and levelness affect tile adhesion and grout integrity, you’ll test for dampness and correct any unevenness before laying tile.
Use a moisture meter on concrete or wood, verify RH and MVER meet adhesive specs, and mark high/low spots.
Level with self-leveler or patch compound, then recheck moisture and flatness before proceeding.
- Test moisture
- Measure flatness
- Repair and recheck
Removing old flooring and addressing structural issues
If you’re tearing out old flooring, start by evaluating what’s beneath it and how the subfloor and joists are holding up.
Remove coverings, nails, and adhesive; inspect for rot, mold, or insect damage.
Repair or replace compromised sections, sister joists as needed, and verify the surface is flat and rigid before tiling.
- Remove and inspect
- Repair structural issues
- Clean and prepare
Dry layout and pattern planning
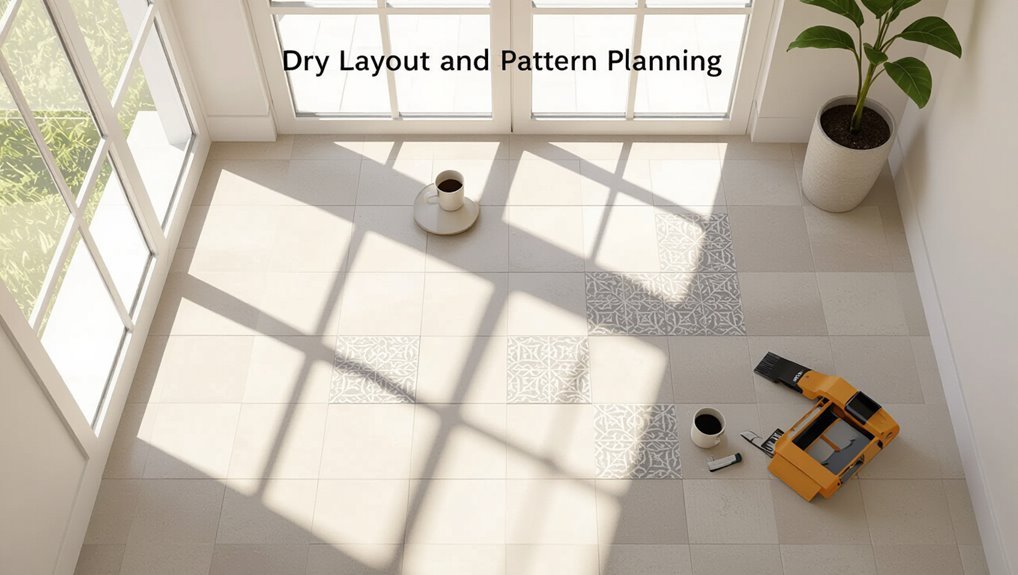
1. Before you set mortar, spread tiles dry across the floor to check fit, pattern flow, and shifts. Move tiles to avoid small slivers at edges, adjust layout to minimize cuts, and confirm alignment with room features like doorways and cabinets.
Mark reference tiles lightly, note problematic spots, and revise placement until the pattern looks balanced and practical.
Determining grout lines, tile orientation, and centerlines

Now that your dry layout looks balanced, you’ll set grout line widths, choose tile orientation, and snap centerlines to guide installation.
Decide grout width based on tile size and style—narrow for rectified porcelain, wider for rustic ceramics.
Align tiles with the room’s longest sightline or main entrance. Snap perpendicular centerlines from two opposite walls, check squareness, then adjust layout to avoid tiny edge cuts.
Step-by-Step Installation Guide
Start by laying out reference lines so you know exactly where the first row will sit.
Mix and spread thin-set correctly, set the first tiles while keeping lines straight, and use spacers and cuts to fit edges.
Finally, work methodically around doorways, cabinets, and pipes so fixtures and openings stay neat.
Step 1: Establish layout and mark reference lines

Begin by finding the room’s visual center and snapping two perpendicular reference lines from that point so you can lay tiles symmetrically.
These lines will guide your first rows and help you spot awkward cuts near walls or fixtures before you spread any adhesive.
Then dry-fit tiles, adjust for grout joints, and mark starter lines.
- Dry-lay full tiles.
- Measure edge cuts.
- Mark grout alignment.
Step 2: Mix and apply thin-set mortar correctly
Mix the thin-set to a peanut-butter consistency and apply it while it’s still workable: you’ll get better adhesion and avoid lumps.
Use a mixing bucket, follow manufacturer water ratio, and let it slake briefly.
Comb with a notched trowel toward your reference lines, keeping mortar ridges uniform.
- Measure water, mix thoroughly.
- Slake 5–10 minutes.
- Comb evenly with notched trowel.
Step 3: Setting the first tiles and maintaining straight lines
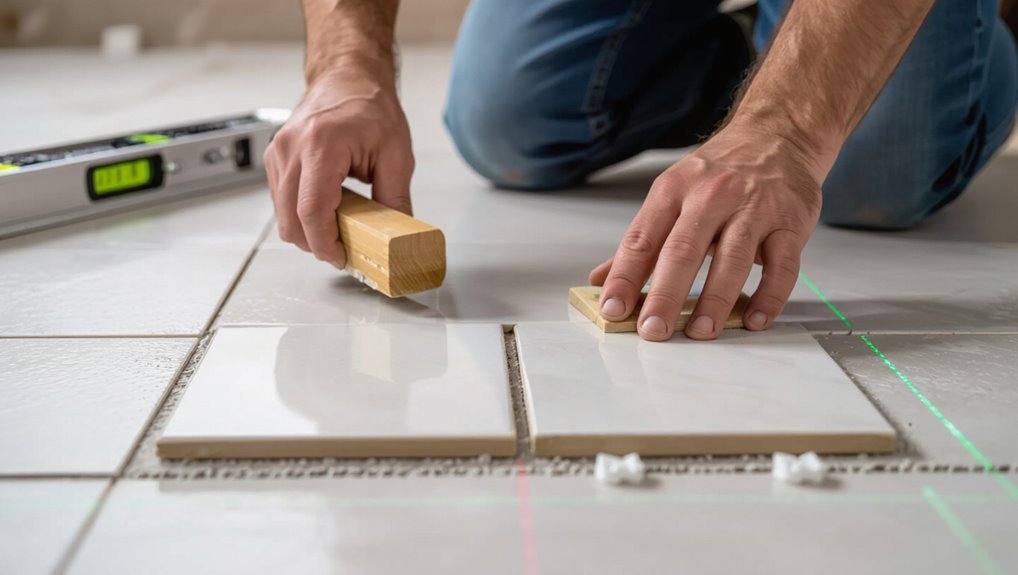
With the thin-set combed and still tacky, lay your first tile at the intersection of your reference lines so it locks the grid for the rest of the floor.
Press, twist slightly, and check level. Work outward row by row, using spacers to keep uniform joints and a chalk line to verify straightness.
- Press and level
- Use spacers
- Check alignment
Step 4: Spacing, cutting tiles, and fitting edges
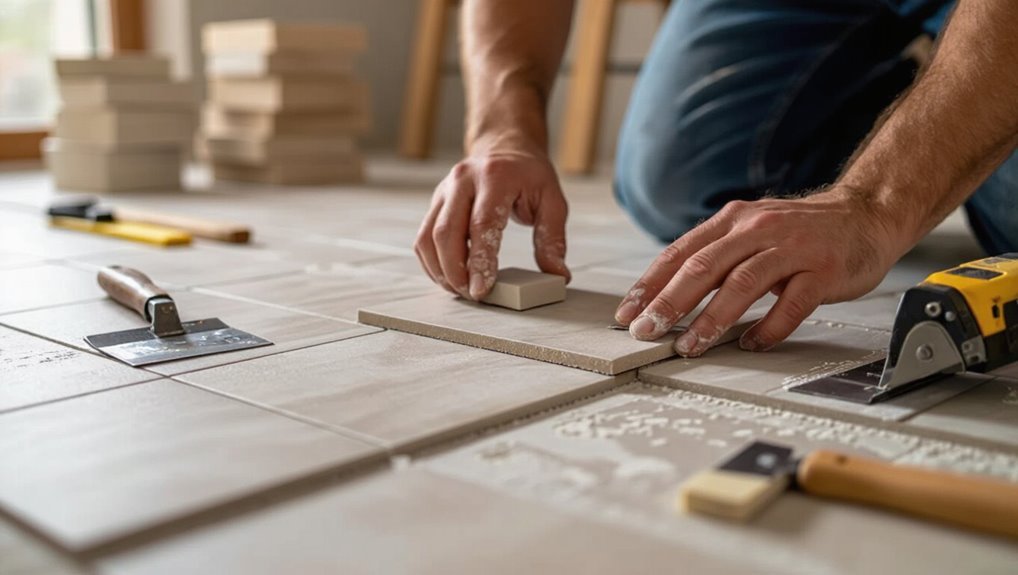
Now you’ll focus on spacing, cutting, and fitting the edge tiles so the layout stays neat and accurate; keep spacers in place as you work toward walls and fixtures.
Measure and mark each cut precisely, and dry-fit pieces before applying thin-set to confirm gaps and grout lines match the field tiles.
- Use a tile cutter or wet saw; score, then snap or wet-cut for curves.
- Measure twice, cut once; mark tile backs.
- Fit trims and small edge pieces dry, then set with thin-set.
Step 5: Working around obstacles (doorways, cabinets, pipes)
5 obstacles—doorways, cabinets, and pipes—require careful planning so your tile layout stays neat and functions properly; measure and mark each obstacle, dry-fit tiles to determine cuts and clearances, and plan connections (thresholds, reducers) before you spread thin-set.
You’ll cut around cabinets, under door jambs, and around pipes, using collars or escutcheons for neatness.
- Plan cuts
- Dry-fit tiles
- Use trims
Step 6: Allowing the mortar to cure and checking for lippage
After you set the tiles and tapped them into the mortar, let the thin-set cure undisturbed for the time recommended by the manufacturer—typically 24 to 48 hours—so it reaches full strength before you walk on it or grout.
Then check for lippage and verify stability. Follow these steps:
- Visually inspect joints and edges for height differences.
- Use a straightedge to detect high tiles.
- Mark and re-seat any tiles with excessive lippage after mortar cures.
Step 7: Grouting types, mixing, application, and cleanup
Step 7 covers choosing the right grout, mixing it to the correct consistency, applying it neatly between tiles, and cleaning up before it hardens so your floor looks professional and lasts.
You’ll pick sanded vs. unsanded, mix to a peanut-butter texture, pack joints with a rubber float, and wipe haze with a damp sponge before it cures.
- Select grout type
- Mix properly
- Tool and clean
Step 8: Sealing tiles and grout (if required) and final cleaning
Now you’ll seal tiles and grout where needed and finish with a final clean so your floor stays protected and looks sharp; sealing locks out stains and moisture, and the final cleanup removes any residue before everything fully cures.
- Apply recommended sealer evenly; follow dwell times.
- Wipe excess with a clean microfiber; avoid pooling.
- Final mop with pH-neutral cleaner after sealer cures; ventilate while drying.
Cutting Tiles Methods and Tips
You’ll choose between a wet saw, a manual tile cutter, or nippers depending on the cuts you need and the tile material.
Learn the straightforward techniques for straight cuts, how to score and snap for notches, and how to use nippers or a grinder for curves.
Always follow safety precautions—eye and hand protection, proper guards—and keep your tools clean and well-maintained for accurate cuts.
Wet saw vs manual tile cutter vs nippers
When you need precise, clean cuts or have a lot of tiles to trim, choosing the right tool—wet saw, manual tile cutter, or nippers—makes the job faster and neater. Pick a wet saw for thick or porcelain, a manual cutter for straight ceramic cuts, and nippers for small adjustments. Use proper safety gear and steady hands.
| Tool | Best for | Notes |
|---|---|---|
| Wet saw | Thick/porcelain | Precise, wet cutting |
| Manual cutter | Straight ceramic | Fast, clean score |
| Nippers | Small chips | Rough, finish work |
| Safety | PPE | Goggles, gloves, mask |
How to make straight cuts, notches, and curved cuts
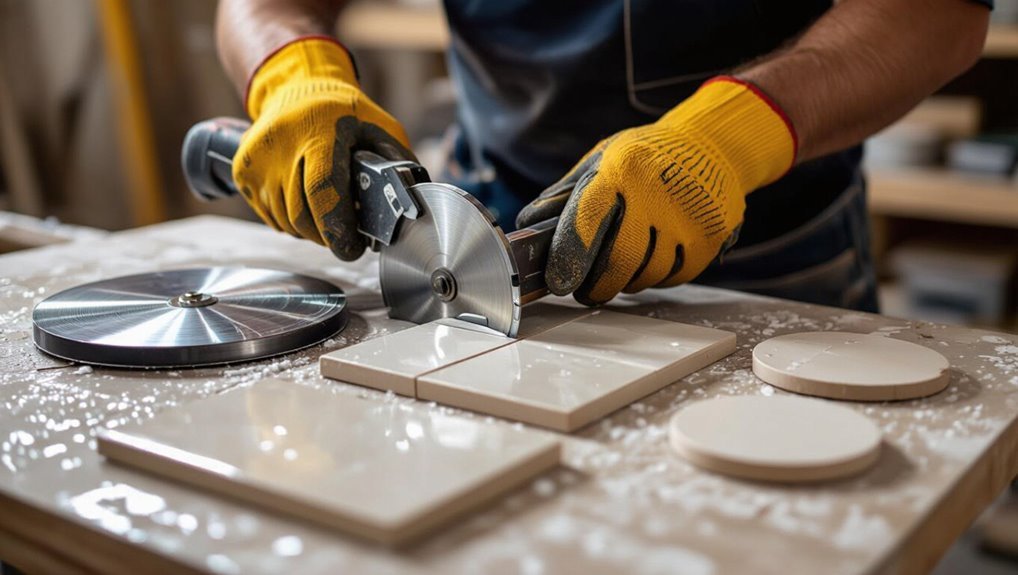
Cut tiles cleanly by choosing the right method for the cut: score-and-snap for straight lines, a wet saw for long or thick cuts and precise notches, and nippers or a carbide-grit wheel for small curves and irregular shapes.
Measure and mark accurately, clamp or support tiles, cut slowly with steady pressure, finish edges with a rubbing stone or diamond file, and dry-fit pieces before installation.
Safety and maintenance for cutting tools
One simple rule will keep you safe: always treat cutting tools as if they’re sharp, powered, and unpredictable.
Wear eye, ear, and hand protection, secure tiles, and disconnect power before adjustments. Clean blades, check guards, and replace dull parts. Store tools dry.
- Inspect regularly for damage.
- Replace worn blades promptly.
- Follow manufacturer maintenance schedules.
Common Problems, Troubleshooting, and Mistakes to Avoid
As you lay tiles, you’ll run into issues like uneven tiles, lippage, and hollow spots — learn how to diagnose and fix them early.
You’ll also want to spot causes and remedies for cracking, loose tiles, and grout failure before they spread.
Finally, plan your layout carefully to avoid off-center runs and awkward cuts that make everything look amateurish.
Uneven tiles, lippage, and hollow spots diagnosis and fixes
Uneven tiles, lippage, and hollow spots can ruin the look and durability of a floor, but you can diagnose and fix them if you know what to look for:
- Check level with a straightedge and feel edges; lift and reset tiles with fresh thinset if high/low.
- Tap tiles to find hollow spots; remove and clean substrate, then reapply proper mortar coverage.
- Use spacers and wedges to prevent lippage while adhesive cures.
Cracking, loose tiles, and grout failure causes and remedies
Cracks, loose tiles, and failing grout usually trace back to movement, poor adhesion, or improper installation.
You can prevent and fix most issues by diagnosing cause, removing damaged tiles, and addressing substrate or bonding problems quickly.
- Replace cracked tiles; use proper thinset and back-butter for adhesion.
- Re-secure loose tiles; check substrate movement and use uncoupling membrane.
- Remove failed grout; regrout with correct type and seal.
Poor layout issues (off-center runs, awkward cuts) and prevention
When your tile layout ends up off-center or forces tiny, awkward cuts at doorways and walls, the room will look amateurish no matter how well the tiles are set.
Plan and snap centerlines, dry-lay borders, and shift layout to hide narrow cuts. Measure twice, stagger joints, and keep consistent grout widths.
- Dry-fit first
- Align focal points
- Trim symmetrically
Best Practices, Tips, and Time-Saving Strategies
Get your workspace organized and batch tasks like cutting, mixing, and grouting so you work faster and cleaner.
Pick mortar and grout formulated for your subfloor and site conditions, and follow temperature and humidity guidelines to guarantee proper curing.
Finish with simple maintenance routines—regular cleaning and prompt grout care—to keep the floor looking new for years.
Efficient workspace organization and batching tasks
While you’re laying tile, a well-organized workspace and batching similar tasks will keep you moving steadily and reduce mistakes, wasted materials, and downtime.
Clear zones for cutting, mixing, and drying, label supplies, and prep tiles in groups. Follow these steps:
- Stage tools and spacers by task.
- Mix mortar and grout in planned batches.
- Pre-cut and arrange tiles for each area.
Choosing the right mortar and grout for conditions
Because different environments demand different performance, pick mortar and grout that match your floor’s conditions and traffic, and you’ll avoid failures later.
- Use modified thinset for high-traffic or moisture-prone areas; it bonds better.
- Choose unsanded grout for narrow joints, sanded for joints ≥1/8″ to prevent cracking.
- Select epoxy grout for durability and stain resistance where chemicals or heavy wear occur.
Temperature, humidity, and curing best practices
Once you’ve picked mortar and grout that suit traffic and moisture, pay close attention to temperature, humidity, and curing—these factors determine how well your installation bonds and how long it takes to reach full strength.
Keep conditions stable and follow product cure times.
- Work between 50–90°F (10–32°C); avoid extremes.
- Maintain 40–60% humidity for proper hydration.
- Protect tiles from drafts, direct sun, and foot traffic during cure.
Maintenance tips to extend tile floor life
To keep your ceramic floor looking and performing its best, establish a simple routine of sweeping, mopping, and prompt spill cleanup so grit and stains don’t wear the glaze or grout.
Use gentle cleaners, avoid harsh acids, and dry grout lines to prevent mildew. Seal grout annually and use felt pads under furniture.
- Clean weekly
- Seal grout yearly
- Protect from scratches
Cost, Time Estimates, and When to Hire a Professional
You’ll usually spend most on tile and thinset, with DIY labor adding a day or two for a small room and several days for larger or complex patterns.
If you spot uneven subflooring, extensive layout cuts, or plumbing/electrical obstacles, it’s time to call a pro.
When comparing quotes, check scope, materials, warranty, and hourly vs. flat pricing so you’re comparing apples to apples.
Typical DIY cost breakdown and labor time estimates
A basic DIY tile job typically runs $3–$10 per square foot for materials and tools, plus another $2–$6 per square foot in your time if you value it, depending on tile quality and surface prep needs. Expect 4–8 hours per 100 sq ft for prep and layout, plus 8–16 hours for setting and grouting.
| Item | Typical time |
|---|---|
| Prep/layout | 4–8 hrs/100 sq ft |
| Setting/grout | 8–16 hrs/100 sq ft |
Signs the project requires professional help
If your DIY estimates for materials and time start ballooning or the job involves tricky conditions—like uneven subfloors, large-format tiles, or wet-area waterproofing—you should consider hiring a pro.
- Complex subfloor repairs or structural issues that exceed your skills.
- Tight deadlines or scope that make delays costly.
- Precise waterproofing, layout, or specialty tile work where mistakes are expensive.
How to evaluate professional quotes
Wondering how to tell a fair quote from a lowball or an overestimate? Compare detailed line-item costs, not just totals.
Check timelines and milestones, plus allowances for unexpected issues. Verify credentials and warranties; hire pros for complex layouts, subfloor repairs, or tight deadlines.
- Itemized costs
- Realistic timeline
- Credentials and warranty
FAQ
You probably have a few practical questions before you start, like how long tiles need to set before foot traffic and whether you can lay new tile over existing tile or vinyl.
You’ll also want to know the right grout width, how to prevent cracking in wet areas, and how often to seal and maintain your floors.
Read on for clear, concise answers to each point.
How long does tile installation take to be ready for foot traffic?
How soon can you walk on new tile?
You can usually walk on ceramic tile after 24 hours if thin-set was used and cured under normal conditions, but grout needs 24–72 hours to set before regular traffic.
Wait at least 7 days for heavy furniture or rugs.
Follow manufacturer cure times and keep area dry and undisturbed for best results.
Can I install ceramic tile over existing tile or vinyl?
If your existing tile or vinyl is sound, level, and well-bonded, you can often install new ceramic tile right over it to save time and demo mess; just don’t skip the prep—check for loose pieces, clean thoroughly, and scuff or prime glossy surfaces so the new thin-set will adhere.
Remove quarter-round, verify changes match height, and use proper underlayment where needed.
What grout width should I use for ceramic floor tiles?
When matching new tile over an existing surface, you’ll also want to pick the right grout joint width to guarantee proper spacing, movement accommodation, and a clean look.
For most ceramic floor tiles, use 1/8″ (3 mm) for tight joints, 3/16″ (5 mm) for slight size irregularities, and 1/4″ (6 mm) for larger tiles or pattern variation.
Adjust for tile edges and layout.
How do I prevent tiles from cracking in high-moisture areas?
Because moisture and movement are the main culprits, you’ll prevent cracking by choosing the right substrate, waterproofing, and flexible materials: install a stable, water-resistant backer (cement board or waterproof membrane), use a bonded waterproofing membrane over the substrate in wet zones, set tiles with a flexible polymer-modified thinset, and grout with a flexible, water-resistant grout or epoxy so the assembly can tolerate slight movement without transferring stress to the tiles.
Use proper expansion joints.
How often should tile floors be sealed and maintained?
How often you should seal and maintain tile depends on the tile type, grout, and traffic.
Porcelain often needs little to no sealing; ceramic glaze is usually fine without sealant, but grout and unglazed tiles benefit from sealing every 1–3 years.
Clean routinely with pH-neutral cleaner, reseal grout sooner in high-moisture or heavy-traffic areas, and inspect yearly for wear or stains.