How to Level a Concrete Floor Before Installing New Flooring
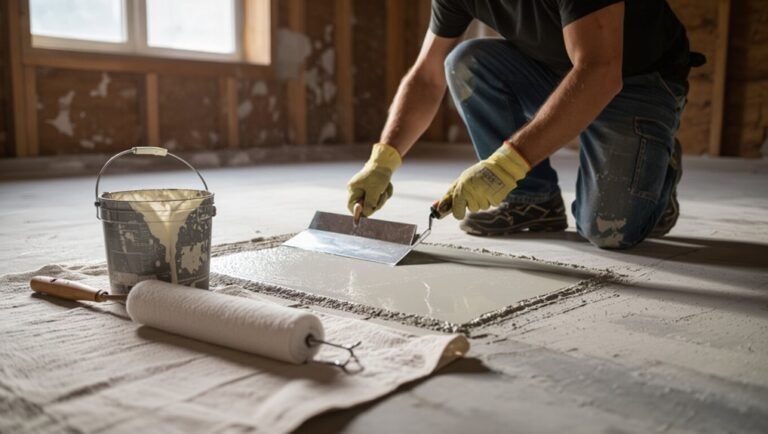
You can level a concrete floor before installing new flooring by first testing moisture and mapping high and low spots with a straightedge or laser level, then cleaning and priming the slab. Grind or scarify high areas, patch cracks and low spots with a cementitious filler, and pour a self-leveling compound for broad unevenness, following cure times. Wear protection and follow manufacturer limits to avoid failure. Keep going for step-by-step tips, tool lists, and when to call a pro.
Can You Level a Concrete Floor Before Installing New Flooring?
Yes—you can level a concrete floor before installing new flooring, and you’ll usually choose between patching low spots, grinding high spots, or applying a self-leveling compound.
Each option varies in time and cost: grinding is quick but can be dustier and may need rental equipment, patching is inexpensive for small areas, and self-leveling compounds take longer to prepare and cure and cost more in materials.
Consider the floor condition, your skill level, and how soon you need the new flooring to set the right approach.
Short summary of options and typical time/cost considerations
Before you install new flooring, you can and often should level a concrete slab. The best method depends on how uneven the floor is, the type of finish you want, your timeline, and your budget.
You’ll choose between grinding, self-leveling compound, patching, or a skim coat.
Ask: how can I level a concrete floor? Expect hours to days; costs range from DIY low to contractor-high.
Basic Understanding Why Level a Concrete Floor?
An uneven concrete subfloor can cause cracking, squeaks, glued or nailed flooring failures, and poor drainage that shortens flooring life.
You’ll need different tolerances depending on what you install—tile needs a very flat base, hardwood can cup or gap on dips, and vinyl or carpet will show ripples or seam issues.
Understanding these effects helps you choose the right leveling method before you install new flooring.
Problems caused by an uneven concrete subfloor
If your concrete subfloor’s uneven, you’ll quickly notice more than just a wobbly tile or squeaky floorboard—unevenness can cause trip hazards, poor adhesive and flooring failures, doors that won’t close properly, and accelerated wear on finishes and furniture.
Uneven floors also create moisture pockets, stress seams and underlayment, complicate installation, and reduce overall longevity and performance of your new flooring system.
How floor level affects different flooring types (tile, hardwood, vinyl, carpet)
Uneven concrete doesn’t just look bad—it directly affects how different floor coverings perform, so you need to match the repair level to the material you’re installing.
Tile needs a flat, stiff base to avoid cracking; hardwood tolerates slight variations but needs stability; vinyl demands a smooth surface for adhesives and wear; carpet hides minor dips but still benefits from uniform support to prevent premature matting.
Assessing Your Concrete Floor Tools and Measurements
Start with a quick visual inspection checklist to note cracks, stains, and obvious high or low areas.
Use the right measuring tools—a bubble level or straightedge for short runs, a laser level for the whole room, and a dipstick for pinpoint depth measurements.
Map the high and low spots on a floor plan so you know where to grind, fill, or pour leveling compound.
Visual inspection checklist
Before you touch a tool, walk the entire slab and look closely for cracks, spalling, high or low spots, staining, moisture marks, and joint conditions—note their locations and size so you can prioritize repairs.
Then catalog defects, note traffic areas, and plan fixes. Check edges and connections for trip hazards.
- Visible cracks and width
- Spalled or pitted zones
- Depressions and humps
- Stains and efflorescence
- Joint gaps and condition
Measuring tools and when to use them (level, laser level, straightedge, dipstick)
After you’ve walked the slab and logged defects, it’s time to quantify those observations with the right tools so you can plan fixes accurately.
Use a spirit level for short runs and checking camber, a laser level for room‑wide datum and slope, a straightedge for spanning and spotting hollows, and a dipstick (tape and rod) to measure depth of low areas before choosing patch or overlay materials.
How to map high and low spots
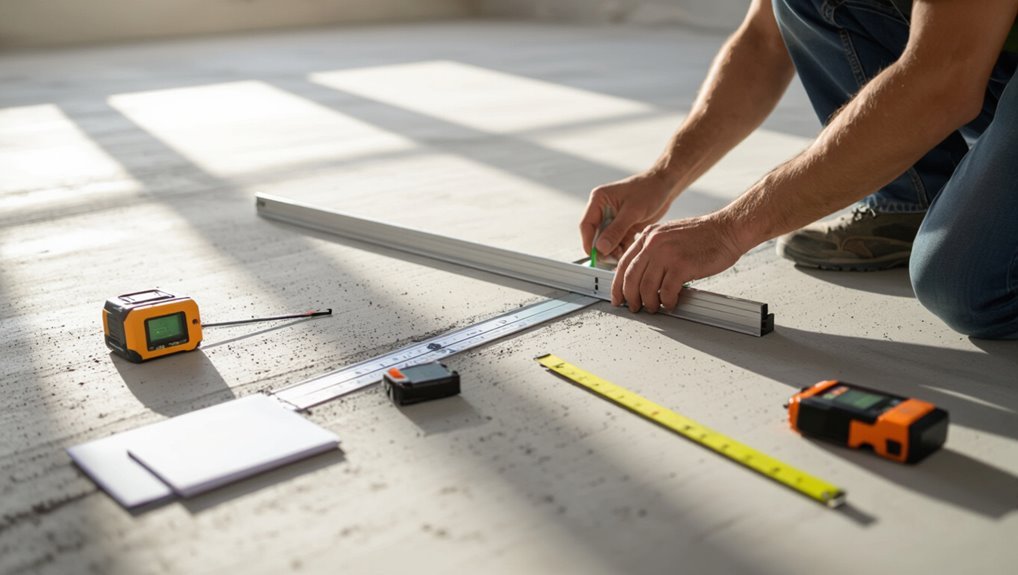
You’ll want a clear, measured map of highs and lows so repairs match the slab’s true profile; set up a grid or a series of reference lines, then record elevations at each intersection using your laser level, straightedge, and dipstick.
Note deviations from your reference plane, mark high spots to grind and low spots to fill, and create a contour diagram to guide repair quantities and sequencing.
Quick Decision Guide Repair vs. Leveling vs. Replacement
If you’re seeing small cracks or surface spalls, patching will usually do the job quickly and cheaply.
For larger low spots or gradual slopes, a self-leveling compound can restore a flat surface without major work.
If the slab has significant height issues, heavy unevenness, or structural damage, you’ll need grinding, milling, overlays, or a pro’s assessment and help.
When patching is sufficient
When is a simple patch enough instead of a full leveling or replacement?
You can patch when damage is limited: small cracks, spalls, or isolated low spots under a few square feet. The slab is structurally sound, mostly flat, and drains correctly.
Patch materials restore surface integrity and bond well. Choose patching for localized defects; larger uneven areas need leveling or replacement.
When self-leveling compound is appropriate
Because self-leveling compound flows and bonds quickly, it’s best for broad, shallow unevenness rather than deep repairs or structural fixes.
Use it when floors have low spots, minor warps, or grout lines you need to smooth before thin flooring.
You’ll still prep: clean, prime, and contain the pour.
Don’t expect it to replace slab repair or resolve major slope issues.
When grinding, milling, or overlay is required
You’ve covered shallow fixes with self-leveling compound, but some problems need heavier tactics: grinding, milling, or applying an overlay.
Use grinding to remove high spots or coatings and improve flatness.
Mill when large uneven areas or thick surface defects demand material removal.
Choose an overlay to restore worn, pitted, or slightly uneven floors without full replacement, matching thickness and adhesion needs.
When to call a professional
If the problem goes beyond a few cracks, dips, or a thin skim coat, call a professional to assess whether repair, leveling, or full replacement makes sense.
You should also call if structural issues, moisture, large height variations, or hidden deterioration exist.
Pros diagnose causes, recommend cost-effective fixes, and guarantee warranties and substrate prep meet flooring manufacturer requirements before you proceed.
Step-by-Step Procedure to Level a Concrete Floor
Start by prepping the area—cleaning, marking high and low spots, and protecting nearby surfaces.
You’ll grind and plane high areas, then fill cracks and low spots before pouring a self-leveling compound.
For larger or cosmetic jobs you’ll finish with a cementitious overlay or skim coat.
Preparatory steps
Before you start leveling, clear the area and protect adjacent spaces so dust and materials don’t spread.
Check the slab for moisture and plan for a vapor barrier if readings are high.
Repair cracks and fix any active water issues to guarantee a stable, long-lasting surface.
Clearing the area and protecting adjacent spaces
1 clear, unobstructed workspace makes the leveling process faster and safer: remove furniture, loose items, and floor coverings, then sweep or vacuum debris so you can see cracks, high spots, and drainage slopes.
Tape plastic or drop cloths along walls, doorways, and vents to contain dust. Seal off adjacent rooms, protect trim and fixtures, and label or move anything sensitive.
Testing for moisture and preparing for vapor barriers
Because trapped moisture can ruin new toppings and finishes, you’ll test the slab and plan for a vapor barrier before pouring any leveler.
Use a calcium chloride or in-situ relative humidity test per ASTM to measure moisture. If results exceed product limits, schedule vapor-retardant membranes or liquid-applied barriers.
Clean and dry the surface, follow manufacturer specs, and document readings before proceeding.
Repairing cracks and active water issues
When you find cracks or signs of active water, stop and assess their cause and extent so you can choose the right repair method; small, static hairline cracks need a different fix than wide cracks, leaking joints, or hydrostatic upwelling.
Fix hairlines with epoxy or polyurethane injections. For wider cracks and joints, rout, clean, and seal or use cementitious patch.
Address groundwater with drains, sump pumps, or exterior waterproofing.
Step 1 Grinding and planing high spots
Before you start grinding and planing high spots, make sure you’ve got the right tools and safety gear—think concrete grinder or scarifier, dust shroud, hearing protection, respirator, and sturdy boots.
Use a grinder for minor, precise leveling and a scarifier when you need to remove thicker high spots or old coatings. Work methodically in passes, keeping the tool moving to avoid gouging and checking progress frequently.
Tools, safety gear, and technique
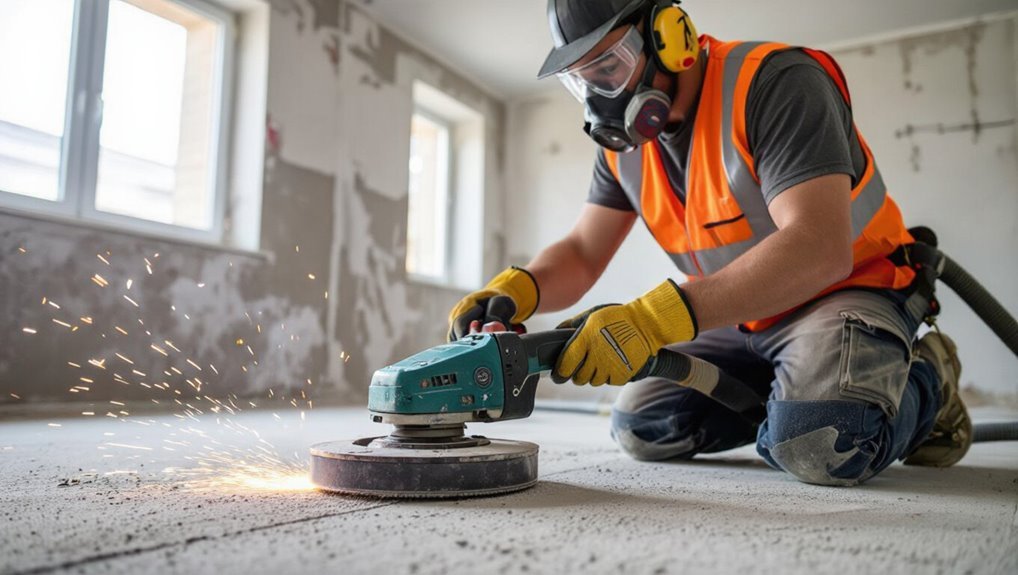
Step 1 starts with the right tools and safety gear: you’ll need a floor grinder or handheld angle grinder with diamond cup wheels, a bullfloat or planer for stubborn peaks, a shop vacuum, replacement discs, and extension cords rated for the job, plus ear, eye, and respiratory protection and cut-resistant gloves.
Use firm, even passes, keep the grinder moving to avoid gouging, and vacuum dust frequently.
When to use concrete grinders vs. scarifiers
Although both devices remove high spots, you’ll choose a grinder when you need controlled, smooth material removal and a scarifier when you must rapidly cut through thick, stubborn concrete or layered coatings.
Use a grinder for fine leveling, feathering edges, and preparing for thin flooring.
Pick a scarifier for heavy removal, multiple coats, or scale; expect rougher texture and deeper cuts requiring patching.
Step 2 Filling low spots and cracks
Now you’ll pick the right patching compound and primer for the size and depth of each low spot or crack.
Mix and apply the products per the manufacturer’s directions, watching working times so the material flows and bonds properly.
Let each repair cure fully before sanding or applying the leveling coat to guarantee a stable, even surface.
Choosing patching compounds and primers
When you’re filling low spots and cracks, picking the right patching compound and primer makes the difference between a short-lived fix and a durable, level surface.
Choose cement-based, polymer-modified patch for deeper repairs and quick-setting mixes for thin fills.
Use a concrete primer or bonding agent recommended by the manufacturer to improve adhesion and prevent delamination before you apply the patch.
Mixing, applying, and curing times
Before you start, read the product labels so you mix the patch exactly to the manufacturer’s ratio and achieve the right consistency for the repair.
Mix small batches, keeping them workable. Trowel the compound into low spots, feathering edges smooth.
Follow set and cure times listed—don’t rush sanding or traffic. Maintain recommended temperature and humidity for full strength before installing flooring.
Step 3 Applying a self-leveling compound
Before you pour, make sure the slab is clean, dry, and primed per the manufacturer’s instructions so the compound bonds properly.
Mix to the exact water-to-powder ratio, work within the specified pot life, and pour steadily while using a gauge rake and smoothing tool to spread the material.
Respect the product’s thickness limits, feather edges into changes, and apply in multiple passes if you need more build-up.
Surface preparation and primers
Although the self-leveling compound does the heavy lifting, you need a spotless, properly primed surface for it to bond and flow correctly.
Sweep, vacuum, and degrease; remove loose debris, paint, and laitance.
Repair deep cracks or spalls with patching mortar and let cures fully.
Choose the manufacturer-recommended primer, apply evenly, and allow tack-free time so the compound adheres and levels predictably.
Mixing ratios, pouring technique, and working time
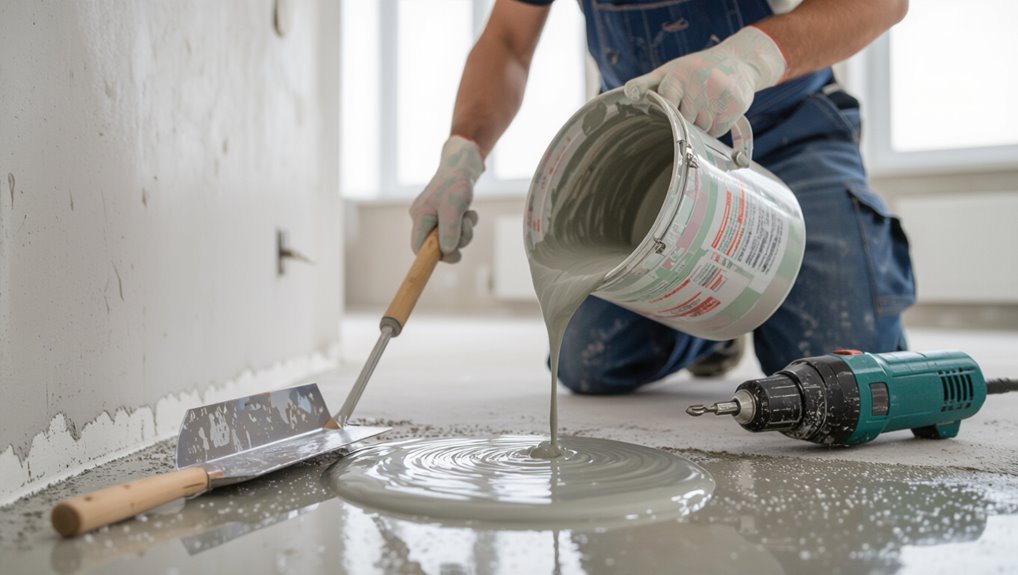
Mix the self-leveling compound exactly to the manufacturer’s ratio—usually 4–6 parts powder to 1 part water by volume or the specified weight—using a drill with a paddle until you get a lump-free, pourable consistency; follow the bag instructions, measure accurately, and don’t add extra water to thin it.
Pour steadily from a low height, spread with a gauge rake, work in 10–20 minute windows, and avoid reworking.
Thickness limits and feathering to transitions
When you pour self-leveling compound, stick to the manufacturer’s maximum and minimum thickness—most products can be applied from a feather edge up to 1/8″–1/4″ in a single pour, while some fiber-reinforced or special formulas allow thicker pours (up to 1/2″–1″).
Feather changes by tapering thinly to adjoining surfaces, using primer and a skim coat for gradual ramps so flooring seats evenly without telegraphing joints.
Step 4 Installing a cementitious overlay or skim coat (for large or aesthetic jobs)
Now you’ll choose the right cementitious overlay or skim coat—polymer-modified, microtopping, or standard cement mixes—based on the job size and desired finish, and pick an adhesion method like primer, bonding slurry, or mechanical keying.
You’ll also decide on finishing options (trowel, broom, or decorative treatments) to get the look you want.
Finally, you’ll follow proper curing procedures—keep it moist or use curing compounds—to guarantee strength and prevent cracking.
Types of overlays and adhesion methods
You’ll choose an overlay and adhesion method based on floor condition, thickness needed, and the final look you want.
For thin corrections, use a skim coat or polymer-modified microtopping; for thicker builds, use a bonded mortar or self-leveling underlayment.
Promote adhesion with primer, epoxy bonding slurry, or mechanical keys on damaged concrete.
Match product specifications to substrate and traffic.
Finishing options and curing
Having selected the right overlay and adhesion method, it’s time to focus on finishing options and proper curing for your cementitious overlay or skim coat.
Choose broom, trowel, or float textures depending on final flooring. Seal or densify if needed.
Keep the surface moist and covered for recommended cure time, avoid traffic, and follow manufacturer temperature and humidity guidelines to guarantee strength and adhesion.
Step 5 Moisture mitigation and final checks before flooring installation
Before you install flooring, you’ll need to verify the slab’s moisture with calcium chloride or in-situ relative humidity tests to guarantee it meets the flooring manufacturer’s limits.
If levels are high, install a vapor barrier or choose a moisture-tolerant underlayment to protect your finish.
Finally, recheck flatness and moisture after any remediation so you’re confident the surface is ready.
Conducting calcium chloride or RH tests
When moisture concerns remain, run either calcium chloride or relative humidity (RH) tests to quantify vapor emissions and decide on mitigation; both give concrete-specific data that guides your next steps.
You’ll place test kits per manufacturer instructions, seal areas, and wait the required time.
Record results, compare them to flooring limits, and use findings to determine if remediation or delay is necessary before leveling and installation.
Installing vapor barriers or moisture-tolerant underlayments
If your calcium chloride or RH results show elevated moisture or you’re stopping short of a full remediation, install a vapor barrier or choose a moisture-tolerant underlayment to protect the new floor and adhesives.
Roll out a compatible vapor retarder, overlap seams and seal with manufacturer tape.
For moisture-tolerant underlayments, follow thickness and adhesion specs, allow acclimation, and test adhesion before final flooring.
Tools, Materials, and Cost Estimates
Before you start, gather essential tools like a level, screed, trowel, grinder, and mixing bucket so you won’t stop mid-job.
You’ll also want common compounds—self-leveling underlayment for shallow fixes, patching mortar for deep spots, and primer and bonding agent—each used for specific repair depths and adhesion.
Finally, expect rough DIY costs in the low hundreds for materials and rental tools, while hiring professionals can run into the thousands depending on area and scope.
Essential tools list
You’ll need a compact set of tools and materials to level a concrete floor efficiently—some you might already own, others you’ll buy or rent—so this list focuses on what’s truly necessary and gives ballpark costs to help plan your budget.
- Concrete grinder or cup wheel (rent $40–$80/day)
- Self-leveling squeegee ($15–$40)
- Mixing drill with paddle ($30–$80)
- Floor primer and patch kit ($20–$60)
- Long level or laser level ($25–$200)
Common compounds and materials with brief use-cases
Covering the essentials, here’s a concise rundown of common compounds and materials you’ll use to level a concrete floor, what each does, and typical cost ranges so you can match products to the job and budget.
| Material | Use / Typical cost |
|---|---|
| Self-leveling compound | Smooths low spots; $20–$60/bag |
| Cementitious patch | Repairs holes; $10–$40 |
| Primer/bonder | Improves adhesion; $15–$50 |
| Underlayment | Thin layer for flats; $0.50–$3/sq ft |
Rough DIY vs. professional cost ranges
Now that you know the common compounds and what they do, it helps to compare what a DIY setup will cost versus hiring a pro.
For DIY, expect $100–$400 for tools and materials for small rooms (trowels, primers, 20–50 lb underlayment bags).
Pros charge $2–$6 per sq ft plus $100–$300 mobilization; complex jobs rise accordingly.
Comparison Best Methods by Flooring Type
When choosing a leveling approach, you’ll need to match methods to the flooring you plan to install.
Tile and stone demand the flattest, most rigid base, while engineered and solid hardwood need controlled moisture and gentle tolerances.
Vinyl, laminate, carpet, and other resilient floors tolerate more variation but still benefit from smoothing or patching specific low spots.
Tile and stone requirements
Because tile and stone demand a rigid, flat substrate, you’ll need to choose leveling methods that match each material’s thickness, grout lines, and finish—thin-set over a decently flat slab, a bonded mortar bed for large-format tile, or a self-leveling compound where minor deviations exist.
Check substrate flatness per tile size, reinforce membranes for movement, slope wet areas, and guarantee substrates are clean, cured, and primed.
Engineered and solid hardwood requirements
Although hardwood tolerates slight variations better than tile, you still need a flat, dry, and stable concrete slab to prevent cupping, gaps, or squeaks; check for level within 3/16 inch over 6 feet, repair cracks, and remove moisture with a test.
Use a self-leveling compound for localized low spots or a skim coat for larger areas.
Follow manufacturer moisture limits and acclimate boards before install.
Vinyl and laminate requirements
Hardwood has stricter flatness and moisture limits, but vinyl and laminate let you be a bit more forgiving — they still need a stable, dry, and reasonably flat slab to perform.
You’ll check for surface levelness within manufacturer tolerances, repair cracks, and fill low spots with a suitable patch or self-leveler.
Confirm moisture is below spec and use underlayment as recommended.
Carpet and resilient flooring requirements
When you’re preparing a concrete slab for carpet or resilient flooring, aim for a smooth, stable, and dry surface that meets each product’s tolerances. These floor types are generally more forgiving than hardwood but still demand attention to flatness, moisture, and surface texture.
Check for dips over 1/4″ in 6′, use self-leveling compound where needed, repair cracks, and test moisture with a reliable meter.
Common Mistakes and Problems to Avoid
Don’t ignore moisture—too much dampness will ruin adhesives and topping compounds.
Make sure you apply the leveling compound at the thickness the product allows and prep the concrete properly so it bonds instead of flakes.
Read and follow the flooring manufacturer’s instructions so your finished floor performs as expected.
Overlooking moisture issues
Because moisture can quietly ruin a level floor, you need to check and address dampness before you start screeding or installing finishes.
Test for vapor with a moisture meter or plastic sheet test, and fix any leaks, drainage problems, or high RH.
Use proper primers or vapor barriers when needed.
Ignoring moisture leads to adhesive failure, mold, and warped flooring.
Applying leveling compound too thin or too thick
If you skim the manufacturer’s directions or guess thickness based on looks, you’ll likely end up with a leveling compound layer that’s too thin to hide dips or too thick to cure properly.
You’ll get cracking, uneven finish, or long cure times. Follow recommended pour depths, build in layers when needed, and use a gauge rake or depth guide to guarantee consistent, specified thickness for reliable results.
Improper surface prep and bonding failures
One common cause of failed floor leveling is skipping thorough surface prep, which prevents the leveling product from bonding and leads to delamination, cracking, or trapped moisture.
You need to remove dust, grease, loose particles, and previous coatings, etch or profile smooth concrete when required, and use the proper primer.
Otherwise, patches won’t adhere and repairs will fail prematurely.
Skipping manufacturer instructions for flooring
When you skip the manufacturer’s instructions for primers, mixes, or curing times, you gamble with adhesion, warranty coverage, and long-term performance; following those guidelines guarantees the product behaves as designed and reduces the risk of failure.
You’ll void warranties, create weak spots, and waste materials. Read labels, measure precisely, and follow cure and application steps so your leveled floor bonds properly and lasts.
Tips, Best Practices, and Time-Saving Strategies
Plan your work sequence and tools so you can move smoothly from prep to pour without wasted steps.
Pick leveling compounds and admixtures that cure quickly yet resist cracking for long-term performance.
Also factor season and temperature into your timing and mix choices to avoid delays or failed cures.
Preparing for efficient workflow
Although you’re focused on the leveling itself, prepping your workspace first will save hours and prevent costly mistakes. Clear the area, gather tools and materials, and set up zones for mixing, cutting, and drying so tasks flow without backtracking.
You’ll plan sequence, label supplies, and schedule work to minimize downtime.
- Stage materials by task
- Create clear walkways
- Keep tools charged
- Pre-measure mixes
- Assign cleanup times
Choosing products for fast cures and long-term performance
With your workspace organized and materials staged, pick products that speed curing without sacrificing durability so you won’t have to redo work later.
Choose high-quality polymer-modified patching compounds and rapid-setting underlayments rated for your floor load.
Confirm manufacturer cure times, compressive strength, and compatibility with adhesives or finishes.
Use primers and bonding agents as recommended to guarantee adhesion and long-term stability.
Test small area first.
Seasonal and temperature considerations
Because temperature and humidity directly affect cure times and material behavior, you should adjust your schedule and product choices to match the season.
Work during moderate temperatures when possible, use heaters or coolers to maintain manufacturer-recommended ranges, and pick fast-setting mixes in cold months.
Monitor moisture with a hygrometer, extend drying times in humid conditions, and plan extra curing time for reliability.
When to Hire a Pro Signs and Questions to Ask
If your floor has large cracks, persistent water damage, or unevenness that won’t respond to leveling compounds, it’s time to call a pro.
Ask contractors about their experience with concrete repair, warranties, timelines, and whether their estimates include labor, materials, permits, and surface prep.
Get at least three written bids and request references and photos of similar completed jobs before you decide.
Indicators you need professional repair or resurfacing
When unevenness, cracks, or ongoing settling start affecting how your floor looks or performs, it’s time to evaluate professional repair or resurfacing.
Hire a pro if cracks widen, large voids or spalling appear, moisture causes efflorescence or staining, or leveling compounds keep failing.
Also call a contractor for structural movement, repeated repairs, or if you lack tools and experience to guarantee a durable, flat substrate.
Questions to ask contractors and what to request in estimates
Once you’ve decided to call in a contractor, you’ll want to ask targeted questions and get specific items in writing so estimates are comparable and the work holds up.
Ask about licensing, warranties, timeline, materials, and cleanup.
Request a written scope, unit prices, payment schedule, references, and proof of insurance.
- Scope of work
- Materials/specs
- Timeline and milestones
- Warranty details
- Insurance and references
FAQ
You probably have specific questions before you start—like how flat the slab needs to be for tile, hardwood, or vinyl, and whether you can pour self-leveling compound over old adhesive or paint.
You’ll also want to know how long to wait after leveling, what to do about active water or high moisture, and whether this is a DIY job or one for a pro.
Keep reading for clear answers and practical guidance on each of these points.
How flat or level does a concrete floor need to be for tile/hardwood/vinyl?
How flat does a concrete slab need to be for different floor coverings?
For tile, aim for no more than 1/8″ variation over 10 feet and spot depressions patched; porcelain and large formats need stricter flatness.
For hardwood, limit deviation to 3/16″ over 10 feet and guarantee moisture control.
For vinyl/LVT, keep deviations under 1/8″ to prevent telegraphing and wear.
Can I use self-leveling compound over old adhesive or paint?
Can you pour self-leveling compound over floors that still have old adhesive or paint on them? You generally shouldn’t. Contaminants prevent bonding, causing delamination or failure.
Remove glue and flake paint by scraping, grinding, or using chemical strippers. Then clean, vacuum, and apply a manufacturer-recommended primer.
For stubborn residues, consult product guidelines or test a small area before full application.
How long after leveling can I install new flooring?
After the leveler cures, check the manufacturer’s recommended wait time—most products need 24 to 48 hours before you can install flooring, while thicker patches or cool, damp conditions can extend that to several days.
Also confirm the surface is hard, dry, and free of dust. Perform a quick adhesion or moisture test if recommended, then proceed with your underlayment and final flooring.
What if my floor has active water intrusion or very high moisture?
If your slab shows active water intrusion or very high moisture, stop work and address the source before leveling—continuing will trap water, ruin the leveler, and void many warranties.
Find and fix leaks, improve drainage, and install a proper vapor barrier or waterproofing system.
Test moisture with a reliable meter after repairs, and only proceed once readings meet manufacturer and flooring requirements.
Is it possible to level a floor myself, and how hard is it?
Wondering whether you can level the floor yourself? You can for small, shallow unevenness using patching compound or self-leveling underlayment and basic tools.
Larger issues—deep dips, major slopes, structural cracks, or moisture—need pros. Assess scope, rent a pump or trowel if needed, follow product instructions, and don’t rush.
Safety and proper prep matter to avoid costly mistakes.