
How to Install Outdoor Tile on Dirt: Base Prep and Laying Techniques
You can’t just lay tile on loose dirt; you’ll need to rebuilt substrate for drainage and stability. Excavate to depth, lay geotextile, then compacted crushed stone or gravel, followed by a screeded sand or mortar bed, edge restraints, and frost‑rated tiles set with proper jointing and polymeric sand or grout. Compact and level frequently, seal joints, and allow curing time. Keep tools and safety gear ready — continue for detailed steps, materials, and troubleshooting.
Can You Install Outdoor Tile Directly on Dirt?
You generally can’t just lay outdoor tile directly on loose dirt and expect it to last — the ground needs stable, well-draining support.
In some cases you can install tile over compacted soil if you first add a proper base like crushed stone and a compacted sand or mortar layer.
If you want durable, level results, plan for a prepared subbase and good drainage before setting tiles.
Short summary of feasibility and ideal conditions
Although it’s technically possible to lay outdoor tile over compacted dirt, it’s only advisable under very specific conditions: you need stable, well-draining soil, minimal freeze-thaw cycles, proper edging, and a compacted aggregate or sand bed beneath tiles.
If you follow guidelines for how to install outdoor tile on dirt—prepare a firm base, prevent water pooling, and use suitable adhesives—you’ll avoid shifting and failure.
Basic Understanding What Installing Tile on Dirt Means
When you plan to install tile directly over dirt, you’ll want to pick durable outdoor tiles like porcelain or natural stone that handle moisture and wear.
Check your soil type, slope, and drainage because loose, clayey, or poorly graded sites need more preparation to stay stable.
Your goals should be clear: good drainage, a stable substrate, and frost resistance where winters freeze.
Types of outdoor tile suitable for dirt installations
Picking the right tile matters because not all outdoor tiles handle direct contact with dirt, moisture, and ground movement the same way.
You’ll favor dense, frost-resistant porcelain, unglazed quarry tile, or textured natural stone like slate. Avoid soft, porous ceramics.
Look for low water absorption, anti-slip finishes, and thickness suited to uneven substrates so tiles resist cracking and staining when laid over prepared dirt.
Soil and site conditions that affect success
Because the ground will become the tile system’s foundation, you need to assess soil type, drainage, slope, and freeze/thaw risk before you start—these factors determine how much prep, reinforcement, and water control you’ll need to keep tiles stable and dry.
Check for clay, sand, organic layers, compaction, water table depth, nearby trees, and surface runoff patterns so you can plan excavation, geotextile, and base materials.
Key performance goals: drainage, stability, and frost resistance
Evaluating soil and drainage tells you what to build toward: three performance goals will guide every choice—effective surface and subsurface drainage, long-term stability, and resistance to frost action.
You’ll direct water away, prevent saturation under tiles, and use graded base materials plus proper slope. Aim for compaction and edge restraints to stop movement, and depth plus insulation where frost heave is a risk.
Materials, Tools, and Costs Overview
Before you start, you’ll want to know which materials you’ll need—tiles, base layers (gravel, crushed stone), sand, adhesives or mortar, edging, and any pavers or trim.
You’ll also need specific tools and equipment like a shovel, plate compactor (or hand tamper), tile cutter, trowels, and a level.
Finally, I’ll outline a typical cost breakdown and budgeting factors so you can estimate materials, tool rental, and labor.
Required materials (tiles, base materials, adhesives, edging, sand, pavers)
Tools and materials determine whether your outdoor tile on dirt will last, so you’ll want to gather the right items up front: frost-resistant porcelain or natural stone tiles, crushed stone and compactable gravel for the base, polymeric sand for joints, exterior-grade thinset or mortar, concrete pavers or edging restraints, and weed barrier fabric.
Buy sealant and replacement tiles for future repairs.
Necessary tools and equipment
Now that you’ve picked the right materials, you’ll want to assemble the specific tools that make installation accurate and efficient.
You’ll need durable, ergonomic gear to dig, level, cut, and secure tiles, plus safety items.
- Shovel, tamper, and wheelbarrow for base shaping
- Level, straightedge, and string line for layout
- Wet saw, notched trowel, and grout float for setting tiles
Typical cost breakdown and budgeting factors
A clear budget keeps your outdoor tile project on track, so start by listing materials, tool needs, and labor to estimate total cost. Decide tile type, base materials, and hire vs DIY. Track contingencies (10–20%). Compare rental vs purchase for tools and factor delivery, disposal, and permits.
| Item | Typical Cost | Notes |
|---|---|---|
| Tiles | $2–$15/ft² | Porcelain vs ceramic |
| Base | $1–$6/ft² | Gravel, sand, paver base |
| Tools/Labor | $50–$500+ | Rent or hire pros |
Step-by-Step Installation Process
Start by evaluating the site so you know slope, soil type, and how much tile and base material you’ll need.
Mark your layout, calculate quantities, then excavate to the proper depth and slope.
Lay geotextile, compactible aggregate, and sand in layers and compact each one with the right tools for a stable surface.
Step 1 Site assessment and planning
Before you lay a single tile, walk the site and assess drainage, slope, sunlight, and existing soil conditions so you can plan grading, base depth, and tile layout that’ll prevent future shifting or water damage.
Check for nearby roots, utility lines, and compacted spots. Note low areas needing fill, sun exposure for material choice, and access for equipment to guarantee a durable, maintainable installation.
Step 2 Marking layout and calculating materials
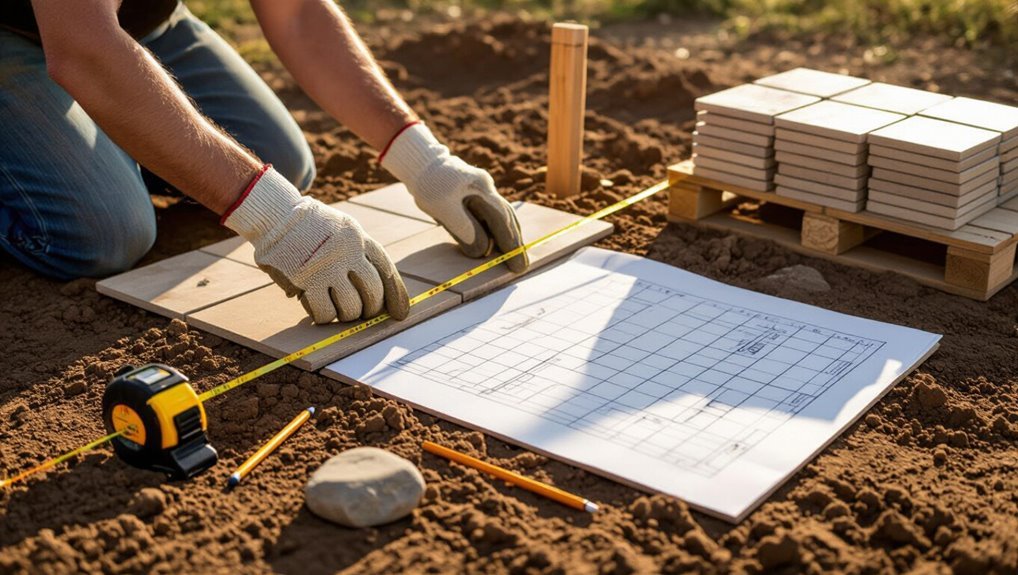
Lay out your tile pattern and measure carefully so you know exactly how many tiles, edge pieces, and base materials you’ll need.
Snap chalk lines from a central reference, mark cut lines, and outline borders.
Calculate tile count plus 10% waste for cuts and breakage.
Determine quantities of paver base, sand, and edging by area and compacted depth.
List tools and fasteners.
Step 3 Excavation depth and slope preparation
Now you’ll dig to the proper depth and shape the slope so water drains away from structures; typically that means excavating to the combined thickness of the compacted base, bedding sand, and tile plus 1/4–1/2 inch per foot of slope away from the house (or 2% grade) toward a drainage path.
Remove organic soil, roots, and soft spots, check grade with a level, and compact subgrade evenly.
Step 4 Installing base layers: geotextile, compactible aggregate, and sand
Start by unrolling a geotextile fabric across the excavated area to separate the subgrade from your aggregate; this keeps fines from migrating upward and improves long-term stability.
Next, spread a 3–4 inch layer of compactible aggregate, rake level, then add a 1 inch bedding of coarse sand.
Screed the sand flat and check elevations before laying tile; keep edges supported.
Step 5 Compaction techniques and tools
Compact the base methodically to create a stable platform for your tiles; you’ll prevent future settling and uneven joints by choosing the right equipment and technique.
Use a plate compactor for aggregate layers and a hand tamper for tight spots. Make multiple passes, change directions, and check for uniform firmness.
Finish with a screeded sand layer, compacted gently to maintain profile and drainage.
Step 6 Laying tiles: dry-lay test, spacing, and patterning
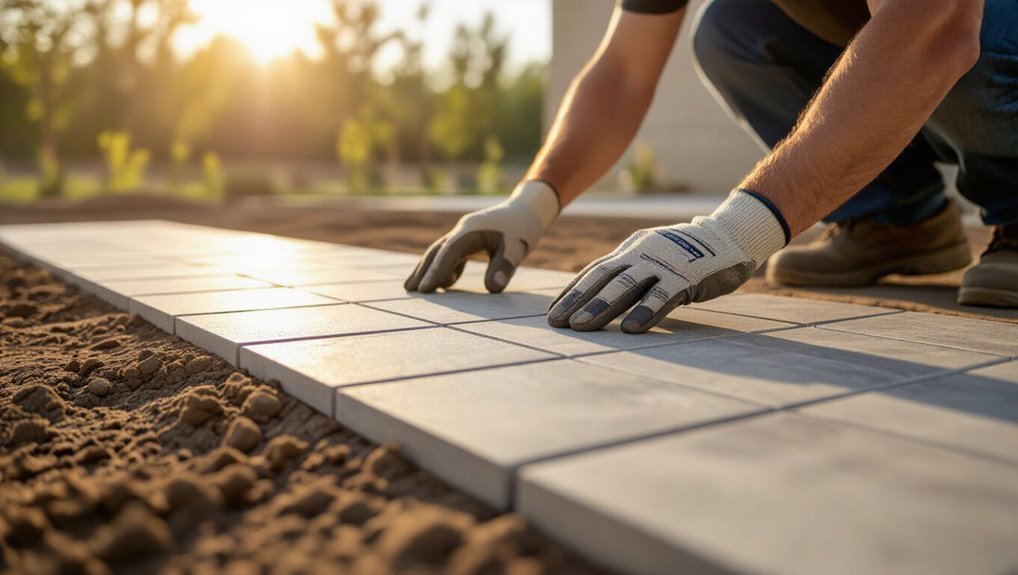
Before you set a single tile, do a dry-lay to confirm fit, pattern, and spacing so you can catch mistakes early and tweak cuts or alignment without adhesive hassle.
Lay tiles from your landmark line outward, maintain consistent joint widths with spacers, and check level and symmetry frequently.
Adjust tiles for pattern repeats, diagonal layouts, or edge cuts before final fixing.
Step 7 Bedding and bonding options (sand setting bed vs mortar vs pedestal/floating systems)
Now that your dry-lay proves the layout, you’ll choose how to bed and bond the tiles — the method you pick determines drainage, future maintenance, and how much ground prep and skill the job needs.
Use a compacted sand bed for simple, permeable installs; mortar for rigid, long-lasting adhesion and better waterproofing; or pedestals/floating systems for leveling, airflow, and easy access beneath tiles.
Step 8 Joint filling and sealing
Once your tiles are set and the bedding has cured, it’s time to fill and seal the joints to lock the installation in place and control water, debris, and weed intrusion.
Sweep clean, moisten joints, then brush polymeric sand or grout into gaps. Compact and remove excess.
After curing, apply a compatible penetrating or surface sealer to protect joints and tiles from moisture and staining.
Step 9 Edging, restraints, and finishing touches
With joints filled and sealed, you’ll move on to edging and restraints to keep the installation stable and neat; this step secures tile edges, prevents shifting, and gives the finished area a clean outline.
Install metal or plastic edge trim, compact adjacent soil, anchor restraints into the base, and add a beveled junction where needed.
Inspect for level, clean residue, and tighten fasteners.
Step 10 Curing time and first-use recommendations
Although the tiles may look set, you’ll need to let the installation cure fully before regular use; give grout and adhesives the manufacturer-recommended time (typically 24–72 hours for foot traffic and up to 7 days for heavy loads).
Keep the area dry and free of disturbance, and avoid placing heavy furniture or vehicles on the surface until the specified cure period has passed.
After curing, clean residue, seal if recommended, and introduce traffic gradually.
Alternative Methods and When to Use Them
You can choose between a paver-style installation on a compacted base, a traditional mortar bed, or a pedestal system depending on how permanent and level you need the surface to be.
If drainage or ground movement is a concern, raised platforms or decking alternatives might be a better fit.
I’ll compare strengths, costs, and typical use cases so you can pick the right approach.
Paver-style installation on compacted base vs mortar bed vs pedestal systems
When choosing between a paver-style installation on a compacted base, a mortar bed, or pedestal supports, consider site conditions, anticipated use, and your skill level—each method balances cost, drainage, durability, and ease of repair differently. You’ll pick compacted base for DIY leveling, mortar for permanence, and pedestals for adjustability.
| Method | Best use |
|---|---|
| Compacted base | Low cost, good drainage |
| Mortar bed | Heavy traffic, permanent |
Raised platforms and decking alternatives
If your site has uneven ground, poor drainage, or you want an elevated look without extensive excavation, raised platforms and decking give a practical alternative to laying tile directly on dirt.
You can build a framed deck, use adjustable pedestals for tile atop a weatherproof platform, or install modular composite decking. Choose based on load, maintenance, ventilation, and how permanent you want the installation.
Common Problems and How to Fix Them
You’ll run into a few recurring issues—uneven settling and lippage, poor drainage and standing water, frost heave and cracking, and staining or efflorescence—and you should know how to spot each one early.
For each problem I’ll explain common causes, quick diagnostics, and practical fixes or preventative steps. Follow those tips and you’ll cut down on repairs and extend the life of your outdoor tile.
Uneven settling and lippage: causes and corrections
Although outdoor tile looks crisp when laid right, uneven settling and lippage can quickly betray a DIY job, causing trip hazards, water pooling, and a patchy appearance.
You’ll want to identify the root causes—poor base compaction, inconsistent mortar thickness, or inadequate joint spacing—and correct them before they get worse.
Recompact or rebuild the base, re-bed tiles with uniform mortar, adjust spacers, and replace warped pieces.
Drainage failures and standing water: diagnosis and remediation
Uneven settling and lippage often let water run where it shouldn’t, so you’ll also need to check how your site handles drainage when tiles start holding puddles.
Identify low spots, blocked slopes, or compacted base layers.
Fix by regrading, adding a slight slope, installing gravel channels or a French drain, and ensuring joints and grout allow runoff.
Recompact and retest for proper flow.
Frost heave, cracking, and tile failure: prevention and repair
When freezing soil forces tiles upward or repeated temperature swings crack grout and adhesive, your patio won’t stay flat or waterproof for long; preventing frost heave and tile failure means controlling moisture, stabilizing the base, and choosing materials that flex without breaking.
Excavate to frost depth, install proper drainage and compacted, well‑draining aggregate, use a flexible adhesive and movement joints, and repair cracks promptly.
Tile staining and efflorescence: cleaning and prevention
Keeping water and movement under control will also cut down on surface staining and the white, powdery efflorescence that can ruin a clean look.
Mop spills, clear debris, and seal porous tiles with a breathable outdoor sealer. Use proper drainage and joint mortar to prevent water migration.
For existing efflorescence, dry-brush then rinse with a diluted muriatic or specialized efflorescence cleaner, following safety directions.
Best Practices, Tips, and Maintenance
You’ll want a simple long-term maintenance schedule and a few trusted products to keep tiles and grout in good shape.
Before winter hits, follow seasonal care and winterizing steps to prevent frost damage and shifting.
Pick durable tiles, frost-resistant grout, and tight installation tolerances to minimize repairs.
Long-term maintenance schedule and recommended products
A simple, consistent maintenance plan will keep outdoor tile on dirt looking great and performing well for years, so schedule seasonal inspections and cleanings at the start of spring and late fall.
You should:
- Use a pH-neutral tile cleaner and soft-bristle brush monthly for grime.
- Reseal grout and tiles every 1–3 years with a breathable outdoor sealer.
- Replace damaged tiles promptly and check base drainage annually.
Seasonal care and winterizing outdoor tile installations
When temperatures drop and moisture increases, prepare your outdoor tile installation so freeze-thaw cycles and winter grime don’t cause cracking or staining.
Sweep and wash tiles, clear debris from joints, and inspect grout and drainage.
Use breathable sealers before prolonged wet weather, protect edges with removable barriers, and store movable furniture.
Address minor repairs promptly to prevent bigger winter damage.
Tips for durability: tile selection, grout type, and installation tolerances
After winter prep and repairs, focus on choices that keep your outdoor tile lasting longer: pick frost-rated, low-porosity tiles, use polymer-modified sanded grout for wider joints or epoxy grout where moisture and stains are a problem, and set tolerance limits for slope, joint width, and bedding depth so tiles aren’t stressed by movement.
Check substrate compaction, allow 1/8–3/8″ joint variance, and maintain 3/4–1″ bedding depth.
DIY vs Hiring a Professional
You can handle prep, leveling, and laying simple pavers if you’ve got basic DIY skills and the right tools.
If the site needs major grading, drainage work, or complex tile patterns, call a pro who’ll handle permits, substrate engineering, and a clean finish.
Weigh labor, time, and risk against contractor costs to decide whether hiring out makes financial and practical sense.
Tasks suitable for DIY and required skill level
Some tasks you can tackle yourself include clearing and grading the soil, laying a weed barrier, and setting a simple sand or gravel base; these require basic tools and careful measuring but no specialized licensure.
You can also cut and dry-lay tiles, mix and apply paver sand, and compact the base.
Basic carpentry, measuring, and patience handle most steps safely.
When to call a pro and expected contractor scope
If your project stays small—simple patio, level ground, and basic tiles—you can handle most steps yourself.
However, call a pro when the site needs significant grading, drainage work, complex layout, heavy cutting, or local permits.
Professionals will assess soil conditions, install proper subbase and drainage, guarantee a long-lasting edge restraint, and provide warranties you won’t get with a DIY job.
You should hire contractors to survey, permit, compact, and finish.
Cost-benefit considerations
After weighing when to call a pro, you’ll want to compare the real costs and benefits of doing the job yourself versus hiring a contractor. You’ll save labor costs DIY but risk mistakes, time, and tool expenses. A pro brings warranty, speed, and proper base prep. Use the table to weigh priorities:
| Factor | DIY | Pro |
|---|---|---|
| Cost | Lower upfront | Higher upfront |
| Risk | Higher | Lower |
| Time | Longer | Shorter |
FAQ
You’ll probably have questions like whether you can lay tile directly on compacted dirt or how deep the base should be in different climates.
You’ll also want to know which tile materials work best, how to stop weeds from coming through joints, and when it’s safe to walk on newly installed outdoor tile.
Read on for concise answers to each of these common concerns.
Can I lay tile directly on compacted dirt without gravel?
Wondering whether you can lay tile directly on compacted dirt without gravel? You shouldn’t.
Compacted dirt shifts, settles, and retains moisture, risking cracked or uneven tiles. Gravel provides drainage, load distribution, and a stable base.
If you skip it, expect movement, drainage issues, and shorter tile life. For a durable installation, include a proper gravel layer beneath your bedding material.
What base depth do I need for outdoor tiles on dirt in different climates?
Because climate affects frost, drainage, and load, the base depth for outdoor tile on dirt varies: aim for 4–6 inches of compacted gravel in warm, dry regions; 6–8 inches in temperate areas with seasonal freeze-thaw; and 8–12 inches where deep frost, heavy clay, or poor drainage are common.
Adjust depth for expected loads, slope, and soil stability, and compact each layer thoroughly before tiling.
Which tile materials are best for outdoor use on a dirt base?
Having the right base depth handled, pick tiles that stand up to moisture, freeze-thaw cycles, and occasional ground movement.
Porcelain and high-density vitrified tiles top the list for durability and low water absorption. Natural stone like granite or slate works if sealed and installed with flexible bedding.
Avoid soft, porous ceramics. Choose non-slip finishes and frost-rated products for longevity on dirt bases.
How do I prevent weeds from growing through tile joints?
How can you keep weeds from poking up between tiles? Use multiple defenses: lay landscape fabric over compacted dirt, add a gravel/sand bedding, and seal joints with polymeric sand or a flexible outdoor grout.
Edge with metal or plastic edging to block root encroachment.
Apply a pre-emergent herbicide before installation and spot-treat any early sprouts to prevent reestablishment.
How long before I can walk on newly installed outdoor tile on dirt?
Once your joints are sealed and edging’s in place, you’ll want to give the installation time to cure before regular foot traffic.
Wait at least 24–48 hours for adhesive to set and grout to harden enough for light use. For full strength and heavy traffic, allow 7 days.
Keep weight and moisture off the area during curing to prevent shifting or staining.