How to Install Pool Tile: Waterproof Methods for a Lasting Finish
You’ll get a lasting, leak-free pool finish by prepping a sound substrate, choosing a waterproof membrane (cementitious, liquid, or sheet) and using compatible waterproof mortar and grout. Repair cracks, follow manufacturer cure times, set tiles full-bed with proper spacers, and seal joints with flexible sealant or backer rod. Test before filling and maintain balanced water chemistry. Follow a maintenance schedule and inspect seals regularly—keep going to learn specific steps, materials, and troubleshooting tips.
How to Install Pool Tile: and Overview
You’ll get a quick roundup of the best waterproofing methods so your tile lasts through seasons and chemicals.
I’ll help you decide when retiling makes more sense than spot repairs.
You’ll also see a visual preview of finished results to set expectations before you start.
Best Waterproof Methods Summarized
When waterproofing pool tile, choose a method that matches your pool type, tile material, and budget so the finish stays secure and leak-free. Common approaches include cementitious waterproofing, liquid-applied membranes, and sheet membranes.
For how to install pool tile, prep surfaces, use compatible waterproof mortar or membrane, seal joints with flexible grout or silicone, and test thoroughly before filling to guarantee long-term performance.
When to Retile a Pool vs. Repairing Existing Tile
Although small chips and loose grout can often be fixed quickly, extensive cracking, large areas of delamination, or widespread discoloration usually mean it’s time to retile rather than patch.
You should retile when structural bonding fails, multiple tiles move, or repairs would be frequent.
Patch when damage is isolated, substrate sound, and matching tile is available; weigh cost, downtime, and longevity.
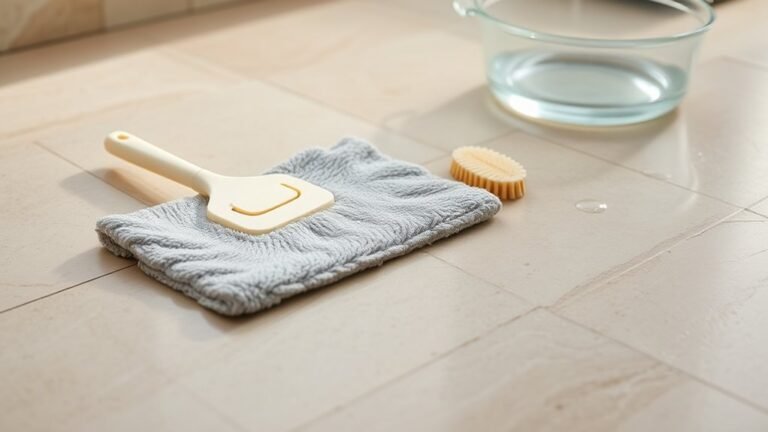
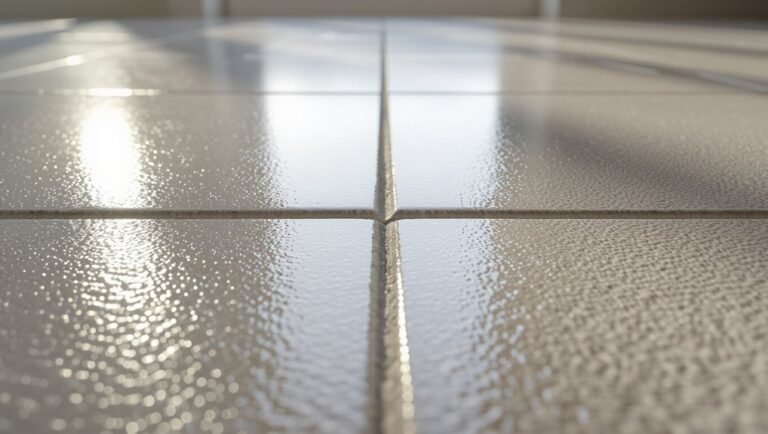
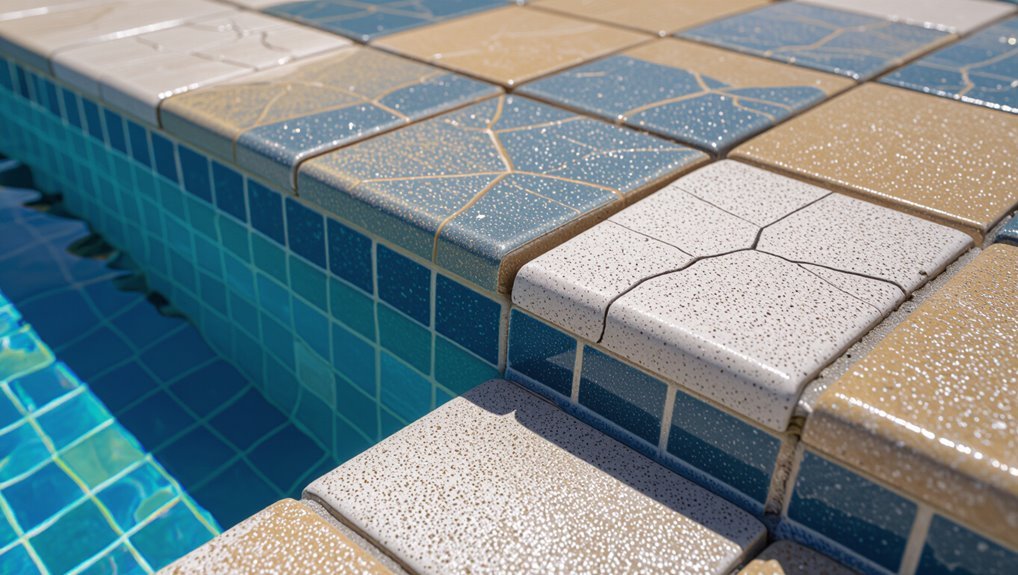
Visual Preview of Finished Results
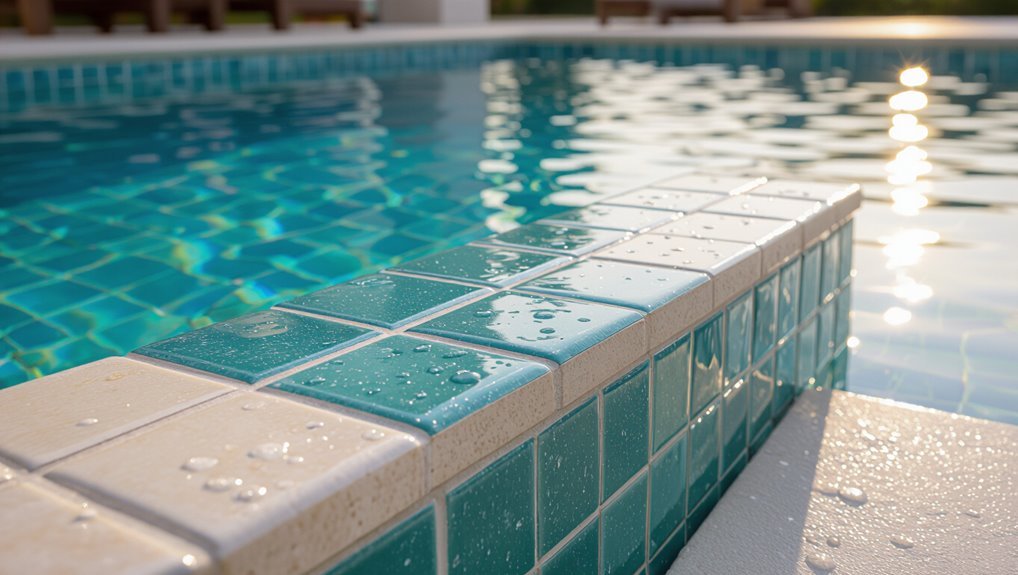
Before you commit to retiling or repairs, take a moment to picture how the finished pool will look—this preview will guide color, grout, and layout choices so you don’t regret them later.
Visualize tiles under different lighting, water clarity, and from common viewing angles. Mock up samples, tape layouts, and evaluate grout contrast to confirm the aesthetic and maintenance expectations before work begins.
Basic Understanding What Pool Tile Installation Entails
When you pick pool tile, you’ll choose from ceramic, porcelain, glass, or natural stone—each has different durability and maintenance needs.
You’ll also need to understand why waterproofing is critical to prevent leaks and extend the tile’s life.
Finally, know the key components you’ll work with: the substrate, waterproofing membrane, adhesive, grout, and sealant.
Types of Pool Tile (Ceramic, Porcelain, Glass, Natural Stone)
If you want a durable, attractive pool finish, choose your tile material based on durability, slip resistance, maintenance, and budget. You’ll pick ceramic for affordability, porcelain for toughness, glass for color, or natural stone for texture. Consider maintenance and chemical resistance when selecting.
| Material | Strength | Maintenance |
|---|---|---|
| Ceramic | Moderate | Low |
| Porcelain | High | Low |
| Glass | Medium | Medium |
Why Waterproofing Matters for Pool Tile Longevity
Because water constantly surrounds and seeps around pool tile joints, you’ve got to waterproof properly to prevent leaks, delamination, and costly repairs down the line.
If you skip or skimp on waterproofing, moisture will weaken bonds, promote mold and efflorescence, and shorten tile life.
Proper waterproofing preserves structural integrity, reduces maintenance, and protects your investment so tiles stay secure and attractive for years.
Key Components: Substrate, Waterproofing Membrane, Adhesive, Grout, Sealant
Think of pool tile installation as a system: each component—the substrate, waterproofing membrane, adhesive, grout, and sealant—has a specific job and they all need to work together.
You’ll guarantee longevity by choosing compatible materials, prepping surfaces, and following proper sequencing.
Key tasks:
- Solid substrate
- Continuous membrane
- Correct adhesive
- Waterproof grout and sealant
Planning and Preparation
Before you start, inspect the pool for cracks, movement, and efflorescence so you know whether repairs are needed first.
Choose tiles, backer boards, adhesives, and grout rated for constant immersion, and gather the right tools and safety gear.
Check local permits and codes, and decide when the job requires a pro.
Assessing the Existing Pool Condition: Cracks, Movement, Efflorescence
When you inspect the existing pool, focus on cracks, structural movement, and signs of efflorescence so you can decide whether patching, underpinning, or a full recoat is needed.
Check crack width, depth, and location; note lateral or settlement movement.
Scrape for powdery salts and damp stains.
Document areas, take photos, and mark spots requiring structural repair before tile work begins.
Choosing Materials for Wet Environments (tile, backer, adhesives, grout)
Although pool environments demand extra durability, you can select products that balance longevity, appearance, and ease of maintenance by prioritizing materials rated for constant immersion and chemical exposure.
Choose porcelain or vitreous glass tile, cement backer boards or waterproof membranes, epoxy or polymer-modified thinset adhesives, and epoxy or urethane grout.
Confirm NSF/ANSI or equivalent ratings and manufacturer guidance for submerged use.
Tools and Safety Equipment Checklist
You’ll need a concise set of tools and safety gear to work efficiently and protect yourself: tile nippers, wet saw or tile cutter, notched trowels, grout float, mixing buckets, sponge, tape measure, level, chalk line, and a quality drill with mixing paddle, plus PPE—safety glasses, nitrile gloves, knee pads, respirator or dust mask, and hearing protection.
- Inspect tools before starting
- Keep PPE accessible
- Secure wet saw setup
- Organize workspace
Permits, Codes, and When to Hire a Pro
Because local rules can vary widely, check permits and codes before you start so you don’t hit delays or fines: contact your building department to confirm waterproofing, electrical, and plumbing requirements.
If inspections, structural changes, or complex waterproofing systems are required, hire a licensed pro. You’ll save time, avoid violations, and guarantee durable, code-compliant tile installation.
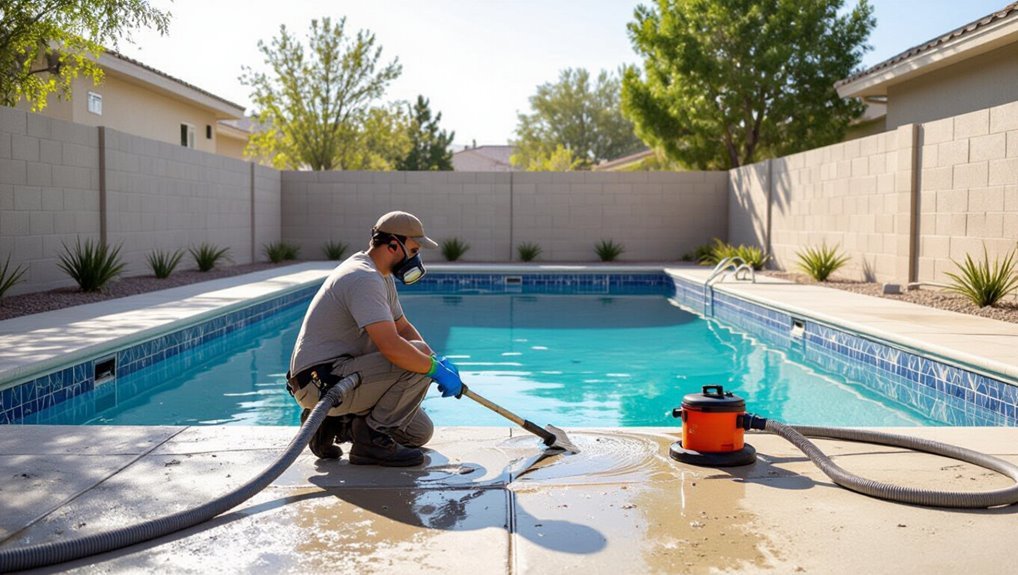
Step-by-Step Installation Process
Now you’ll work through the installation step by step, starting by draining and thoroughly cleaning the pool surface.
You’ll remove old tile, prep and repair the substrate, and address any cracks or concrete damage before applying a waterproofing membrane and letting it cure.
Finally, you’ll lay out and set the new tile with the proper waterproof adhesive, trowel, and spacing to guarantee a long-lasting finish.
Step 1 Drain and Clean the Pool Surface
Start by draining the pool to a level that lets you access the tile line and any areas you’ll be working on; lower the water slowly and follow local discharge regulations.
Then clean and inspect surfaces, removing dirt, algae, and loose material.
Take these steps:
- Brush walls and floor thoroughly.
- Rinse residue with low-pressure wash.
- Apply pool-safe cleaner.
- Allow full dry time.
Step 2 Remove Old Tile and Prepare Substrate (techniques and precautions)
With the pool drained and the surface clean, you can move on to removing old tile and getting the substrate ready for new installation.
Use a chisel and hammer or an oscillating tool to pry tiles, working slowly to avoid damaging surrounding substrate.
Wear eye, ear, and respiratory protection.
Clear adhesive and debris, then rinse and let the area dry before waterproofing and tiling.
Step 3 Repair and Level Substrate; Treat Cracks and Concrete Damage
Assess the substrate carefully before you mix any patching compound: remove loose material, probe cracks for depth, and mark areas that need leveling so you can prioritize repairs.
Clean dust and efflorescence, then widen narrow cracks to sound concrete.
Use compatible hydraulic cement or polymer-modified repair mortar, pack in layers, feather edges, and screed low spots.
Let cures reach recommended strength before tiling.
Step 4 Apply Waterproofing Membrane: Types, Application Methods, Dry Times
Now that you’ve repaired and leveled the substrate and allowed repairs to cure, it’s time to apply a waterproofing membrane to protect those fixes and prevent water intrusion beneath the tile.
Choose between liquid-applied elastomeric products, sheet membranes, or cementitious coatings.
Follow manufacturer prep, roller/brush or trowel application, guarantee full coverage and seams sealed, and respect specified dry and cure times before proceeding.
Step 5 Layout and Setting Tile with Waterproof Adhesive (trowel choices, spacing)
Before you set a single tile, lay out a clear grid and pick the right trowel and spacing so the job goes straight and drains properly.
Choose a notched trowel matching tile size for full-bed coverage; back-butter large tiles.
Spread waterproof adhesive evenly, comb ridges toward grout joints, and use consistent spacers.
Check alignment frequently and bed tiles with firm, even pressure for proper adhesion.
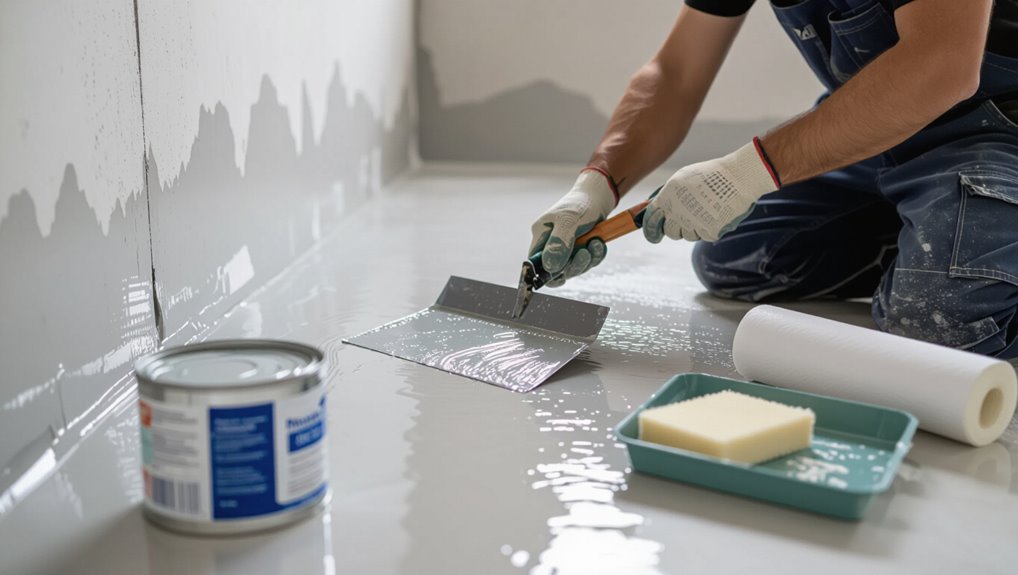
Step 6 Grouting with Waterproof/Anti-efflorescence Grout (mixing, application)
Once the tiles have fully set, you’ll mix a waterproof, anti-efflorescence grout to a smooth, lump-free consistency and apply it promptly so joints seal uniformly and resist staining.
Use a grout float to force grout into joints, wiping excess diagonally with a damp sponge before it skins.
Cure per manufacturer instructions, avoiding pool fill or heavy traffic until grout reaches full strength.
Step 7 Sealants and Caulking for Joints and Waterline Details
After the grout has set and you’ve cleaned the joints, you’ll move on to sealing and caulking the expansion joints, control joints, and the tile-to-deck/waterline interfaces to keep movement and water intrusion from compromising the installation.
Use a compatible ASTM-rated silicone or polyurethane, install backer rod where needed, tool smooth beads, and follow manufacturer cure times to guarantee flexible, watertight seals.
Step 8 Curing, Filling, and Initial Chemical Balancing
When the sealants and grout have fully cured, you’ll slowly fill the pool while watching for leaks, checking tile edges, and ensuring no debris disturbs the joints; fill to the skimmer level and stop to inspect corners and returns before continuing.
After filling, let the water sit 24–48 hours, adjust pH, alkalinity, and calcium hardness gradually, then add chlorine and stabilize per manufacturer instructions.
Comparison of Waterproofing Methods and Materials
Now you’ll compare cementitious waterproofing, liquid membranes, and sheet membranes to see which fits your pool’s needs.
You’ll also weigh the best adhesives and grouts for submerged conditions and consider cost, durability, and whether the job is DIY-friendly or better left to a pro.
This will help you pick a reliable, long-lasting system that matches your budget and skill level.
Cementitious Waterproofing vs. Liquid Membranes vs. Sheet Membranes
You’ll choose between three common waterproofing systems—cementitious, liquid-applied, and sheet membranes—based on the pool’s structure, budget, and long-term maintenance needs; each type brings distinct strengths and trade-offs in durability, flexibility, ease of application, and compatibility with tile finishes.
| Type | Best for |
|---|---|
| Cementitious | Rigid concrete shells |
| Liquid | Complex shapes |
| Sheet | Fast installs, seams to manage |
Best Adhesives and Grouts for Submerged Conditions
Because submerged pools expose tile joints and adhesives to constant water, chemical treatment, and temperature swings, you’ll need products formulated specifically for continuous immersion and chlorinated/salt environments. Use polymer-modified thinsets, epoxy adhesives, and cementitious epoxy grouts for strength and chemical resistance. Pick NSF/ANSI-rated or marine-grade options and follow manufacturer cure times.
| Product Type | Best Use |
|---|---|
| Epoxy adhesive | Full immersion, tile bonding |
| Cementitious epoxy grout | Joints, chemical resistance |
Cost, Durability, and DIY vs. Professional Trade-offs
After choosing the right adhesives and grouts for submerged conditions, you’ll need to weigh how different waterproofing methods affect cost, longevity, and who should do the work.
Consider these trade-offs:
- Liquid membranes: lower cost, moderate lifespan, DIY possible.
- Sheet membranes: higher cost, longer lifespan, pro-recommended.
- Cementitious systems: mid cost, durable, skilled DIY feasible.
- Full drainage layers: costly, best longevity, hire professionals.
Common Problems and Mistakes to Avoid
You’ll want to avoid common prep and installation mistakes that lead to poor adhesion, membrane failures, or the wrong grout choice.
Watch for early signs of delamination, efflorescence, or freeze damage so you can diagnose problems before they worsen.
I’ll cover how these failures happen, how to spot them, and what to do to prevent them.
Mistakes During Preparation: Poor Adhesion and Inadequate Surface Prep
When prep is rushed or corners are cut, tile won’t bond properly and problems start before you even lay the first piece.
You must clean, level, and dry surfaces, remove loose coating, and roughen smooth areas for mechanical keying.
Skipping priming, using wrong backerboard, or ignoring substrate movement leads to delamination and cracking.
Take time—proper prep prevents costly repairs.
Installation Errors: Incorrect Membrane Application, Wrong Grout Choice
If you skip proper membrane application or pick the wrong grout, the best-laid tile job can fail quickly; membranes applied too thin, overlapped incorrectly, or with gaps let water reach the substrate, while inappropriate grout—too porous for a wet environment or incompatible with pool chemicals—will stain, crumble, or allow leaks.
You should follow manufacturer coverage, guarantee seamless seams, and use polymer-modified, chemical-resistant grout for pools.
Long-Term Issues: Tile Delamination, Efflorescence, Freeze Damage
Although careful installation keeps tiles looking great at first, long-term problems like delamination, efflorescence, and freeze damage can undermine your work if you don’t address their root causes.
Understand how water intrusion, improper materials, and temperature cycles interact so you can spot early signs and take corrective action before repairs become costly.
Use compatible adhesives, proper waterproofing, breathable grout, and expansion joints to prevent failures.
How to Diagnose Failure Signs Early
Having prevented delamination, efflorescence, and freeze damage by choosing the right materials and details, you now need to watch for the earliest signs of failure so you can act before repairs grow expensive.
Inspect weekly and address issues quickly:
- Loose or hollow-sounding tiles.
- Hairline cracks or grout gaps.
- White deposits or staining.
- Water seepage behind tile lines.
Prevention, Maintenance, and Best Practices for a Lasting Finish
To keep your pool tile looking great and lasting longer, follow a routine maintenance schedule for cleaning, grout checks, and timely sealant renewal.
Keep your water chemistry balanced to prevent grout erosion and tile staining, and take seasonal steps like winterizing or shock treatments as needed.
Know the signs—persistent grout loss, loose tiles, or waterproofing failure—so you can reapply waterproofing or replace tiles before small issues become costly.
Routine Maintenance Schedule (cleaning, grout inspection, sealant renewal)
When you keep a simple, regular maintenance routine—cleaning tiles, checking grout, and renewing sealant—you’ll prevent small issues from becoming costly repairs.
- Weekly: brush tiles, remove debris.
- Monthly: inspect grout for cracks or voids.
- Annually: reapply sealer where wear appears.
- As needed: replace damaged grout, patch loose tiles.
Stick to this schedule to extend tile life and avoid surprises.
Chemical Balance and Its Impact on Tile and Grout Longevity
Because pool water chemistry directly affects tile and grout, you need to keep levels balanced to prevent etching, staining, and grout breakdown.
Test pH, total alkalinity, calcium hardness, and sanitizer regularly. Maintain pH 7.2–7.6, adjust alkalinity to stabilize pH, and keep calcium hardness within manufacturer recommendations.
Avoid strong chlorine spikes and cyanuric acid extremes to protect tile glaze and grout integrity.
Seasonal Care and Winterization Tips
If you want your pool tile and grout to look great season after season, proactive seasonal care and proper winterization are essential.
Drain to recommended levels, clean tiles and lines, and treat grout with a compatible sealer before closing.
Remove debris, cover the pool to limit freeze damage and algae, and store accessories dry.
Resume balanced chemistry and inspect tiles at reopening.
When to Reapply Waterproofing or Replace Tile
Although regular cleaning and chemistry keep tiles looking good, you’ll need to reapply waterproofing or replace tiles when you spot persistent grout discoloration, loose or cracked tiles, or recurring water penetration despite proper maintenance.
Inspect yearly, and act sooner after stains, efflorescence, or movement. Reapply waterproof membrane every 5–10 years or after repairs; replace tiles when structural leaks or repeated failures occur.
Cost Estimate, Timeline, and When to Hire a Professional
You’ll want a clear sense of time and money before you start: DIY tiling can take a weekend to a few weeks, while pros typically finish in days.
Expect costs for materials, waterproofing, and grout plus labor to vary widely depending on tile and prep needs.
If you spot structural cracks, complicated patterns, or extensive waterproofing requirements, hire a specialist.
Typical Project Timeline for DIY vs. Pro Installation
When weighing cost and time, DIY tileers can often save on labor but should expect a longer, more variable timeline than hiring a pro: a small repair or mosaic border might take a weekend, a full re-tile can stretch over several weekends plus cure time, while a professional crew typically completes the same job in a few days with predictable scheduling and guaranteed workmanship.
You should factor skill, available time, and risk tolerance when deciding.
Ballpark Cost Breakdown (materials, labor, waterproofing options)
Now that you’ve weighed time versus skill, let’s look at what this work will cost. You’ll pay for tile, mortar, waterproofing and labor; DIY saves money but adds time. Expect $1,000–$6,000+ depending on size and finish. Hire a pro for reliable waterproofing if unsure.
| Item | Low | High |
|---|---|---|
| Materials | $200 | $2,000 |
| Waterproofing | $150 | $1,000 |
| Labor | $650 | $3,000 |
Signs You Should Hire a Specialist (structural issues, complex finishes)
If your pool shows structural cracks, persistent leaks, or the job calls for elaborate mosaics or specialty stone, hire a specialist—these issues need experience and waterproofing guarantees you may not get from a DIY job.
You should also call a pro if waterproofing systems, complex substrates, or unusual drains are involved, or when timelines, permits, and warranty-backed labor matter for safety and long-term value.
FAQ Frequently Asked Questions
You’ll likely have questions about whether this is a DIY job, how long waterproofing and tile last, and which grout works underwater.
You might also wonder if you can put a waterproof membrane over existing tile and how soon to refill the pool after work.
Read on for clear, practical answers to those common concerns.
Can I install pool tile myself, or is waterproofing too difficult for DIY?
Thinking about tackling pool tile yourself? You can handle tile setting if you have tiling experience, steady patience, and proper tools.
Waterproofing is trickier: it demands careful surface prep, compatible membranes or coatings, and strict curing times. If you’re unsure about substrate condition or fluid-applied systems, hire a pro.
Mistakes lead to leaks and costly repairs, so weigh skill versus risk before starting.
How long should waterproofing and tile last before needing major repairs?
Expect pool waterproofing and tile to last differently: quality membrane systems and proper installation often give you 10–20 years before major repairs become likely, while ceramic or glass tiles themselves can easily last 20–30+ years if the substrate and waterproofing remain sound.
You’ll prolong life with routine inspections, prompt leak repairs, balanced water chemistry, and replacing damaged tiles or sealants before issues spread.
What is the best type of grout for underwater use?
Which grout should you pick for underwater use?
You’ll want a polymer-modified, cementitious grout or an epoxy grout.
Epoxy offers superior chemical, stain, and water resistance—ideal for pools—but it’s harder to work with and costlier.
Polymer-modified cement grouts are more user-friendly, still durable when sealed, and suitable for many pool installations.
Choose based on exposure, budget, and installer skill.
Can I apply a waterproof membrane over existing tile?
Can you put a waterproof membrane over existing tile? You can, but it’s rarely ideal.
Bonding over glazed tile risks delamination unless you mechanically roughen the surface, use a manufacturer-approved primer, and choose a flexible membrane rated for submerged use.
Inspect for cracked or loose tiles first, replace as needed, and follow membrane manufacturer instructions to guarantee adhesion and long-term performance.
How soon can I refill the pool after retiling and waterproofing?
How soon you can refill depends on the materials and curing times you used for the tile adhesive, grout, and waterproof membrane; follow manufacturer cure times and wait until adhesives, grout, and membranes reach their specified full cure (often 24–72 hours for rapid systems, up to 7 days or more for some cementitious products or thick liquid-applied membranes) before slowly refilling.
Also check bond strength, perform leak tests, and refill gradually.