How to Install Mosaic Tiles With Mesh Backing on a Wall Like a Pro
You can install mesh‑backed mosaic tiles like a pro by prepping a flat, clean substrate, choosing the proper thinset and notched trowel, and snapping level reference lines for a consistent start. Mix thinset to a smooth consistency, butter and comb the wall, press full mesh sheets firmly while aligning edges, clean excess adhesive, then grout and seal after cure. Follow manufacturer specs for materials and curing times, and keep going to learn layout, cutting, and troubleshooting tips.
How to Install Mosaic Tiles with Mesh Backing on a Wall Quick Overview and Direct Answer
Yes—you can install mesh-backed mosaic tiles on a wall; plan on a few hours for a small area (plus 24–72 hours for grout curing) and gather thinset, a notched trowel, tile spacers, a grout float, and a wet saw or tile nippers.
Choose mesh-backed sheets when you want faster layout and consistent spacing over flat surfaces; use individual-tile sheets if you need to conform to curves, make lots of cuts, or want custom patterns.
Follow manufacturer instructions for adhesive and grout to guarantee a durable install.
Quick answer: Can you install mesh-backed mosaic tiles on a wall and the basic time/materials estimate
Wondering whether you can put mesh-backed mosaic tiles on a wall? Yes—you can.
For guidance on how to install mosaic tiles with mesh backing on wall, expect basic steps: prep surface, apply thinset, press sheets, grout.
Time: 1–2 days for a small backsplash, longer for full walls.
Materials: mesh sheets, thinset, trowel, spacers, grout, sponge, sealer.
When to choose mesh-backed mosaics vs. individual-tile sheets
When deciding between mesh-backed mosaic sheets and loose individual tiles, think about speed, layout control, and surface complexity.
Mesh sheets let you cover large areas quickly and keep patterns aligned, while individual tiles give you more flexibility for uneven surfaces, tight corners, or custom spacing.
- Use mesh for speed and consistent patterns.
- Use loose tiles for irregular surfaces.
- Prefer loose for complex edges.
- Choose mesh for low-skill installs.
Understand Mosaic Tiles with Mesh Backing
Mesh-backed mosaic tiles are sheets of individual pieces (glass, ceramic, stone, or metal) pre-mounted on a flexible mesh for easier handling and installation.
You’ll want to pick the material and finish that matches your look and performance needs—glass for shine, stone for texture, ceramic for durability, and metal for modern accents.
Mesh makes placement and grout work faster but can limit cutting flexibility and may need extra adhesive for heavy materials.
What are mesh-backed mosaic tiles
Think of mesh-backed mosaic tiles as ready-to-install sheets of small tiles bonded to a flexible net that holds them in a preset pattern—you’ll get the visual variety of mosaics without placing each piece individually.
You’ll handle full sheets, cut them to fit, and set them with thinset. The mesh keeps spacing consistent, speeds installation, and simplifies alignment for a professional-looking result.
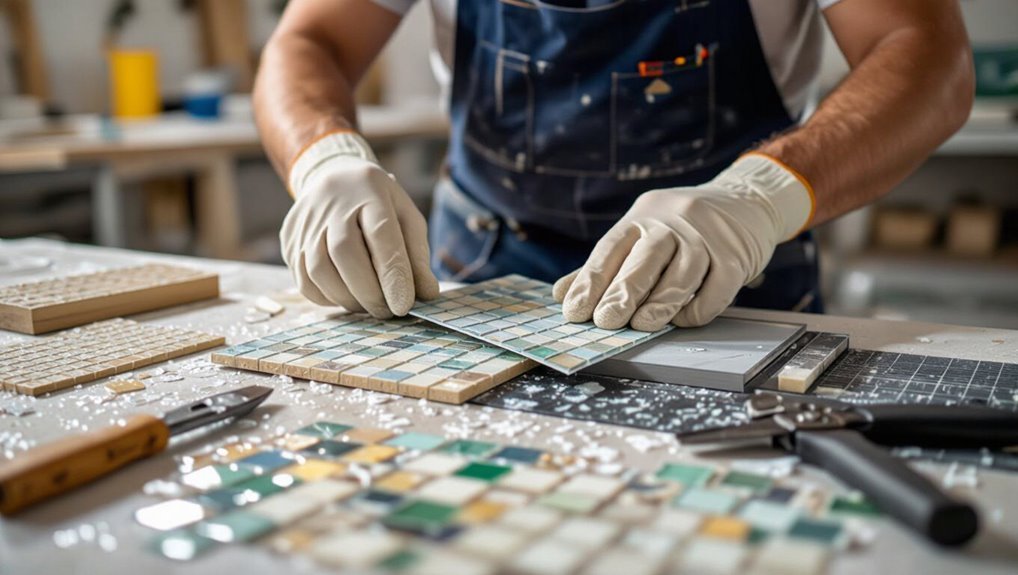
Common materials and finishes (glass, ceramic, stone, metal)
Now that you know how mesh-backed sheets make installation faster and more consistent, it’s helpful to compare the materials and finishes you’ll encounter. You’ll pick glass for shine, ceramic for versatility, stone for texture, or metal for edge. Consider finish, durability, and mood to match your space.
| Material | Feeling |
|---|---|
| Glass | Sparkling |
| Ceramic | Comfortable |
| Stone | Earthy |
| Metal | Bold |
Advantages and limitations of mesh backing
A mesh sheet holds individual tiles in a precise grid, so you can lay larger areas faster and keep patterns aligned without fiddling with grout joints for each tiny piece.
You’ll save time, reduce cutting, and get consistent spacing, but mesh limits intricate layouts, can warp if wet, and may need stronger adhesive.
Plan seams and substrate prep to avoid problems.
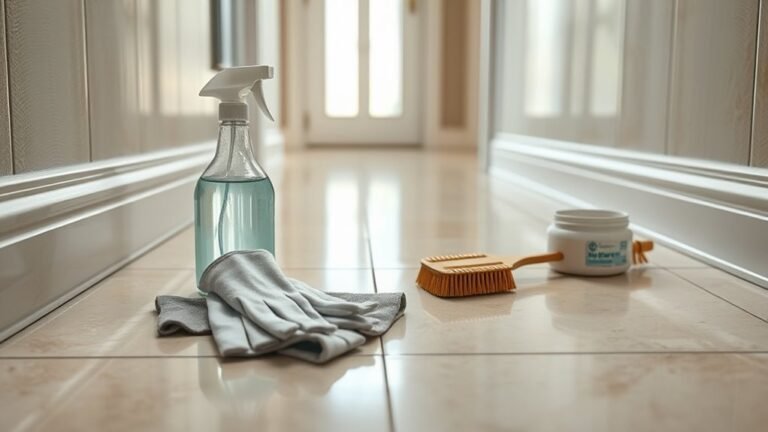
Tools, Materials, and Preparing Your Budget
Before you start laying mosaics, get a clear checklist of the tools you’ll need—both hand tools and any power tools—and lay out the materials and consumables like adhesive, grout, sealant, and spacers.
Calculate estimated costs and the expected time per square foot so you can buy the right quantities and schedule the job.
With tools, materials, and budget planned, you’ll avoid delays and extra trips to the store.
Complete tools checklist (hand and power tools)
Tiles and grout won’t install themselves, so gather the right hand and power tools before you start cutting or setting pieces.
You’ll need reliable gear for accurate cuts, smooth application, and secure fixing.
- Wet saw or tile cutter
- Drill with mixer and screwdriver bits
- Notched trowel, rubber float, tile nippers
- Level, tape measure, spacers, caulking gun
Materials and consumables checklist (adhesive, grout, sealant, spacers)
Now that you’ve got the right tools, you’ll need the materials and consumables that make the job stick together: adhesive, grout, sealant, and spacers.
Gather quality thinset or mastic suited to your substrate, sanded or unsanded grout matching joints, a penetrating or epoxy sealant as needed, and durable plastic spacers.
Prioritize compatibility and coverage estimates.
- Adhesive
- Grout
- Sealant
- Spacers
Estimated costs and time per square foot
A quick per-square-foot estimate helps you budget and schedule the job: factor in tool amortization, materials (adhesive, grout, sealant, spacers), and prep time so you know whether a section will cost $8–$25 and take 1–3 hours per sq ft to prep and install depending on complexity and substrate.
Adjust for tile type, waste (10–15%), access difficulty, and labor rates to refine totals.
Surface Assessment and Preparation
Before you start tiling, check that your substrate—drywall, cement board, plaster, or existing tile—is sound and suitable for mosaics.
Test for flatness with a straightedge and for moisture with a moisture meter or taped plastic; patch dents or high spots and address any dampness before proceeding.
In wet areas you’ll need to install proper backer board and a waterproofing membrane to protect the substrate and guarantee a long-lasting installation.
Which wall substrates are suitable (drywall, cement board, plaster, existing tile)
You’ll want to choose a substrate that’s sound, flat, and appropriate for wet or dry locations—common options include drywall, cement backerboard, plaster, and existing tile.
Drywall works in dry areas; cement backerboard is best for showers and wet zones.
Plaster can be tiled if stable.
You can tile over existing ceramic provided it’s well-bonded and cleaned first.
How to test and repair the wall for flatness and moisture
Now that you’ve chosen a suitable substrate, check the wall for flatness and moisture so your mosaic will set properly.
Use a straightedge and level to find high or low spots, and a moisture meter to confirm dryness.
Repair small hollows with setting compound; sand highs.
Then:
- Mark deviations
- Patch low areas
- Sand highs
- Recheck moisture and flatness
Installing backer board or waterproofing for wet areas
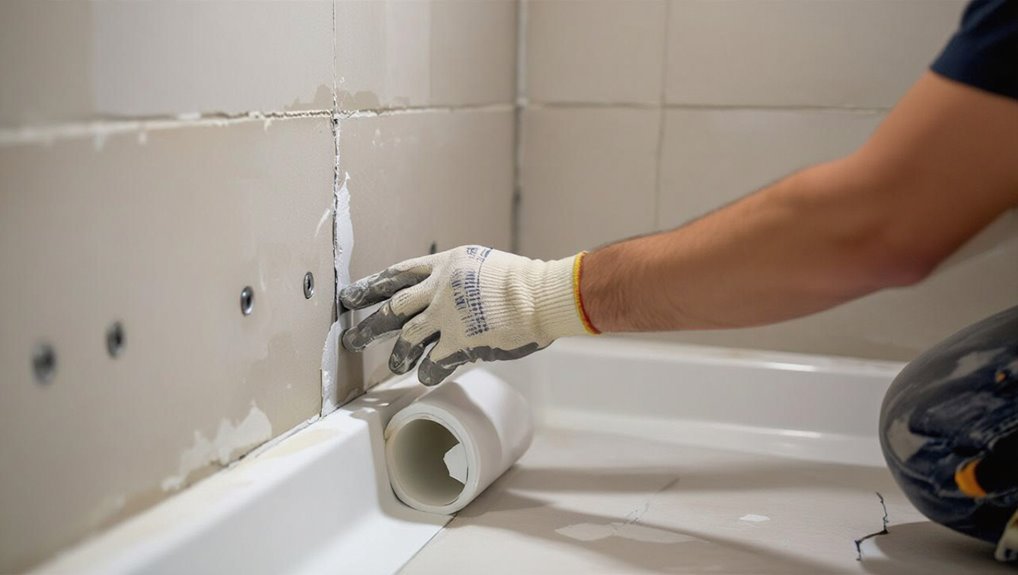
Because wet areas demand a stable, moisture-resistant substrate, install cement backer board or a waterproof membrane before setting mosaic tiles to prevent long-term damage.
Cut and fit backer board tightly, screw per manufacturer spacing, seal joints with fiberglass tape and thinset.
For showers or tubs, apply a liquid or sheet waterproofing system over seams, following cure times, then proceed with tile adhesive.
Planning the Layout and Cutting Mosaic Sheets
Measure your area carefully and calculate how many sheets and individual tiles you’ll need, including a waste allowance for cuts and breakage.
Plan a layout that centers focal points and balances cut pieces along edges to avoid tiny slivers.
When cutting mesh-backed sheets or tiles, use the right tools—wet saw for straight cuts, nippers for curves, and a scorer for small straight trims—while following safety precautions.
How to measure and calculate tiles needed, waste allowance
Before you cut a single sheet, calculate the total area you’ll tile and add a waste allowance so you don’t run short mid-job.
Measure height × width of each wall section, convert to square feet or meters, then divide by a sheet’s coverage.
Add 10–15% for cuts, mismatches, and breakage; increase to 15–20% for intricate patterns or many small pieces.
Layout strategies: centered, balanced cuts, focal points
Start by deciding where the eye should land and work outward: choose a focal point—like a centered medallion, a line along a vanity, or a feature tile—and align your first full sheet or grout joint to that axis so cuts fall at the edges where they’ll be least noticeable.
Then dry-lay sheets, adjust rows for balanced half-cuts at opposite edges, and stagger seams for visual rhythm.
How to cut mesh-backed mosaic sheets and individual tiles safely (wet saw, nippers, tile scorer)
Once you’ve set your focal axis and dry-laid the sheets to balance cuts, you’ll need to plan how each sheet and any loose tiles will be trimmed to fit edges, corners, and obstacles.
Mark cuts on mesh, support sheet on plywood, score glass tiles, use a wet saw for straight cuts, nippers for small adjustments, and tile scorer for ceramic.
Wear gloves, goggles, and respirator.
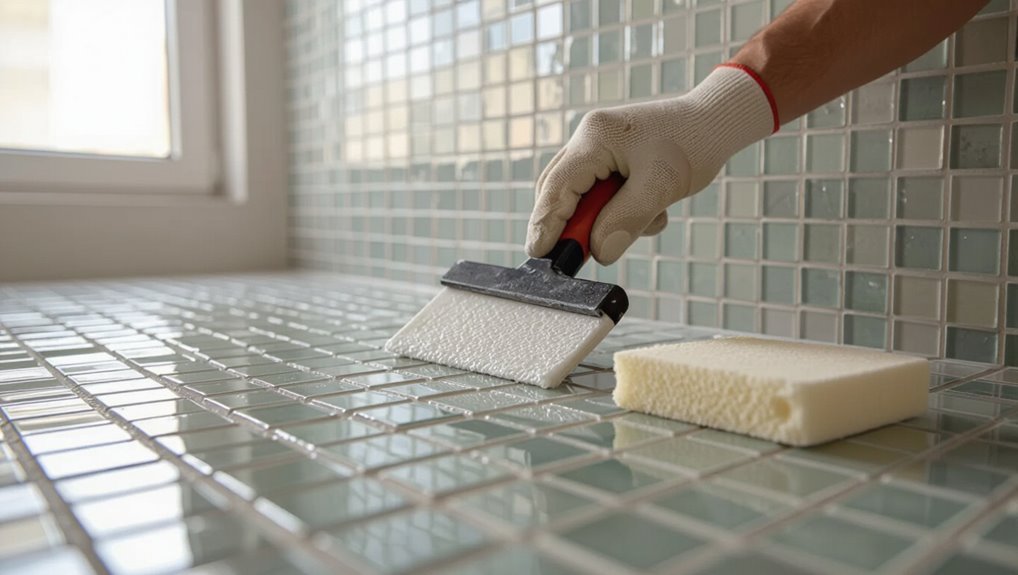
Step-by-Step Installation Process
Start by marking reference lines and picking a level starting point so your sheets stay straight.
Mix the right thinset for mesh mosaics and apply it with proper technique, coverage, and attention to open time.
Then set and tap the sheets, keep consistent spacing, and handle seams, trim pieces, and changes carefully.
Step 1 Marking reference lines and setting a level starting point
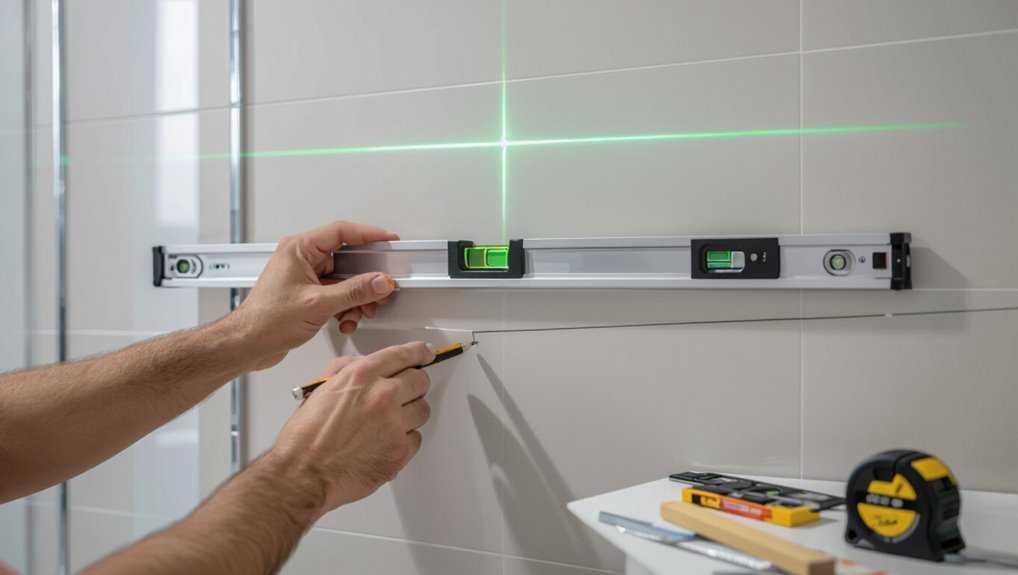
Before you lay any tiles, mark clear reference lines and establish a level starting point so your mosaic stays straight and even across the surface.
Use a level and chalk line to snap horizontal and vertical guides, locate the center or a focal point, and transfer measurements.
Account for grout joints and cut tiles at edges so rows stay balanced and aligned from the start.
Step 2 Mixing and selecting the right thinset or adhesive for mesh mosaics
1. You’ll choose a thinset rated for mosaics and substrate—modified for cement boards or unmodified for glass when manufacturer requires it.
Mix to a smooth, lump-free paste with a drill and paddle, aiming for a peanut-butter consistency and correct pot life.
Test a small batch for bonding and adjust water sparingly.
Keep mixed amounts manageable to avoid waste.
Step 3 Applying adhesive: technique, coverage, and open time
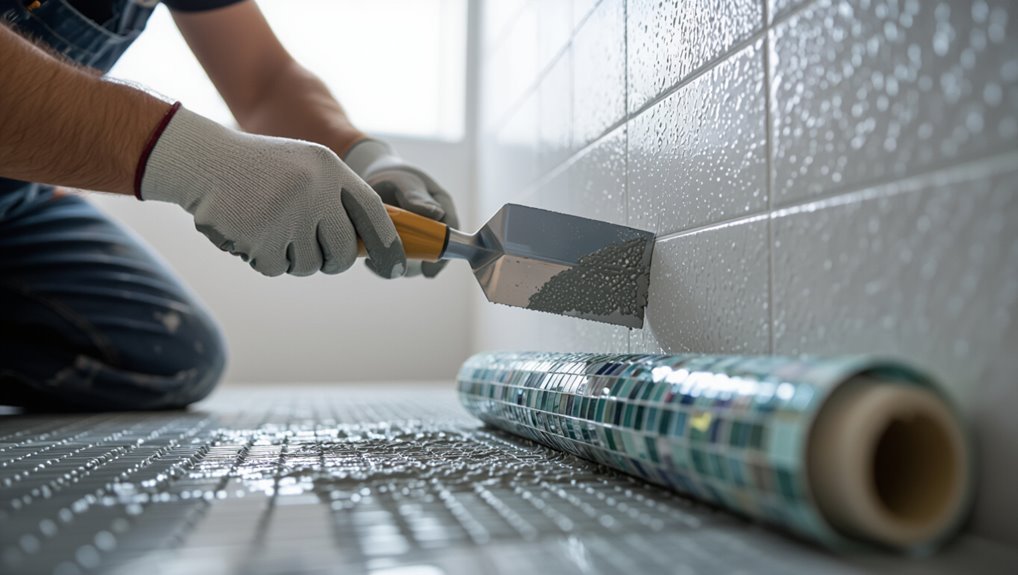
With your thinset mixed to the right consistency, it’s time to apply it to the substrate so the mesh-backed sheets will bond uniformly.
Use a notched trowel held at the correct angle to comb even ridges. Work in small sections within the adhesive’s open time, achieving full coverage without excess squeeze-out.
Check for voids and maintain clean edges.
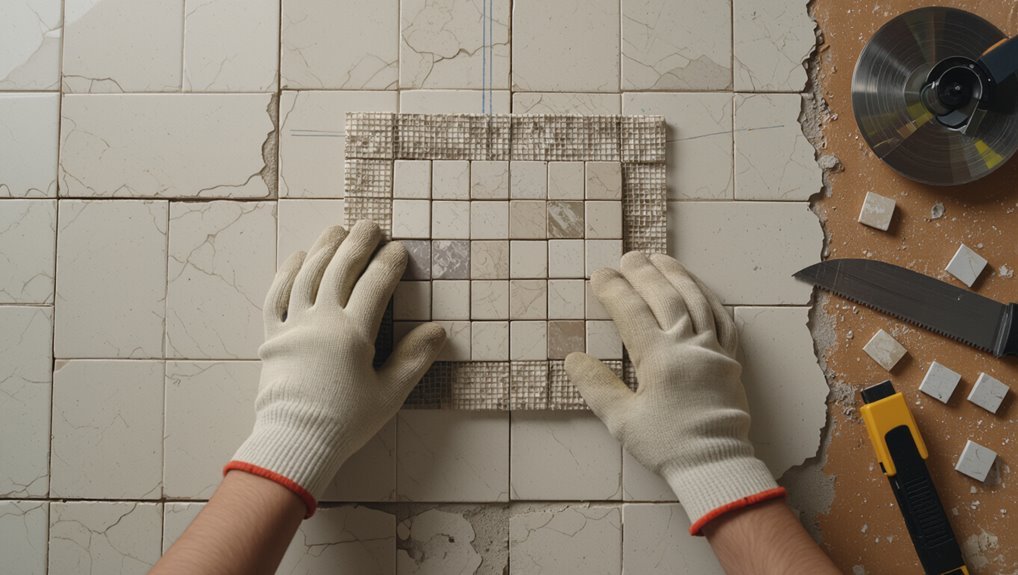
Step 4 Setting mosaic sheets: aligning mesh, tapping, and spacing
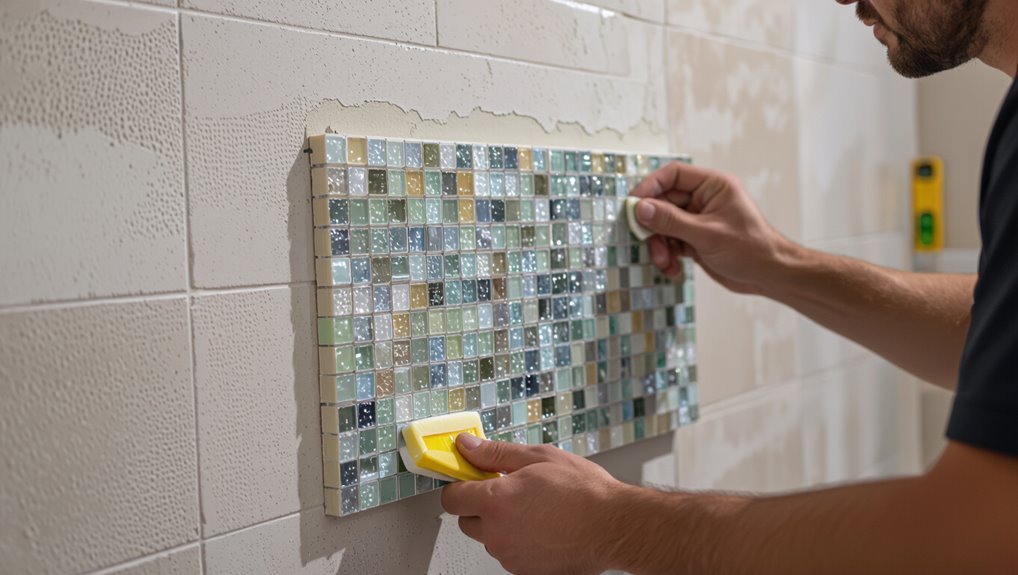
Press each mesh-backed sheet into the combed thinset, aligning the mesh edges so the tiles sit straight and the pattern flows continuously; tap the tiles gently with a rubber float or beating block to seat them firmly and remove air pockets.
Then check spacing and adjust by nudging the sheets or inserting small plastic spacers where needed to maintain even grout lines.
Work row by row, wiping excess thinset.
Step 5 Handling seams, trim pieces, and transitions to other surfaces
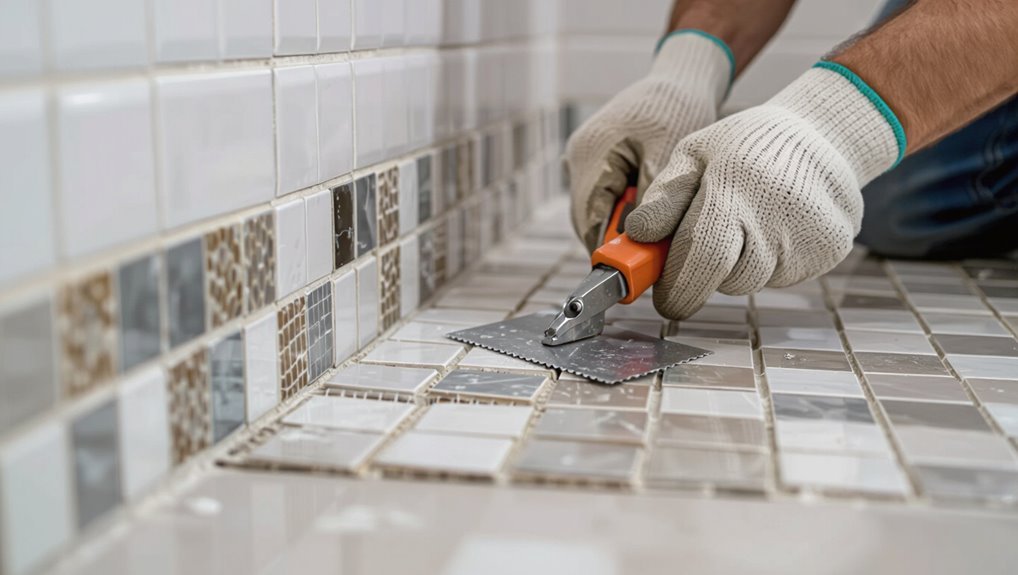
3 key areas—seams, trim pieces, and changes—determine whether your mosaic installation looks finished or makes the room feel patchy, so address them deliberately.
Match sheet edges carefully, stagger seams for visual flow, and use minimal grout gap.
Fit metal or matching trim for exposed edges, scribe tiles to meet adjacent surfaces, and seal transitions with flexible caulk for movement and a clean finished line.
Step 6 Allowing proper cure time before grouting
After you’ve finished aligning seams and installing trim, give the adhesive time to set before you grout; rushing this step can weaken the bond or gum up your grout lines.
Wait the manufacturer’s recommended cure time—usually 24–72 hours—keeping the area dry and undisturbed.
Check adhesive firmness by gently pressing a test tile edge before mixing grout and proceeding with confidence.
Grouting and Finishing
Now that your mosaics are set, you’ll need to pick the right grout—sanded for wider joints, unsanded for narrow seams—and choose a color that complements the tile.
Apply grout carefully with a rubber float, wipe off haze promptly with a grout sponge, and buff for a clean finish.
Finally, seal the grout (and porous tiles if needed) with a suitable sealer when fully cured to protect against stains and moisture.
Choosing the right grout (sanded vs. unsanded) and color considerations
When you’re picking grout for mosaic tiles, think first about joint width and surface texture because those two factors determine whether sanded or unsanded grout will perform best; choose sanded for wider joints and textured tiles, unsanded for narrow gaps and delicate glass. Pick grout color to contrast for pattern pop or match for seamless look.
| Use | Best for |
|---|---|
| Sanded | Wide joints |
| Unsanded | Narrow joints |
Grouting technique for mosaics and cleaning grout haze
With your grout type and color chosen, it’s time to apply and finish the grout so your mosaic looks sharp and lasts.
Work small sections, forcing grout into joints with a rubber float held at 45°. Remove excess diagonally across tiles.
After initial set, wipe haze with a damp sponge, rinsing frequently. Buff final haze with a dry microfiber cloth for crisp, clean joints.
Sealing mosaics and grout: when and what products to use
Because grout and tile faces absorb moisture and stains differently, you should seal both after the grout cures to protect your mosaic and make future cleaning easier.
Choose a penetrating sealer for grout and a suitable surface sealer for porous or natural stone tiles.
Apply per manufacturer directions, test first on a scrap, and reapply periodically—typically every one to three years depending on use and exposure.
Common Problems and How to Fix Them
If some tiles sound hollow or won’t stick, you’ll learn how to diagnose voids and re-bond or replace affected sheets.
You’ll also get straightforward fixes for uneven grout lines and lippage so your surface sits flat and looks professional.
Finally, I’ll show how to repair damaged mesh or secure loose tiles after installation without tearing out the whole job.
Problem: tiles not adhering or hollow spots diagnosis and remedies
When tiles don’t stick or you hear hollow clicks under the surface, you’re usually dealing with poor bonding, inadequate adhesive coverage, or movement in the substrate.
Diagnosing the cause quickly lets you choose the right fix. Check adhesive type, trowel notch, and full coverage by cutting a suspicious tile.
Replace bad mortar, reapply correct thinset, and stabilize or repair the substrate before rehanging.
Problem: uneven grout lines or lippage correction methods
After fixing adhesion and substrate issues, you’ll want to address uneven grout lines and lippage, since they affect both appearance and walking safety.
Use a straightedge to spot high tiles, shim low areas with thin-set undercutting, and tap down high ones with a rubber mallet and beating block.
Regrout narrow gaps, remove excess mortar, and sand minor lippage with a diamond pad for a flush finish.
Problem: damaged mesh or loose tiles after installation repair steps
Check the mesh backing and tap every tile gently to locate loose ones; damaged mesh or loose tiles usually show up as hollow sounds, lifted corners, or visible tears in the fabric that let grout slip through.
Remove affected tiles, clean old adhesive, and replace mesh strips.
Reapply thinset, press tiles firmly, guarantee full coverage, and grout after proper cure to prevent recurrence.
Best Practices, Tips, and Professional Tricks
For straight patterns and even grout joints, use a snapped chalk line and spacers to keep every sheet aligned.
Pros save time with staging sheets and suction-cup handles to set and adjust large panels quickly.
When you’re done, seal grout and wipe tiles regularly to keep mosaic walls looking new.
Tips for achieving perfectly straight patterns and consistent grout joints
Although precise planning makes installation easier, you’ll get perfectly straight mosaic patterns and even grout joints by starting with a clear layout, using reliable spacers and guides, and keeping consistent pressure while setting tiles.
- Snap level reference lines before you begin.
- Use uniform spacers and check alignment often.
- Press sheets evenly, removing air pockets.
- Clean excess adhesive promptly for crisp grout lines.
Time-saving techniques used by pros (staging sheets, suction cup handles)
When you’re tackling a large mosaic area, staging sheets and suction-cup handles shave hours off the job by letting you move, adjust, and set whole sections at once; use lightweight staging sheets to assemble tiles flat, then lift with suction cups to position without distorting grout lines.
Align, press, and level each sheet, score mesh where needed, and remove sheets after adhesive firms.
Maintenance tips to keep mosaic walls looking new
A few simple routines will keep your mosaic walls vibrant and damage-free for years: wipe down tiles weekly with a pH-neutral cleaner, address grout stains immediately, and inspect for loose or cracked pieces every month so you can repair them before problems spread.
Reseal grout annually, use nonabrasive tools, avoid harsh chemicals, blot spills promptly, and keep humidity controlled to prevent mold and adhesive failure.
Comparison: Mesh-Backed Sheets vs. Other Mosaic Installation Methods
When choosing between mesh-backed sheets and loose or mounted mosaics, you’ll want to weigh ease of installation, durability, and cost to match your project’s needs.
Mesh sheets usually speed installation and suit backsplashes or feature walls, while loose tiles can offer tighter grout lines and better long-term performance in wet areas.
Consider budget and location—mesh for quick, budget-friendly installs; loose or mounted methods for high-moisture zones or when durability and precision matter most.
Ease of installation, durability, and cost comparison
Although mesh-backed sheets speed up layout and grout-ready placement, you’ll want to weigh ease of installation against long-term durability and overall cost when choosing a method. You’ll install faster with sheets, but loose-set mosaics can last longer and allow repairs. Budget varies: sheets save labor, custom tile raises material and time costs.
| Method | Trade-off |
|---|---|
| Mesh sheets | Quick install, moderate durability |
| Loose mosaics | Slower, higher durability |
| Pre-mounted panels | Fastest, costly |
Best use-cases for each method (wet areas, backsplashes, feature walls)
Because each mosaic method handles moisture, movement, and visual detail differently, you’ll pick the one that matches the space’s demands:
Use mesh-backed sheets for wet areas and showers when you want faster, uniform installation and better waterproof membrane compatibility.
Hand-set mosaics suit intricate feature walls and floors where grout profile and pattern control matter.
Sheet-mounted but unbacked tiles work well for kitchen backsplashes.
Tools and Product Recommendations (Beginner to Pro)
You’ll want to pick adhesives, grout, and sealers that match your substrate and tile material—thinset for most installations, a polymer-modified grout for durability, and a penetrating sealer for natural stone.
For mesh mosaics, use a good quality scoring wheel, nippers, and a wet saw with a continuous-rim blade plus spacers and a straightedge to get clean cuts.
I’ll recommend specific brands and models for beginners through pros so you can choose tools and products that fit your budget and skill level.
Recommended adhesives, grout brands, and sealers
When choosing adhesives, grout, and sealers for mosaic tile, you’ll want products matched to your substrate, tile material, and exposure—thinset mortars for ceramic and stone, epoxy-based adhesives for glass or metal mosaics, and color-consistent grouts for joints.
Use trusted brands and match performance to location:
- Modified thinset (Versabond/Custom)
- Epoxy adhesive (Laticrete/Harden)
- Sanded/unsanded grout (Mapei/Schluter)
- Penetrating sealer (Aqua Mix)
Recommended cutting tools and accessories for mesh mosaics
Although mesh-backed mosaics are forgiving, you’ll need the right cutting tools and accessories to get clean, consistent pieces without damaging the mesh or tiles.
You’ll want quality tools to work efficiently and safely:
- Wet tile saw with thin blade for ceramic/glass.
- Score-and-snap cutter for straight cuts.
- Nippers for small chips and curves.
- Fine diamond hand file for smoothing edges.
FAQ Frequently Asked Questions
You probably have a few quick questions about mesh-backed mosaics, thinset cure times, grout choices, and how to finish edges and seams.
I’ll explain whether you can install over existing tile, how long to wait before grouting, and whether mesh-backed sheets work on shower walls.
Then we’ll cover hiding exposed mesh and picking a grout color that makes your mosaics pop.
Can you install mesh-backed mosaics over existing tile?
If you’re wondering whether mesh-backed mosaic sheets can go over existing tile, the short answer is yes—but only when the substrate is sound, flat, and properly prepared.
You’ll need to clean, degrease, and roughen glossy tiles or use a bonding primer. Check for loose or damaged tiles and remove them.
Use appropriate thinset and guarantee full coverage for reliable adhesion.
How long should thinset cure before grouting?
Once your mesh-backed mosaics are properly bonded, you’ll want to wait before grouting so the thinset reaches adequate strength.
Generally, wait 24 to 48 hours for standard thinset at room temperature. For modified or rapid-setting mortars follow manufacturer times—sometimes 3–12 hours.
Avoid rushing; pressing grout into soft thinset can shift tiles or cause joint failure.
Are mesh-backed mosaics suitable for shower walls?
Curious whether mesh-backed mosaics work on shower walls? Yes—they’re suitable if you use waterproof substrate, quality thinset and grout, and a proper waterproofing membrane behind the tiles.
You’ll need rust-resistant mesh or nonmetal tiles, correct slope for drainage, and sealed grout lines.
Install carefully to prevent water intrusion; with proper prep and materials, mesh-backed mosaics perform well in showers.
How do you hide exposed mesh edges and seams?
You’ll want to address mesh edges right after ensuring proper waterproofing and rust-resistant materials, because exposed mesh can collect grout and trap moisture.
Trim excess mesh neatly, tuck edges under tiles or behind trim, and secure with thinset.
Seal seams with a flexible, paintable caulk or membrane tape before grouting.
Finish with a clean bead of caulk where tile meets trim or fixtures.
What grout color makes mosaics look best?
Which grout color makes your mosaic pop depends on the look you want: choose a contrasting grout to outline each piece and emphasize the pattern, or pick a matching grout to create a seamless, subtler field of color.
You’ll also weigh maintenance and tile sheen—darker grout hides stains; lighter grout brightens.
Test samples against lighting before grouting to guarantee the effect you want.
Quick Installation Checklist and Final Inspection
Before you start, check substrate flatness, cleanliness, layout, and that you have the right tools and adhesives.
As you finish, inspect grout joints, tile alignment, adhesive coverage, and clean off any residue.
Tackling these quick checklists will help you catch issues early and guarantee a professional result.
Pre-install checklist before you start
Once you’ve gathered your materials and scoped the space, run through a quick installation checklist and a final inspection to catch any issues that would slow the job or ruin the finish.
Check these before you begin:
- Surface flatness, clean and dry
- Proper substrate and waterproofing
- Tile layout mockup and cuts planned
- Adhesive type, open time, and trowel size
Final inspection checklist after installation
After the grout’s cured and the adhesive’s set, go through a focused final inspection to catch any issues before the space gets used.
Check these items methodically:
- Verify grout joints are full and consistent, no voids.
- Confirm tiles are level, aligned, and edges are clean.
- Inspect for loose tiles or soft spots.
- Guarantee sealant and connections are neat and watertight.