How to Remove Glue From Laminate Flooring Without Scratching the Surface
You can remove glue from laminate without scratching by softening it with gentle heat, then lifting it with a plastic scraper and nylon pad while wiping with warm, soapy water. Test rubbing alcohol or a vinegar solution in a hidden spot, apply sparingly, and rinse often. Wear gloves and eye protection, avoid metal tools and harsh solvents, and buff the finish with a microfiber cloth. Keep going to learn stepwise techniques, safety tips, and product choices.
Safest Way to Remove Glue from Laminate Flooring
You’ll want a gentle, step-by-step approach—start with warm soapy water.
Try a plastic scraper, then use a manufacturer-approved adhesive remover if needed.
Test any product on an inconspicuous spot first to avoid damaging the finish.
If the glue covers a large area, won’t come off, or the flooring looks compromised, call a professional.
solution summary
When removing glue from laminate flooring, start with the gentlest method and only step up if residue stays: try warm soapy water and a soft cloth first, then a plastic scraper, followed by a cloth dampened with white vinegar or rubbing alcohol, and finally a commercial adhesive remover designed for laminate if needed.
Work patiently, test products on a hidden spot, and dry the area thoroughly to prevent damage.
When to call a professional instead
If the glue covers a large area, has soaked into seams, or won’t budge after gentle methods, call a professional to avoid damaging your laminate.
A pro has proper solvents, heat tools, and experience to remove adhesive safely. They’ll assess subfloor risk, prevent warping, and restore finish.
Hire one when time, risk, or stubborn residue exceeds your safe DIY limits.
Understanding Glue on Laminate Flooring
You’ll often find common residues like hot-melt adhesive, construction glue, tape residue, and everyday spills clinging to laminate surfaces.
Laminate’s thin wear layer and printed finish make it vulnerable to scratching, staining, or delamination if you use harsh scrapers or solvents.
Using the wrong removal method can permanently dull or lift the surface, so you’ll want to choose techniques that protect the finish.
What types of glue/residue commonly stick to laminate
Adhesives and residues on laminate come in several common forms, each needing a different removal approach.
You’ll encounter various sticky substances that demand specific care.
- Construction adhesive — tough, cured globs from projects.
- Double-sided tape residue — gummy, often thin film.
- Carpet or furniture glue — aged, hardened patches.
- Spills (syrup, glue sticks) — sticky but softer, water-responsive.
Why laminate is prone to surface damage (composition and finish)
Because laminate combines a thin decorative layer over a fiberboard core and a protective wear layer, it looks sturdy but can be surprisingly vulnerable to surface damage. The finish is hard yet relatively thin, so sharp objects, abrasive cleaners, or strong solvents can penetrate or dull it quickly.
You’ll need to use gentle tools and mild cleaners, work carefully, and avoid excessive scrubbing that abrades the wear layer.
Risks of improper glue removal
If you try to scrape or dissolve glue aggressively, you’ll likely damage the laminate’s thin wear layer, causing dull spots, scratches, or even permanent peeling.
Using harsh solvents or metal tools can strip the protective finish and expose the fiberboard core to moisture, warping, and staining.
You risk voiding warranties, creating uneven color, and inviting mold or structural failure if you don’t use proper, gentle techniques.
Tools, Materials, and Safety Precautions
Before you start, gather basic tools and household supplies like a plastic scraper, soft cloths, warm soapy water, and optional chemical removers or solvents suited for the glue type.
Stay away from abrasive tools and strong harsh chemicals that can scratch or damage laminate, and check product labels for laminate compatibility.
Wear gloves, eye protection, and guarantee good ventilation to protect your skin and lungs while you work.
Recommended tools and household supplies
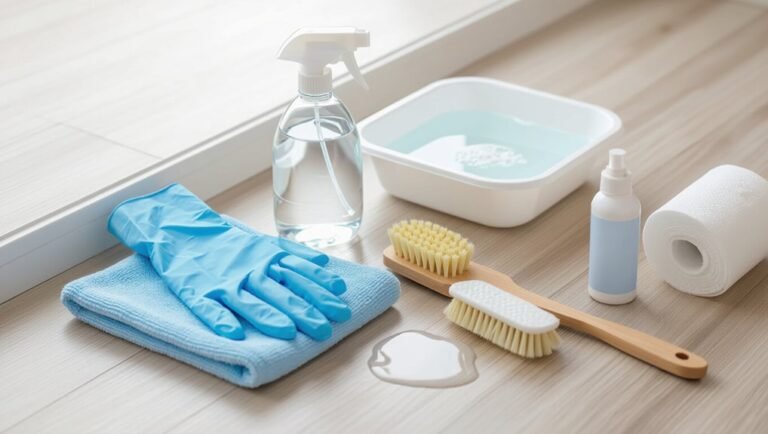
You’ll need a small set of tools and a few common household supplies to remove glue from laminate flooring safely and efficiently.
- Soft plastic scraper, nylon scrub pad, microfiber cloths.
- Warm water, mild dish soap, spray bottle.
- Plastic putty knife, painter’s tape, disposable towels.
- Rubber gloves, safety glasses, good ventilation fan or open windows.
Chemical removers and solvents to consider
When tackling stubborn adhesive, choose chemical removers that match the glue type and laminate finish so you don’t damage the floor; common options include citrus-based solvents, isopropyl alcohol, acetone for small spots, and commercial adhesive removers labeled safe for laminate. Test in an inconspicuous area, wear gloves, ventilate, and blot—don’t rub.
| Solvent | Best for | Note |
|---|---|---|
| Citrus | Sticker residue | Gentle |
| Isopropyl | Tape adhesive | Evaporates fast |
| Acetone | Small spots | Use sparingly |
What to avoid (abrasive tools, harsh chemicals)
Since laminate’s protective wear layer is thin, don’t use abrasive tools or harsh chemicals that can scratch, dull, or strip the finish; instead, steer clear of steel wool, metal scrapers, scouring pads, concentrated bleach, and industrial solvents like paint stripper or undiluted acetone.
Also avoid razor blades, harsh alkaline cleaners, and aggressive sanding; opt for gentle plastic scrapers, mild solvents, and tested, floor-safe products instead.
Personal protective equipment and ventilation
Avoiding harsh tools and chemicals protects your floor—and your health—too, so put on proper personal protective equipment before you begin.
Wear nitrile gloves, safety goggles, and a disposable mask or respirator rated for organic vapors if you use solvents.
Open windows, run fans to create cross-ventilation, and avoid enclosed spaces.
Keep a fire extinguisher nearby when using flammable products.
Step-by-Step Safe Removal Method
You’ll start by identifying the glue type and testing a small, hidden spot so you know what you’re dealing with.
Begin with warm soapy water and a soft cloth, then move to heat to soften stubborn residue and to safe solvents like rubbing alcohol, vinegar, or citrus cleaners as needed.
Finish by gently scraping with a plastic scraper or nylon brush, avoiding anything that could scratch the laminate.
Step 1 Identify the glue type and test in an inconspicuous area
Before you plunge into removal, pinpointing the glue type and testing a small, out-of-the-way spot will keep you from damaging the laminate.
Inspect residue: is it rubbery, tacky, brittle, or shiny?
Smear a tiny amount of solvent (water, rubbing alcohol, acetone) on an unseen corner and wait a minute.
If finish softens, stop—choose a gentler approach or consult product instructions.
Step 2 Start with the mildest method: warm soapy water and soft cloth
Start by mixing a few drops of mild dish soap into a bowl of warm water.
Dampen a soft cloth (not soaked), and gently rub the glue in small circular motions to lift it without harming the laminate finish.
Work steadily, rinsing and rewetting the cloth as needed.
Pat the area dry with a clean microfiber towel to prevent moisture damage and streaks.
Step 3 Use heat for softening (hair dryer/heat gun techniques)
If warm soapy water didn’t fully lift the residue, apply gentle heat to soften the glue so it wipes away more easily.
Hold a hair dryer on low to medium about 6–8 inches away, moving constantly. For stubborn spots, use a heat gun on the lowest setting briefly.
Test a hidden area first, avoid overheating, then wipe softened glue with a soft cloth.
Step 4 Apply safe solvents (rubbing alcohol, vinegar, citrus-based) with proper technique
When heat has softened the adhesive but some residue remains, use a safe solvent—rubbing alcohol, white vinegar, or a citrus-based cleaner—to dissolve what’s left without damaging your laminate.
Dampen a microfiber cloth, blot the residue, and let it sit briefly. Wipe gently in the grain direction, refresh the cloth as needed, and dry the area completely to prevent moisture damage.
Step 5 Gentle mechanical removal (plastic scraper, nylon brush) without scratching
Move slowly and work with light pressure as you scrape and brush—this is about lifting softened adhesive, not gouging the laminate.
Use a plastic putty knife at a shallow angle and push, don’t pry. Follow with a soft nylon brush to loosen residue. Wipe often with a damp microfiber cloth.
Stop if you see scratches; reapply solvent and try again gently.
Step 6 For stubborn adhesive: mineral spirits or commercial adhesive remover (how to apply safely)
You’ve done as much as you can with gentle scraping; for stubborn adhesive that won’t budge, bring out a solvent like mineral spirits or a commercial adhesive remover and apply it carefully.
Ventilate the area, wear gloves and eye protection, and test on an inconspicuous spot.
Dampen a cloth—don’t soak the floor—rub gently until the glue softens, and reapply sparingly as needed.
Step 7 Clean residue and neutralize solvent
Step 7 focuses on removing any softened adhesive and neutralizing the solvent so your laminate finishes cleanly and won’t be damaged later.
Wipe the area with clean, lint-free cloths soaked in warm, soapy water to lift residue, then rinse with plain water. Dry thoroughly.
If solvent smell lingers, ventilate and repeat rinsing. Dispose of used cloths per local guidelines.
Step 8 Restore finish: polish or laminate cleaner
Once the surface is clean and dry, it’s time to restore the laminate’s sheen and protect it from future wear.
Apply a manufacturer-approved laminate cleaner or polish sparingly with a microfiber cloth, working in gentle, circular motions.
Don’t use wax or abrasive products.
Buff lightly to a uniform shine and let it cure per product instructions to guarantee lasting protection and an even finish.
Alternative Methods and Comparisons
You can weigh DIY natural methods against commercial products to find what fits your budget and risk tolerance.
Consider heat-only, solvent-assisted, and mechanical approaches and how each affects your laminate’s finish and your safety.
I’ll outline the pros and cons of each so you can pick the most effective, least damaging option.
DIY natural methods vs. commercial products
While natural, homemade remedies can be gentler and cheaper, commercial products often remove stubborn glue faster and with less elbow grease; weigh factors like severity of residue, safety for your finish, cost, and ventilation before choosing. You’ll test small areas, prefer mild solvents for sealed laminates, and use commercial removers when DIY fails.
| Method | Pros | Cons |
|---|---|---|
| Vinegar | Gentle | Slow |
| Citrus oil | Natural scent | Oily residue |
| Commercial | Effective | Stronger fumes |
Heat-only vs. solvent-assisted vs. mechanical approaches
Although each method can work, choosing between heat-only, solvent-assisted, and mechanical approaches comes down to the glue type, the laminate finish, and how much effort you’re willing to invest.
You’ll use a heat gun or hairdryer for softening, careful solvent application for stubborn residues, or gentle scraping with plastic tools.
Match method to damage risk, ventilation needs, and cleanup preferences.
Pros and cons of each method
Because each removal technique trades off speed, safety, and finish risk, you’ll want to pick the one that best fits the glue type and your comfort level.
- Heat: quick, low chemical use, risks finish warping.
- Solvent: effective on stubborn glue, needs ventilation and testing.
- Mechanical: fast, precise, but can scratch if careless.
- Steam: gentle on finish, slower and less effective on dried adhesive.
Common Mistakes and How to Avoid Them
Don’t use metal scrapers or steel wool, because they’ll scratch the laminate.
Don’t apply undiluted harsh chemicals or scrub so hard that you remove the finish.
Always test any method in an inconspicuous spot first so you can avoid costly damage.
Using metal scrapers or steel wool
Reach for metal scrapers or steel wool with caution — they’ll remove stubborn glue fast but can also gouge or dull laminate if you press too hard or use the wrong grit.
Test on an inconspicuous spot, use the flattest, sharpest scraper possible, and choose very fine steel wool.
Work gently, keep blades angled shallowly, and stop at the first sign of surface damage.
Applying undiluted harsh chemicals
After using careful scraping, you might be tempted to speed things up with undiluted harsh chemicals, but that’s a common mistake that can permanently damage laminate.
You should dilute cleaners per label, spot-test in an inconspicuous area, and use manufacturer-approved products.
Wear gloves, ventilate the room, and apply gently with a soft cloth.
Neutralize residues and rinse thoroughly to protect the finish.
Rubbing too hard and removing finish
Scrub lightly—pressing too hard can wear away the laminate’s protective finish and leave dull spots or scratches that you can’t fix.
Use soft cloths or a non-abrasive sponge, gentle circular motions, and patience.
If glue’s stubborn, apply a softening agent and let it sit rather than forcing removal.
Stop as soon as the adhesive loosens to preserve the surface.
Not testing in an inconspicuous spot
If you don’t test a cleaner or solvent in an inconspicuous spot first, you risk discoloring or dulling the laminate’s finish across a visible area.
Always try products on a hidden edge or under furniture and wait the recommended time. If color change, softening, or sheen loss appears, stop immediately.
Choose gentler alternatives or consult manufacturer guidance before proceeding on the main surface.
Prevention and Best Practices
You can prevent most glue headaches by cleaning spills right away so adhesives don’t bond.
Use drop cloths and painter’s tape during projects to protect your laminate.
Keep floors scratch-resistant with felt pads, routine sweeping, and regular maintenance.
Immediate cleanup tips to prevent adhesive bonding
Because glue starts to set quickly, tackling spills right away keeps them from bonding to your laminate and cutting cleanup time drastically.
Blot excess with a soft cloth, don’t smear. Gently peel cooled droplets with a plastic scraper.
Dampen a microfiber with warm soapy water for residue, then dry immediately. Repeat as needed, and ventilate the area to speed drying and prevent tackiness.
Protective measures during projects (drop cloths, tape)
One simple way to keep glue off laminate during projects is to set up effective barriers—drop cloths to protect large areas and painter’s tape for edges and hardware.
Lay cloths flat, overlap seams, and weigh corners to prevent shifting. Use low‑tack tape along baseboards and around fixtures so removal won’t lift finish.
Replace soiled cloths promptly to avoid tracked adhesive.
Recommended maintenance to keep laminate scratch-resistant
After protecting surfaces and hardware from adhesive mishaps, focus on regular maintenance that keeps laminate resilient against scratches.
Wipe spills promptly with a damp microfiber, avoid abrasive cleaners, and use furniture pads under legs.
Vacuum with a soft-brush attachment, trim pet nails, and place rugs in high-traffic zones.
Reapply recommended manufacturer sealers or finishes sparingly to maintain surface protection.
Troubleshooting Scenarios
You’ll face different challenges depending on whether you’re treating small spots or large glued areas, so you’ll need different tools and techniques for each.
If cleaning leaves a hazy film, try a gentle solvent or polish designed for laminate to lift the residue without harming the finish.
For stains or finish damage after glue removal, you’ll want targeted repair tips like spot-bleaching, touch-up markers, or replacing planks if necessary.
Small spots vs. large glued areas (different approaches)
Dealing with glue on laminate depends a lot on size: small spots usually come off with targeted, gentle methods, while large glued areas need more intensive, controlled techniques to avoid damage.
For small spots, you’ll spot-treat with adhesive remover and a soft cloth or plastic scraper.
For extensive glue, you’ll work in sections, use diluted solvent or heat cautiously, and rinse frequently to prevent residue.
Residual haze or film after cleaning (how to remove)
Small spots or large swathes of glue can both leave behind a cloudy haze or sticky film even after you think the adhesive’s gone.
So it helps to know how to clear that residue without harming laminate. Wipe with a microfiber cloth and warm water, then apply a diluted vinegar solution or rubbing alcohol sparingly.
Rinse, dry, and repeat gently until the film disappears.
Stains or finish damage after removal (repair tips)
If the adhesive removal leaves stains or dull spots, don’t panic—you can often restore the look without replacing planks.
Lightly buff with a microfiber cloth and a laminate-safe polish to revive shine.
For discoloration, try a diluted hydrogen peroxide spot test in an inconspicuous area.
Deep finish damage may require a matching repair kit or replacing the affected plank for best results.
Recommended Products and Tools (Shopping Guidance)
When shopping for supplies, you’ll want to pick adhesive removers labeled safe for laminate and low-odor to protect the finish and your lungs.
Choose non-abrasive scrapers and pads—plastic putty knives and microfiber or nylon scrub pads—so you don’t scratch the surface.
If the glue is stubborn or covers a large area, consider hiring a pro who’s industrial solvents and tools to finish the job safely and efficiently.
Safe adhesive removers for laminate
Because laminate is sensitive to harsh chemicals, pick removers that dissolve adhesive without dulling or swelling the surface.
- Citrus-based solvent — gentle, effective on sticker residue.
- Isopropyl alcohol (70%) — safe for small spots; test first.
- Goo Gone or similar commercial formula labeled “laminate-safe.”
- Warm soapy water with a few drops of white vinegar for light glue.
Best non-abrasive scrapers and pads
Choose non-abrasive scrapers and pads that lift glue without scratching the laminate finish; you’ll want tools that combine a soft edge with enough rigidity to peel residue off.
- Plastic razor scraper — thin, stiff blade.
- Nylon scraper tool — flexible, gentle edge.
- Melamine sponge — fine grit, non-scratch.
- Microfiber pad with rubber edge — lifts residue, protects finish.
When to choose professional services
If the adhesive covers a large area, has soaked into seams, or resists DIY methods, you should consider hiring a professional—especially for expensive or patterned laminate where mistakes are costly.
Call a licensed flooring specialist when glue is aged, chemically stubborn, or near junctions and thresholds. They’ll use heat, commercial solvents, and tools safely, minimize damage, and often guarantee results faster than trial-and-error.
Frequently Asked Questions
You’ll find quick answers to common concerns about solvents, heat, and sticky residue so you can choose the safest method for your laminate.
Learn whether rubbing alcohol or a heat gun is safe, how to remove gum or sticker residue without scratching, and what to do if glue’s been sitting for months.
If a removal step causes surface scratches, we’ll also cover simple repair options.
Will rubbing alcohol damage laminate flooring?
Will rubbing alcohol harm your laminate floors?
You can use isopropyl rubbing alcohol sparingly to dissolve sticky residue without damaging the wear layer if it’s diluted (50–70%) and applied with a soft cloth.
Don’t let it pool or soak seams; wipe promptly and rinse with a damp cloth.
Test a hidden spot first to ascertain finish compatibility.
Can I use a heat gun on laminate?
After using rubbing alcohol to tackle sticky spots, you might wonder whether a heat gun can help loosen stubborn glue on laminate.
You can, but be cautious: keep the gun on low, hold it several inches away, and move constantly to avoid warping or melting the surface.
Test on an inconspicuous area first and combine gentle scraping with a soft cloth for safe results.
How do I remove gum or sticker residue without scratching?
How can you get gum or sticker residue off laminate without scratching it?
Gently loosen residue with a plastic scraper or credit card at a low angle.
Apply a small amount of rubbing alcohol, WD-40, or commercial adhesive remover on a soft cloth; blot, don’t rub.
Rinse with warm soapy water and dry.
Repeat gently until all residue’s gone, avoiding metal tools.
What if the glue has been on the floor for months?
If the glue’s been sitting on your laminate for months, don’t panic—aged adhesive can be tougher, but you can still remove it with patience and the right approach.
Warm the area first with a hair dryer to soften adhesive, then gently lift with a plastic scraper.
Use a mild solvent (rubbing alcohol or citrus-based remover) sparingly, wipe clean, and finish with a damp microfiber cloth.
How to fix surface scratches if they occur during removal?
When you notice surface scratches from glue removal, don’t worry—you can often minimize or hide them with a few simple steps.
Clean the area, then gently buff fine scratches with a soft cloth and a laminate-safe scratch repair kit or paste.
For deeper gouges, use a color-matched laminate repair filler, level it, let it cure, and lightly sand before polishing.
Visual Guide and Step Demonstrations
You’ll find a clear photo sequence that shows how to identify the type of glue and test a small spot safely.
Then you’ll follow a second photo sequence that demonstrates each removal step, from softening the adhesive to wiping the residue.
Use the images to match your situation and replicate the technique with confidence.
Photo sequence: identifying and testing glue
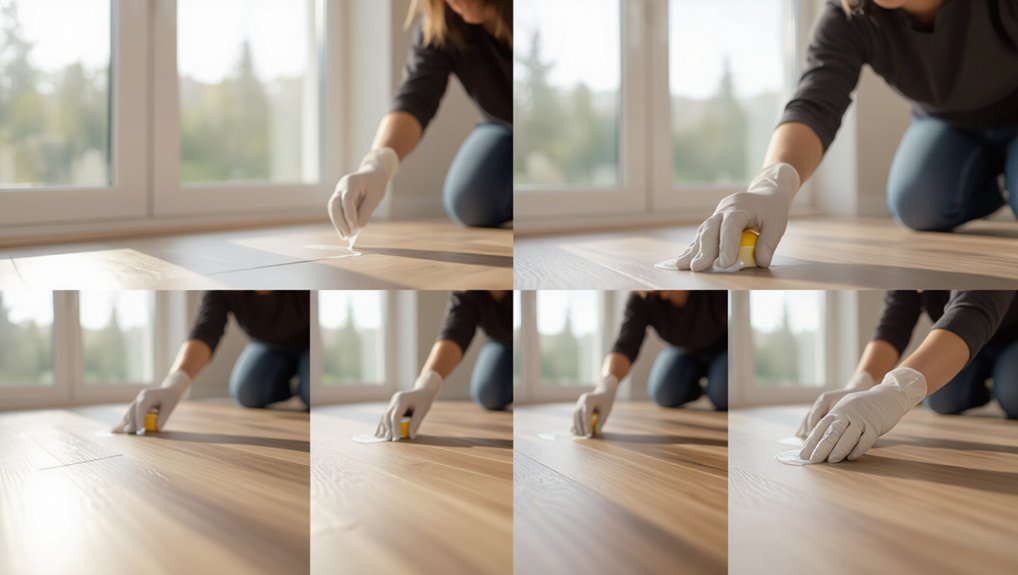
Before you start scraping or applying solvents, take clear photos of the affected area and perform a small test patch to identify the glue type and how the laminate reacts.
Photograph each test step and note timing, product used, and results. Compare textures, discoloration, and residue.
Use these images to choose the safest removal method and avoid repeating harmful treatments.
Photo sequence: step-by-step removal technique
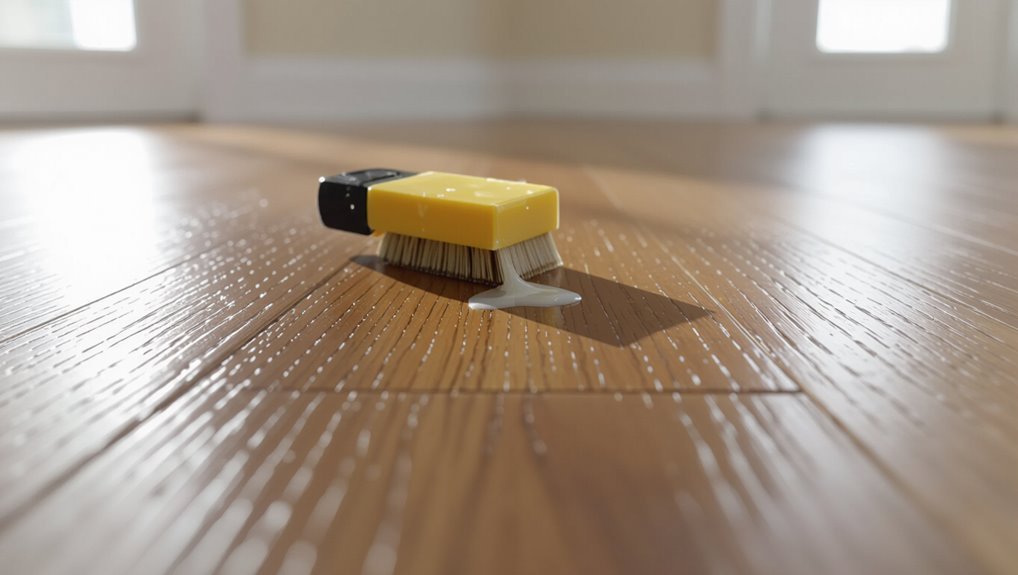
Now that you’ve documented the glue type and tested reactions, it’s time to follow a clear, photographed sequence for removal.
Begin with a wide shot of the area, then close-ups before, during, and after each step. Photograph scraping angles, heat application, solvent use, and gentle wiping.
Label each image with time, tool, and setting so you can replicate or review the process reliably.