How to Level a Concrete Floor Without Leveling Compound: Practical Alternatives
You can level a concrete floor without self-leveling compound by grinding high spots, patching low areas with cement or fast-setting patch, or building up with thin-set, mortar beds, or a plywood subfloor for larger differences. Clean and test moisture first, use a straightedge or laser to map highs and lows, and prime patched areas for good bond. These approaches save cost and work for many jobs — keep going to see step-by-step methods and tool lists.
Can You Level a Concrete Floor Without Leveling Compound?
You can sometimes level a concrete floor without a self-leveling compound by using methods like grinding high spots, patching low areas with a standard cement mix, or installing a plywood subfloor.
Those alternatives work well for small, localized unevenness or when you’re preparing for finished flooring that tolerates slight variations.
Don’t skip the compound for large dips, severe slopes, or where a perfectly flat surface is required.
Short summary of viable alternatives
Although traditional self-leveling compounds are common, you can level a concrete floor without them by using alternatives like thin-set mortar, patching cement, floor grinders with feathering coat, or plywood subfloors for moderate unevenness.
You’ll choose based on depth, traffic, and finish: thin-set or patch for shallow repairs, grinders and feather coats for smoothing, or a plywood subfloor when isolation and thickness control matter.
When it’s appropriate and when it’s not
If alternatives like thin-set, patching cement, grinders, or a plywood subfloor seem workable from the previous comparison, now consider when those choices actually fit a job and when they won’t.
You should use them for small dips, localized damage, or temporary fixes.
Don’t rely on them for large height differences, major structural cracks, or when a perfectly flat, bonded surface is required long-term.
Basic Understanding What Causes an Uneven Concrete Floor?
You’ll first want to recognize common defects like settlement, heaves, dips, and trowel marks so you know what you’re dealing with.
Use a straightedge, level, laser level, or digital gauge to measure unevenness and compare results to local tolerance standards.
Before you start repairs, check for safety and structural issues—cracks, drainage problems, or subgrade failure can mean you need a professional fix.
Common defects: settlement, heaves, dips, and trowel marks
When a concrete slab settles, heaves, or ends up with dips and trowel marks, you’ll notice uneven surfaces that affect drainage, finish, and how flooring materials lay. Understanding these specific defects helps you diagnose causes like soil movement, freeze-thaw cycles, poor subgrade compaction, or finishing errors so you can choose the right repair.
Settlement causes low spots; heaves lift slabs. Dips trap water. Trowel marks create localized roughness and bond issues, often from overworking or premature finishing.
How to measure unevenness (tools and tolerance standards)
Because uneven floors can cause drainage problems and flooring failures, you’ll want to measure flatness and levelness precisely before planning repairs.
Use straightedges, a 4‑ or 6‑foot level, laser level, and digital level/tilt meter to map highs and lows. Acceptable tolerances vary: often 1/8″ in 10ft for finished floors; document deviations and mark repair zones.
- Straightedge
- 4/6-ft level
- Laser level
- Digital tilt meter
Safety and structural considerations before repairing
Before you start repairs, get a clear sense of why the slab’s out of level and whether fixing it will address symptoms or mask deeper problems.
Inspect for cracks, sinkage, drainage issues, and load changes. Consider underlying soil, moisture, and nearby structural elements.
Don’t ignore permits, utilities, or safety gear—call a structural engineer if settlement, major cracks, or load concerns exist.
Assessment and Preparation
Before you start leveling, gather the right tools and materials and run a detailed floor survey with a straightedge, laser level, or profilometer to map highs and lows.
Clean, degrease, test for moisture, and inspect cracks so you know what repairs are needed before any leveling compound goes down.
From your measurements you’ll decide if you’re fixing small dips, correcting a major slope, or addressing localized high spots.
Tools and materials checklist
Gather the right tools and materials so you can assess and prep the floor efficiently: a straightedge and level, moisture meter, hammer and chisel (or grinder) for high spots, patching compound or self-leveling underlayment, primer, bonding agent, mixing bucket and drill with paddle, trowels, a notched squeegee or gauge rake, protective gear, and drop cloths to protect adjoining areas.
You’ll also need measuring tape and marker.
- Gloves
- Eye protection
- Knee pads
- Shop vacuum
How to perform a detailed floor survey (straightedge, laser level, floor profilometer)
Once you’ve cleared and cleaned the slab, perform a detailed floor survey to map low spots, high spots, and overall slope so you can choose the right leveling method and material.
Use a long straightedge and feeler gauges for quick checks, a laser level for accurate plane and slope readings, and a floor profilometer or spotted grid to record deviations.
Mark and photograph findings.
Preparing the surface: cleaning, degreasing, moisture testing, and crack evaluation
With your survey notes in hand, you’ll shift from mapping problems to getting the slab ready for repair and topping.
Clean debris, degrease stains, test moisture, and evaluate cracks so repairs bond and finishes last.
Follow steps:
- Sweep and vacuum thoroughly
- Use alkaline cleaner or degreaser, rinse, dry
- Perform a moisture test (sensor or calcium chloride)
- Inspect cracks for depth and movement
Determining severity: small dips vs. major slope vs. localized high spots
Before you pick a repair method, you need to judge how severe the unevenness is—small dips, a major slope, or isolated high spots each call for different fixes.
Walk the floor, use a straightedge and level, and mark trouble areas.
Small dips suit patching or thin overlays; major slopes need grinding, shimming, or subfloor adjustments; high spots get grinding or chipping.
Practical Alternatives to Leveling Compound (Primary Methods)
If you prefer not to use a premixed leveling compound, you can tackle flatness with several primary methods.
You’ll consider mechanical grinding, screeding or thin overlays, targeted cementitious patching or hydraulic cement, installing a plywood/subfloor, or shimming with mortar or sand-cement beds.
Choose the approach that matches the severity of unevenness, your skill level, and the finished floor you plan to install.
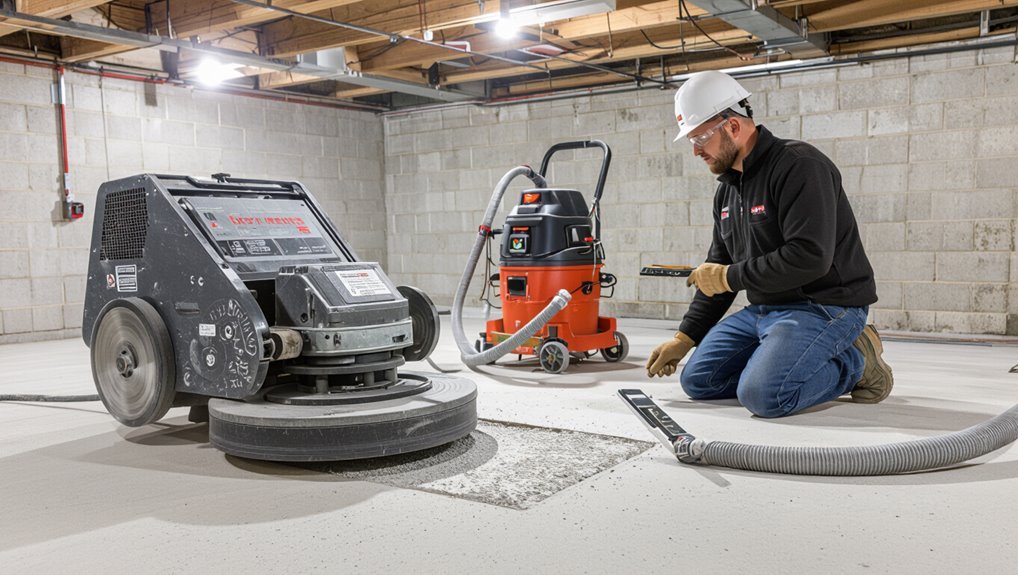
Mechanical grinding and surface preparation
You’ll choose mechanical grinding when you need to remove high spots, coatings, or thin surface imperfections instead of building up with a leveling compound.
Start by marking high areas, use the grinder in overlapping passes with progressively finer diamonds, and control dust with a vacuum-attached machine or HEPA filter system.
Expect a flatter, profile-ready surface but know grinding won’t fix deep depressions or structural issues without additional repair.
When to grind vs. other methods
When deciding whether to grind a concrete floor or choose another method, consider how severe the unevenness is, what finish you need, and what’s underneath the surface.
Choose grinding for minor high spots, coatings, or prep for overlays.
Pick patching, thin set, or self-leveling for low spots, large depressions, or when you need thickness build-up.
Assess access, time, and dust constraints.
Step-by-step grinding process and dust control
After deciding grinding is the right approach for minor high spots or prep for an overlay, gather the right tools and plan a clear sequence: mark the high areas, pick the proper grinder and diamond cup wheels, arrange dust collection and PPE, and set up barriers to contain grit.
Work in overlapping passes, check flatness often, vacuum continuously, wipe with a damp cloth, and dispose of dust per local rules.
Typical results and limitations
Though grinding and surface prep can restore a slab to a workable flatness, you should expect limited depth correction and variable finish depending on the slab condition and tools used.
You’ll remove high spots, feather small changes in elevation, and improve adhesion, but can’t easily fix deep depressions or severe crown.
Expect exposed aggregate, profile variations, and the need for spot patching or alternate repairs.
Self-built concrete screed or thin concrete overlay
If you’re considering a self-built concrete screed or thin overlay, you’ll want to know the right materials and mix proportions so the patch bonds and cures properly.
I’ll walk you through the step-by-step screeding and troweling process to get a flat, even surface.
Finally, we’ll cover curing and finishing details that prevent cracking and guarantee a durable finish.
Materials and mix proportions for a thin overlay
When you decide to install a thin concrete overlay as a DIY screed, pick materials and proportions that balance workability, strength, and thin-section performance: use Portland cement, clean sharp sand, and a well-graded aggregate (or just sand for very thin coats), and mix roughly 1 part cement to 2–3 parts sand by volume for a mortar-like overlay.
Add 3–5% polymer modifier or acrylic fortifier and a water-reducing admixture to improve adhesion and reduce shrinkage for overlays under 1/2 inch. Use silica sand for texture, limit water to avoid slumping, and cure properly for 3–7 days.
Step-by-step troweling and screeding process
One: prepare your tools and workspace before you mix any overlay—clean the slab, mark reference lines or screed rails, and set up a straightedge so you’ll trowel and screed with consistent planes; this groundwork keeps your passes efficient, prevents rework, and makes it easy to maintain the thin, uniform thickness your mortar requires.
Two: spread, screed with long strokes, strike off high spots, then trowel edges and finish smooth, checking levels as you go.
Curing and finishing considerations
Although you’ve just finished screeding or laying a thin overlay, proper curing and finishing will determine how durable and level the surface stays over time.
Keep the slab moist for at least seven days using wet burlap, plastic sheeting, or a curing compound.
Smooth joints and edges, remove trowel marks, and protect from traffic and temperature swings until concrete reaches desired strength.
Using cementitious patching and hydraulic cement for localized low spots
For small, localized low spots you’ll often choose between fast-setting and standard cementitious patches or hydraulic cement, so pick a product that matches how quickly you need to reopen the area and the patch depth.
Prepare the pothole or depression by cleaning, undercutting edges if needed, and dampening the base before mixing per the manufacturer’s directions.
Then apply, compact, and finish the patch in layers if deep, curing as specified to guarantee a durable repair.
Selecting the right patch product (fast-setting vs. standard)
When you’re patching localized low spots, choosing between a fast-setting and a standard cementitious patch matters because each type suits different timelines and repair conditions. You’ll pick fast-setting for quick traffic and cold weather; standard for bigger fills and working time. Compare pros and cons:
| Fast-setting | Standard |
|---|---|
| Cures quickly | Longer working time |
| Less shrinkage | Better for large fills |
| Cold-tolerant | Economical |
Step-by-step patch application for potholes and depressions
Start by isolating the damaged area and removing loose debris, oil, or old patch material so the new cement can bond solidly.
Mix chosen patch per instructions, dampen the hole, and apply in layers for deep spots.
Tamp and smooth each layer, feather edges to match surrounding floor, cure per manufacturer, then grind or skim lightly for a seamless finish.
Installing a plywood or subfloor system over the concrete
If your concrete has wide uneven areas or moisture issues, you can install a floating subfloor or sleeper system to create a level, ventilated base.
You’ll need to choose materials (plywood, sleepers, insulation/underlayment), plan the layout and fastening pattern, and follow step-by-step installation to guarantee a flat, stable surface.
Consider the pros and cons for your finish—tile needs a rigid substrate, hardwood prefers plywood over sleepers, and vinyl works with several underlayments—before you start.
When a floating subfloor or sleeper system is appropriate
Although not every uneven slab needs a full rebuild, a floating subfloor or sleeper system can be the fastest, most practical solution when the concrete has moderate dips, deflection isn’t a structural issue, and you want a stable surface for finish flooring without the mess of self-leveling compounds.
Choose this when localized low spots, minor slope correction, or sound and thermal isolation are priorities and you need quick, reversible installation.
Materials, layout, and installation steps
When a floating subfloor or sleeper system fits the bill, you’ll next gather the right materials and plan the layout before you lift a single panel.
Measure and mark high/low spots, choose moisture barrier, sleepers or furring strips, 3/4″ exterior-grade plywood, screws, adhesive and a circular saw.
Dry-fit panels, shim sleepers to level, secure plywood with screws into sleepers, and trim edges.
Pros and cons for flooring types (tile, hardwood, vinyl)
Because you’re installing a plywood or subfloor system over concrete, picking the right finish matters: you’ll balance durability, moisture tolerance, and movement. Tile is rigid but needs decoupling; hardwood looks upscale but can warp; vinyl’s forgiving and waterproof.
| Type | Strength | Consideration |
|---|---|---|
| Tile | Durable | Needs grout, decoupling |
| Hardwood | Attractive | Sensitive to moisture |
| Vinyl | Flexible | Best for moisture areas |
Shimming with mortar beds or sand-cement bedding for tile preparation
When you’re prepping for tile, you can shim low spots with a sand-cement bedding or a mortar bed instead of pouring a liquid leveling compound.
Mix to the manufacturer’s ratios and work the material until it’s plastic, then compact and screed so it won’t settle under the tile.
For thin areas, use a modified thinset applied and tamped in layers to build up and bond without adding a separate leveling product.
Correct mixing and compaction technique
Start by mixing a sand-cement mortar to a stiff, butterable consistency—wet enough to compact and bond, but dry enough to hold a shaped shim without slumping.
Scoop and tamp the mortar into low spots, using a trowel and wooden float to press out voids. Strike and feather edges smooth to adjacent slab levels.
Cure per manufacturer guidance before tiling.
Using modified thinset or mortar beds without liquid leveling compound
Level your floor using modified thinset or a full mortar bed as a practical alternative to premixed liquid compounds: these methods let you build up low spots with durable, tile-ready material that bonds well to concrete and won’t compress under traffic.
Mix to manufacturer specs, feather edges, and compact in layers. Use a screed or straightedge, check with a level, and cure before tiling.
Spot-heights using epoxy or polymer-modified mortars
For high-traffic or moisture-prone areas you’ll get better durability and water resistance by building spot-heights with epoxy or polymer-modified mortars.
Prepare the slab carefully—clean, etch or mechanically profile, and use a suitable primer or bonding agent—so the patch bonds tightly.
Apply the mortar in thin lifts or trowel to shape, cure per manufacturer instructions, and feather the edges to blend with the surrounding floor.
Advantages for high-traffic or moisture-prone areas
When you need durable repairs in high-traffic or moisture-prone areas, spot-height repairs using epoxy or polymer-modified mortars give you a focused, long-lasting solution that won’t require re-leveling the whole slab.
You’ll get high compressive strength, chemical and abrasion resistance, fast cure times, and excellent adhesion to sound concrete. These mixes resist moisture and heavy use, minimizing future maintenance.
Application steps and bonding preparation
Those spot-height repairs hold up because of how they’re prepared and applied, so you’ll want to focus on bonding and step-by-step placement before mixing.
Clean and remove loose debris, dust, and grease. Etch or mechanically roughen smooth concrete. Prime with epoxy or manufacturer-recommended bonding agent.
Mix small batches. Apply mortar or epoxy, compact into low spots, strike level, and cure per instructions.
Step-by-Step Repair Workflows (Scenario-Based)
You’ll get three clear workflows: A for minor unevenness under 1/8″ before finish flooring, B for moderate depressions between 1/8″ and 1/2″ across a room, and C for major slopes or settlement over 1/2″ where you should consider a pro.
For each scenario I’ll outline step-by-step repair actions and tools, plus a simple checklist to verify level, flatness, and moisture after the work.
Follow the appropriate workflow to save time and avoid unnecessary repairs.
Workflow A Minor unevenness (<1/8) ready for finish flooring
Start by evaluating the slab with a straightedge and level to confirm the unevenness is under 1/8″ across the area designated for finish flooring.
This small deviation can usually be corrected with a thin skim coat or self-leveling compound so the new floor lays flat and lasts.
Clean, etch, and prime concrete.
Mix a thin cementitious skim or feathercoat, trowel smooth, cure, then sand any high spots before installing flooring.
Workflow B Moderate depressions (1/8″1/2″) across room
Assess the room with a straightedge and 6–8 ft level to confirm consistent depressions between 1/8″ and 1/2″ and mark low areas for repair.
Clean and etch depressions, then apply feather-edge vinyl patch or polymer-modified cement in thin lifts, troweling smooth.
Allow proper cure, sand high spots, and recheck with level.
Prime before installing finish flooring.
Workflow C Major slope or structural settlement (>1/2) when to call a pro
When a concrete floor slopes more than 1/2″ over a short span or shows signs of structural settlement, call a professional—these conditions often indicate foundation movement, subgrade failure, or compromised load-bearing elements that go beyond simple DIY patching.
You’ll need an inspection, level survey, and structural assessment. A pro will recommend underpinning, slab jacking, or full replacement and manage permits, safety, and long-term guarantees.
Checklist for post-repair verification (level, flatness, moisture)
Although the repair crew has left and the patch looks solid, you’ll want to verify level, flatness, and moisture before finishing the floor to guarantee durability and proper finish adhesion.
Use a long straightedge and feeler gauges to check level within tolerance, a rolling digital level for slope, and a moisture meter or calcium chloride test.
Record results, remediate any failures, then proceed.
Tools, Materials, Costs, and Time Estimates
Now you’ll compare methods side-by-side—cost, time, durability, and skill required—so you can pick the right approach for your situation.
Don’t forget to factor in essential safety gear and any site-prep expenses before you start.
Finally, we’ll cover typical lifespans and maintenance needs for each fix so you know what to expect long term.
Comparative table of methods by cost, time, durability, and skill required
Choosing the right leveling method comes down to balancing cost, time, durability, and the skill you’ve got or can hire—so this comparative table breaks each option into tools, materials, estimated costs, and time requirements to help you decide.
| Method | Quick summary |
|---|---|
| Grinding | Low cost, fast, medium durability, moderate skill |
| Self-leveling patches | Moderate cost, quick, short-term, low skill |
| Thin-set/underlayment | Moderate-high cost, longer, durable, skilled |
| Screeding with mortar | Low-moderate cost, slow, very durable, high skill |
Essential safety gear and site preparation costs
A few key safety items will protect you and keep the site compliant, so factor them into your budget before you start leveling:
- NIOSH-rated respirator, gloves, and eye protection — $30–$120, reusable
- Knee pads and steel-toe boots — $40–$150
- Dust control (shop vac, HEPA filter) — $100–$300
- Temporary lighting and barriers — $50–$200; allow setup time: 1–3 hours
Typical lifespan and maintenance needs of each fix
Several common fixes—thin self-leveling compounds, patching mortars, epoxy overlays, and full slab replacement—have very different lifespans and maintenance demands.
So you’ll want to match the repair to how long you need it to last.
Thin mixes last 5–10 years with minimal upkeep; patching 3–7 years and occasional resealing; epoxy 10–20 years with cleaning; replacement lasts decades but costs and downtime increase.
Common Mistakes and How to Avoid Them
Watch out for common mistakes that turn a simple leveling job into a costly redo: over-grinding or under-preparing the surface, wrong mix ratios that prevent bonding, and ignoring moisture or vapor barriers.
You’ll also avoid big problems later by not skipping proper curing, which can cause cracking and weak spots.
Follow the right prep, mix, moisture control, and curing steps to get a durable, flat floor.
Over-grinding or under-preparing the surface
If you over-grind or skimp on surface prep, you’ll undermine the whole leveling job before it starts—poor adhesion, visible seams, and uneven wear are common results.
Balance grinding depth: remove contaminants and laitance but keep sound concrete. Use progressive grits, clean debris, and check flatness frequently.
Don’t rush; inadequate or excessive preparation forces repairs and shortens the finished surface’s lifespan.
Incorrect mix ratios and poor bonding
When you mix leveling compound or bonding slurry, precise ratios matter—too much water weakens the mix and too little prevents proper flow and adhesion.
You should follow manufacturer specs, measure ingredients, and mix consistently. Test small batches, maintain proper slump, and apply bonding agents per instructions.
Poor bonding leads to delamination; correct proportions and surface priming prevent failures and extend floor life.
Ignoring moisture issues and vapor barriers
Because concrete can hold and release moisture long after it’s poured, ignoring vapor issues will wreck your leveling job and any finish you apply on top.
You should test moisture, use a proper vapor retarder or sealant, and allow time for readings to stabilize.
Don’t assume dry just because the surface looks ok—moisture can cause adhesion failures, mold, and flooring delamination.
Skipping proper curing and its consequences
Although you might be enthusiastic to move on, skipping proper curing will seriously weaken the slab and ruin any leveling work you put on top.
You’ll get reduced strength, increased cracking, and poor adhesion for overlays or patches.
Follow curing guidelines: keep concrete moist for at least seven days, use curing compounds or wet coverings, and avoid traffic until strength develops to guarantee durable, level results.
Best Practices and Pro Tips
Pick the leveling method that matches your final floor—thinset for tile, self-leveler for vinyl or polished concrete.
Make sure you prepare the slab and use primers or moisture barriers so adhesion and flatness last, especially in basements or damp areas.
Ultimately, test for settlement and moisture before finishing so you can address issues early.
Choosing the right method for intended final flooring
When planning how to level a concrete floor, match your method to the final flooring so you don’t create extra work or performance problems down the line; thinset and self-leveling compounds suit tile, while underlayment and plywood may be better for hardwood or floating floors.
Consider floor height, changeover strips, moisture tolerance, and substrate rigidity.
Pick a method that meets warranty requirements and eases installation.
How to ensure long-term adhesion and flatness
Because a level surface is only useful if it stays bonded and flat over time, you should focus on prep, product choice, and installation technique from the start.
Clean, etch, and repair cracks; use compatible primers or bonding agents; select materials rated for your substrate; control workability and cure times; feather edges smoothly; apply consistent thickness; and inspect and test before installing finish flooring to prevent failures.
Tips for working in basements or high-moisture environments
If your basement tends to trap moisture, you’ll need to treat the slab as part of a system rather than a standalone surface: install a vapor barrier, guarantee proper perimeter drainage, and seal cracks before leveling.
Use moisture-resistant primers and adhesives, choose breathable flooring materials, elevate wood framing off the slab, and run dehumidification during and after work to prevent mold and bonding failures.
When and how to test for future settlement
Before you start pouring leveling products, check whether the slab or surrounding soil is likely to settle further; doing so prevents wasted effort and costly repairs later.
Probe around foundations, inspect for cracks, and note drainage issues.
Install simple crack monitors or a few datum nails to track movement over weeks.
If you see ongoing change, consult a geotech or structural engineer before finishing the floor.
Frequently Asked Questions (FAQ)
You’ll have practical questions about materials, structural issues, grinding, cure times, and low-odor or eco-friendly options.
I’ll explain when sand or mortar can substitute for leveling compound and how to spot structural damage that needs repair instead of simple leveling.
You’ll also get clear guidance on grinding limits, curing times before flooring, and greener patching alternatives.
Can I use sand or mortar to level a floor instead of leveling compound?
Curious whether sand or mortar can replace a leveling compound? You can use sand for minor fill under a subfloor or mortar for small surface repairs, but neither matches self-leveling compound’s ease, bonding, or uniform flatness.
Sand shifts and compresses; mortar’s trowel work is laborious and crack-prone. Use them only for specific, small fixes and follow proper surface prep and compaction.
How do I know if my concrete floor needs structural repair rather than leveling?
How can you tell whether your concrete needs structural repair instead of just a surface leveling?
Look for large, widening cracks, significant settlement or sloping, separated joints, heaving, or areas that flex under weight.
Measure multiple spots with a level or straightedge.
If damage affects load-bearing performance, plumbing, or foundation alignment, call a structural engineer—don’t just patch or skim.
Will grinding damage the slab or reduce thickness too much?
Wondering if grinding will eat away too much concrete? You’ll remove only surface material—usually millimeters—so it won’t harm slab integrity when done properly.
Stay conservative: use coarse diamonds, multiple light passes, and measure thickness frequently. Avoid grinding over structural edges or thin spots.
If the slab is already shallow, consult a pro before aggressive grinding to prevent unintended thinning.
How long must repaired areas cure before installing finished flooring?
When do repaired patches reach the strength needed for finished flooring?
It depends on the repair material: cement-based patches usually cure 24–72 hours for light foot traffic and 7 days for adhesives or thinset; full strength often takes 28 days.
Follow the manufacturer’s cure times, keep repairs moist if recommended, and confirm dryness and bond before installing vinyl, tile, or hardwood.
Are there eco-friendly or low-odor alternatives to standard patch materials?
Looking for low-odor or eco-friendly patch options? You can choose Portland cement mixes with low-VOC additives, clay-based repair mortars, or lime-based plasters that emit less odor than synthetic resins.
Recycled aggregate blends and natural hydraulic lime are sustainable choices. Always check VOC ratings, cure times, and compatibility with your finish.
Test a small area first to verify adhesion and appearance.