How to Clean White Floor Tiles and Keep Them Gleaming Longer
You can keep white floor tiles gleaming by sweeping or vacuuming daily, mopping with a warm pH-neutral cleaner, rinsing with clean water, and drying with a microfiber cloth to avoid streaks. Treat grout with a grout brush and seal it regularly, use gentle stone cleaners on natural stone, and avoid acidic or abrasive products. Spot-clean spills quickly and use doormats to reduce tracked dirt. Follow simple weekly and monthly steps below to learn more.
How to Clean White Floor Tiles and Keep Them Gleaming
Start by sweeping or vacuuming to remove grit. Then mop with a mild cleaner and warm water for quick stain removal.
You’ll see best results if you work systematically in small sections and rinse with clean water to avoid streaks.
With focused effort, you can have gleaming white tiles in under 30 minutes.
One-paragraph direct method summary
When you want gleaming white tiles, begin by sweeping or vacuuming to remove grit.
Then mop with a warm solution of mild detergent and water, rinsing with clean water to avoid residue.
For stains, scrub grout and spots with a paste of baking soda and water or a vinegar-water spray.
Rinse thoroughly, and dry with a microfiber cloth to prevent water marks.
Follow this how to clean white floor tiles routine.
Best results in under 30 minutes
In under 30 minutes you can refresh white floor tiles by working efficiently: clear loose dirt, target stains, and rinse to leave a streak-free finish.
Start in one corner and move outward, using a microfiber mop and a gentle cleaner. Quickly treat grout spots, then rinse and dry.
- Sweep or vacuum first
- Spot-clean stubborn marks
- Rinse and buff immediately
Understanding White Floor Tiles
To clean white floor tiles well, you first need to know what they’re made of—ceramic, porcelain, marble, vinyl, or the grout between them—because each material needs different care.
White tiles show dirt and stains faster than darker floors, so you’ll notice spills, scuffs, and discoloration right away.
Common problems to watch for are grout staining, marble etching, and overall dullness from wear or wrong cleaners.
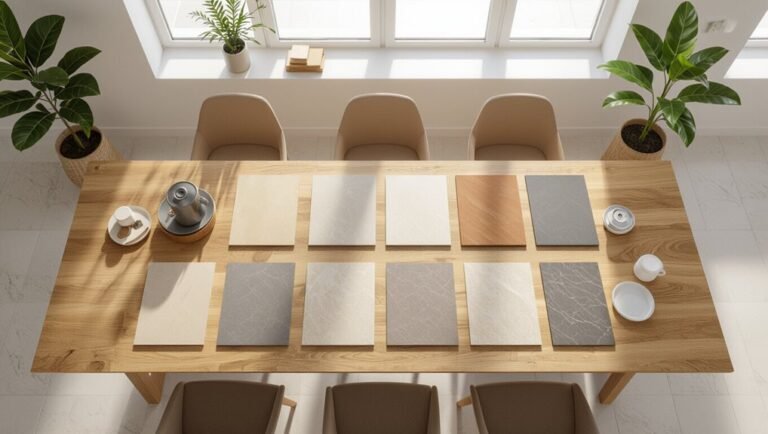
Types of white floor tiles (ceramic, porcelain, marble, vinyl, grout)
Choosing the right white floor tile starts with knowing the main types—ceramic, porcelain, marble, vinyl, and the grout that holds them together—because each material needs different care and gives a distinct look. You’ll pick ceramic for affordability, porcelain for durability, marble for elegance, vinyl for ease, and keep grout sealed to prevent staining.
| Type | Quick note |
|---|---|
| Ceramic | Affordable, porous |
| Porcelain | Hard, low absorbency |
| Marble | Porous, elegant |
| Vinyl | Resilient, low maintenance |
Why white tiles show dirt and stains more easily
Although white tiles can make a room feel bright and spacious, they also highlight grime, spills, and scuff marks more readily than darker floors.
You’ll notice crumbs, dust, and muddy footprints immediately because contrasts stand out. Light surfaces reveal shadows, liquid outlines, and tiny stains, so you’ll need more frequent spot-cleaning and quick spill response to maintain that crisp, clean appearance.
Common problems: discoloration, grout staining, etching, dullness
Because white tiles reflect every mark and change in tone, you’ll notice several specific issues sooner than you’d on darker floors.
You’ll see discoloration from sunlight or spills, grout staining that traps dirt, etching from acidic cleaners or dropped cookware, and overall dullness as wear removes sheen.
Address each problem with targeted cleaning, sealing grout, and gentle, pH-neutral maintenance to preserve brightness.
Essential Tools and Cleaning Supplies
You’ll want a few must-have tools—microfiber mops, a soft-bristle brush, grout brushes, and a steam cleaner for deep sanitizing.
Choose cleaners safe for your tile type: pH-neutral or mild detergents for ceramic/porcelain and specially formulated stone cleaners for marble or travertine.
Avoid harsh acids, waxes, bleach misuse, and abrasive pads that can dull or damage white tiles.
Must-have tools (mop types, brushes, microfiber, steam cleaner)
Start with a few reliable tools that make cleaning white tiles faster and more effective: a good mop (microfiber or flat), a stiff-bristled brush for grout, a handheld scrub brush for corners, microfiber cloths for spot-touching and buffing, and a steam cleaner for deep sanitizing when needed.
- Microfiber mop for streak-free drying
- Grout brush for stubborn lines
- Steam cleaner for periodic deep clean
Safe cleaners for different tile materials (pH-neutral, mild detergents, stone cleaners)
While different tiles need different care, choosing the right cleaner is simple: use pH-neutral or mild detergents on ceramic and porcelain, avoid acidic or abrasive products on natural stone, and pick stone-specific cleaners for marble, travertine, and limestone. You’ll protect surfaces and finish. Choose products labelled for your tile and test a small area first.
| Tile type | Cleaner | Tip |
|---|---|---|
| Ceramic | pH-neutral | Dilute |
| Porcelain | Mild detergent | Rinse |
| Marble | Stone cleaner | Test first |
| Limestone | Stone cleaner | Gentle methods |
What to avoid (harsh acids, wax, bleach misuse, abrasive pads)
After picking the right cleaner for your tile, you should also know which products and tools to avoid to prevent damage.
Don’t use harsh acids or vinegar on natural stone; skip waxes that yellow or build up; avoid overusing bleach—dilute and rinse if necessary; never scrub with abrasive pads or steel wool.
Choose soft cloths, mops, and gentle brushes instead.
Step-by-Step Cleaning Process
Start by preparing the area: move furniture and give the floor a thorough sweep or vacuum.
Next, dry-clean with a dust mop, treat stains and scuffs (grease, food, ink, rust) as needed, then mix your cleaning solution and mop for a deep clean.
Finish by cleaning grout with a paste and brush or use steam for stubborn buildup.
Step 1 Prepare the area (remove furniture, sweep/vacuum)
Clear the room and give the floor a quick once-over before you bring out cleaners.
Remove small furniture and rugs so you can reach grout lines. Check for sticky spots and pet hair. Prep helps cleaners work better and prevents damage.
- Move lightweight items to a staging area
- Protect heavy furniture with sliders
- Collect loose debris for disposal
Step 2 Dry clean: sweeping, dust-mopping, vacuuming
Because loose dirt and grit will scratch and dull white tiles, you should dry-clean thoroughly before wetting the floor.
Start by sweeping edges and corners with a stiff broom, then dust-mop across the entire surface using overlapping strokes.
Vacuum with a soft-floor setting or hard-floor attachment to lift fine particles.
Empty debris, check brushes for grit, and repeat until no visible residue remains.
Step 3 Spot treatment for stains and scuffs (grease, food, ink, rust)
Tackle stains and scuffs individually so you don’t spread or set them—identify the type (grease, food, ink, rust) and use a targeted method and product for each.
For grease, apply degreaser or dish soap, blot and rinse.
For food, lift with warm water and mild detergent.
For ink, try rubbing alcohol; for rust, use a commercial rust remover or lemon and baking soda, then rinse.
Step 4 Deep clean: mixing solution and mopping technique
Start by mixing a gentle, pH-neutral cleaning solution—about 1/4 cup of a mild floor cleaner or dish soap per gallon of warm water—to avoid damaging grout or tile sealant.
Dip a mop, wring until damp, and work in sections with overlapping strokes. Rinse the mop often, change dirty water, and finish with a clean, damp pass to remove residue and prevent streaks.
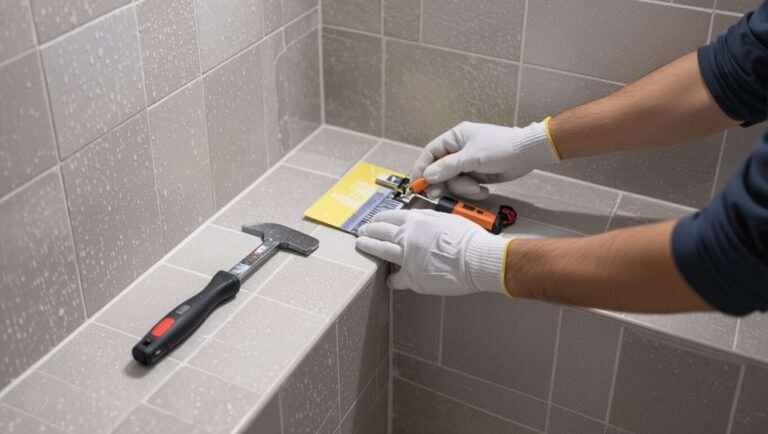
Step 5 Grout cleaning: paste methods, brushes, steam
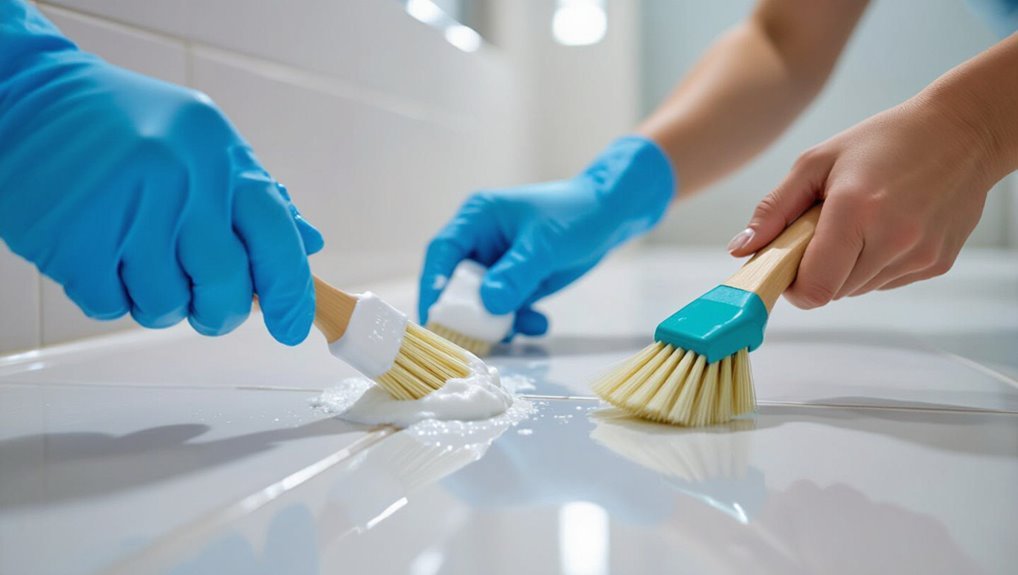
Step 5 focuses on grout cleaning, where you’ll choose between a paste, a stiff brush, or steam to lift embedded dirt and restore contrast to white tiles.
Apply a baking soda and water paste or a commercial grout cleaner, scrub firmly with a nylon grout brush, or use a handheld steam cleaner for stubborn stains.
Rinse grout residue locally and repeat tight spots as needed.
Step 6 Rinsing and drying to avoid streaks and residue
6. After scrubbing, mop with clean water to remove detergent and loosened dirt; change rinse water often.
Wring the mop well or use a flat microfiber mop to avoid excess moisture.
Follow with a dry, absorbent towel or microfiber cloth, moving in straight strokes to prevent streaks.
Confirm edges and grout lines are dry to stop residue and spotting.
Step 7 Final polish and buffing options (microfiber, polishing pads)
Once the floor is rinsed and dried, finish by polishing and buffing to restore shine and eliminate any remaining streaks.
Use a dry microfiber cloth for small areas, moving in circular motions.
For larger spaces, attach a soft polishing pad to a low-speed buffer.
Work evenly, avoid excess pressure, and inspect as you go to achieve a consistent, streak-free gloss.
Tailored Methods by Tile Type
Different tiles need different care, so you’ll want to use the right cleaner and technique for each type.
For example, ceramic and porcelain tolerate a mild detergent and scrubbing, while natural stone like marble or travertine needs pH-neutral, stone-safe cleaners and periodic sealing.
For vinyl, laminate, and outdoor patio tiles you’ll use low‑moisture methods or outdoor-safe cleaners to avoid damage and streaks.
Ceramic and porcelain tiles best cleaner and method
When you’re cleaning ceramic or porcelain tiles, choose a cleaner that matches the tile’s glaze and the type of soil—neutral pH cleaners work well for glazed porcelain, while slightly stronger, non-abrasive solutions help cut through grime on unglazed ceramic; avoid acidic cleaners on grout and unsealed tiles.
Mop with warm water, scrub stubborn spots with a soft brush, rinse thoroughly, and dry to prevent streaks.
Natural stone (marble, travertine) stone-safe cleaning and sealing
Because natural stone is porous and easily damaged by acids and abrasives, you’ll need stone-safe cleaners and the right sealing routine to keep marble and travertine looking their best.
Use pH-neutral cleaner, soft mop, and blot spills immediately. Test any product in an inconspicuous spot.
Reseal every 6–12 months or when water no longer beads. Avoid vinegar, bleach, and abrasive pads.
Vinyl and laminate low-moisture techniques
Vinyl and laminate floors handle moisture poorly, so use low-moisture methods that lift dirt without warping seams or swelling cores.
Sweep or vacuum regularly, then spot-clean with a damp microfiber mop and a pH-neutral cleaner diluted per instructions.
For stubborn grime, use a barely damp cloth or a gentle, nonabrasive scrubber.
Dry immediately and avoid waxes or oil-based products.
Outdoor white tiles and patio surfaces
How do outdoor white tiles and patio surfaces differ in care?
You’ll tackle dirt, algae, and weathering differently: sweep often, pressure-wash occasionally on low setting, and use a mild bleach or oxygen cleaner for mildew.
Reseal porous stone yearly, repair grout cracks promptly, and place mats under planters.
Choose UV-stable sealers and avoid harsh acids that etch or dull outdoor whites.
Preventive Measures and Maintenance Schedule
Keep a simple daily and weekly routine—sweep or vacuum and mop with a mild cleaner—to keep white tiles gleaming.
Schedule monthly and quarterly deep-cleans for grout scrubbing, sealing, and any restorative treatments, and use doormats or area rugs to reduce dirt that stains grout.
Consider protective products like sealers, anti-slip coatings, and occasional polish to preserve finish and prevent discoloration.
Daily and weekly routines to keep tiles gleaming
Daily and weekly routines make it easy to prevent dirt buildup and preserve your white tiles’ shine without scrubbing.
You should sweep or vacuum daily, spot-clean spills immediately, and mop weekly with a mild cleaner.
Keep mats at entries and lift furniture to clean under it.
- Sweep or vacuum daily
- Spot-clean spills right away
- Mop weekly with mild solution
Monthly and quarterly deep-clean checklist
Once you’ve got the daily and weekly habits down, schedule monthly and quarterly deep-cleans to catch buildup you can’t see and prevent grout staining or dulling.
Each month, mop with a pH-neutral cleaner, scrub grout lines lightly, and rinse thoroughly.
Quarterly, steam-clean or use a tile-safe heavy cleaner, inspect caulk and edges, and address chips or loose tiles so small issues don’t become big problems.
Preventing grout discoloration (sealing frequency, doormats, rugs)
Although grout will naturally darken over time if you don’t protect it, simple preventive steps will keep it looking fresh longer: stamp a maintenance rhythm—re-seal grout every 1–2 years depending on traffic, clean spills promptly, and sweep daily.
Place doormats at entrances and rugs in high-traffic zones to trap dirt and moisture, reducing staining and extending sealant effectiveness.
Protective products: sealers, anti-slip coatings, polish
To keep white floor tiles and grout looking their best, use targeted protective products: sealers to block stains and moisture, anti-slip coatings where traction matters, and polish to restore shine.
Apply penetrating sealer every 1–3 years, spot-treat high-traffic areas, use water-based polish for periodic gloss, and add anti-slip on wet zones.
Follow manufacturer instructions and test in an inconspicuous spot.
Common Mistakes and How to Avoid Them
Don’t reach for harsh chemicals or straight bleach—they can dull or damage white tiles.
Avoid abrasive pads or steel wool, rinse thoroughly to prevent residue, and clean grout and edges regularly so dirt doesn’t hide.
Follow gentle products and proper tools to keep tiles bright without causing harm.
Overuse of harsh chemicals and bleach
When you reach for harsh chemicals or bleach thinking they’ll speed up the job, you can actually harm your tiles, grout, and indoor air quality. Frequent use can strip protective finishes, discolor grout, and release irritating fumes.
Use mild pH-neutral cleaners, dilute bleach sparingly for stubborn stains, ventilate well, and spot-test first.
Rotate gentle cleaning methods to protect surfaces and your health.
Using wrong tools (abrasive pads, steel wool)
Harsh cleaners aren’t the only way to damage white tiles—you can scratch or dull them just as quickly with the wrong tools.
Don’t use abrasive pads, steel wool, or stiff metal brushes; they score glaze and create micro-scratches that trap dirt.
Choose soft microfiber cloths, non-abrasive sponges, or nylon brushes instead, and test any new tool in an inconspicuous spot first.
Improper rinsing and residue buildup
If you skip thorough rinsing after cleaning, soapy film and cleaner residues will stay on your white tiles and make them look dull, streaky, or attract more dirt.
Rinse with clean water, change rinse buckets often, and wipe dry with a microfiber mop.
Test cleaners for residue, dilute per instructions, and don’t overuse detergents so finishes stay bright and nonsticky.
Neglecting grout and edges
Because grout and edges trap dirt and moisture, overlooking them will make even clean white tiles look dingy and can lead to staining or mold.
You should scrub grout lines with a stiff brush and a baking soda paste, vacuum edges first, and use a toothbrush for corners.
Seal grout annually and wipe baseboards regularly to prevent buildup and keep floors bright.
Comparison: DIY Cleaners vs. Commercial Products
You can often tackle everyday grime on white tiles with simple DIY mixes—vinegar for soap scum, baking soda for scrubbing, and hydrogen peroxide for organic stains—but they won’t always remove deep-set or chemical stains.
Commercial cleaners and stain removers can be stronger and faster, though they may be harsher on grout, finishes, or indoor air quality.
If stains persist or you’re worried about damage, call a professional cleaner to assess and treat the problem safely.
Homemade solutions (vinegar, baking soda, hydrogen peroxide) when they work and when they don’t
While homemade cleaners like vinegar, baking soda, and hydrogen peroxide can tackle everyday dirt and mild stains on white tile, they don’t always match the strength, safety, or stain-specific action of many commercial products. You can use them for routine upkeep, grout brightening, and spot fixes, but avoid relying on them for deep-set stains or delicate finishes.
| Emotion | Use | Limit |
|---|---|---|
| Relief | Quick upkeep | Not deep stains |
| Pride | DIY brightening | Risk on sealed stone |
| Caution | Gentle grout care | Time-consuming for heavy grime |
Commercial cleaners and stain removers pros and cons
1 clear advantage of commercial tile cleaners is their formulated strength: they cut through grease, mineral deposits, and set-in stains faster than most DIY mixes.
You’ll get consistent results, faster dwell times, and sometimes disinfecting action.
Downsides: stronger chemicals can damage grout, dull finishes, or irritate skin and lungs.
Always follow instructions, test a hidden spot, and ventilate well.
When to call a professional cleaner
If stubborn stains, extensive grout damage, or a large area have you doubting a DIY approach, call a professional—pros handle tough restorations, use industrial-grade equipment, and can restore tile and grout without risking further damage from overworking or misapplied chemicals.
You should hire help when DIY fails, odorless commercial products aren’t working, or delicate tiles need sealant replacement—you’ll save time and avoid costly mistakes.
Troubleshooting Common Issues
If a stain won’t budge—oil, dye, or rust—you’ll need targeted cleaners and the right technique.
For stone, you’ll learn how to address etching or a dulled finish without causing more damage.
I’ll also show quick fixes for yellowed grout and for streaks or cloudy residue so your tiles look crisp again.
Removing stubborn stains (oil, dye, rust)
When oil, dye, or rust won’t budge with routine cleaning, you’ll need targeted methods and the right products to lift those stubborn stains without damaging the tile or grout.
For oil, blot, apply a degreasing cleaner or baking soda paste, scrub, then rinse.
For dye, try oxygen bleach.
For rust, use a commercial rust remover per instructions, test first, and ventilate.
Repairing etched or dulled finishes on stone
Stubborn stains can be cleaned, but abrasive cleaners or acidic rust removers sometimes leave stone looking etched or dull. You’ll need gentler repair methods to restore the finish without causing more harm.
Lightly hone with a fine-grit diamond pad or polishing compound designed for your stone. Test an inconspicuous area first, then buff with a soft pad and reseal with a compatible stone sealer to protect the restored luster.
Restoring yellowed or permanently stained grout
Although grout can resist many spills, years of dirt, soap scum, and mildew can yellow it or leave permanent stains. You’ll need targeted steps to bring it back without damaging surrounding tile.
Scrub grout with a stiff brush and a baking soda paste, rinse, then apply oxygen bleach for stubborn discoloration.
Seal grout after it’s fully dry to prevent recurrence.
Fixing streaks and cloudy residue
If you’re seeing streaks or a cloudy film on white floor tiles, it usually comes from leftover detergent, hard-water minerals, or cleaning product residue—so start by ruling out each source before scrubbing harder.
Rinse thoroughly with clean water, mop with distilled water or vinegar solution (1 cup vinegar to 1 gallon warm water), then buff dry with microfiber.
Repeat spot-treat mineral spots with diluted vinegar.
Cost and Time Estimates
You’ll usually spend 20–60 minutes per room for regular mopping, 1–2 hours for deep scrubbing, and several hours if you’re stripping and resealing grout.
DIY supplies typically cost $10–$50 per room, while hiring a pro can run $75–$300 per room depending on services and location.
Use these ranges to decide whether you’ll tackle the job yourself or hire help.
Typical time required per room by method
When planning, factor in the size of the room, the method you choose, and how dirty the tiles are—simple sweeping and mopping usually takes 15–30 minutes for a standard 12×12 ft room, steam cleaning or deep-scrubbing grout runs 45–90 minutes, and full stain removal or sealing can take 2–4 hours including drying time.
| Method | Time |
|---|---|
| Sweep & mop | 15–30 min |
| Steam/deep scrub | 45–90 min |
| Stain removal/seal | 2–4 hrs |
Estimated costs for DIY vs. professional services
Compare costs against time to decide whether to tackle white tile cleaning yourself or hire a pro.
DIY supplies (cleaner, mop, grout brush, sealant) usually run $15–$60 per room and take 1–3 hours.
Professional services cost $75–$250 per room but save you time and guarantee deep grout restoration.
Weigh budget, urgency, and desired results before choosing.
FAQs
You’ve probably got questions about care and safety, like how often to deep-clean, whether vinegar or bleach will harm tiles or grout, and how to stop yellowing.
You’ll also want to know the best way to keep natural stone tiles shiny. Below are clear answers to those FAQs.
How often should I deep-clean white floor tiles?
Regularly deep-clean your white floor tiles about every 1–3 months, depending on traffic and soil levels.
For high-traffic areas, deep-clean monthly; for moderate use, every 6–8 weeks; for low-traffic rooms, every 2–3 months.
Spot-treat stains and do weekly surface cleaning to reduce buildup.
Adjust frequency after events, spills, or seasonal changes to keep tiles bright and grout healthy.
Is vinegar safe for cleaning white tiles and grout?
Wondering whether vinegar’s a safe, effective cleaner for white tiles and grout?
You can use diluted white vinegar (one part vinegar to four parts water) on ceramic or porcelain tiles for routine cleaning.
Avoid undiluted vinegar and prolonged use on natural stone, marble, or acid-sensitive grout—those can etch or weaken.
Rinse well and test a small area first to be safe.
Can I use bleach to whiten grout without damaging tiles?
How safe is bleach for whitening grout without harming your tiles?
You can use diluted household bleach on grout cautiously: ventilate, wear gloves, and test an inconspicuous spot first.
Avoid prolonged contact and don’t use on colored grout or porous stone.
Rinse thoroughly and neutralize with water.
For repeated use, consider oxygen bleach or commercial grout cleaners designed for tile safety.
How do I prevent yellowing on white tiles?
If you want to keep white tiles looking bright, stop staining and yellowing before they start by controlling moisture, cleaning gently, and reducing exposure to products that discolor surfaces.
Wipe spills immediately, ventilate bathrooms, use pH-neutral cleaners, and avoid oil-based or colored cleaners.
Test new products on a hidden spot, reseal porous grout and tiles as recommended, and clean regularly to prevent buildup.
What is the best way to maintain shine on natural stone tiles?
Keeping white tiles bright helps, but natural stone needs a different approach to keep its shine without damage.
You should use pH-neutral cleaners, soft mops, and avoid acidic products. Wipe spills promptly, dry surfaces to prevent water spots, and apply a suitable stone sealer yearly.
For scratches or dullness, hire a professional for honing or polishing to restore the finish safely.